


To see if this custom-fit item will work for you please tell us what vehicle you'll use it with.


Thank you! Your comment has been submitted successfully. You should be able to view your question/comment here within a few days.
Error submitting comment. Please try again momentarily.
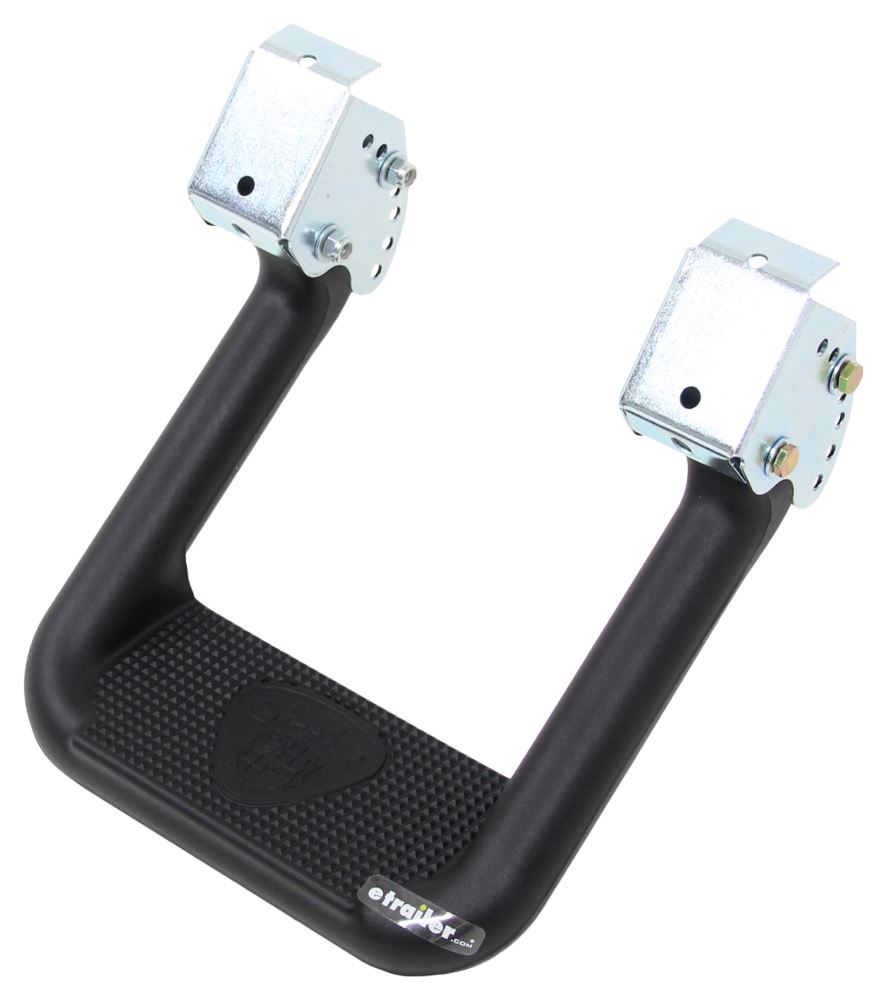
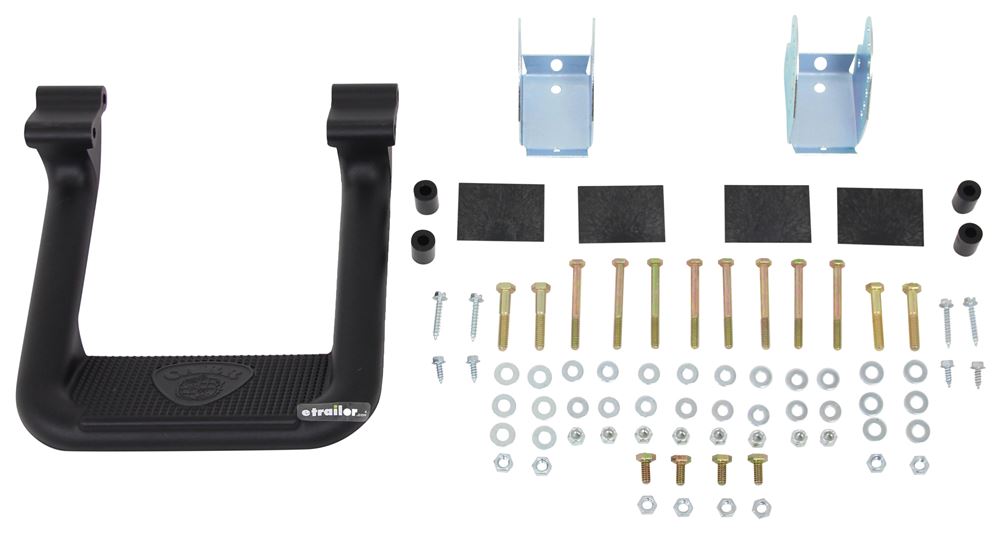
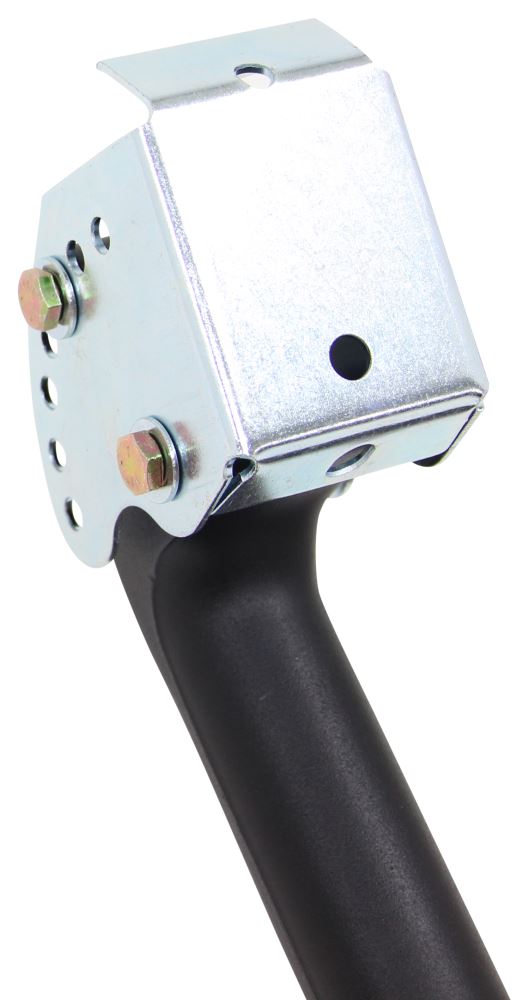
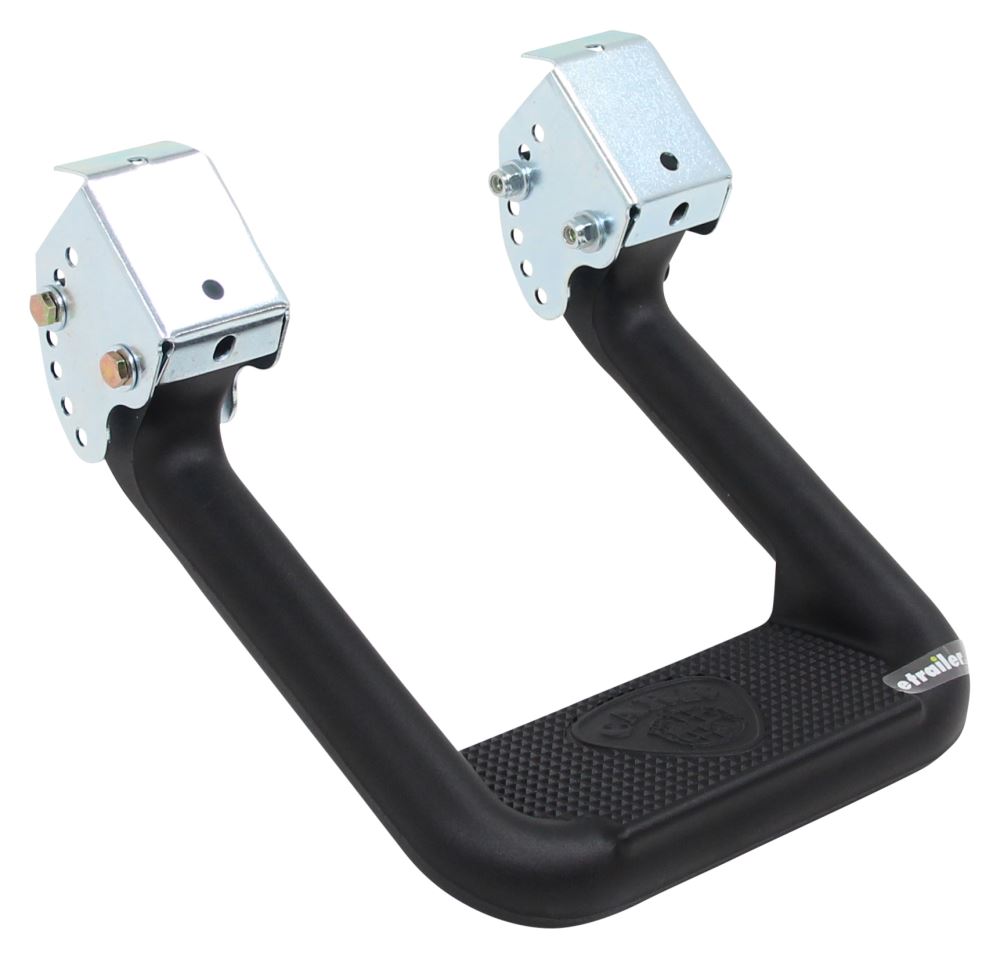

Get into and out of your vehicle with ease by using this sturdy, durable step. Multi-mount system ensures a precise, stable fit. Wide, flat, non-slip surface provides sure footing, and the black finish complements almost any application.
Features:
Specs:
The heads of the unique multi-mount installation system on Hoop II side steps attach to your rocker panels and allow the steps to pivot for a precise fit.

Videos are provided as a guide only. Refer to manufacturer installation instructions and specs for complete information.
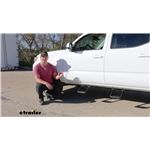
Hi, everyone. Aidan here with etrailer. Today we're gonna be taking a look at and showing you how to install these CARR Hoop II Truck Steps, and we're gonna be showing them on our 2023 Toyota Tacoma. So if you're looking for a good way to help step up into your Tacoma and make it a little easier, this could be the option for you. It's gonna give you a 5-inch drop, which on our stocked Tacoma today is cutting that distance that I have to move my leg up I'd say by almost half. So, if I need a little bit of help getting in and out of the truck, it's going to be really helpful and make it so I don't have to stretch near as far to get out.
It's a pretty wide step. So, I can fit one shoe on there pretty comfortably. It's a size 12 boot, so definitely a bit bigger, but I'd say I can fit on there pretty comfortably. Now, the advantage is something like this is it's a lot smaller than a a full running board. But the disadvantage to that is you can't really step anywhere on it.
You're limited to just that spot. So, during the installation process, you'll have to move it around and find the right spot for you. Pretty much centering it up with the end of your seat, which isn't too hard to do, but I feel like that placement's pretty solid. Now you can get these as just a kit of one if you maybe have a work truck that you just need on the driver's side, or you can get 'em in pairs. So, if you wanted to have 'em on the front and the back, like our neighbor today, you'll need to pick up two pairs.
For me personally, I don't like the back seat one as much just because there's not as much leg room for the backseat, making it, I think, easier to just step up into the backseat. Now that's being said, this is just a stock truck, so if you had a lift kit on here, aftermarket tires that added height to it, I think that'd be a different story. But for me personally, I don't have any trouble getting up into that backseat. So for me, I probably wouldn't use it all that much, but I think it can have some other applications like maybe accessing a roof rack because that does give a lot of extra reach without having to step into our door jamb. And the thing I like about it is that compared to a lot of other running boards that I've worked with, it's really solid.
When I step on it, I'm really not getting any flex. It's got a 500 pound weight capacity, so I'm well within the limit and I'm not worried about it breaking. Now, that robust construction and the way it mounts up is what gives it that heavy weight capacity. It is going to mount up to the rocker panel underneath your vehicle, which is some pretty solid metal. And with this being a semi-custom install where you have to kinda pick and choose where you want it, you are gonna have to make some drilling holes and mount it up yourself. So with that being said, the install is gonna take a little bit more time because of that. We're not using factory holes. And if you choose to have some for the front and the back, you're essentially gonna have to take what we show you for one step and repeat it three more times throughout. So the install can take a while if you're doing all four locations. So, just keep that in mind. But the actual installation process itself is fairly straightforward. Aside from the drilling and the time, it's really not complicated. So, we'll walk you through the process in the shop right now. Now, with these steps being sold in pairs, you'll need to pick out which side you wanna start on, driver or passenger side. We did our passenger side first just to get a feel for it, and we're gonna walk you through the second one. Now, our neighbor today actually purchased four, so two sets total, so you can have some for the back seat as well. And the good thing about this is they can really go anywhere. So, as we show you the one on the backseat here, the process is gonna be the exact same for the front, driver, passenger, whichever you choose. So, the first thing we need to do is open up our door and find where the end of our seat is. And you wanna go down to this pinch weld here and make a mark right where that seat ends. So, this is the start of the seat cushion on the back seat and everything back is the seat itself. So, I just made a line right there. And from that line we can take two measurements. That's gonna be basically the center of our step. So, what I'll do is I'll go from there. I'm gonna measure out 4 1/8 of an inch. So, we're at about there. And I'll make another line and do the same thing on the other side. So, the final two lines should be 8 1/4 of an inch apart. Now, I will say that the brackets we're gonna be drilling in, have a little bit of wiggle room to them. So, if you're off by maybe an eighth of an inch, or maybe when you start drilling your drill bit walks just a little bit, you should be fine. There's plenty of room to play with here. So, just make sure that you get the measurements as close to that 8 1/4 as possible. The next thing we need to do, I'm just gonna grab my paint marker, is go to those outer lines and from the bottom of our pinch weld, we're gonna measure about 3/8ths of an inch up and that's going to be the height for our location that we're drilling. So, I'm just going to do a cross there. So, the joint between those two lines is where I'm gonna drill my holes. We're gonna start with a pilot hole using an 8-inch drill bit, and we'll work our way up to the final size of 5/16ths. So, just find your mark and carefully drill through. If you wanna use a center punch to just help you out, then you can. (drill whirring) So, you'll wanna go over your freshly drilled holes with some paint from a paint pen, a spray can, or maybe just some clear coat. We've got these little clear coat pens, so that's gonna cover up any bare metal and just protect it from rust and corrosion over time. So for this step, you're gonna have two brackets, and you'll notice that this one looks a little different because this back tab is bent up. That is part of the process. I just did this one off camera because it's easier to do before you install these. So, we can go up to those drilled holes and you can see kinda how this lines up. So, this will sit underneath and kind of match the shape of that rocker panel underneath where the back tab is pointing inward towards the middle of the car. And you want it to be bent up a little bit more. This one we might even hammer out just a little bit extra because eventually we're gonna run a screw through that and it's gonna go into that rocker panel. That's a couple steps down the line though. The thing we need to focus on now is just grab a hammer and try to flatten this bracket out. It's pretty easy if you set it on the ground and just hammer it out, and we can go from there. (hammering sounds) Now, the kit comes with a lot of hardware because these steps are meant to work with lots of different trucks. On our Tacoma, this is what we're looking for. The slightly longer bolts that'll fit through those drilled holes, the corresponding washers, two of them, and then the corresponding locking nut that will again match up with that bolt thread. So, what we're gonna do is add one of those washers to the bolt and take this up to the hole. We'll pass that bolt from the inside out. So, we'll just add that washer and nut on the outside edge like that. And that's essentially what we're gonna do for both of those bracket locations. Now, one thing you can do and the instructions do recommend this is actually adding a little bit of silicone to the bracket where it's gonna be touching the metal on your vehicle. So, I'm gonna actually pull this back down now that we've verified it fits, and we can add that silicone for protection. Wow. With the bracket loosely in place, grab yourself a 13-millimeter wrench and socket and tighten it up. (drill ratcheting loudly) Now when I'm doing this, I'm trying to put a little bit of upward pressure on the bracket so it sits a little bit more flush, and we can move on to those tabs. So, with those tabs and those holes line up kind of along the corner here, we just need to bend this up a bit more. So, your best bet is to grab a wood block and hammer the wood block. (hammering sounds) Now, you don't need that bracket to bend completely flush. We just want it so that the hole is lining up with that metal edge a bit better so we can drill a hole through there using that 8-inch drill bit and run a self-tapping screw through the hole as a secondary point of contact. (drill whirring) And with the pilot hole, we can just run our shorter self-tapping screws into those holes. (drill ratcheting) With both brackets (metal clanging) fully installed and tightened down, we can grab our step. Now, this part if you measured right should feed up between these two brackets here. And as far as these holes go, this one is going to be our pivot point that's just matching up closest to the edge of the truck. And the one that's further towards the inner edge of the truck is going to be all these adjustment holes along the back. So, we'll install the pivot point first so that we can kinda rotate the step into level and level it out. So, we just get this slid up. And I've got a bit of a friction hold in there right now, so I can set it there while I grab my hardware, which will consist of these longer bolts, a flat washer. I'm gonna feed that through from the inside out, make sure it passes through. Once that passes through, we're gonna have another washer on the other side and one of the other nylon lock nuts from our kit. We'll repeat that for the other pivot point. With the first two bolts in we're free to pivot the step and find where it's going to sit the most level, which for us is going to be this second hole right here. And we're just gonna repeat the same process with washers and nut on the other side. We'll go back through with an 11-millimeter wrench and socket, tighten up all that hardware and repeat. (drill ratcheting) And once that's all tightened up, you're done. You can repeat that process on the other side or for the, in our case, other two locations on the driver's side. And that's it. Overall the install isn't too bad. Does require some drilling, which you know, if you're looking at other running boards, a lot of them will use factory mounting holes. But the thing I like about this is you can kinda customize it so you can get these spaced apart, however works best for you and your truck with your seat. And they're not nearly as large as full running boards. So, if you only want the extra step just to help you get in and out, then I think this provides a pretty clean look and the install isn't too bad, giving you a nice custom step. But that'll do it for a look at and installation of the CARR Hoop II Steps for your 2023 Toyota Tacoma. Thanks for watching.
Customer Satisfaction Score:
83% were satisfied with this product
17% of customers were not satisfied
Ratings & Reviews

I own a 1997 F250 crew cab truck. I got tired of wearing the driver seat down getting in and out without some type of step. I've always liked the "stirrup" style steps and was happy to stumble across your website. After seeing the actual product AND HARDWARE in the kit, I ordered immediately. The steps arrived several days later and I installed them that night. Very happy with the steps, shipping, and quality of the boxes they arrived in. Took me several minutes to get to the product as the boxes were secured so well. The hardware provided was perfect. I will order 2 more for my rear doors in the near future. Thank you!
Good quality. Made some adjustments to fit my side rails. Painted brackets and bolts. Drilled holes to fit 3/16" self tapping screws. Bent rear tab flat. Works great so far.
The steps themselves are solid, and make getting in and out of our truck easier, esp. for older folks. I have a minor issue with the installation instructions, however. In the instructions, they state:
" 8. *REFER TO DIAGRAM “A” WIRE HARNESS. Remove the plastic cover that is holding the carpet down and move the wire harness out of the way before drilling out the hole for the next step as shown on the diagram. Do
this procedure for both sides of your vehicle, because the wire harness may be on either side."
There's insufficient space to move the wiring out of the way as the hole for the sheet metal screw ends up dead in the center of the channel , so I used a piece of angle iron slipped under the wiring to protect the harness while drilling the hole. Once I installed the screw, I realized that the sharp point of the screw would be rubbing against the harness, and would eventually cause a short. To prevent this, I slipped the extra 1/4" Nyloc nuts provided in the kit over the sharp end of the sheet metal screw as shown in the photo.
I realize that there's not much room to use another type of fastener and working around the harness is awkward, but I think the sheet metal screw should really be replaced with another fastener that doesn't present a hazard to the harness. A 1/4" Torx button head bolt inserted from the top would definitely be an improvement, for example.
Matte black finish and heavy duty construction. Easy install on a 2024 2 door Rubicon and a 2024 Mojave. I would recommend laying out all the parts and organizing them. The shorter bolts are for the rear of the bracket while the longer are for the front toward the step. I would also recommend drilling the pinch weld area, attaching the bracket to the pinch weld area, and then drilling the hole for the sheet metal screw. This is perfect if you need a step but don't want to lose your rock sliders. They can be easily removed by taking off two bolts and two sheet metal screws for each side if you are wheeling. I wouldn't order from anyone other than etrailer. They are the only site with a review and install video. They offer great customer service if you run into a problem and fast shipping. I am very happy with etailer and Carr.
This worked excellent to put on an existing running board to create a half step for my wife to get into my 2012 Avalanche much easier. I had to alter it slightly to mount it but am very happy with the result.
They've made it easier for the ladies in my life to enter and exit my vehicle easier
I finally installed the side steps that I bought from you guys. Check it out
Had to remove the rock slide to install which was no big deal, other then that installation was easy. Steps look great quality is great I really like that they don't stick out to far so I'm not hitting my shins. Will be adding some for rear doors soon.
Solid and simple installation, the right parts nothing missing. They look good and so much easier on my knees.
Thank you for the fast delivery!!
great product, it does work great!
Great price
Better product
Happy with my purchase
Would recomend and will buy again!!!!
Easy to install and look great!
great product and fast shipping. THANKS !!
Tammie was awesome! Noticed i had ordered the wrong step for my truck and ordered the right one she was a pleasure on the phone! Thanks again
My wife really appreciates this side step. Happy wife - Happy Life.
Nicely made product. It was the first time installing this product so the instructions were not really clear. Maybe improve on the diagram
The product is great. The only problem was the shipping. Thank You
Seems to be well made and durable. My only concern is how well it is installed and subsequent susceptibilty to rust in the body panels. Tying these into the metal frame makes more sense for strength, rust resistance, and longevity.
Overall I am pleased with their function and appearance.
The side step bars wok great! I couldn’t use the hardware that came with the kit, but finding the proper bolts was easy. All in all I’m happy with the setup.
Fit the truck very nicely !!Installation went well!!
Would recommend to others to buy.
Makes it so much easier for me to get in the truck !!
Mike

4/27/2022
Wonderful Working great
Well made, did not provide lower step than existing side rail
Do you have a question about this Nerf Bars - Running Board?
Info for this part was:
At etrailer we provide the best information available about the products we sell. We take the quality of our information seriously so that you can get the right part the first time. Let us know if anything is missing or if you have any questions.























Clair
3/30/2023
Great product!