
 Product Experts Available Now!
Call 1-800-940-8924


Thank you! Your comment has been submitted successfully. You should be able to view your question/comment here within a few days.
Error submitting comment. Please try again momentarily.
Brake line kit lets you run brake fluid from your surge brake actuator to your trailer brakes. Great for disc brakes and torsion axles. Includes 24', (2) 7', 3-1/2', and (2) 1-1/2' flexible hoses, plus fittings and hardware.
Features:
Specs:
Flexible Rubber Brake Hoses
Kodiak brake hoses are made of rubber, making them a practical choice for a variety of applications. Because you can easily bend them, rubber hoses are simpler to work with than rigid stainless steel brake lines. This flexibility makes rubber hoses great for use with foldaway trailer tongues because they are less likely to kink or break when bent. In addition, rubber hoses allow for a wide range of motion so articulating parts can effectively function. These qualities make rubber hoses better suited than steel lines for trailers with torsion axle suspension systems and trailers that have disc brakes.
Stainless steel brake lines have braided exteriors, which can not only wear against exterior surfaces, but also against the interior lining of the hose if dirt gets underneath the steel braid. And if the braid on a stainless steel line tears, it can cut into the hose lining. The exterior surface of these hoses is solid rubber, so there are no crevices for debris to enter.
Durable Fittings with Deep Threads
Kodiak brake hoses have corrosion-resistant brass fittings with stainless steel flares. These fittings have a gap built into them that allows room for a line wrench - also called a flare nut wrench - to slide over the line and down to the nut. This type of wrench grips the nut better than a standard open-ended wrench so there is less chance of stripping the threads as you tighten down the nut.
The stainless steel that is used to create the flares on these hoses is stronger than brass. As a result, these fittings are more durable than ones made entirely of brass. The stainless flares are primarily designed to keep the fittings from splitting when you tighten them down, but they offer absolute rust protection as well.
Kodiak's fittings have deeper threads than many other fittings on the market to provide a higher thread engagement. Deeper threads offer an advantage when used with fittings that have the same thread depth. These Kodiak fittings will work with most fittings on the market, but when they're used with other Kodiak fittings, the result is a stronger connection with fewer leaks.
Videos are provided as a guide only. Refer to manufacturer installation instructions and specs for complete information.
Shane: Hey, guys. Shane here with etrailer.com. Today, I have a 2018 Grand Design Momentum M-CLASS fifth wheel travel trailer. Now, I'm going to be installing the Kodiak hydraulic brake lines. These hydraulic brake lines are going to be great because they're going to be rubber-coated as opposed to the hard lines, which are going to make it a lot harder to run those lines from the front where your actuator is back to your axles. With the rubber lines, or flex lines as they call them, it's going to make it a lot easier.
We're not going to have to worry about getting a tube bender and trying to bend those lines or bending the line too much and it effecting the flow of the fluid going through the line.Another nice thing about these lines here over the hard ones is where these connect, they are a lot easier to get those tightened down. With the hard lines, because the hard line is so thin, you pretty much had to crank down on that quite a bit to get it to tighten in there. These seal up a lot better. There's a lot more room for error with the hard lines, and with that line being so thin, if you twist it too much, you're going to end up breaking that line and then you've got to start all over again.These lines are also going to be designed not only for your double axle trailers or tandem axle trailers, but they're also going to work with your triple axle trailers, and they don't just have to go on a camper. They can go on any trailer that you're putting brake lines on.
They're also going to hold up against salt, so maybe you live on the coast, somewhere salty environment, these are designed to hold up against that salt so they don't corrode.As I mentioned, these will also work on boat trailers. Another great benefit to them is if you have a tongue that is collapsible, that folds over, these lines work perfect for that. The hard lines, you're not going to be able to use it, because there's no way for that line to flex. Overall, I think this line kit is the way to go. It's going to make a lot easier to get installed.
It's going to make the drive a lot quicker. You're not going to have to fight the hard lines, worrying about breaking ends off, or putting a bend too tight, or anything like that. With our rubber lines, it's really going to hold up against corrosion really well, and we're not going to have to worry about the salt effecting it. With all that being said, let's go ahead and walk you through how to get them installed.Once you've got your brakes installed, you've got your accelerator mounted, it's time to start running your lines. What we're going to have to do is we're going to have to get from our actuator out and then back to our brakes.
You can see there's quite a bit of stuff in here and we need to potentially go out through the floor if possible. The only space that I really found to get out is between our battery here and this wall, there was an open space on the floor. What I'll potentially do is take my line from the back of my actuator and go against that wall and then straight down through a hole through the bottom over to our passenger side axles.Underneath the camera, this is where our batteries are. These bolts right here are what are holding the frame for our battery box in, so in between here and this wall, we need to get right inside of here. Be careful if you're doing it this way. Make sure you're not too far over you're going to damage the batteries or hit them potentially. What we need to do is we need to open that up big enough to get this fitting up through there. I'm going to go up to a half inch, let's see if I can't get it in. If I can't, we'll just open up a little bit more.Once you get your line ran up through the hole, we're going to connect to the back of the actuator first. What I did is ran it as low as I could. It came right up the back here, directly across from my actuator. You can see I put a loom clamp right in that wall, coming straight out from where it connects in the back of the actuator. I will suggest when making any of these connections with these houses is you use line wrenches instead of regular wrenches. If you don't know what a line wrench is, they're going to look like this. They kind of have a rounded opening there.Line wrenches are designed for these particular fittings. On the back of your actuator, you're going to have a little red plug. It's going to look like this. Pull that plug out, and that's where your line's going to hook into your actuator. Now, what we're going to do is I'm going to go down where that hole is. I'm going to pull out my excess. I'm going to put some a piece of airline tube or vacuum line around that just to kind of help protect that hose from that metal edge.Let's take a little bit of wire loom. It's not going to come in your kit, but again, anything you may have to help protect your line from that metal edge. Let's take that, shove it up inside of there like that. I'll take some tape and take this right here so it doesn't move. Now what I'm going to do is I'm going to take these self tappers out along this frame and along this panel. I'm going to take this line, we'll run it right up inside that panel, and then we can reinstall this later. It's going to help protect my line and keep it up from getting damaged.With our line ran all the way back to our front axle on our passenger side, what I did is in the panel, I put a small a hole in it so I can run my line out. That way when I add my fittings, my fittings are outside so if there's potentially ever a leak, you're able to get to them. If they're up underneath here, you're not going to see them, you're not ever going to know there's a leak. Any extra line that you have, because you may have extra, loop it inside up inside of here. Make sure it's not kinked, or twisted, or anything. Once you get it out, we're going to take this cap off here. You're going to have a four way and your kit that looks like this. We're going to connect it onto side. Again, you want to make sure you using line wrenches. With a line wrench, as I mentioned, how it's closed there instead of a regular wrench that's open, it keeps you from slipping off of that. You want to make sure you're not over tight in these.We're going to have two short lines, like this. One's going to be for the front axle and one's going to be for the back axle on one side. Since we're on the passenger side, we're going to use both of these on our passenger side. We're going to take your cap off and we're going to put it into the four way that's facing our axle. We're going to take the other end of our short line, it's going to go right into this fitting on the back of our brakes. It's going to hook up the same way with all four.You're going to have a hose about this long and it's going to go from front axle to back axle. It's going to connect into the four way and I'm going to hide my hose up inside, just like I did the other one coming from the front. I'll make my connections, feed my hose up, bring it out, put another hole, bring it out, and then I'll have another fitting that connects to my two hoses back here.I brought my line from my front axle out, connected it to a tee fitting that's going to come in your kit. Other side's going to go down to the brake. This side, we're going to have longer lines that are going to go from here straight across to the other brake. Then we're going to have another line the same size. It's going to go from our four way on the front axle, straight across to the front brake.These are going to be our two longer lines that are going to go from our fittings across to the other side of the camper. What I need to do is get these, I'm going to run them the same way I did all the other ones, up underneath that panel and across. There is a bunch of insulation in there, so just taking this and trying to feed it across, it's probably not going to go over there, so it might be a good idea if you have something stiff, a piece of wire or something that you can feed. There's a frame rail about here and here. You can take that wire and feed it across. Then you can attach one end with some tape and pull it over. That makes it a little bit easier to get that ran across there.When we installed this side and ran our other ones over, I found that the ones that we're going across we're a little bit too short. My two hoses that I ran from each pedal or brake here up to this, what I was finding was, while this was in there, you can see how kind of how that hose bends It was pulling down on this. I really don't want this hanging down. What I did was I took the hoses off that we're on this side and I'm going to replace them with ones that have a 90-degree bend in them. The two that I have over here, I'm going to put over on the other side to extend those. These are going to install exactly the same way.Now to secure it up, what I did is where this is going to sit up against here, I put a hole with a screwdriver on each side of the hose. I'm going to take a zip tie, run it up and back down, then I can zip tie that right up against there. Now when we put this back in place, you can see we've got plenty of hose to allow our suspension to travel without putting any pressure on our hose itself. With securing them like this, this is going to keep everything up nice and tight, it's not hanging down, we're not going to have to worry about it getting knocked off with any debris or anything like that. We're going to do the same thing to our back one and then we'll go over the other side and get that set up.Now, as I mentioned, we took the lines from the other side and brought him over here. But in order to get this line connected to the other one, you're going to need a union. It's going to look like this, two female ends. Here and here. You'll need one for the front axle, as well as the back. Take our line wrench and a half inch. We'll get these secured on each side here. Then we can secure it to our panel. I'm going to push this inside like this. Keep in mind, our short lines that we had hooked to the brakes on the passenger side are the ones we moved to the driver's side, and that's to give us enough length to extend our lines that are running from one side to the other.Once you have all your connections made, the next thing you want to do is fill your actuator with your brake fluid. It's a good idea to have two people to do this. Once you fill your brake fluid, you're going to want to bleed your brakes. As you're filling or as you're bleeding your brakes, you want to check all of your fittings for any leaks. If you see any leaks, you want to make sure you tighten those down. As you're bleeding them, you want to start with the furthest wheels away from the actuator and then move to the closest ones.Now we're going to start bleeding our brakes. We're going to start from the furthest one, as I mentioned. You want to make sure you add your fluid, fill it up, and leave the cap off. You can see I got a little airline tube here going into a bottle, also an oil pan. I'm going to take this, stick it right over the top of that, and I'll open the valve. Wait for fluid. Have somebody pull the break away switch. We got fluid. No bubbles. We'll close it. Then we'll move over to the next one.Once you get fluid coming out of your furthest one, we're going to go across the other side of the axle, come over to this one, and then back over the other side. The other three should be pretty easy to do once you have fluid in your lines. You should be able to just open those and then close them. All you're wanting to do is get the air out of them.Once you've checked everything out, cleared up any leaks you may have, go ahead and top off your actuator. After that, you can go ahead and put up your skirting that you pulled down from underneath, reinstall your wheels, and you're ready to go.That's going to do it for a look at and installation on the Kodiak brake line kit on our 2018 Grand Design Momentum M-CLASS fifth wheel trailer.
Ratings & Reviews


James D.

9/2/2017
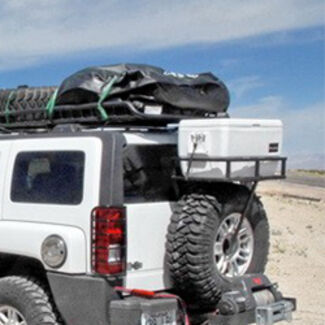
Still looking good with NO rust issues!


Jenny N.
11/2/2022
I sincerely apologize about how the order was received. Customer Service will be in touch with you shortly.
Info for this part was:
At etrailer we provide the best information available about the products we sell. We take the quality of our information seriously so that you can get the right part the first time. Let us know if anything is missing or if you have any questions.


























Ron H.
4/13/2020
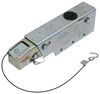
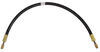
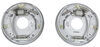
One year later, Im still really happy with how this system works. It has saved me from at least 1 accident when I had to do panic braking and the trailer stopped much better than the old electric brake system ever did.