bing tracking image
  1. Lubricants Sealants Adhesives
  2. Loctite
  3. Nut and Bolt Sealant
  4. Sealant
  5. 1.22 oz
Loctite Threadlocker 242 - Medium Strength - 1/4" to 3/4" Nuts/Bolts - 1.22-Fl Oz Bottle
Loctite

Loctite Threadlocker 242 - Medium Strength - 1/4" to 3/4" Nuts/Bolts - 1.22-Fl Oz Bottle

Part Number: LT37477
In Stock
$33.33
Retail:$47.48
You Save: 30%
Lubricants Sealants Adhesives
zoom in icon
slider vertical icon
zoom out icon
Comment field cannot be left empty.
Name field cannot be left empty.
By submitting this form, you understand and agree to our Terms of Sale, Website Terms of Use and Privacy Policy.

Thank you! Your comment has been submitted successfully. You should be able to view your question/comment here within a few days.

Error submitting comment. Please try again momentarily.

Product Images

Videos

Need help with installation?
Locate installers near me
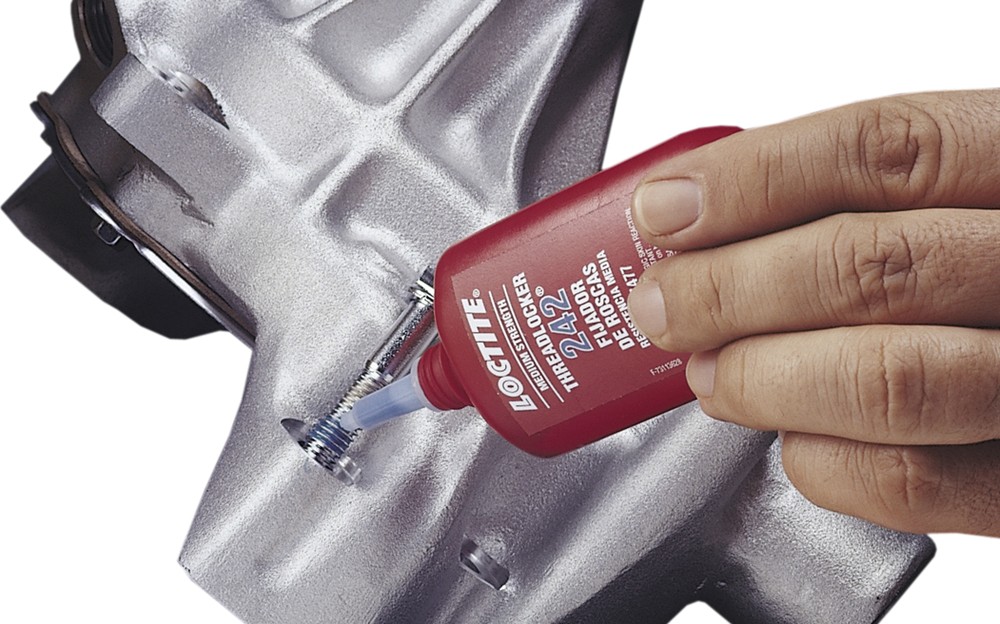
This general-purpose, blue threadlocker locks and seals a variety of threaded assemblies, preventing unwanted loosening of nuts and bolts and thwarting corrosion of treated parts. Medium-strength formula isn't permanent, easing disassembly. Fastest Shipping and Great prices for Loctite Threadlocker 242 - Medium Strength - 1/4" to 3/4" Nuts/Bolts - 1.22-Fl Oz Bottle. Read our customer reviews of Loctite lubricants sealants adhesives. Call 1-800-940-8924 for expert service or order your lubricants sealants adhesives part number LT37477 by Loctite online at etrailer.com.
  • All Info
  • Reviews (13)
  • Q & A (0)
  • Videos (1)
  • Photos

Loctite Lubricants Sealants Adhesives - LT37477

  • Nut and Bolt Sealant
  • Sealant
  • 1.22 oz
  • Loctite

This general-purpose, blue threadlocker locks and seals a variety of threaded assemblies, preventing unwanted loosening of nuts and bolts and thwarting corrosion of treated parts. Medium-strength formula isn't permanent, easing disassembly.


Features:

  • General-purpose, medium-strength thread-locking liquid keeps nuts and bolts securely tightened
  • Treated threads resist corrosion
  • Assembled parts can be taken apart easily with hand tools
  • Made in the USA


Specs:

  • Application: 1/4" to 3/4" (6-mm to 20-mm) nuts and bolts
  • Quantity: 1.22-fl oz bottle (36 mL)
  • Fixture cure (time required to become tacky): 10 minutes
  • Full cure (time required to reach full set): 24 hours
  • Temperature range (endurance limits of threadlocker): -65 F to 300 F


Applications:

  • Bolts for drive shaft, valve cover(s), water pump, oil pan and shock absorbers
  • Nuts for rocker arm adjustment
  • Studs and mounting screws for carburetors
  • Bolts used in trailer hitch installation
  • Small fasteners
  • Motorcycle mirrors, fenders and handlebar brackets
  • Boat fuel pumps and cable anchors
  • Industrial diesel injectors, manifold bolts and differential cover mounting bolts


The shaded areas in these diagrams illustrate where threadlocker should be applied in a variety of assemblies:


diagram of threadlocker placement

diagram of threadlocker placement


Threadlocker 242 is applied as a liquid to the threads of screws, nuts and bolts before assembly to keep them securely tightened, even when vibration occurs. Threadlocker also seals out air, water and grime to prevent rust or other corrosion from forming. Nuts and bolts that aren't corroded last longer and can be taken apart more easily. Standard hand tools can break the seal of the threadlocker, allowing you to remove treated nuts and bolts, which then can be reused.


This threadlocker is anaerobic (hardens in the absence of air) and requires contact with an active metal to cure. Active metals (those that tarnish, corrode or rust) include brass, copper, bronze, iron, soft steel and nickel. If both parts to be joined are made of inactive materials, Loctite Klean 'N Prime primer must be applied to one of the surfaces for curing to occur. Inactive materials include plated parts, stainless steel, galvanized steel, magnetite steel, pure aluminum, titanium, magnesium, gold, silver, plastic, cadmium, Iconel, zinc, natural or chemical black oxide and anodized aluminum.


Klean 'N Prime can speed the cure rate of Threadlocker 242. This is especially helpful when you are applying the adhesive to any material, active or inactive, in colder temperatures (below 70 F).


OEM symbol

This product is OEM specified: It is approved to meet specifications of original equipment manufacturers.


492140 Loctite Threadlocker 242 - Medium Strength - Blue

Alternate part number: 37477

Installation Details LT37477 Installation instructions


Video of Loctite Threadlocker 242 - Medium Strength - 1/4" to 3/4" Nuts/Bolts - 1.22-Fl Oz Bottle
Video Thumbnail Video Player Dialog

Videos are provided as a guide only. Refer to manufacturer installation instructions and specs for complete information.


Video Transcript for Hands-On with the Loctite Threadlocker 242

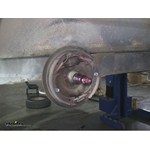
All right, today on this old trailer, we're going to install the hydraulic brake assembly, part number T2351100. Now, we're going to start off our install with the hub already removed so we can show how to remove the vacuum plate. First off, we'll go ahead and disconnect the hydraulic line behind it. We're going to use a wrench to undo the fitting and remove the line. We're going to take the line and point it upward to help keep the fluid in the line. Next, we'll go ahead and unbolt the old vacuum plate.

There will be five nuts that we have to remove. We'll uninstall them and save the hardware and then we'll go ahead and reinstall them later. Once the hardware is removed, we'll go ahead and take off the vacuum plate. With the old removed, we can go ahead and install the new one. We're going to make sure that the wheel cylinder is situated towards the top.

We'll push it on and then we'll go ahead and reinstall the hardware. To secure our hardware, we're also going to use some Loctite, part number LT37477. With the new brake assembly in place, we'll go ahead and reinstall the hub. Next, we'll go ahead and reinstall the hydraulic line. We'll thread it back into the back of the wheel cylinder and tighten it down.

Our brake assembly is fully installed. Now, we'll go ahead and adjust the brakes. We'll peel off the cap at the bottom for the adjuster and we'll take our tool and go ahead and spin the adjuster to tighten up the brakes. Now, we're going to tighten them up just enough where the wheel stops moving by hand, and then we'll go ahead and back off about 10 clicks. There should be a slight drag when you're through.

Next, we'll go ahead and repeat the same process on the driver's side. With that, that will finish it for our install of the vacuum plate, part number T2351100.

Ratings & Reviews

5.0

13 reviews
5 Stars
(13)
4 Stars
(0)
3 Stars
(0)
2 Stars
(0)
1 Star
(0)
Review Sort Icon
by:
Locks the threads so the screw doesn't back off. Its holding down a tongue pivot bolt and a anti-rattle bolt currently. Only time will tell if it stays put per long run. Put it was exactly as desired.
by:
Great website, great prices, and appreciate the fast shipping. Thank you very much
by:
1st time to use it and worth it
by:
by:
by:
This is a really solid base plate. Installation for the Pontiac Vibe was is definitely more involved that installing the alternative (Road Master). The Road Master base plate just bolts through existing bumper holes and an engine mount. This base plate is bolted directly to the frame just behind the bumper, with four 3/8" grade 5 bolts in holes you have to drill after clamping the base plate in place. I found it easy to get the required height (3/4" below bumper) but simply using a 1x3 piece of lumber. You also have drill a 1.25"hole in the frame to gain access to the inside of the frame. Tricky part of this install is getting the nuts, which are welded to a 1" plate and a ~14" steel rods, into place to be line up with the holes. It is a little hard to see. I also recommend making sure the bolts actually thread easily on to the nuts before putting the nuts in the the frame. I had the misfortune of one of the either cross threading or jamming, and I ended up having to cut the bolt head off with a sawsall using a metal blade. The bolt had not gone very far into the nut before it jammed so I was just able to get the sawsall blade behind the head, and cut it off, holding the head with a pair of vice grips. If that hadn't worked I would have had to take the car to a shop with oxy-acetaline torch to have it cut off. I was able to fish the cut of bolt out for the frame with a bent coat hanger. The first photo is of the base plate after I cut off the bolt.
Blue Ox support was GREAT! I sent them and email explaining that I needed new nuts and bolts, and they sent the needed parts (at no charge!). I just had to put my install on hold for several days.

The second problem I had was in attaching the electrical harness recepticle to the tubes on the to bar. One of the self tapping screws twisted off as I was tighting it. I ended up cutting of 1/2" of the tubes (with the sawsall) and then tapping the tubes with 1/4x20 threads, and regaining the length cut off with the bolt. My recommendation to blue ox, is that they tap these tubes with to 1/4x20, and provide regular bolts to attach the recepticle. The second picture showes the result.

When I showed the 3rd and 4th pictures to my mechanic, he was impressed and said, "That looks really solid!" The last picture shows the front of the car after I have started to assemble it (with the styrofoam padding on the bumper, and the draw bars in place.

The solidity of the Blue Ox engineering and the FABULOUS customer support has totally turned my into a Blue Ox fan. I'm glad my RV dealer suggested that I go with Blue Ox instead of the slightly cheaper solution, that would have been much less solid.
by:
These were suggested as I was replacing my suspention system. They work well. Only thing I woould say is that they are a little longer than I think they should be. Made it hard to use my torque wrench.
by:
Have always used this great product.
Fa
st service from merchant.
Mike N. profile picture

Mike N.

11/7/2017

Outstanding, as always!

by:
What can be said.....it works.....
by:
Very good product.
by:
by:
by:
13
13
true

See what our Experts say about this Loctite Lubricants Sealants Adhesives

  • Which Metal Valve Stem Will Fit On Aluminum Hi-Spec Series 06 Trailer Wheel # AM22651B?
    I recommend using the Americana Metal, Bolt-In Valve Stem # AM20906 on the Aluminum Hi-Spec Series 06 Trailer Wheel # AM22651B. Be sure to use some Medium Strength Loctite Threadlocker # LT37477 to help hold the nut in place on the valve stem. I find this is typically why most have issues is the nut loosens on them allowing for leaks.
    view full answer...
  • What is Loctite 242 Made Of
    Loctite 242, # LT37477, is made of a liquid synthetic polymer that cures in an anaerobic environment, which basically means that it will not harden in the presence of air, and it cures when it is sandwiched in the threads between active metals like a nut and bolt. I have included a table, see link, that shows the make up of Loctite for you to review.
    view full answer...
    Image 1 for
  • Could The etrailer 16-Gauge Steel # HP36VR Be Installed Using Bolts Instead of Welding
    If you wanted to use bolts to attach these Redline Trailer Fenders, part # HP36VR, to your trailer instead of welding it you could. As long as you used enough bolts to secure this fender to your trailer you would not have a problem using bolts to install it instead of welding. I would recommend you use Loctite Threadlocker 242, part # LT37477, on the nuts and bolts to help prevent them from vibrating loose and causing the fenders to detach from your trailer while driving.
    view full answer...
  • Is Threadlocker Needed For Installation Of The Derale 3/4-16 Filter Nipple?
    I took a look at the instructions for the Derale 3/4-16 Filter Nipple # D98020, and it does not call for any threadlocker, however you could still use a less permanent threadlocker like the Loctite Threadlocker 242 # LT37477, which is a medium strength threadlocker and can still be disassembled relatively easily.
    view full answer...

Do you have a question about this Lubricants Sealants Adhesive?


Info for this part was:

Employee Robert G
Expert Research:
Robert G
Employee Raymond P
Written by:
Raymond P
Employee Dustin K
Video Edited:
Dustin K
Employee Wilson B
Updated by:
Wilson B
Employee Matthew S
Updated by:
Matthew S

At etrailer we provide the best information available about the products we sell. We take the quality of our information seriously so that you can get the right part the first time. Let us know if anything is missing or if you have any questions.


Product Experts Available Now!
Call 1-800-940-8924