


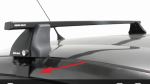
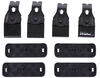
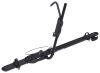
Durable nylon legs with built-in locks help mount Vortex Aero crossbars to your vehicle's naked roof or fixed mounting points. Leg bases pivot to level bars on your roof. Pair with 2 crossbars and fit kit to create complete roof rack.
Features:
Specs:

California residents: click here
Videos are provided as a guide only. Refer to manufacturer installation instructions and specs for complete information.
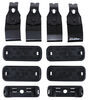
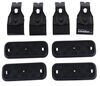
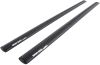
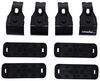
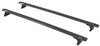
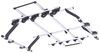
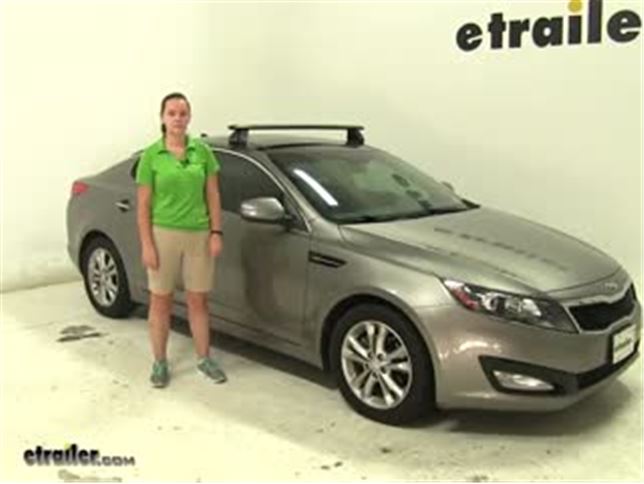
Today on our 2014 Kia Optima we're doing a test fit of the Rhino Rack Vortex Arrow Crossbars. The part number for our crossbars today is RRVA126B-2. For our foot pack we're using RRRLKVA, and for our fit kit for our Optima we're using DK283. We have all 3 pieces, our crossbar, foot pack, and then our fit kit here, the clamp and the rubber portion on the bottom. These are a great aerodynamic bar. They're available in silver as well with the same part number, just replace the B with S.
These are going to be aerodynamic, going to reduce wind noise and drag. The lock for the end cap here on the foot pack is included, and then we also have a lock on the end cap of the crossbar. We have our weather strip in there that's going to help prevent any dirt, debris, or liquid from getting inside of our crossbar. Those are also adjustable. You can cut them up and place in any kind of channel mounted accessories as well. We've got that front bar on.
We're going to show you how to put together our last foot pack and fit kit. We've got one of them already installed. Then we'll show you how to put our back bar on our vehicle. We've got our fit kit here, our foot pack, and then the crossbar. Everything you see on this table is included with the kit.
The only thing you will need to provide is a flat tape measure, or a regular tape measure will work as well. We're going to start off grabbing our foot pack. We're going to pull off this bottom piece. It just snaps right off. We're going to take our rubber piece, this one is a 506, M506 there, and all these instructions will be with your fit kit.
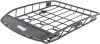
We're just going to make sure both of our arrows are facing the same way on the rubber portion and on the plastic portion. We're just going to squeeze that together so that it fits in completely. Just like so. We want to make sure that our arrows are facing out when we put them on our foot pack. They're facing towards the opening. Now we'll remove our bolt here on the back of our foot pack. We're going to take our clamp and we're going to just simply set it in place and start to tighten our bolt down just enough so that it holds our clamp in place. With that tightened down we'll take our nut here and we're going to slide it into our channel along the bottom. We'll loosen that bolt up just a bit. Slide that on and now we'll take our measurement. This is going to give us a even bar overhang on each side so that our bars are sitting evenly. This is going to be 16.5 centimeters which is there. Tighten down the bolt on the inside here to hold that in place. Double check my measurement. Perfect. Now I like to place on my end caps so I don't have to worry about it later. It just snaps right on into place. Then we can take our included key and we're just going to lock those up. These are actually great. It helps prevent theft and tampering of any channel mounted accessories because you can remove that weather strip on the top here, place it on, and not have to worry about that. We'll move this off to the side. We're going to make sure that the 506 pad that we put on our crossbar is towards the driver's side, or the left hand side of the vehicle. We'll just start by opening up our doors. Then we can grab our crossbar and place it on. We're just going to loosely place it on. Make sure that it's fitting evenly. Now we'll take our measurement. We're going to measure from the center of the front foot pack to the center of the back one. We're going to have 70 centimeters. Make sure we measure both sides. Perfect. Now we can start to tighten these down. You'll notice that whatever we do to one side we do to the other. That's to make sure that our crossbars are sitting evenly from one side to the other. We also want to make sure we tighten these down evenly. We don't want our foot pack to pull the crossbar towards one side or else it won't be completely secured down and we can cause damage to our crossbars. I like to start by tightening down my clamps so that they're sitting just up against our door jamb area. Now we'll start to tighten them down evenly. I do about 5 to 10 turns on each side, going back and forth, until they're completely secure. What's great about this crossbar spread is it's going to be perfect for any kind of Rhino Rack roof mounted accessories that you may have. Whether that's roof mounted bike racks, ski and snowboard carriers, cargo baskets, or anything. You'll notice it does get a little more difficult. You'll see now that the blue portion of our torque tool, the skinnier part, has completely straightened out. That's when we know we have enough torque behind our bolt so this side is completely tightened down. Just want to check the other side and make sure that one's torqued down. That one's coming out straight as well. We can close up our door and we'll grab our foot pack end caps. This is going to help prevent theft and tampering of the actual crossbars, the whole kit itself. We'll just place it on, lock that down, and remove the key. Now, with everything completely secured down you're ready to load up your gear and hit the road. That's going to be our completed look at the Rhino Rack Vortex Arrow Crossbars and how they fit on our 2014 Kia Optima.

Do you have a question about this Accessories and Part?
Info for this part was:
At etrailer we provide the best information available about the products we sell. We take the quality of our information seriously so that you can get the right part the first time. Let us know if anything is missing or if you have any questions.


Thank you! Your comment has been submitted successfully. You should be able to view your question/comment here within a few days.
Error submitting comment. Please try again momentarily.