
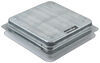
WeatherTech Side Window Rain Guards with Dark Tinting - Front and Rear - 4 Piece


To see if this custom-fit item will work for you please tell us what vehicle you'll use it with.


Let fresh air in while keeping bad weather out. These heavily tinted rain guards keep your interior dry, reduce wind noise, and help to keep temperatures down by promoting better air circulation in your vehicle.
Features:
Videos are provided as a guide only. Refer to manufacturer installation instructions and specs for complete information.
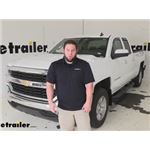
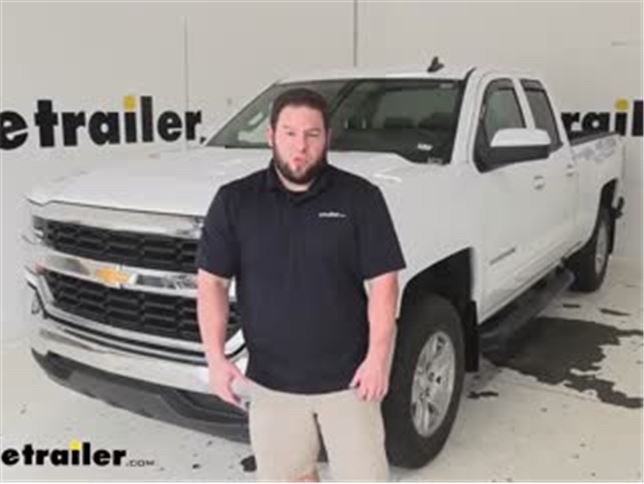
What's up everybody it's Ajay with etrailer.com. Today, we're gonna be checking out the WeatherTech wind deflectors for the front and the back of a 2018 Chevrolet Silverado 1500. These winter plugs will be a nice addition to your Silverado. Not only do they add a cool look to it, but they're also functional. As in, you know, if it's a rainy day I don't know about you. I don't like driving around with the windows up all the time.
I like them to have crack just a little bit to have some kind of wind flow. So if it's rainy or snowy or the weather's not cooperating you can bring the window down just a little bit and don't have to worry about those elements coming inside. One good thing about these are they're not like the old style where you would stick them out to the outside of your truck. These are custom fit for your Silverado and they go up into the groove of the weather strip on the inside of your window. So there's not going to be tape residue on the outside of your vehicle.
Now I said, they go in the weather strip here and your windows just want to prove you. They don't get in the way of that at all. And just roll and roll them up and show ya. There right in line. There's not going to be any issues with that.
This kits going to come with both of them for the front and the rear. Now, if you want to get them separate you could buy just the front separate or just the rear separate. They aren't that bad to install. It just takes a little bit of patience. Just follow along with us and see how we did it.
To install our first wind deflector we're gonna make sure the windows down already at the front make sure your windows also clean, where they did that. So we're going to try and just work in the corners first start here at the edge, feed them like that. And they recommend you bow it just a little bit to try and get it started here. It'll go in the corner, just like that and then start to work it in from there. So now put the two corners in first and then you kind of work it in from there. That's okay to bow it just a little bit. It will bend and slide in the track, just like that. With that in place. Okay, just pull back on it a little bit and kind of just pulling it out. You're not slotting out, but you're bending it out that way just so when you go to roll the window up and doesn't make contact another thing they give you a specialty tool and they want you to run up into the channel just to kind of help it, push it in place. So it's going to run that up through there and you might hear a snap or something like that as it pushes it a little further into place. I just kind of push up on it while I have that tool in there just to maybe get up further up in that seal but it seems like it's seated in there pretty well. So I think we're ready to roll up the windows. Now we're going to roll the window up all the way five times So just slowly roll it up there and you might hear it push it into place and that's fine. Just make sure it doesn't make contact with it. I think we'll be all right. Let's give it a shot. Now the instruction tell you to go ahead and leave your window up for about 12 hours. There just kind of helps hold it up into place and keeps it there. Installing our back one is going to be a little bit different. We have clips that we have to install first. So they give you the tool to reach up in there and pull down your weather strip. Now I'm going to pull it all the way down to show you where it goes. We have one clip installed already. So pulling this down kind of gets out of the way actually go up above this ridge, not this one. So you got to go up and in there you can see we've already got one clip installed at the top of there. They recommend that you go three inches from there. We're going to go four inches from here. So come back down to here. And that's what we're going to put our clip. So when you go to install the clip you want the side that kind of flares out to face outward. Get it up and in there like that, I'll come back with this tool and that'll help me push it up into place. Right about there. So make sure you look at your back wind deflector here and you want to match up this side with here and you can see this one's a little bit more rounded. So it's going to match this part of the window frame there an easy way to do this is you can just put it in like that and see this parts in and you can slide it down. Now, both sides are in. You don't have to bow it out or anything like that. Then you can tilt it back just a little bit to go up and above those clamps. Cause you want to slide this part, up in that part. So I kind of got it up there and this kind of tilted in, slide it into place. Just like that. Using the tool that gave you to kind of push up on this part. I'm going to do the same thing. Just watch out for the clip. I'm just going to try and just push up just a little bit more. Before we roll up the windows, it looks like it's pretty well seated in there. And just like the front we're going to go up and down five times Looks good! Now you're gonna repeat that same process on the other side. Overall, not that bad of an install. It can be a little intimidating because they are pieces of plastic. You don't want to bend or break them, but it's okay, bend just a little bit, especially on the front ones to install and once you get them in there they go right into place. We didn't have many troubles after that. I think it makes your truck stand out. Look a little bit cooler too, and it's functional. You don't have to worry about the rain coming in the window. If your window is down, I think that about does it thanks for hanging out. And I hope this helped..
Customer Satisfaction Score:
88% were satisfied with this product
12% of customers were not satisfied
Ratings & Reviews

Do you have a question about this Rain Guard?
Info for this part was:
At etrailer we provide the best information available about the products we sell. We take the quality of our information seriously so that you can get the right part the first time. Let us know if anything is missing or if you have any questions.


Thank you! Your comment has been submitted successfully. You should be able to view your question/comment here within a few days.
Error submitting comment. Please try again momentarily.