
 Product Experts Available Now!
Call 1-800-940-8924


Thank you! Your comment has been submitted successfully. You should be able to view your question/comment here within a few days.
Error submitting comment. Please try again momentarily.


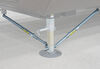
Provide your RV screen door reinforcement with this adjustable Screen Door Cross Bar. Attaches to the screen door frame with the included hardware and acts as a sturdier handle for exiting the trailer, allowing you to avoid screen wear and tear.
Features:
Specs:
Videos are provided as a guide only. Refer to manufacturer installation instructions and specs for complete information.
Today we'll be taking a look at the Camco RV screen door crossbar. The one we're working with today is in black, part number CAM42188. It's also available in white, part number CAM42189. Reinforce your camper or RV screen door and make entry and exit a delight. The Camco RV screen door crossbar adds a stylish look to your RV while firming up your screen door. It's made with a durable aluminum construction, and it's adjustable to fit a wide variety of screen doors.
It expands out to twenty-eight and five eighths of an inch long and retracts down to 20 and three quarters of an inch long. It's an easy installation with the included hardware. Providing a solid place to push or pull, it's going to ensure that your screen door lasts a long time. Now that we've gone over the features, I'll go ahead and show you how to get it installed. First thing we need to do is determine our location for our crossbar. We're going to put ours right about here.
Just where our screen door starts. I'm going to line it up and make sure it bumps up to the very edge of our door on both sides, so I'll need to do is telescope the brackets out a little bit. Right, and then when I've got it in the right location, I can grab my marker and mark out my holes. Then once we have those marked out, we can grab our crossbar, and we're going to turn it over and we're going to mark the wholes here and there. Perfect, so then we can take our brackets off, and we're going to drill a pilot hole in each one of those holes to put our brackets back on and then run our hardware through. That's to ensure the brackets don't scoot in or our when we're replacing it on the screen door.
We're not going to be going all the way through, we're just going to go though the first layer and then we've got it. Now with our holes drilled out, we can replace our brackets. We'll put them on, we'll make sure our holes line up. That looks pretty good. Then we can grab two screws of our hardware and run those through.
Now I'm using a low torque setting screw gun, that way I don't strip them out. Now we can just repeat that process on the other side. Now with our crossbar assembled, we can turn our attention back to our screen door, and draw out pilot holes for our marked holes here. Now just be sure we're not going to go all the way through the screen door, we're just getting started because it is hollow. Now with those last four holes drilled out, we can take our crossbar and our remaining hardware and go ahead and fasten that down. Perfect, and let's get a completer look at the Camco RV screen door crossbar.
Ratings & Reviews



Gbucyk

9/23/2018
product is the best item I’ve ever added to the RV, highly recommend that others do the same.

Dave M.
8/15/2016
After one year, the handle is still rock solid. Its nice when walking into the trailer to grab the handle and close the door quickly to minimize the chance of getting bugs in the trailer.
John M.
3/23/2018
Still working great. We have just got our camper out of storage and we are ready for camping season. Door handle is awesome.
Info for this part was:
At etrailer we provide the best information available about the products we sell. We take the quality of our information seriously so that you can get the right part the first time. Let us know if anything is missing or if you have any questions.

















Richard
6/21/2025
Product has been working great. My grand children even use it proberly.