


Thank you! Your comment has been submitted successfully. You should be able to view your question/comment here within a few days.
Error submitting comment. Please try again momentarily.


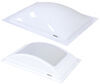
A cracked skylight can quickly turn into leaks and water damage if left unchecked. This smoke-tinted replacement fits 14" x 30" openings, seals tight with included sealant, and holds up to sun exposure to keep your RV dry and comfortable.
When your RV skylight cracks and starts leaking during a storm or you notice water stains forming around the opening, the repair becomes urgent because water doesn't wait. This replacement comes with polycarbonate-safe sealant for installation, so you can apply a continuous seal on the roof surface and finish with a watertight barrier over the flange and fasteners. Once it's installed correctly, you're not chasing drips or watching water work its way into the roof.
A big part of replacing a skylight is confirming the opening size when the old unit doesn't provide clear measurements. This one is sized for a 14" x 30" cutout, with complete outer flange dimensions of 17-1/2" x 33-1/2", so you have the key measurements before removing the old unit from the roof. That lets you confirm the fit before removing the old unit so you're not stuck mid-project with the wrong size.
Sun-baked plastic is usually what sends people shopping for another skylight in the first place. This one uses UV-resistant polycarbonate that stands up to sun exposure without cracking or discoloring. Over time, that gives you a skylight that keeps its shape and appearance instead of turning brittle and worn after living on the roof.
Sometimes the problem isn't just a broken skylight, it's dealing with harsh sunlight and heat building up inside your RV. This smoke-tinted skylight helps reduce glare and manage heat while still allowing natural light into the space. The 5" bubble height raises the skylight above the roofline, allowing light to enter from more angles so your RV still feels bright and open during the day.
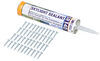
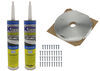
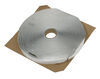
Get a waterproof install using the included sealant approved for use with polycarbonate plastic. Carefully remove the old skylight, then clean and prep the roof surface so it's dry and debris-free. For additional sealing, you can apply butyl tape (sold separately) along the flange before setting the skylight in place. Secure it with screws (1" zinc or stainless steel screws not included), then seal over the flange edges and fasteners to create a watertight barrier that holds up over time and helps prevent leaks from turning into costly roof repairs. There is an install kit with screws and an additional tube of sealant sold separately (SR76RR). If you'd like help installing your skylight, check out our Installer Locator to find an installer near you.
Videos are provided as a guide only. Refer to manufacturer installation instructions and specs for complete information.
Hi, everyone. Steven here with etrailer.com. Today, we're looking together at our Specialty Recreation Replacement RV Skylight. Folks, this is gonna be used in a 14-by-30-inch cutout, and as you can see, it's a nice smoke color. Now as I mentioned that 14-by-30-inch cutout, this is sized with a 33.5-inch-long-by-17.5-inch-long flange. And that's for installation.
You have all the screw holes pre-drilled. There are no screws included. You'd have to purchase those separately, or you most likely have some already locally. You're gonna get two of this SR140. That's the sealant from the manufacturer.
That's what they recommend strongly use with this. Again, it's a polycarbonate construction, so a lot of times, different sealants don't work good with polycarbonate. So you wanna make sure you're reading your labels. You don't wanna be eating through the polycarbonate, that's potentially what could happen. So be careful.
Five inch height on the bubble itself. And as you can see, a lot of give, it pops right back out every time, so you don't have to worry about hail damaged from this, stuff like that. Again, you will need screws, sold separately, but once you use the sealant and the screws, you're gonna ensure a watertight seal. and everything's gonna be properly installed as long as you follow those instructions. And we also have videos of our technicians here at etrailer installing some of these as well.
So feel free to reach out to us if you need help or if you have any questions. I'm Steven, have a good one.
Customer Satisfaction Score:
97% were satisfied with this product
3% of customers were not satisfied
Ratings & Reviews


Info for this part was:
At etrailer we provide the best information available about the products we sell. We take the quality of our information seriously so that you can get the right part the first time. Let us know if anything is missing or if you have any questions.














Victoria H.
4/1/2025
I appreciate your insight Thomas, this is valuable feedback! Even with the hole issue, I'm glad you were able to get this installed and seal the deal. Looks like you’ll have the perfect view once the weather cooperates, keep those positive vibes shining through :)