Optronics RV Exterior Lights
- RVPLL13CB
- Porch Light
- Utility Light
- LED Light
- Hardwired
- 12V
- Black
- Surface Mount
- Optronics
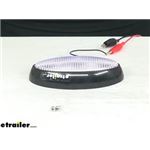
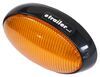
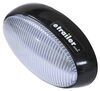
6-5/16" x 3-5/16" Oval LED light functions as an RV porch light or utility light with 16 diodes producing bright light at a downward angle. Durable SMD LEDs better withstand shock and vibration. Surface mount installation. 2-Wire pigtail.
Features:
- LED light functions as an RV porch light or utility light producing bright light at a downward angle
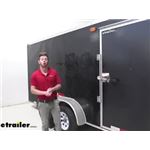
- Also works great for an enclosed trailer
- Toggle switch controls on/off function
- SMD construction of LED circuit board
- Better withstands shock and vibration
- Allows improved heat distribution and thinner construction
- LEDs make great replacements for incandescent lights
- Last 50 times longer
- More efficient - provide brighter light with less power output
- No bulbs to replace - no brittle filaments
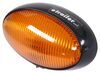
- Durable acrylic snap-on lens and black ABS housing
- Clear lens over white LEDs
- Compatible with 12V DC systems
- Mounts on surface of RV - hardware not included
- 2-Wire design includes power lead and ground wire
Specs:
- Dimensions: 6-5/16" long x 3-5/16" tall x 1-7/16" thick
- Distance between mounting holes (center on center): 4-7/8"
- Diodes: 16
- Power draw at 12V: 0.32 amps
- Lifetime warranty on LEDs
![Optronics RVPLL13CB LED Oval Porch Utility Light with Switch Diagram]()
Surface-Mount Light
Surface-mount RV lights install using a flange or bracket with mounting holes. These lights lay flat against the RV surface and only require a small, often pre-existing hole, for wiring. Mounting hardware is used to secure the light to the trailer.
RVPLL13CB Optronics LED Porch and Utility Light - On/Off Switch - 16 SMD LEDs - Oval - Black Housing - Surface Mount - Clear Lens
WARNING: This product contains chemicals, including lead, known to the State of California to cause birth defects or other reproductive harm. Wash hands after handling. For more information, go to www.p65warnings.ca.gov.


Thank you! Your comment has been submitted successfully. You should be able to view your question/comment here within a few days.
Error submitting comment. Please try again momentarily.