
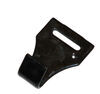
etrailer Trailer Hitch Receiver - Custom Fit - Matte Black Finish - Class III - 2"


To see if this custom-fit item will work for you please tell us what vehicle you'll use it with.


Built for weekend getaways and daily demands, this custom hitch bolts on fast, tows up to 4,000 lbs, and features a matte black finish with a fourth layer of powder coat for strength, style, and corrosion resistance that lasts.
Rated for 4,000 lbs of gross trailer weight (GTW) and 600 lbs of tongue weight (TW), this hitch is built to handle mid-size trailers, campers, multi-bike racks, and cargo carriers. Whether you're heading out for a weekend getaway or hauling extra cargo, this hitch provides the durability and security needed for worry-free towing.
Unlike standard glossy hitches, etrailers hitch features a matte black carbide finish, making it more resistant to scratches and better at hiding dirt and scuffs. The added fourth layer of powder coating ensures superior corrosion resistance, making it ideal for long-term use in various weather conditions.
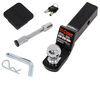
No drilling or welding required - this hitch mounts directly to your vehicle's existing frame attachment points. The included complete hardware kit and straightforward instructions make it a great DIY-friendly option.
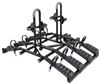
Designed to accommodate a wide range of hitch-mounted accessories, this 2-inch receiver is ideal for multi-bike racks, cargo carriers, motorcycle carriers, and a variety of towing setups. The standard sizing ensures compatibility with most hitch accessories on the market, making it a go-to choice for adventure and utility needs.
The square-tube construction enhances durability and provides a clean, streamlined appearance. This design ensures a strong and stable connection while integrating seamlessly with most vehicles for a factory-like fit.
Built with precision robotic welding and high-quality steel, this hitch ensures long-lasting strength, a precise fit, and consistent performance. Designed for reliability, it meets rigorous quality standards to provide a dependable towing solution for years to come.
When you purchase a hitch from etrailer, you have access to lifetime technical support from towing enthusiasts. Whether you need installation guidance, troubleshooting tips, or advice on accessory compatibility, our team is here to help every step of the way.
California residents: click here
Videos are provided as a guide only. Refer to manufacturer installation instructions and specs for complete information.
Hi everyone, Jesse here with etrailer. Today we're gonna take a look at and I'll show you how to install the etrailer custom fit trailer hitch receiver on our 2023 Kia Sorento. Adding a hitch to the Sorento makes a ton of sense. Even though it is pretty spacious on the inside, you might have all the seats filled up and you might just run out of storage space, so it's always nice to be able to add some extra storage onto the back of your vehicle and adding a hitch allows you to do that. With this hitch, you can throw in accessories such as a bike rack or a cargo carrier, and you can even do some towing with it. Just remember, if you plan on doing any kind of towing with your vehicle, you will need to add on trailer wiring to keep you safe and legal out there on the road.
Here's a closer look at our hitch installed on our neighbor's vehicle. As you can see, the crosstubes are completely hidden behind the fascia, so you have a really nice clean look. So all you'll be able to see is the matte black coating on the receiver opening. That receiver opening is gonna be your standard two inch by two inch opening, and behind that is another standard 5/8 inch pin hole. The pin and clip are not included with the hitch.
However, we have many options available here at etrailer. Also, any accessory that you add on will most likely come with one included and we have a nice sturdy safety cable loop here. Very easy to access with whatever style safety cable you have. For example, this large clevis here or even an S style like this. Now for some measurements, we'll start with our ground clearance.
From the ground to the top of the inside of the collar is at about 13 or three quarters inches. Then from the center of the pinhole to the edge of our bumper here is right at about five inches. You'll wanna keep that in mind for any folding accessory that you add on. Just make sure it doesn't make contact with the vehicle. For the weight capacities with this hitch, we have a gross trailer weight of 4,000 pounds.
That's the amount of weight that you can pull behind the vehicle, and we have a maximum tongue weight of 600 pounds. That's gonna be the amount of weight pushing down on the hitch. Always be sure to double check your owner's manual to make sure your vehicle can handle that weight safely. All in all, if you're looking for a hitch for your Sorento, I really like the etrailer option. I think the matte black paint on it matches up with our bumper here very well. If you have any questions or concerns about this hitch or anything else that we offer here at etrailer, please feel free to reach out to us. We'd love to get you pointed in the right direction. And as for the installation with this hitch, it's honestly a pretty easy process. You do have to get under the vehicle and lift the weight of the hitch up so I'd understand if that's not something that you're looking to do yourself, maybe you just don't have the time, the space, or the tools to get it done, feel free to check out our dealer locator. That's where you'll find someone local to you that would be happy to get it set up for you. If you are looking to see how this gets installed, then follow along and I'll walk you through the process. To begin our installation, you'll want to lower down your spare and set it aside to get it out of the way. Then we'll move on to lowering our exhaust down. We have a rubber hanger right here on the rear. I sprayed it down with some soapy water just to make it pop off a little easier and I'll get a pry bar in there to remove it. And then before we move on to any other hangers, I'm gonna grab a cam strap to support this. If you're working on the ground, you could just use something like a floor jack, just something that will keep us from damaging the exhaust when we drop it down. There's another hanger on the backside of our muffler here. We could use a pry bar or an exhaust hanger tool to get that one removed. And then we have one more towards the center kind of where our differential is and I'll get that popped loose. Then we can relax our cam strap a bit and get this lowered down. Now we'll come to the driver's side. We have this plastic panel here that we need to get out of our way. So there's a couple push pin fasteners or a few push pin fasteners. You just use a flathead screwdriver, pop the center out and the whole thing will come out with it. Once you have those all taken out, we have some plastic nuts to remove. We got those three out and these plastic nuts, usually you can remove 'em by hand. If they're a little tight for you, you can put a 12 millimeter socket on it and it does help to kind of pull down while you're unthreading it to get it popped loose. And once you get those loose, you can pull it down and set it aside. On both sides you'll have this rubber kind of grommet thing. We just want to take those off and get 'em out of our way. That's gonna make sure that our hitch sits flush with the frame. Now with that out of our way, we can come to our three holes on both sides. So there will be two on the inside of the frame rail here and one on the bottom. It'll be the same on both sides. We're gonna use a wire brush, clean out any corrosion or rust that might be built up in there. Then I like to take the hardware, thread it in and out a few times, make sure it's nice and smooth. That way when we have the hitch above our head, we don't have to fight the threads while holding it up. Then for our hardware, we'll have the hitch in between the hardware and the frame, so each hole will get a bolt and a conical tooth washer with those teeth facing the hitch so that they bite down on 'em. Now it's a good idea to have an extra set of hands to lift the hitch up. I have my friend Daniel here to help me out. So we'll get his side up above the exhaust first. Then we'll line up our bottom hole and get a piece of hardware, thread it on on both sides. That's gonna hold it up for us so we can get the rest of our hardware installed. Now to help us get those side holes lined up, I like to come in with a 19 millimeter socket and just kind of snug it up just 'cause it's easier to have the bolt lift the hitch up than actually lifting it up. (socket whirring) Now that we have all of our hardware threaded on, we can snug it all down with that same 19 millimeter set. (socket whirring) Now we'll take a torque wrench and torque down everything to the specifications in the instructions. Now all that's left is to get our exhaust hung back up and reinstall that plastic panel and don't forget to put your spare back up. But other than that, that's gonna do it for our look at and installation of the etrailer custom fit trailer hitch receiver on our 2023 Kia Sorento.

The hitch was very easy to install and very high quality!!
The hitch was great. Easy to install and did not take long.
Fit perfectly on my 2024 Hyundai Santa Fe Hybrid. Did not need to jack it up, just dropped the muffler and bam, done.
Perfect fit for our Sorrento. Instillation instructions were very clear and straightforward which made installing it a breeze.
Great customer service!
Very well made, easy install (maybe 30 mins) in the driveway.
Took approximately 2 hours for 2 people to install. Too heavy for me to do alone. Haven’t used it yet.
Do you have a question about this Trailer Hitch?
Info for this part was:
At etrailer we provide the best information available about the products we sell. We take the quality of our information seriously so that you can get the right part the first time. Let us know if anything is missing or if you have any questions.


Thank you! Your comment has been submitted successfully. You should be able to view your question/comment here within a few days.
Error submitting comment. Please try again momentarily.