
 Product Experts Available Now!
Call 1-800-940-8924


To see if this custom-fit item will work for you please tell us what vehicle you'll use it with.


Thank you! Your comment has been submitted successfully. You should be able to view your question/comment here within a few days.
Error submitting comment. Please try again momentarily.


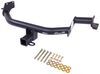
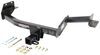
Your vehicle might just need a hitch that fits, works, and holds up. This one's built for everyday use, but not oversized jobs. It's perfect for adding a bike rack or cargo carrier for weekend trips, or towing a small camper.
You don't need a heavy-duty truck to get out there with your gear. With 4,000 lbs of towing capacity and 400 lbs of tongue weight, this hitch is built for everyday use. It's right at home carrying a cargo tray for a weekend trip, taking bikes out to the trailhead, or even hauling a trailer to the hardware store. The 2" receiver is what most racks, trays, and ball mounts are designed for, so chances are the gear you already have (or the gear you want) will slide right in. You shouldn't have to hunt for an adapter to make your accessory work. And it's Class III, which means it's strong enough for regular use, not just occasional hauling.
This hitch bolts directly to the frame using included hardware and the tools most folks already have in the garage. There's no need to drill into the vehicle or weld anything in place, and you won't be cutting up the bumper just to make it fit. It's designed for a simple install whether you're putting it on yourself or having a shop handle it. If you'd rather not DIY, we can help you find a local installer using our dealer locator.
This hitch meets SAE J684 standards, so it's been tested to handle its rated capacity under real towing conditions. You may not spend time thinking about certifications, but they matter when you're pulling weight. This one covers strength, performance, and structural integrity, so you're working with something that's actually been proven, not just claimed.
Videos are provided as a guide only. Refer to manufacturer installation instructions and specs for complete information.
Hi, I'm Daniel with etrailer, and today we're gonna be taking a look at, and I'm gonna show you how to install the Trailer Mate trailer hitch on our 2025 Kia Telluride. Adding a hitch to the back of your vehicle is gonna allow your Telluride to pull some trailers, so if you're wanting to pull a camper back here, or maybe a flatbed trailer, or it's gonna allow you to put accessories back here like cargo carriers or bike racks. As you know, there's three rows of seats, so if you have the entire family in here, there's not a lot of room for luggage in the back. So if you have a luggage rack, it's gonna let you maximize the space back here. I really like how this hitch looks on the Kia Telluride. It has a matte black finish, which matches some of the trim that's on here.
And the entirety of the hitch cross tube is completely hidden behind the fascia. Now, I will mention that the front of this hitch does have a cleaner look than some of the other ones. They have a welded-on collar that's kinda beefed up in this section. And another thing I kinda wanna point out is how smooth the welds are. On a lot of the hitches, I do see a lot of weld splatter and some gross-looking welds, but this one's really clean looking.
This hitch has a two-inch by two-inch hitch receiver opening, and that's gonna be your standard size. It's gonna fit most of your accessories. You will need a 5/8-inch pin and clip to secure those. I would always recommend getting a locking pin, just so you have that simple upgrade to lock your accessory in there so no one can come and take it. Now, if you are planning on towing, you need a spot to put your safety cables, and that's gonna be on this loop on the bottom and it can easily accept an S hook or a clevis-style safety chain.
Now I'll get to a couple measurements. So from the ground to the top of the inside of the hitch receiver tube is about 14 and a half. So that measurement will help you level out a trailer. So if you have a trailer with a coupler, level that out, measure up to the top of your coupler, and that'll help you determine what size rise or drop you need in the ball mount accessory. Now, the next measurement's gonna be from the center of our hitch pin hole to the outside of our bumper.
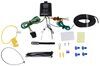
And that measurement is about five inches. So that'll help you determine if you have a folding accessory like a bike rack and you wanna make sure that can fold up without hitting your bumper. If you are planning on towing with your Kia Telluride, make sure you check your owner's manual, make sure what your vehicle can handle. But as far as the hitch, the hitch total towing capacity is gonna be 4,000 pounds. That's gonna be your trailer plus what's inside of it. And then your tongue weight, that's the weight pushing down on the hitch receiver, that's gonna be 400 pounds. Something else to consider if you are planning on towing is trailer wiring. I would highly recommend getting that while you're installing the hitch. It's gonna make everything a lot easier. And if you have any questions on that, please feel free to reach out to us and we'll be happy to point in the right direction. Now, as far as getting this hitch installed, it really isn't too bad, doesn't take too long. You are having to lower that exhaust and put some bolts through the frame, but that's just about it. If you don't have the time or tools, however, you can check out our installer locator, and we find an installer local to you to get this installed. You wanna do it yourself, follow along, and we'll walk you through the process. Starting off, we wanna remove that spare tire, so I got the hatch open. We're gonna take this out. And you just wanna pop this cover off that says spare tire. We'll use a 13/16 socket. We'll get an extension on here and get our spare tire off by loosening that up. We got that already out of our way. Now we can get this trim piece removed. So there's gonna be three push pin-style fasteners. And to get those removed, I'm gonna use a flathead. Get that center section out. Then you can use a trim piece or just your hand. Usually they're pretty easy at that point. And with all three removed, I'm gonna use a 14-millimeter socket and there's just some plastic nuts up here. I'll loosen up these while pulling down. And now we can set this to the side. Now, we need to lower this exhaust a little bit so we can get to our frame. There's gonna be three rubber isolators. I already put a strap in place, so this will hold the weight of the exhaust. I'm gonna get some soapy water. This will help slide this rubber isolator off. Spray that on there and then use a pry bar. There is one more over closer to our tire. And then the last one's further in the back. And the reason we drop this down is so we can get to these holes in our frame. Before we get the hitch in place, we do need to trim out this panel, and it's a lot easier to actually take this down first. So I will take out the push pin fastener on both sides. And on the backside, there are two screws. Pull those out. Now we can pull this down. Let's get that unclipped. We can take our long bolt that comes in the kit with a conical tooth washer. Make sure those teeth are facing the metal. We're gonna go inside out. So we'll get this held up into place. It might be a good idea to have a second person supporting the other side, or if you're doing this on the ground, you can usually support it easier. But now I'll line it up with our holes and put our long bolt through. Put both of these in. And on the other side, I'm gonna put another conical tooth washer, tooth facing in, and a nut. On our passenger side, it is really close and up against our heat shield. So instead of taking our heat shield down, I'm just gonna use a punch and a hammer. And I'm able to get them in that way. Now, using a 13/16-socket on the nut side, I'm gonna tighten these up. And if it is straight like that, use a three-quarter inch on the bolt side. With everything tightened down on both sides, I'll come back through and torque everything down to the specs and the instructions. And if you don't have a torque wrench at home, you can usually rent one from a local auto parts store. Then we can get our panel trimmed out. So how I do this is I set it up there and put a little dash where our hitch is gonna be. And I did follow the instructions for the depth. So just take a look at that and that's how high I'm gonna cut. So now I'll just cut this out and get this put back. (tool whirring) Now that that's all torqued down, the last thing to do is to put our plastic trim piece back up, put our exhaust back up and our spare tire. And that just about does it for our Trailer Mate trailer hitch on our 2025 Kia Telluride.
Customer Satisfaction Score:
99% were satisfied with this product
1% of customers were not satisfied
Ratings & Reviews

Info for this part was:
At etrailer we provide the best information available about the products we sell. We take the quality of our information seriously so that you can get the right part the first time. Let us know if anything is missing or if you have any questions.
























Kate F.
4/23/2026
I am very sorry to hear this Evan. Can you please give me the information off of the sticker? I know we got a batch that were stickered incorrectly from the manufacturer that we are trying to correct, but the matte black doesn't sound right at all. I would like to look into this =)