


To see if this custom-fit item will work for you please tell us what vehicle you'll use it with.


Thank you! Your comment has been submitted successfully. You should be able to view your question/comment here within a few days.
Error submitting comment. Please try again momentarily.


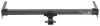
Your vehicle might just need a hitch that fits, works, and holds up. This one's built for everyday use, but not oversized jobs. It's perfect for adding a bike rack or cargo carrier for weekend trips, or towing a small camper.
You don't need a heavy-duty truck to get out there with your gear. With 4,000 lbs of towing capacity and 400 lbs of tongue weight, this hitch is built for everyday use. It's right at home carrying a cargo tray for a weekend trip, taking bikes out to the trailhead, or even hauling a trailer to the hardware store. The 2" receiver is what most racks, trays, and ball mounts are designed for, so chances are the gear you already have (or the gear you want) will slide right in. You shouldn't have to hunt for an adapter to make your accessory work. And it's Class III, which means it's strong enough for regular use, not just occasional hauling.
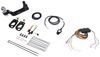
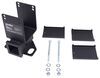
This hitch bolts directly to the frame using included hardware and the tools most folks already have in the garage. There's no need to drill into the vehicle or weld anything in place, and you won't be cutting up the bumper just to make it fit. It's designed for a simple install whether you're putting it on yourself or having a shop handle it. If you'd rather not DIY, we can help you find a local installer using our dealer locator.
This hitch meets SAE J684 standards, so it's been tested to handle its rated capacity under real towing conditions. You may not spend time thinking about certifications, but they matter when you're pulling weight. This one covers strength, performance, and structural integrity, so you're working with something that's actually been proven, not just claimed.
Videos are provided as a guide only. Refer to manufacturer installation instructions and specs for complete information.
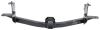
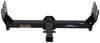
Hi, this is Scott with etrailer. Today we're taking a look at and installing our TrailerMate Class 3 hitch on our 2025 Ram ProMaster 3500. Our TrailerMate hitch we have on our Ram ProMaster today is gonna be a good affordable hitch option if you're looking to maybe haul some bike racks around, cargo carriers, or even pull some small trailers. This is gonna be a really good hitch for you. This one's gonna have a black powder coat finish on it that's gonna be a little bit more flat colored. So it's not gonna stand out as much as it would maybe a gloss, and it kinda matches a little bit here with our bumper that we have on our ProMaster.
This hitch is gonna have a 5/8 pinhole opening and that's gonna hold in any of your accessories that you put into your hitch. Now this won't come with a pin and clip so you may wanna pick one up here at etrailer. We do have options available for these. But a lot of your bike racks and your cargo carriers, they may come with an anti-rattle pin. Now as far as chain loops, you're gonna have really heavy-duty welded-on chain loops and those are gonna accept either your clevis-style hook or your S-style hook.
So either one of those are gonna work if you plan on pulling a trailer. As far as measurements go, from the center of our pinhole out to the edge of our bumper, for that measurement we're looking at right at around two inches. Now that measurement will help you decide on if you have any accessories that fold up or stow away will make any contact with the back of your van. Now as far as from the top inside lip to the ground, for that measurement we are looking at right at around 18 1/2 inches. That measurement will help you decide on what type of a ball mount you may need if you're pulling a trailer.
Or it's also gonna help you figure out if you need any rise in the shank of either your bike racks or your cargo carriers for clearance. As far as weight ratings go for this hitch, we're looking at a tongue weight rating of 400 pounds. That's gonna be the weight of your bike rack loaded down with your bikes or your cargo carrier loaded down with all of your gear pushing down on the lower portion of the hitch itself. Now for a gross trailer weight rating, we're at 4,000 pounds. That's gonna be the weight of your trailer and everything that you have loaded on that.
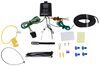
Now keep in mind, it's always a good idea to take a look in your owner's manual and make sure that you're not exceeding any of the maximum towing capabilities listed in there. If you do plan on towing a trailer, it's a good idea to go ahead and pick up your trailer wiring while you're at it. We do have some good options available here at etrailer. Another thing the trailer wiring is good for is if you have accessories that light up like some of your bike racks or cargo carriers, those may have accessory lighting on those so it also works with that. And another thing to take a look at if you plan on doing some towing is go ahead and take a look at a ball mount. It's a good time to get one of those as well. Now, if you have any questions or comments about this hitch for your ProMaster, you can always get ahold of one of our experts here at etrailer. They'd be glad to help you out. Now, as far as installation goes, this one's pretty straightforward and it really isn't that hard to do. But if it's something you don't have time to do yourself or you just don't have the tools or the place to do this, you can always take a look at our installer locator and get something done for you locally. If it's something you feel like tackling yourself, stick around and watch our video and we'll help you get it installed. To start our installation, I have our van up in the air and underneath of our bumper cover, we're gonna have four T30 Torx bits. We're gonna go ahead and get those removed. While we're underneath of here, right back here on the back of the body of our van, we're gonna have a 15 millimeter nut that goes to our bumper beam. While I'm under here, I'm gonna go ahead and get that removed with a 15 millimeter socket. Now we have our rear doors opened up and along the back of our van for our bumper cover, we're gonna have four more T30 Torx bit screws. And again, let's go ahead and get those removed. Now we can remove our bumper cover and we'll set that aside. Now on the back of our bumper beam, we're gonna have four altogether, two on each side of these bolts that are holding this in. Now we already removed the nut from the backside. So with these, I'm just gonna take a 16 millimeter socket and ratchet and get these removed. With all of our bolts removed, we can remove our bumper beam and just set that aside. What we're gonna do now is we have our hitch sitting up and we have our bumper beam. I wanna take our bumper beam and set that over top of our hitch and then go ahead and line up our studs. We're gonna need to get some hardware into this through here and then into our bumper beam. So what I'm gonna do is I'm gonna take our fish wire that comes in our kit. I'm gonna push that through both of the holes. I'm gonna run that through my access point here on my bumper beam. I'm gonna take a spacer block followed by a carriage bolt. I'm gonna thread my carriage bolt onto my coiled end. Now I'll just push in my spacer block. Now we'll just pull our hardware through here and I'll remove my fish wire. Now we'll go ahead and start our nut from our kit. That'll hold that in place. And that'll make it a little bit easier for us to get our hardware in our other hole which will follow our same procedure. Now we can lift our bumper beam and our hitch up and we'll get that set into position. Just wanna line up the lower studs. Get that in place. Now we'll take our hardware that comes in our kit and get those started in our holes. Bring a couple of those down finger tight and that's gonna hold our hitch in place so we can install the rest of our hardware. Underneath of our van, we're just gonna reuse our factory nuts that we removed off of our bumper beam. We'll install both of those then we'll get everything snugged down. With everything snugged down, we'll come back through with our torque wrench and torque down all of our hardware to the specifications listed in our instructions. Now you will have two different sizes of hardware so make sure you're following the correct torque sequences with these. Now with that, if you don't have a torque wrench, you can always pick one up here at E-Trailer. We do have some options available or you can take a look at your local auto parts store. You should be able to rent one there. With everything torqued down, we'll go ahead and reinstall our bumper cover. That was a look at our TrailerMate Class 3 hitch on our 2025 Ram ProMaster. I'm Scott with E-Trailer and thanks for watching.
Customer Satisfaction Score:
96% were satisfied with this product
4% of customers were not satisfied
Ratings & Reviews

The hitch perfectly fit and instructions were good ., love e- trailer hitched every car I put them on no issues ..,definitely recommend
Just got done installing our hitch, very easy!! Great value!!
Info for this part was:
At etrailer we provide the best information available about the products we sell. We take the quality of our information seriously so that you can get the right part the first time. Let us know if anything is missing or if you have any questions.























Kate F.
8/10/2026
Looks great Porkchy! Now can you please tell me the story behind the chosen name? =)