


To see if this custom-fit item will work for you please tell us what vehicle you'll use it with.



With 5,000 lbs of maximum gross trailer weight and 500 lbs of tongue weight, this hitch is made for everyday towing and hauling. It’s built for small trailers, cargo trays, and bike racks without needing a heavy-duty setup. The standard 2" x 2" receiver fits the ball mounts, carriers, and racks most folks already have, so you can get more out of your vehicle right away.
Getting this hitch mounted doesn’t require special tools or cutting into the bumper. The bolt-on design uses included hardware and the tools you already have in the garage, making it a straightforward job for a DIYer. You’ll have a strong connection to the frame without the extra hassle or permanent modifications.
The steel frame and welded construction give this hitch solid strength you can rely on. A black powder coat with an A-coat layer helps it stand up to corrosion and road grime, so it keeps looking good and working hard through all kinds of weather.
This hitch isn’t just rated on paper—it’s been tested to prove its strength and performance under real-world towing conditions. Meeting SAE J684 standards means it’s verified for structural integrity and safe operation up to its rated capacity, giving you confidence every time you pull a load.
Videos are provided as a guide only. Refer to manufacturer installation instructions and specs for complete information.
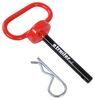
Hi, this is John with etrailer and today we're gonna be looking at installing our Trailer Mate receiver hitch on the back of our 2018 Toyota Highlander. This is what our hitch looks like on the back here. It's gonna have a two inch opening which is gonna make it great for most bike racks, cargo carriers, and ball mounts. This hitch does have a 5/8ths pinhole and it does not come with a pin and clip, but you can pick one up separately here at etrailer. Our safety chain loops on our receiver hitch will accommodate S-style hooks and larger clevis style hooks like this one. After that we're gonna get some hitch measurements here.
From the center of the pinhole to the farthest edge on the bumper here is gonna be about three and a half inches, and that is an important measurement for determining which folding racks and cargo carriers that you can get. After that, we're gonna get another measurement. That's gonna be from the ground to the top of our receiver openings, which is about a little over 16 inches. And you're gonna compare that to the coupler height and that's gonna allow you to choose the right ball mount for this setup. The weight ratings on our Trailer Mate hitch are going to include 500 pounds of towing weight and 5,000 pounds of gross trailer weight.
If you have any questions about this product in particular, feel free to leave any questions or comments below. If you don't have the tools to do this on your own, you can reach out on our installer locator to find an installer near you or stick around and I'm gonna show you how to put this hitch on. To begin our install, I did lower our spare tire. If you're at home doing this, you can do so to make it a lot easier for you. Next we're gonna remove our driver's side underbody panel.
It's gonna be a series of 10 millimeter screws and bolts, and then it's also gonna have some push pin fasteners that we're gonna remove too. To remove our push pins, I like to use a flathead to get it started. Sometimes you do have to wiggle it a little loose. It may be tight with some dust on there. Sometimes after starting with a flathead, you may need to come back with a trim panel removal tool to finish getting the fastener out.
We also have two 12 millimeter plastic fasteners on the side of that underbody panel. Make sure you are gentle with these 'cause they are made of plastic. Now we can pull the underbody panel out of the way. Next we're gonna remove two rubber plugs and then three plastic hole covers. To do that, you're gonna need a trim panel tool and then a small flathead. They do come out pretty easy so you don't need to put a whole bunch of pressure on them. On some models, you may have an existing tow loop that you need to remove on the passenger side. However, in our case, it's gonna be the same as the driver's side. Just some plastic covers that cover our threaded holes. And you're gonna use the same tools we used over on the driver's side to remove them. Then we'll have two more rubber plugs to remove just like the driver's side. For our last attachment point, you're gonna have a larger 17 millimeter bolt and a smaller 10 millimeter bolt, and that's gonna release this bracket which you're gonna have to remove to install your hitch. Before we get ready to lift our hitch into place, we're going to check each threaded hole to make sure the threads are all clean. You can do that by hand threading a bolt into each one. If it is getting caught and the holes are dirty, you can come back with a wire brush there and clean out the threads also with some spray lubricant. The instructions do not mention this, but on the passenger side here we do have a a plastic exhaust deflector. We do have to trim a couple inches off of that to get our hitch to fit up into place. In my case, I'm using an oscillating tool, but you can use whatever the cutting device you do feel comfortable with. Now with an extra set of hands, we can go ahead and raise our hitch into place. We're gonna secure it using our bolt and conical tooth washer. Make sure that the teeth of the washer are facing the hitch. Once we get one bolt in place on each side, you'll be able to take the pressure off and get the rest started. After getting all of our bolts hand tightened, we can go back and tighten them up with a 19 millimeter socket. After we tighten them down, we'll go back through and torque them down to the specifications in our instructions. This next step is optional, but if you want to reinstall this panel after putting the hitch up, I've already gone ahead and pre-marked the cut lines to the specifications in the instructions and you can use the same cutting tool as before. After reinstalling that underbody panel, we'll go ahead and put our spare tire back up and that will complete our install for installing the Trailer Mate receiver hitch on the back of our 2018 Toyota Highlander.
Customer Satisfaction Score:
95% were satisfied with this product
5% of customers were not satisfied
Ratings & Reviews


Do you have a question about this Trailer Hitch?
Info for this part was:
At etrailer we provide the best information available about the products we sell. We take the quality of our information seriously so that you can get the right part the first time. Let us know if anything is missing or if you have any questions.
























Thank you! Your comment has been submitted successfully. You should be able to view your question/comment here within a few days.
Error submitting comment. Please try again momentarily.