


To see if this custom-fit item will work for you please tell us what vehicle you'll use it with.



With a 675-lb tongue weight and a 4,500-lb towing capacity, the TowSmart Class III hitch opens up your options. It’s built for bike racks, cargo carriers, and small trailers, giving you solid support for your gear. The 2" x 2" receiver works with the most common hitch accessories, so you can haul what you need without adapters or hassle.
This hitch is made for do-it-yourself installs. It bolts right on using the included hardware—no drilling or welding required. Whether you’re working in a driveway or a small garage, the simple setup and clean fit make it an easy weekend upgrade that adds real utility right away.
The sturdy square-tube design gives this hitch dependable strength for towing and hauling tasks. Its matte black powder coat keeps rust and road grime at bay and hides scuffs better than glossy finishes. That means it stays looking sharp even after years of use in all kinds of weather.
The concealed cross tube helps the hitch blend in under the bumper, so you still get that neat, factory-style appearance while gaining serious capability. It’s a solid way to add hauling strength without making your ride look like a work truck.
Videos are provided as a guide only. Refer to manufacturer installation instructions and specs for complete information.
Hi everyone, Jesse here with etrailer. Today we'll be taking a look at, and I'll show you how to install the TowSmart Custom Fit trailer hitch receiver on our 2018 Ford Escape. Adding a hitch to a small SUV like the Escape really makes a ton of sense. It's going to give you the ability to add on some extra storage space outside the vehicle, whether it be something like a bike rack or a cargo carrier, or you can even do some towing with it. Just remember, if you plan on doing any kind of towing with your vehicle, there are a few other things that you're going to want to add on. That includes trailer wiring to stay safe and legal out there on the road.
You'll also need a ball mount among some other things. So if you have any questions or concerns about what all you need to get your vehicle ready to tow, reach out to us. We'd be happy to help you out. Here's a closer look at our hitch installed on our neighbor's vehicle. You can see the cross beams are going to be completely hidden behind the fascia.
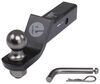
So all you can really see is your receiver. Now on our receiver, we have very, a standard two inch by two inch opening. Behind that is another standard five eighths inch pinhole. The pin and clip, not included with the hitch. However, we have many options available here at etrailer.
Also, any accessory that you add on will most likely come with one included. On the bottom for your towing, we have a wire type safety cable loop. Very easy to access with whatever style safety cable you might have. For example, an S style like that or even a large clevis like this. Now we'll take some quick measurements starting with our ground clearance.
From the ground to the top of the inside of the collar is right at about 13 and a half inches. Then from the center of our pinhole to the edge of our bumper is at about four and a half inches. That's a number you want to keep in mind for any folding accessory that you might add on to ensure it won't make contact with the vehicle. As for our weight capacities with this hitch, we have a gross trailer weight of 4,500 pounds. That's the amount of weight that you can pull behind the vehicle. Then we have a maximum tongue weight of 675 pounds. That's the amount of weight pushing down on the hitch. Always be sure to double check your vehicle's owner's manual, compare those numbers and go off the lowest rated component. All in all, if you're looking to add a hitch to the back of your Escape, you really can't go wrong with the TowSmart option. As for the installation, it does involve getting up under your vehicle. You'll have to lower your exhaust and then also drill out some holes to make them a little bigger. So if that's not something that you're looking to do yourself, check out our installer locator. You can find someone local to you that would be happy to get you set up. If you are looking to see how this gets installed, then follow along and I'll walk you through the process. We'll begin our installation by lowering down our exhaust. So on both sides of our vehicle, we're going to have some exhaust hanger brackets here that are held in by two 13 millimeter bolts. Moving a little bit forward in front of our sub-frame here, we have a rubber exhaust hanger that I did spray down with some soapy water. I'm just going to use a pry bar to get that taken off the beam. Next, we need to trim our heat shield on both sides. So what we're going to do is just use a pair of 10 snips and cut off right along that edge there. We just don't want any of the heat shield covering the bottom of our frame rail. Now before we can start fishing our hardware through, we will have to enlarge our access hole just a little bit. So our access hole is going to be this large hole here that was kind of tucked under our exhaust hanger. And I'm just going to hit one side with this bur bit. We really only have to go out a little bit, just enough to let our hardware fit through. We're can start fishing our hardware through now. So I'll start with this hole on the side of our frame rail. And what we want to do is take the coiled end of our fish wire, feed that through and out our access hole. Get that to come out. Then I'm going to put a bend on the end of our fish wire just so that doesn't want to come all the way through. Take a spacer block, slide that through and up into our frame. And our carriage bolt gets threaded on. We'll flip that around and tuck that up into frame as well. We'll pull this and we don't want to pull it all the way out just because we need to get our hitch to sit up in there. Just pull it just about as far as you can and then let it stay inside the frame. Then it's going to be the same process for our rear most hole on the bottom of the frame rail. But then for our access hole, we're also going to have hardware coming down through that. So you'll just want to slide your spacing block through the fish wire, thread it on before. And then you can tuck that up into the frame and pull it back down. And then we'll just do that same exact process on the other side of the vehicle. As you lift the hitch into place, you can kind of rest it on the exhaust here and start your fish wire. So the side one's going to go through that side hole. Then on the bottom we have four holes. We'll be using the rear most and then the third one, these other two holes are for the exhaust hanger bolts. I'd also recommend having an extra set of hands. I have my friend Daniel here to help me out. So we'll just get worked the rest of the way around our exhaust. Get this up into position. And get your holes lined up. Once you have everything lined up, we can pull a fish wire off one of the bolts and get our nut threaded on. That's going to hold it up so we can get the rest of our hardware installed. Before we tighten all of our hardware down, you're going to want to make sure that everything's lined up for our exhaust hanger brackets. So I'll just get that set up right now. On this side, I didn't have to shift it at all, but I will on the other side. And we do have new hardware for this, so we have a bolt and a washer for each of those threaded holes that we remove that factory hardware from. We can tighten everything down now, so I'll start with our exhaust hanger hardware. This is going to be a 13 millimeter. And then our larger hardware for the hitch is going to be 18 millimeter. Now we'll take our torque wrench and torque everything down to the specifications in the instructions. Once you have everything torqued down, then that's going to do it for our look at and installation of the Tow Smart Custom Fit trailer hitch receiver on our 2018 Ford Escape.
Customer Satisfaction Score:
94% were satisfied with this product
6% of customers were not satisfied
Ratings & Reviews

Perfect fit!
Info for this part was:
At etrailer we provide the best information available about the products we sell. We take the quality of our information seriously so that you can get the right part the first time. Let us know if anything is missing or if you have any questions.






















Thank you! Your comment has been submitted successfully. You should be able to view your question/comment here within a few days.
Error submitting comment. Please try again momentarily.