
To see if this custom-fit item will work for you please tell us what vehicle you'll use it with.
Thank you! Your comment has been submitted successfully. You should be able to view your question/comment here within a few days.
Error submitting comment. Please try again momentarily.
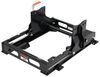
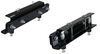
Install your fifth wheel trailer hitch in half the time with this custom bracket kit. Requires less drilling than universal kits and provides a custom fit for your vehicle. Includes everything you need for installation.
Features:

California residents: click here
Videos are provided as a guide only. Refer to manufacturer installation instructions and specs for complete information.
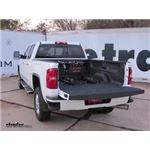
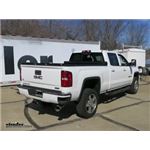
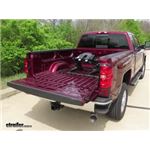
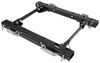
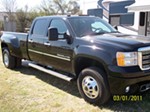
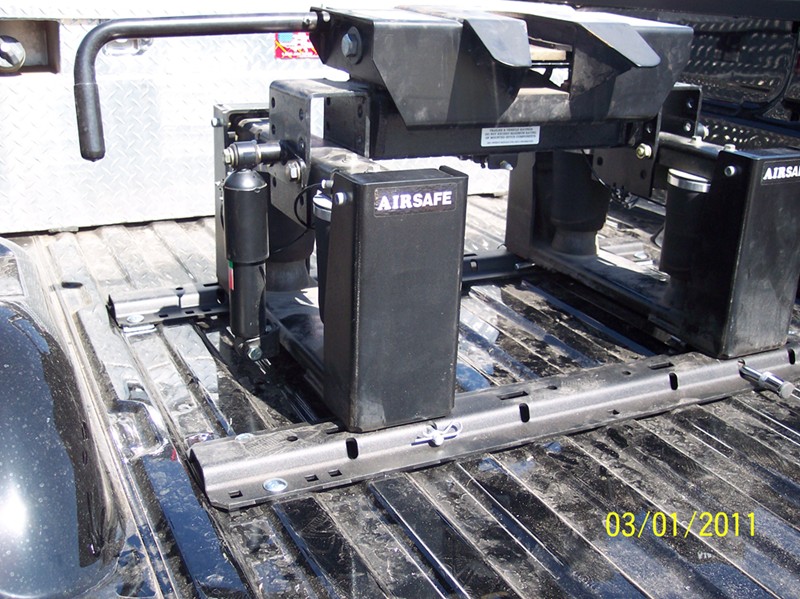
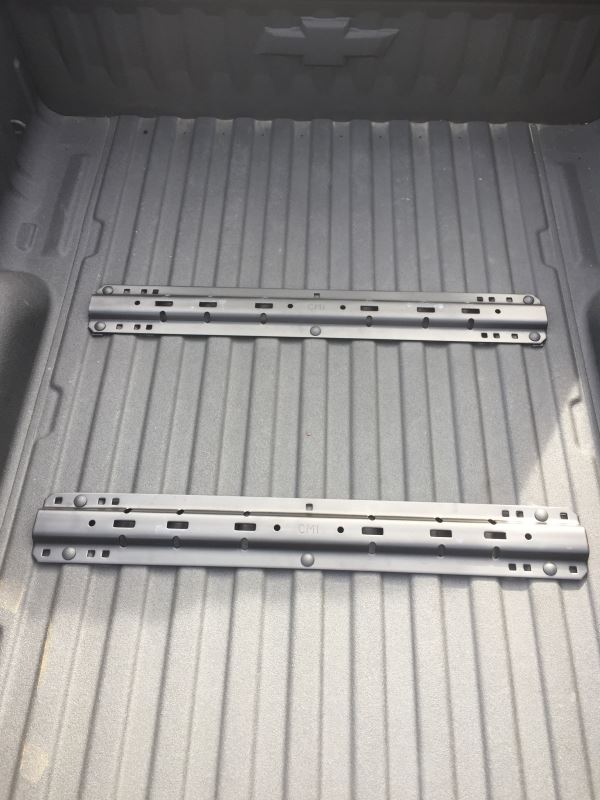
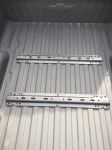
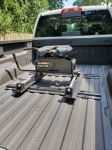
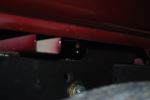
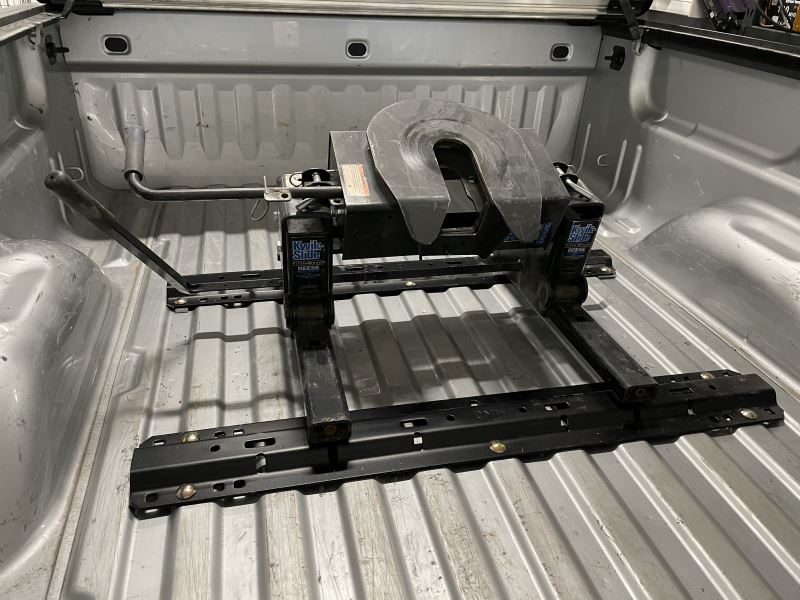
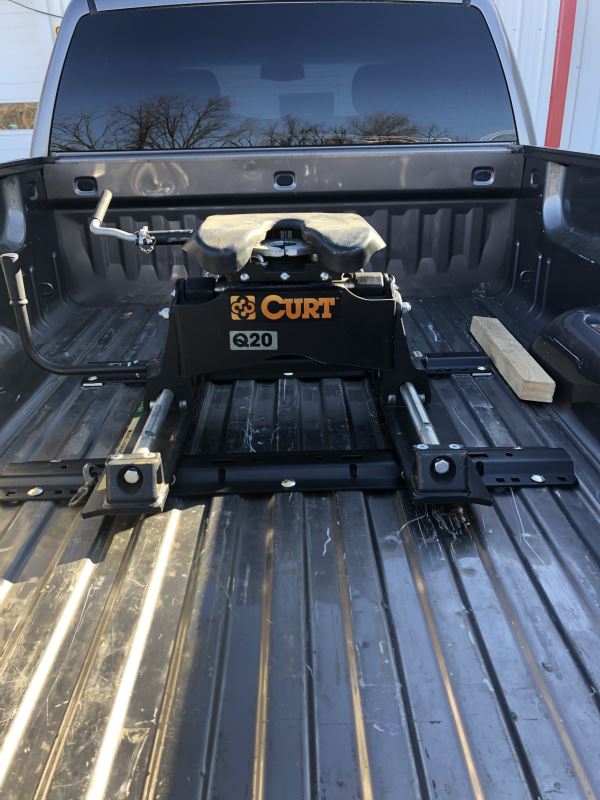
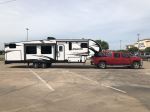
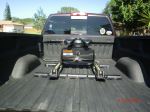
Today on our 2016 GMC Sierra 3500, we're going to be showing you how to install the Curt Custom Fifth Wheel Installation Kit with carbide finish. Part number is C16411-204. Here's what our rail kit is going to look like installed. These do a great job of offering us the ability to put in and take out our fifth wheel without taking up a whole lot of room in the bed of the truck. From the high side of the corrugation on the bed to the top of the rail, we're only looking at about one inch. Not a whole lot of room being taken up there.
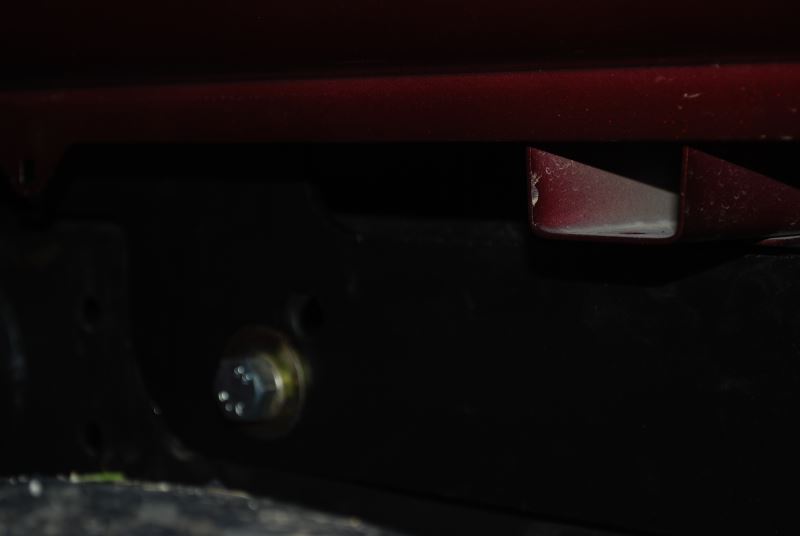
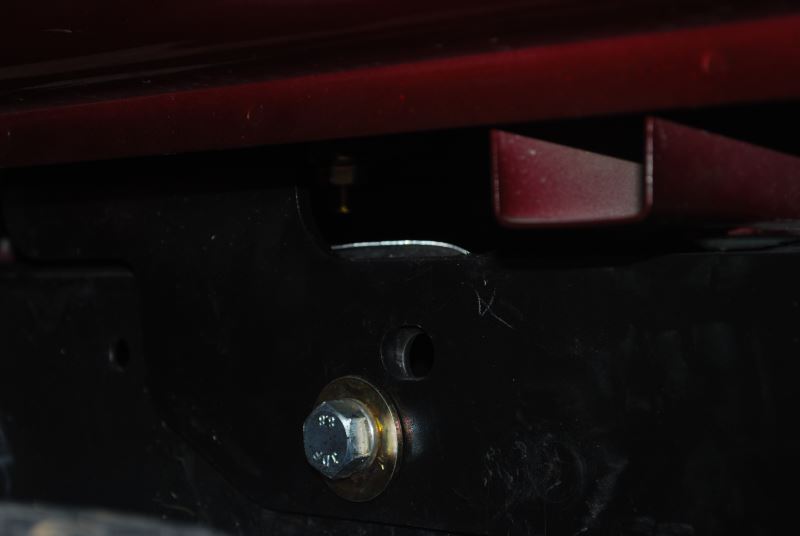
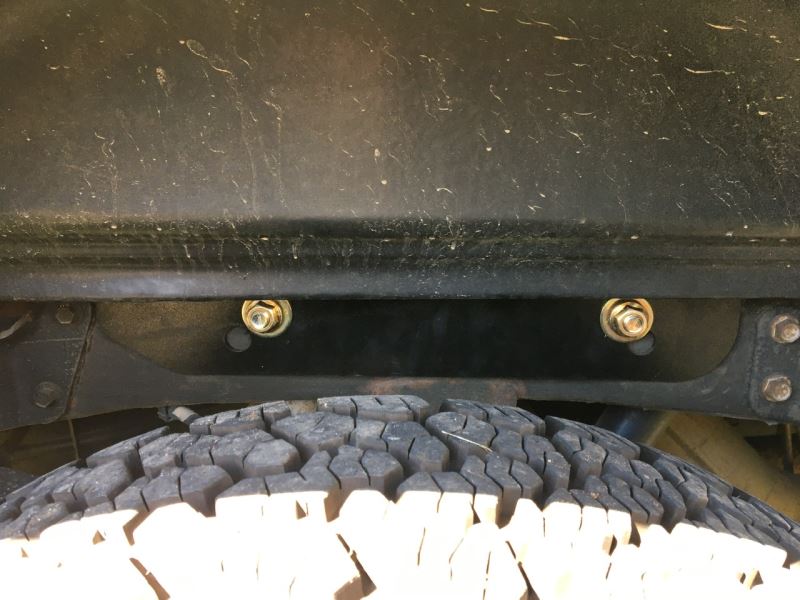
That's going to allow us to get this thing in and out when we need it. As far as installation goes with it, it was really straightforward. You've got five bolts in the rear rail, five bolts in the front rail. The bolts weren't that terribly difficult to get to to put the hardware on, so in pretty good shape there. This offers the custom bracket. These are designed to fit specifically on our frame using, in our case today, existing weld nuts.
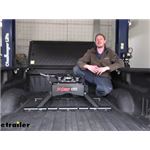
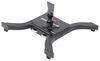
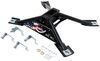
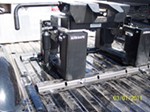
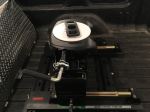
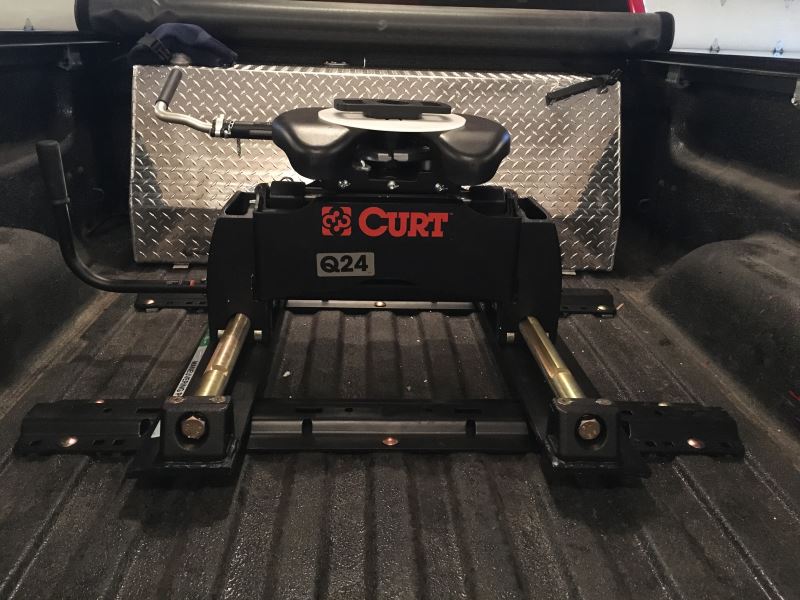
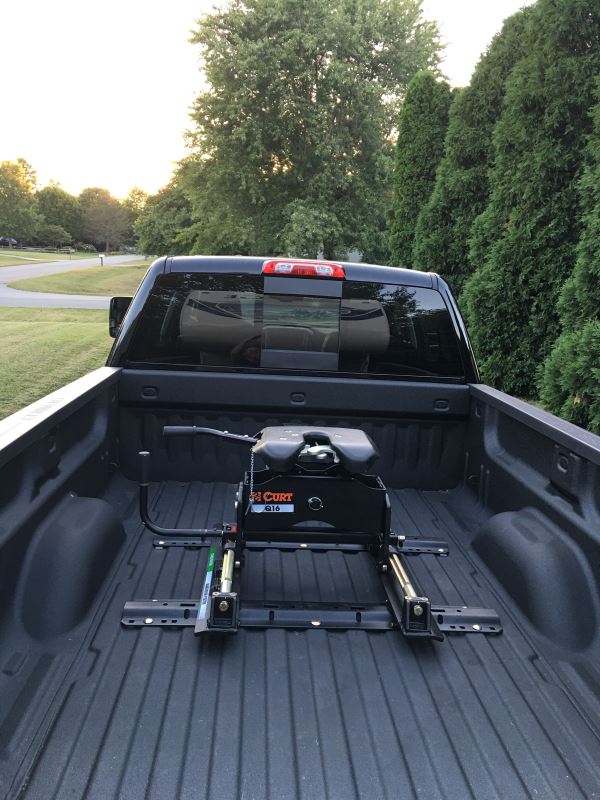
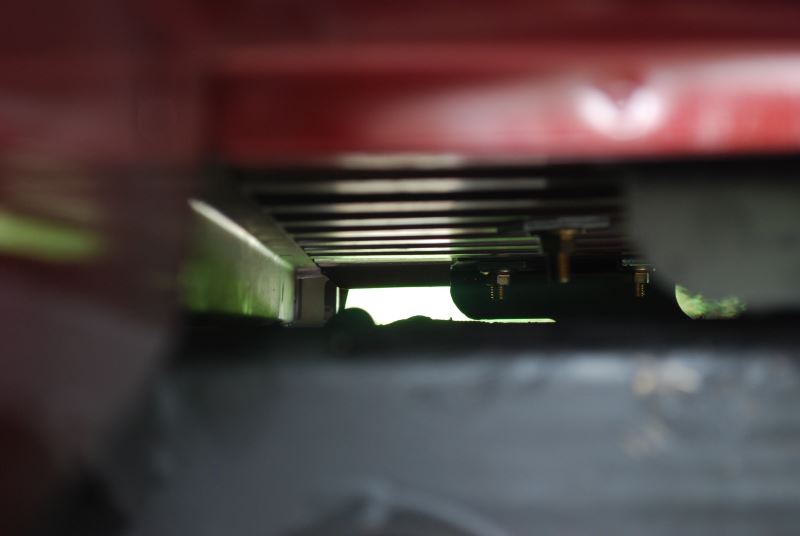
If you've got a little bit older truck, you're going to use carriage bolts that you'll draw through. Either way, it's not going to be that big of a difference one way or another. It allows us to get these mounted to our frame without having to do a lot of drilling, coming up with our own game plan kind of situation that you get usually with those universal style of rail installation kit. It really cuts that job time down in about half. You can get it in your truck, you can get back to work without having a whole lot of downtime. You can see we've got the Curt Q20 mounted in the rails now, but we do have the narrower slots and the wider slots, which will help these rails fit a very wide variety of fifth wheel products, and even the gooseneck heads that'll fit down in the rails, be able to be pinned in that way.
Gives you a lot of versatility with the system. Able to use several different heads with the same set of rails. To begin our installation, we need to get our front rail locked into position so we know where we're going to start our holes. In your instructions, they're going to give you measurements for both the long bed and the short bed. You want to use those. We're going to measure from the rear of the truck bed forward and get it set in the appropriate position.
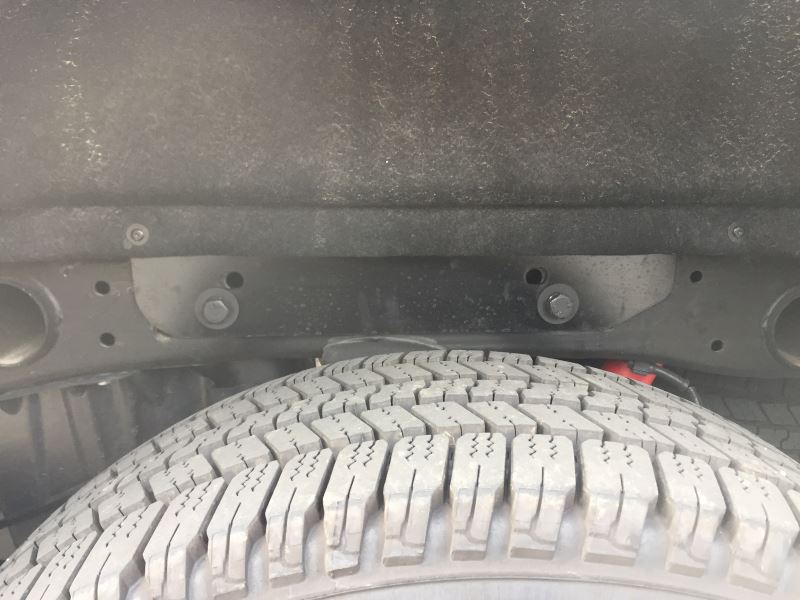
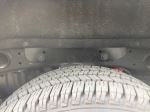
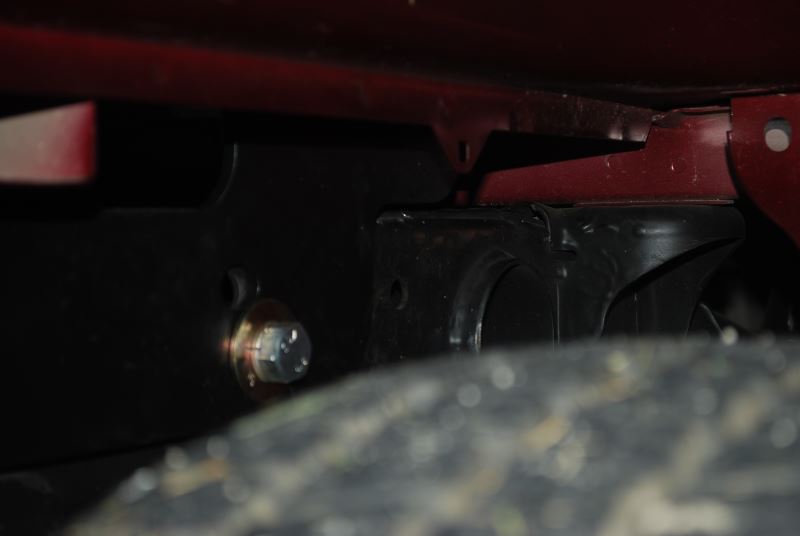
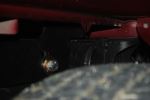
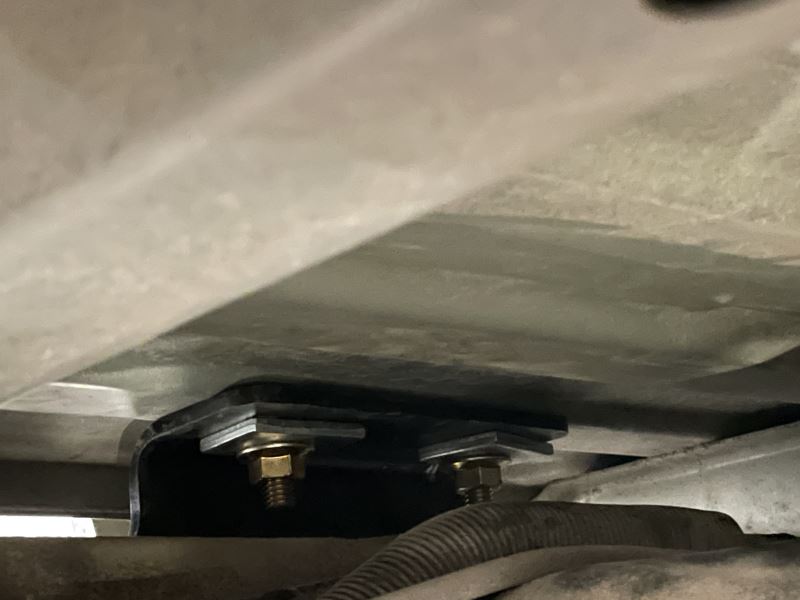
When you do this, if you do have a bed liner, you need to add on the thickness of that bed liner just to keep everything as it should be. Once that's set, we're also going to need to center it side to side. I like to use this little lip that's right here. Just measure over, see what you've got from side to side, and make adjustments as necessary there. Check your measurements one more time, and then we're going to mark the first couple hole locations here with a center punch. For the forward rail, we're going to use two outside locations here. Before you go too far, something I like to do is use a paint marker and mark those locations, because on these spray in bed liners they can be hard to see. Now we'll use a 1/8th inch drill bit. We're going to go down through, free drill our holes. We will want to ensure that we only go through the bed. There can be things underneath that. You'll want to check to make sure there is no electrical harnesses or anything like that you might hit. Now we're here in the wheel well area. If equipped with this fender liner, you want to get that removed. There's going to be 13 screws, just kind of like this. You got two here, and then they go up and around here. You'll want a T15 torques bit for them, and just get them pulled out of there. We're going to put this back in later so you want to hang on to them for sure. We'll set that aside, and we'll go do the same thing over on our passenger side. Now we'll raise our side plate up into position here. We're going to use our M16 bolts and just a flat washer. This is just going to be temporary so we can check our hole location. We want to screw in that down hand tight so it holds that side plate in position. We're going to do the same thing for the forward attachment point here. Now we'll either use a skinny screwdriver or that same drill bit we did before, and we want to poke it down through the holes in the bed and ensure that it comes out in the holes that are in our rail here. Here you see we've got good clearance. We can move that screwdriver all the way around so we shouldn't have any issues in getting our bolts put down through there. We'll enlarge our holes to the appropriate size. It's a good idea, once your done, to get these scrapings vacuumed up so you don't drag them all around the bed of the truck. Of course, we'll also position our rail, slide our bolts in, and get the middle hole drilled. Now our side plates can go back into position. We just need to ensure that this time we have that lock washer as well as the flat washer in place when we do that. We'll snug these down hand tight. Do that on both sides of the vehicle. With those drilled out, we're ready to get our rail put back into position. We've got U shaped spacers. These are going to go on the non-raised side of the corrugated bed. In this case, this is in the valley so we're going to place them right down on there. That's going to prevent us from crushing the bed when we get everything tightened down. In the case for the middle location here, this would be on the raised portion so these spacer will need to go on the bottom. You just want to keep this in mind as you're putting them in place. We're going to do the same thing on the rear rail. Select whether they should go on the top or the bottom when you get it installed. We like to remove the spare tire, and also take the heat shield down. Just gives you some more room to work. That's not necessarily a requirement for you, but it might make it a little bit easier for you to get to your hardware. If you do decide to take down the heat shield, you'll need a 13 millimeter socket and about a 10 inch extension. You got one bolt right here, and then also one right there. Here at our center location, we've got our U shaped spacer there. Place that up in our . We'll still have our spacer block there. I'm just going to tighten these down hand tight for now. Now we can go around to the other four locations, and we'll just be putting on our spacer block there, and flange nut. Now we'll get our hardware snugged down and tightened up to the specifications listed in our instructions. We'll do that for our four other locations as well. With our front rail nice and secure, it's time to find the position for our rear rail. To do that, you're going to need the arms from your slider or your fifth wheel, whatever accessory you're going to put in here. You want the arms. Now whether it's assembled or not assembled, that's going to be up to you. It's easier to do it when they're not assembled. You want to put them in the outside of the brackets here. What we're going to do is pull as far forward on this rear rail as possible. That's going to give us as tight of a fit as we can get. It's going to help to reduce noise and other things like that. We also want to make sure that we're centered between the bed inaudible 00:08:52. That we've got it centered in our bed. That's the position we've got it in now. We're going to mark our holes. The middle hole is going to be in the same location. It's going to be right in the rear of the rail. Get that one marked. When we come to the outside of the rail, that's where it's going to change a little it. On the front rail, we use the outside hole here. When it comes time to do the rear rail, we need to do the second from the outside set of holes. Make sure that we either get a center punch or a mark in there right dead center in the whole, then we can move that rail out of the way, make our 1/8th inch pilot holes, check to make sure we don't have anything in behind the bed, and then finish them up with that 9/16th inch drill bit. Now for our second rail, we can drop all of our bolts down through. Our spacers are going to go on the bottom, so we don't have to worry about the U shaped spacers on top. Here you'll see our rear bolts where they come down through. Those U shaped spacer, we're going to slide those right in so they'll go around that bolt for us. We've got our spacer that goes on the bottom with our flange nut. For the middle location, we'll do it just the same as we did the front rail middle bolt. You just want to go around to get all five of them secure, and we'll start torquing those down. With those rails secured down, it's time to tighten up side plates here. We're also going to have a specification for these bolts listed in the instructions that we'll want to follow as well. We'll do the same thing on our passenger side. Now we get our fender liners put back in here if your truck was equipped with it. Just need to pop them in around the edge. Once we have it all popped in, we'll work on making sure our holes are lined up properly. We'll put all our fasteners back in place. With everything back in place, that's going to complete our installation of the Curt Custom Fifth Wheel Installation Kit, part number C16411-204, on our 2016 GMC Sierra 3500.

Installation went well. High qualirty fifth wheel hitch. Happy with etrailer from order through shipment, I will order again from this company, Thank you.
worked great, thought installation would be easier,but the holes in the factory frame were hard to get to and made it hard to get the washers and nuts on the bolts. Also had to use a wrench on all of them because of limited space.
Great solid product that bolted up to the frame without drilling. If you REALLY want to do it yourself, I suggest that you will need a helper (or 2) to successfully mount on a 2011 Silverado 2500. There is no way I could have done this by myself. This is one item you might be better off taking to a trailer shop.
I installed the fifth wheel kit, it was a great fit, but it is a tight fit, on getting the eight bolt nuts started. But all in all, I believe it's a great product.
Great product, But.. anyone who thinks the install is easy has either never installed these or is not telling the truth! Access to the under bed rail bolts is near impossible!

The installation video is very helpful friendly service and fast shipping and very accurate fitment definitely recommend e trailer for any trailer needs and accessories
I feel that the installation video simplifies the process to much. Attaching the frame plates with the bolt fish wire was more difficult than the video showed. I am to blame for the first bolt. We started on the left side and fished the back bolt first. I did not check to see if the wire would go through both plate and bolt once threaded onto the bolt. I just placed the plate on the wire and then threaded the bolt onto the wire and pulled or tried to pull it through the frame hole. The wire was "bunched" on part of the bolt and would not feed through the frame and the plate holes. I stretched the wire to the point I thought I was going to lose the bolt in the frame. We ended up getting the bolt back out and using the other fish wire to feed this bolt through. We made sure we could fit both the plate and bolt through together before fishing it through the frame. Once we did one the other three went a lot easier but we only had one fish wire to use.
I had watched the installation video several times and played it while we were working. The video is good but it makes the process seem to easy.
I would like to see the video have more details about this process and have 4 fish wire instead of 2 or tell people you may want to have two more on hand for piece of mind.

Jeff L.

10/1/2018
After a year and around 7,000 miles pulling our fifth wheel camper, I love the hitch. I have not had to use the sliding portion but glad we have it if we need it
The installation kit fit perfect but take the time to move the spare tire and the heat shield out of the way to make it easier.

Kevin L.
10/23/2017
The products have worked flawlessly no problems and thank you for checking back with me its nice when a company cares about there costumers. Next time I need any trailer products I will definitely be contacting etrailer.
Last summer I made purchase of the A16 sliding 5th wheel hitch along with rails.the install took about six hours working by myself .following the enclosed instructions is important and saves time if you do it exactly as shown.I was very pleased with the delivery,it was prompt and no charge.that was great.the hitch is a slider which I think is important on a shortbed,could save damage to truck during maneuvers.my experience with etrailer has been really good and would recommend this company to anybody shopping for trailering equipment
Excellent product, perfect fit for my vehicle, arrived a couple days before it was supposed to. I did not want an "aftermarket" look, which is why I ordered a kit designed specifically for my vehicle. I did take the time to remove the heat shield to gain better access to the installation bolts. The biggest challenge was installing and tightening the bolts that go through the bed; there is not a lot of room between the trucks frame and the bed of the truck. The most challenging bolts were the ones on the driver side closest to the cab of the truck due to the placement of the gas tank. Trailer wiring was plug-and-play, hardest part was drilling the 2" hole in the side of my truck bed.
This is the second one of these that I ordered from e trailer. The first one I got at the same time as the fifth wheel hitch. I install on my 2015 Silverado 2500HD. I traded that Silverado for a 2018 Silverado 3500 Z71. Kept the hitch had to leave the rails. Great product and not bad to install. Took about 2 hours. If I trade again, I will get third.
Whew! Installing that Rail kit about kicked my butt! The reason why is all the trips I made from underneath the truck and back. The Rail kit is a very high Quality Product from Curt that fits perfectly in the bed of my truck. The hardware is also high quality. One downside is there isn't a lot of room to work as the gas tank on one side and the exhaust on the other side prevents easy access (gas tank in particular). It was very hard to get a wrench on the nuts unless you used a Gearwrench. After the install they are torqued to 110 ft-lb. The only way to do that was to put a 1 inch adapter on the torque wrench then put that in the open end of the gearwrench in the adapter. Then using a formula on line, convert that to what you have to ft-lb. Anyway It was worth it because I know I have a good product that will stand the test of time.
Box was delivered with a little damage and the contents of the hardware bag was loose in the box. After going through the parts list and realizing I was missing 1 block, we contacted etrailer and they shipped the replacement part immediately, we got it within 3 or 4 days. Install was a breeze after watching the video and fishing the bolts and blocks in the frame. Only took a couple hours total.
Just installed my curt 5th wheel kit,all materials are heavy duty and comes with all hardware needed. Installation is straightforward for the average DIY . The only challenge in the installation of the kit is getting the right tool to torque the rail bolts. My truck is a 2013 chevy Silverado 2500HD. I would recommend this kit.
It went together well! It will work well and it's where it's supposed be!
If you do this yourself, definitely remove the wheel well liners and remove 3 of the 4 bolts holding the heat shield with one loosened to move it out of the way. Top front four nuts are the hardest to get started from under the truck. Start to finish 3 hours. Saved myself $500 for install
This is a great product, but the install time estimates are way off. I have been a mechanic in my own shop for 19 years and I didn’t remove the rear wheels or the spare tire (because) it wasn’t necessary on my truck. I have a lift in my shop and it still took me 6 hours to install it! Trying to hold the spacers while trying to get the nuts installed on the 8 outer through the bed bolts was ridiculous! Terrible place to get to, lots of bad words! I’m thinking that buying the custom kit versus the universal was a bad idea, I have installed both and it was no quicker with this kit and it was almost a hundred dollars higher. My install was on a 2013 2500hd.
This bracket and rail kit was the perfect fit for my 2011 Silverado. Made the install of my hitch a breeze and allowed me to be on the road with my new trailer in no time.
Heavy steel construction. Went on without an issue. Everything fit like a glove. I would suggest the 10-bolt pattern as I did for extra strength and security.

Ron C.
5/15/2018
Great, solid as they come.
This product fit the truck greate the only thing is the flat washers were a little big but all I did I to make them fit flat washers were a I ground off the part the overleaped the other bolt.
Great product for the price.
The structure and how it fit in the truck bed was great.
Real nice kit. Super easy installation. Heavy duty. Definitely recommend
Good quality, easy to install, but hard to reach some of the bolts between bed and frame.
I had originally ordered a 11604/11607 under bed gooseneck mount for my 2019 Silverado 2500HD, but found out during initial parts fitting that an under bed rib had been welded out of position on my truck, and the side rail brackets would not fit because of it. A phone call to Curt verified my finding and they suggested going to an in bed rail mount as an alternative. I called etrailer and spoke with Bailey B about my situation and she was very quick to understand what I needed to do. She helped me place an order for a 16411/16204 in bed rail mount kit. She then emailed me instructions and UPS shipping labels so I could return the parts I could not use. I received my new kit yesterday (one day early!!) and a quick look tells me I now have what I need. Bailey B was super helpful, and the exchange process was above and beyond my expectations. Count on me for future purchases. I had hand surgery a few days ago so it will be a while before I can install this hitch rail kit. If I can edit this review then, I'll add pictures. In the meantime, I'm going to have a spray in bed liner done and I'll be ready to go. Thanks again Bailey and etrailer!

David
3/10/2024
Fantastic! I was able to install the entire kit by myself as soon as my hand allowed me to. Everything went together as it was supposed to. Ive only been able to tow my 5er a few times, but getting hitched up and unhitched is a breeze, even when the truck isnt straight on to the trailer. The hitch is totally silent, with no chucking at all. I was able to set it up so I had good cab clearance that I dont need to use the Turning Point feature on my pin box. I highly recommend this hitch.

Do you have a question about this 5th Wheel Hitch Rail?
Info for this part was:
At etrailer we provide the best information available about the products we sell. We take the quality of our information seriously so that you can get the right part the first time. Let us know if anything is missing or if you have any questions.


Christopher
11/3/2025
Excellent bolt right up to factory holes on the frame and the instructional video is awesome highly recommend