
To see if this custom-fit item will work for you please tell us what vehicle you'll use it with.
Thank you! Your comment has been submitted successfully. You should be able to view your question/comment here within a few days.
Error submitting comment. Please try again momentarily.


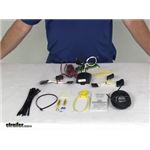
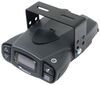
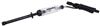
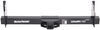
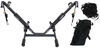
Quickly and easily install a 4-way trailer connector on your Freightliner Sprinter 3500 with this custom wiring harness. T-One connector plugs directly into existing wiring. Powered ModuLite reduces strain on wiring system.
Features:
Specs:
Installation
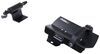
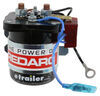
This custom-fit T-One connector plugs into your vehicle's wiring harness, which is located inside your rear cargo area, behind the tail lights on both the driver's side and passenger's side. You will need to remove some interior paneling to access this harness. Once you've plugged in the T-connector, run the hot lead up to your car battery. Connect the lead to the included fuse holder, and then connect the fuse holder to the positive terminal on your battery and insert the provided fuse.
Once installation is complete, the 4-way flat connector will be stowed in your rear cargo area.
It is recommended that you use a small amount of grease on all electrical connections - the plugs on your automobile and the 4-pole connector itself - to help prevent corrosion.
A ModuLite power module is built into this T-One connector. Because your vehicle runs on a multiplex wiring system, the wiring needs to be converted to be compatible with the wiring system of your trailer. This power module functions as a tail light converter to combine the brake and turn signal functions of your automobile so that they run on one wire to properly activate your trailer's tail lights. Note: This will not affect how the tail lights on your vehicle operate.
With a ModuLite, your trailer's lights will be powered without overloading your vehicle's electrical system. Because the module draws power directly from your car's battery and bypasses the electrical routes that are used by a basic wiring harness, there is virtually no draw on your tail light circuits.

California residents: click here
Videos are provided as a guide only. Refer to manufacturer installation instructions and specs for complete information.
Today on our 2016 Mercedes Benz Sprinter 3500, we're going to be taking a look at and also showing you how to install the Tekonsha T-One Vehicle Wiring Harness with the 4-Pole Flat Trailer Connector. The part number is 118649. Now, this is what our kit is going to look like. This kit is going to offer us a direct plugin solution to get a working 4-pole trailer connector at the rear of our vehicle. The 4-pole connector is going to give you right turn and brake, it's going to give you left turn and brake, and it's going to give you your running light signal, also a ground to make sure all of our lights work. Now, the way this system works is we have a module box. This is going to take signal from behind the driver's side tail light and from behind the passenger's side tail light housing, and it converts it into a usable signal for our trailer.
This is also going to act as a safeguard. This is going to allow us to separate our vehicle system from our trailer system, so any shorts or anything like that in your trailer aren't going to affect our vehicle system. Another great feature of the box is the power wire here, which we'll connect using the extra wire and fuse holder, is going to be a standalone power source for the converter, so we won't be using any of the power from behind our tail lights. We're not going to be putting any excess drain on the vehicle system. It's going to have its own power source to send power out to our trailer. The white wire is going to act as our ground, and you'll see they've supplied us with plenty of stuff. There's plenty of zip ties here to get our install done.
They provided heat shrink butt connectors. That way it's going to give us superior moisture resistance. We've got our ring terminal to connect to our battery or positive stud. Going to have the self tapping screw there. That's going to be for our ground wire.
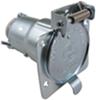
Then, of course, we've got our instructions here, our fuse and fuse holder, and then even some double sided foam tape, if that's what we decide to use to mount the box. Now, the area we need to get to is going to be right behind the tail lights. There's a few openings here, and in the second opening up from the bottom, if you look inside there, you're going to see a long, rectangular shaped black plug. You can see it right in this location. There's going to be a locking tab right on that bottom side and on the top side. It's just a little tiny locking tab.
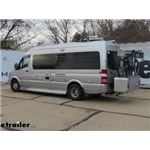
You want to press up or down on those respectively and then pull the wiring out. See, that's what our plug will look like when we pull it out. It's going to plug directly in to our T connector harness. Plug it in until you hear that click, and you should be able to pull on it without it separating. The other end is going to plug in where we just removed that. Now, we're going to take our module light box, and we'll get that zip tied off right here. The customer has requested that we get his 4-pole outside of the vehicle, so there's a small access point right here, which goes into a slot in the frame. Now, with all of this piping and AC and wiring that's here, it's going to make ours pretty difficult to do. If you do choose to take yours outside, you should be able to go in there and then right out of a cap that's on the frame rail. Here you can see where that hole comes out underneath here. What we're going to do is just . you could probably use a stiff piece of wire. You might even just reach in there and feel the hole in the backside, but you can see all this extra we've got here. We're going to use a pull wire to go up in there. On the bottom of that pull, we're going to attach our 12 volt wire. This will allow us to pull it up into our box, and we won't have to try to bring the whole length of wire down out of the vehicle. We'll just use that to pull our 12 volt wire up through here, remove it from that pull wire, and then we'll make our connection with the wire coming out of our black converter box. Now, we'll use one of our heat shrink butt connectors to make our connection here. Let's strip that wire on our converter back just a little bit. This is going to be inside the car, so it's not imperative here, but in the front, you want to get this shrunk down. Now, the heat gun is usually the best solution because you won't have to worry about overheating them, but you can also use a lighter or a mini-torch, and just be careful not to discolor the butt connector. When it's shrunk down all the way, you're going to see the wire kind of look like it magnifies, and then there's a little clear gel that comes out of the end. Now, I'm going to pass my 4-pole down through. You can see how that cover comes down and offers dust protection for us. This is eventually going to be becoming a 7-pole setup, so we're eventually going to be cutting the end off of this wire. I'm going to leave it on there now so we can test it, but in order for me to pass it through this area over here, I am going to need to remove this cover. Now, if you're not going to be doing what we do here in passing in and out, the black wire is the only wire you need to run outside of the vehicle. This can be stored in the back or that, there's a little cubby hole here or here, usually. You just pull it out over your sill here when you want to use it, and you'll see that little bit of cushioning there protects it, and just pull out whatever length you need and connect it to your trailer. This is kind of a custom installation in that we are going to be taking our wiring outside of the vehicle. I'm going to try to follow the same path as that power wire there. We'll just pull down our slack there. Now, the 4-pole will run over this way, maybe use a couple wire loom there, over towards the middle of our hitch area. Our 12 volt power wire, that's going to run up to the front of the vehicle. Now, you'll have a few spots in the frame, you can use the loom clamps or zip ties. In our case, I'm definitely going to run up with this big piece of wire loom here because it's already there. It's going to be easy to do. Then we can run that up to the front of our vehicle. Now with our connections made there, ran outside, we'll get this zip tied off. Our red and green wire, we'll just stretch it out. We're going to be running it across this rear sill plate here in just a few minutes. That will pretty much wrap it up in this side here, with the exception of grounding our wire out here. Get that done. Now, you'll use a quarter inch bit driver to secure it. It's a self tapping screw, so it's going to create it's own hole. You just want to make sure that's secure enough to where you can't move that, or wiggle that ring terminal. Just like that. Now, any panels or anything you've removed on this side, you can get them put back in, and we'll run our wire over to the passenger's side. Now we need to pull up the push fasteners that run across the rear scuff panel here. That's going to allow us to run our wire underneath. See, there's just a little notch in them, you'll pry up with a screwdriver, and just remove them completely. Just like that. Now, we'll just extend our red and green wire. Let's get this over there to the passenger's side and get it hooked up. We're going to have some extra wire here. There's a trim panel that runs across here. Again, this is a limousine conversion that's been done. If this piece of wood and this carpeting wasn't fastened down on top of this rear scuff panel, I'm just going to pull these fasteners out, remove that scuff panel, and we can run our wire underneath there, or you can also opt to go up around the top and come back down the other side. Once we have our wiring over this direction, we're going to separate our connector. It's going to be identical to the driver's side connector and located in the exact same place, of course, on the passenger's side. Now, we'll zip tie this side off, keep it, again, from moving around. I'm also going to be using this space over here to bundle up my excess wire. Now, the battery for the Srinter is located just forward of the driver's seat here, underneath the floor. You'll notice here on the back side, we've got a red cover. There's a 12 volt hot lead right underneath here. Just going to kind of pull straight back on that cover and rotate it out of the way, and you'll see that stud right here. Now, this is going to be a good place to connect. It's going to keep our fuse holder kind of up here and out of the way, so we'll back that off and connect our ring terminal. We're going to be putting a fuse holder in place here, so we'll need to strip off each of the ends of that. You see, you kind of cut it offset, a little bit, about 4:00 position. We'll just strip all these back. Now we'll crimp that heat shrink butt connector on the longer side of the fuse holder and connect that to our 12 volt wire. It's okay to have a little bit of extra wire here. We can bundle that up, and if anything ever needs to change, it'll allow us some flexibility in there. On the other side, we're going to have it on a ring terminal. You'll see the ring terminal provided will be the appropriate size to go over our stud there. Just place that on and get it crimped, as well. Alright, now we can get our butt connector shrink down. Now we'll use our 13, and we'll want to take the nut off our stud here. Place our ring terminal up and on. Try to have that run about the same angle as the cable there, then you can replace the nut. Now, the cover is going to have a small notch out right here. That's what slid over the old post as it came out. We're going to enlarge that just slightly to also accommodate the ring terminal there. Now we can take our fuse, and we're going to place that in our fuse holder, place our cover on it, and now we just need to get our wiring secured off. We'll go right to that cable. That way, if they ever take that battery cable off, this will come with it, rather than being separate. Now, let's get our 4-pole wire ran over towards the center of the hitch. That's where it's going to be attached. Now, as you come by your hook here on the spare tire rack, you definitely want to stay inside of that. We're going to use these clip points all the way down to keep our wiring secured above that. Now, from this point, you've got options with what you want to do with your wiring. Some people will just bring it around and then use that protective cover to go around the safety chain connection point, and it'll stay there for you. There's an attachment tab here for a bracket, or if you don't have this, you could use part number 181410, which is a universal short bracket, and create an attachment point that would stick off there. Then on this bracket and that bracket, you'll have pre-drilled holes, and you can use part number 18144, which would be a 4-pole bracket, and you can have it where it would just kind of sit right there, more permanently attached. Alright, now to test out our wiring, let's turn on those running lights. Our left blinker, our right blinker, and our brakes. That's going to complete our installation of the Tekonsha T-One Vehicle Wiring Harness with the 4-Pole Flat Trailer Connector, part number 118649 on our 2016 Mercedes Sprinter 3500.


Great solution for adding a trailer wiring harness Sprinters lacking the factory tow package. The only functional downside over OEM is lack of stability control, but for sporadic light towing, I wasn't willing to pay the $1500-2000 it would have cost to install and enable the OEM towing components.
A year ago I purchased a tow package for my Mercedes Sprinter Van. The dealership said they don't make them and I can not put an aftermarket one on because I have a step off of the bumper. With some research my husband found 1 that specifically stated it worked for my vehicle. We bought it, installed it which was easy and so I was able to tow my sons car across country. Thank you for making this product. Highly recommend etrailer.
The connectors and wiring slipped in place around the back of the van as designed. Running the power wire to the front of the van was difficult but that is more a reflection on the design of the van than the kit. One thing to note: the black 12 gauge power wire supplied was just long enough to reach from the module to the battery when run under the van and this is a short wheelbase van. If I had attempted to run the wire up along the underside of the roof with the other internal wiring as the instructions indicate the wire would NOT have reached. In a long wheelbase van it would have been that many more inches short.
Purchased for a 170" wheelbase model and the power wire included ended up being about 8' short. Other than that the kit installed fairly easily. I was a little disappointed that there were no plans for exterior penetration with the kit, you are expected to store the plug in the cargo area and then I guess just close it in the rear door jambs when in use.
Great product, with a fairly easy installation process. There are several reasons that I gave this harness 4 stars, so please read on.
1. The included instructions are not very clear, so the install video on the eTrailer website is very helpful. A video of the install on a Sprinter 2500 would be even better, as the process is slightly different.
2. Nowhere did I find mention of the fact that the product package does NOT include the nut necessary to connect the power wire to the positive battery terminal. I did not have a nut on hand, therefore, I had to find somewhere else to make that connection. ETrailer does sell the nut (Part # 185917), otherwise, any 8mm course thread nut should work.
Overall, I appreciated the plug-and-play simplicity, of this product, and I would gladly buy again.
Yes . It works well. I thought I had a problem with the first one I bought, so I bought another to replace it. Turns out I had never made the connections at the taillights. Great unit. No splicing of wires. Wondering if I can return the most recent one? I have the original box and paperwork.
Got this for our 2016 144" WB 4x4 Sprinter. Had a little bit of confusion early on (ordered the wrong trailer connector) and this made for some extra shipping time and longer wait, but Adam E @ etrailer was super helpful and we got everything squared away. The only minor complaint I have is that the second round of shipping was slightly delayed for tight timing on install, but otherwise two thumbs up. Thanks
It’s all good, except the fit of plugs into the original tail light housing.
Very tight fit. If you don’t get them in all(I mean all ) the way in they’ll fall out.
This wiring harness was a perfect fit. No issues at all. It fit all of the factory plugs and worked perfectly the first time. I would highly recommend this item for your Sprinter van.
Solid well constructed, fit perfectly. Wish it sat higher, it lowered bumper clearance
Both the hitch and the trailer light harness (For my 2016 Sprinter passenger van) are well designed and easy to install. The website is easy to navigate and shipment was very prompt. Thanks.
Excellent trailer wiring harness. The wiring was all straight forward and easily done in less than 1.5 hours. Comes with fuse holder, fuse, and cable ties. Overall a well thought out package.
It was easy to install with the video. Only issue for me was my fault I didnt quite get the drivers side tail light connected firmly so it was an easy fix. Highly recommend this product.
All the connectors fit well and were easy to install. Black wire that connects to battery was not long enough to to reach to the front of vehicle. Surprising because I ran it the way the directions instructed and this harness is made for my sprinter. Easy fix but annoying to have to go to the store for more parts.
trailer hitch was exactly as described. Mounted with no issues in about 20 minutes.
Just installed the wiring on 2016 sprinter 4wd 170 ex works good no issues I'm glad the green wire for right turn signal long enough on others unit I got before from curt I had to extend the wire was too short . this unit plag and play that how it should be all nice and clean hope it will last long time
Fit my 2018 Sprinter perfectly. Your Youtube videos are spot on, a very big help, especially with the wiring. Shipping was very fast.
Product worked great , MB wanted over $1200 for unit installed . With extra person it took about an hour . E Trailer is great company to deal with .
Great customer service. Quick shipping
Fit perfectly and installed in no time at all. Was shipped on time. Box that it came in was all beat up and hitch was poking through in spots. Only reason why I didn’t give it a 5 star. The product was not affected however.
Easy installation. Plug and play design.
The video was very helpful.
Thank you
Etrailers YouTube tutorials are the reason to buy from them. Easy step by step install
Everything is excatly as described. Fit perfectly and all the pieces you could ever need for installation are included.
The harness installed easily and after one year it still functions without any issues.
Excellent product. Easy enough install. I wish these guys made this for every make and model car/truck/van, I would never buy anything else.

Daniel

8/10/2022
Best wiring kit I’ve ever purchased. Install was easy, even for someone that struggles with anything wiring related. Would absolutely recommend this to anyone.
Info for this part was:
At etrailer.com we provide the best information available about the products we sell. We take the quality of our information seriously so that you can get the right part the first time. Let us know if anything is missing or if you have any questions.


Thom
8/2/2022
I have disconnected the right side. The plug going into the light socket had a wire pin push back into the harness so the running light would go out.