


Thank you! Your comment has been submitted successfully. You should be able to view your question/comment here within a few days.
Error submitting comment. Please try again momentarily.
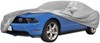
You've seen what the weather can do when a camper van sits too long. This cover keeps it clean, dry, and protected from winter snow to blazing sun. It's a simple way to protect your investment and keep it ready for the next trip.
The thick, ProTop4 roof fabric protects against rain, snow, and harsh sun to keep your van clean and dry year-round. Air vents reduce heat and mildew inside, while SoftGuard foam inserts protect the cover at corners and edges. Adjustable straps and tension panels pull everything tight so wind cant lift or shift it. So when its time to hit the road again, your vans just like you left it.
Videos are provided as a guide only. Refer to manufacturer installation instructions and specs for complete information.
Hi, everyone. I'm Evangeline here at etrailer. If you have a campervan, a Class B motorhome, and you wanna make sure that it is protected, especially during the off-season when you have it all parked, today we're taking a look at the Classic Accessories ProTop4 cover. This is designed specifically for your Class B motorhomes of different shapes and different sizes. You have some different options. So in this video, we're gonna cover just some of the features of this cover as well as how to pick which one is gonna be the right fit for you and your motorhome.
Obviously the most important thing about a storage cover is how much of your van does it actually cover. So here you can see that from the front bumper up over the hood, all the way up to the roof, and then back around the back of the motorhome, you have this cover in place. You do have some customization options where you can cinch things down around your wheels, around the front and around the back. All that will work together to make sure that rain, shine, snow, your vehicle or your motorhome is protected. And the way that Classic Accessories does this is with the different layers or different materials they use all throughout the cover.
Throughout the sides of your cover, you're gonna have this polypropylene material and this is gonna be more of a mesh fabric where the top of it is coated so that it still propels water, but the big thing is that it protects the motorhome from scuffs, from scratches, from dust and debris, but it is still breathable. You probably can't see it as much, but my fingers are a little bit visible through the fabric. That is how that breathability is. Now, the top of the fabric, though, you have this more canvas material and this is really what's working to repel water, but more importantly, to repel snow and just the dirt that may come with rain as it is out in the sun. This is gonna be more similar to the fabric you'll find on tents, especially the more waterproof ones.
Now, if you've ever stayed inside a tent with the rain fly out and in the rain, you know how stuffy it can get. So the good news is, like your tent, you also have these air vents. So along the sides, there's gonna be mesh underneath, allowing for even more air flow, preventing it from getting all musty inside the cover. Good air flow is always good. And here's the thing with motorhomes that you live in when you go out on your adventures, there's a lot of stuff that you like that's stored inside of them.
Now, usually you take all of that out when you start winterization and you start packing up your RV for the wintertime. But I've had times when I've searched all over the house for my favorite blanket. Turns out it's inside the van. So the good news is, is that you are able to unzip your van. This is gonna open up on the passenger side and then give you access to the inside. If you need more extended use, you're not just reaching in real quick to grab something, you can fully open both panels and then cinch this up on top. Now, you also have different straps throughout, so it's not just like that, but this is great for easy access into the motorhome to grab something real quick, to set things up, to clean things. And then when you're all done, you have these strings to make it easier to zip back up again. The locations of your openings are gonna be both sides of your motorhome. You're gonna have this large panel here on the back and you're also gonna have an opening up front by the hood. Now, a big question we get is, "Well, how long does this last Will it last for multiple seasons" And the key answer to that is how well do you take care of your cover Because it's gonna be natural. Your motorhome is covered with all kinds of things, from solar panels to air conditioners to awnings, and there's gonna be sharp edges that your fabric is gonna get caught on as you install it and as you take it off. The good news is that this actually includes a lot of repair fabric. So it's simply a matter of cutting out a piece, removing the adhesive, pressing it on over it where you either need to patch or reinforce, and then you are good to go. What's not included about are gonna be the other ways you prep your van. So along with the winterization process of making sure everything inside is safe in the cold, you also make sure that everything outside is safe in the cold. While the cover does 95% of the work, you don't have wheel coverage. So there are wheel covers available here at etrailer as well. Wheel covers as well as anything else you may need for winterization or prepping your van for the off-season of storage is available here at etrailer. If at any point you're not sure what you might need because everyone has a different van or they're parked in a different spot, feel free to reach out to us here at etrailer. Give us a call, send us a message. One of our experts or myself will reach out to you to make sure that you get the best fit for your journey. For getting your RV cover installed, it's very important that you do this safely. If it is a windy day, please do not install your cover 'cause that can very quickly blow away and take you with it. Now, it is a windy day here at etrailer, so I pulled the van inside. Obviously this is not gonna be how you'll be doing it. Usually you're outside in a parking lot, things like that. But this way we're still able to show you how you can install your cover and some tips and tricks. So first things first, I would remove antennas if you have them. Those stick up and get caught. I would look for sharp corners and try to pad them if possible, and I would get a second person to help you out because this is gonna be a process. If you can get onto the roof of your motorhome, great. Do that safely. Bring the cover with you. In our case, there's a lot on the roof, so we're gonna be using some tall ladders. First, I also like to prep the bag where I roll it up towards the front. So on the front of your bag, there is gonna be a bright yellow tag, and this will help you orient your bag or orient your cover as you get this onto your motorhome. Here we are just sliding the cover over. You can see how helpful it is to have a second person throughout this whole process. You wanna make sure that you have that logo in the front and then centered towards the front as you then start either unzipping parts to fit it over and then zipping back it up to make sure you have all that tension all throughout your cover. And then just fine-tune things as you go. For those sharp spots, you're gonna have these bumper protectors right here and this is what you'll use to fit over sharp edges like gutters, awnings, brackets, things like that. What I've found to help is to just place this over that sharp area and then pull the awning over and then that should stay in place as the tension of the cover, not the awning, pushes down on it. It also sometimes helps to keep some panels unzipped as you're putting everything into place. If that's the case, that's totally fine. Just make sure that once most of the cover is settled, you just go ahead and zip that down. Once everything looks like it's in place around your motorhome, your next step is to cinch down underneath. You're gonna have these straps that have buckles. Now, one end of the buckle, easy. The other end has to be thrown underneath the motorhome and then buckled into the other side. So to make that process a little easier, we have this pouch. Now, usually you'll fill this with rocks that are just laying around. We have some lug nuts just laying around. So those go in there. We're gonna cinch that closed so that doesn't fall out. And then you're gonna have these two hoops. So what I like to do is I like to feed the buckle in through the first hoop and then the second hoop, and then see how that now pulls tight With that in place, I can just use this to throw that across. Overall, there's gonna be four straps that go underneath your motorhome. There's gonna be two straps in the back that will really cinch down. Now, this video is more of just my full review of the whole cover. Your actual experience will be different depending on your own motorhome brand, model, as well as setup on top of the roof especially. With that in mind, I do notice that there is a little bit of wiggle room up front as well as a little bit of wiggle room in the back. So it is nice to have those extra straps to really cinch down. Up front, there is no included straps for that, but you can use your own cam buckle straps with these loops to cinch down around your front windshield as well as around your hood for that more custom fit. What you saw today was my review of the Classic Accessories ProTop4 cover for your Class B motorhomes or campervans. My name is Evangeline here at etrailer and I hope you enjoyed this journey.
Customer Satisfaction Score:
94% were satisfied with this product
6% of customers were not satisfied
Ratings & Reviews


Do you have a question about this RV Cover?
Info for this part was:
At etrailer we provide the best information available about the products we sell. We take the quality of our information seriously so that you can get the right part the first time. Let us know if anything is missing or if you have any questions.


















Nick S.
11/3/2025
I am sorry to hear this cover did not fit your model R-Pod. We will reach out shortly and help get this resolved.