
# 1
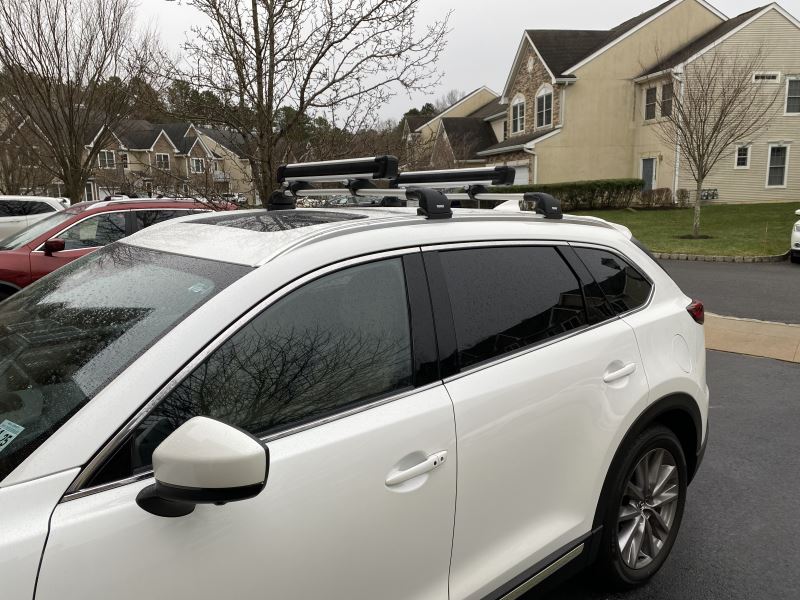
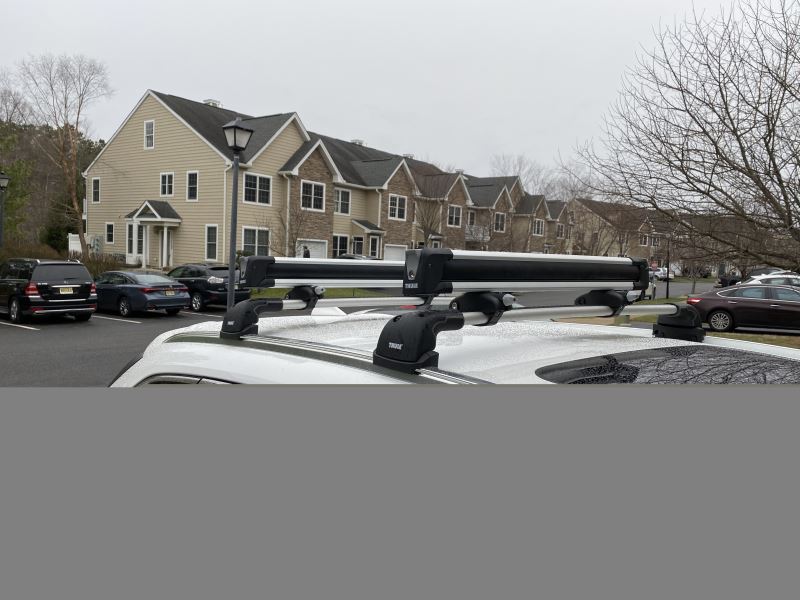
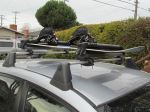
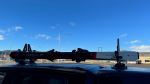
Thule SnowPack Ski and Snowboard Carrier - Locking - 6 Pairs of Skis or 4 Boards - Silver
So easy to install onto Thule AeroBlade. Quality materials and convenient design. No significant noise noticeable from wind resistance when driving. etrailer provided great shipment/notification support and was great resource for how-to videos, commentary.
Better than I expected. Only comes with four core locks so be aware of that if you want six like I did. Bought two more locks from Thule with the same key #. Mounted this carrier on my Rhino Rack. Perfect fit and looks great. Would highly recommend.
# 2
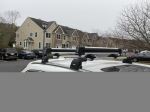
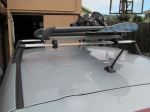
Thule SnowPack Extender Ski and Snowboard Carrier - Slide Out - 6 Pairs of Skis or 4 Boards - Silver
Love it!!!!!! Great ski rack replacement for older rack. The extended slide is incredible. The eTrailer support helped me pick the model that worked for my car and crossbars. Another wonderful purchase from my go to source for bike/ski or other related products!

Used this last season for the first time. Found it lightweight and very easy to install; the main difficulty was getting front and back carriers aligned on the center of the vehicle as the clasps are offset. It was used to hold 4 sets of skis and did this quite easily. I think 5 sets would be no problem, but six sets might be pushing it especially if you are using wider skis. It is very much worth the extra money to get the extender/slide out option if you stand under 6' tall and have an SUV.
# 3
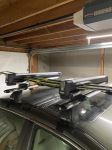
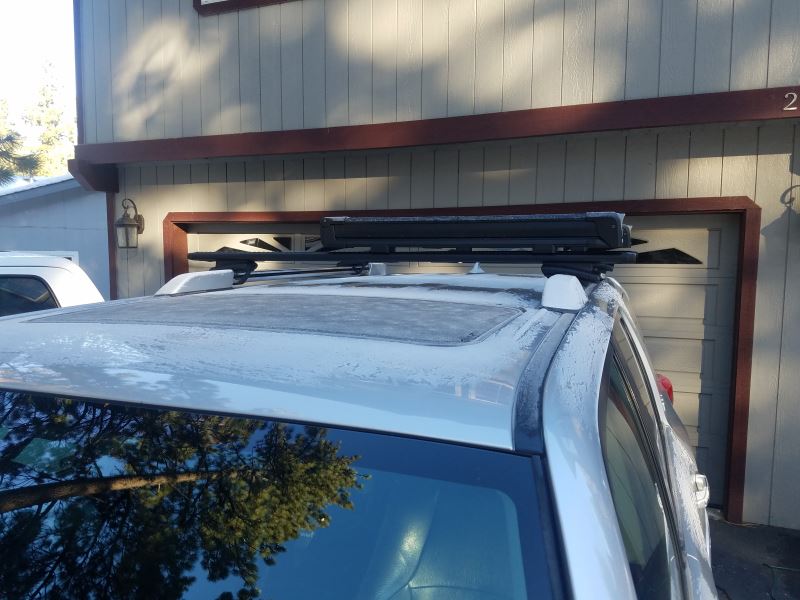
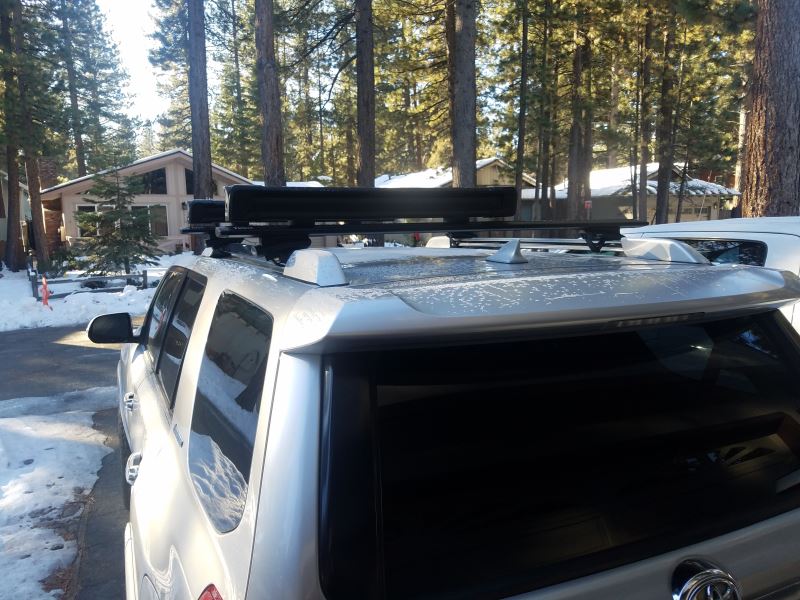
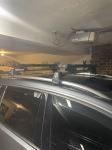
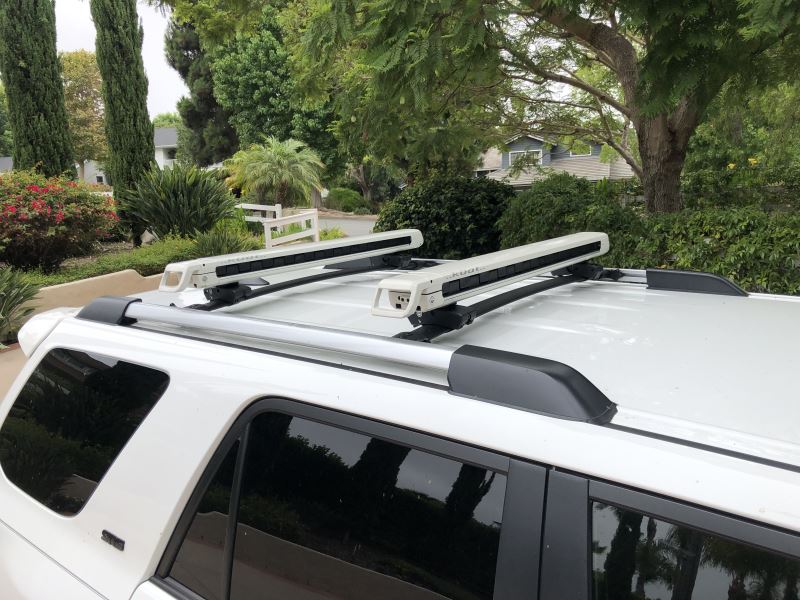
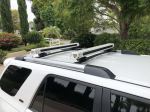
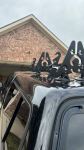
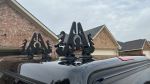
Rhino-Rack Ski and Snowboard Carrier - Locking - 6 Pairs of Skis or 4 Boards
E trailer I have a 2019 Mazda6 and purchased the rhino rack series 2500 parts (fit kit #DK289, foot pack #RRRLKVA, aero crossbars#RRVA126B-2), and the rhino rack snowboard/ski carrier #RR576. My car does have fixed mounting points underneath the strip on the roof so I opted to add them to my roof and not use the clamp for kit that goes in the door jam. Every time I entered the year, make, and model of my car, the parts came up with the clamp fit kit part #DK387 which I did not want. But after some research, I found the correct fixed mounting point fit kit. The site of course told me that this part wouldn’t fit my car but after looking at the customer reviews, I saw them used on Mazdas. All of the rhino rack instructions were not the best. We did have to make some adjustments. One of the instruction packs tells you how long you’re supposed to cut the rubber pieces that go into the crossbars based on your car but unfortunately, the measurements were wrong for my car (picture- front 166mm is wrong). The front bar length was about an inch too short and I had to add more rubber to make it longer to fit the fixed mounting points on my roof. After some time of trying to interpret the instructions, and looking up whatever available instructional videos were online, we finally finished installing them and they do look really nice. At higher speeds on the highway I can definitely hear more noise. The actual snowboard carrier is fine, fits all 4 boards fine. It is a little difficult to close once I have my boards in there because you have to push the top bar all the way down and hold it down to be able to turn the key to lock it. I’m just happy I don’t have to shove the boards in my trunk. I do like that all the parts in this series come with locks and keys. So far no problems. Overall good product.
This rack works great with the four pairs of skis I lugged from Oregon to Alaska. I'm using it on the beef rack cross bars that came with my go fast camper which are very difficult to find mountings for. This one worked great though with a little bit of metal grinding on the bolts that slide into the t-slot of the rack. It locks and unlocks fairly easily (with a little bit of jangling involved), but so far so good!
# 4
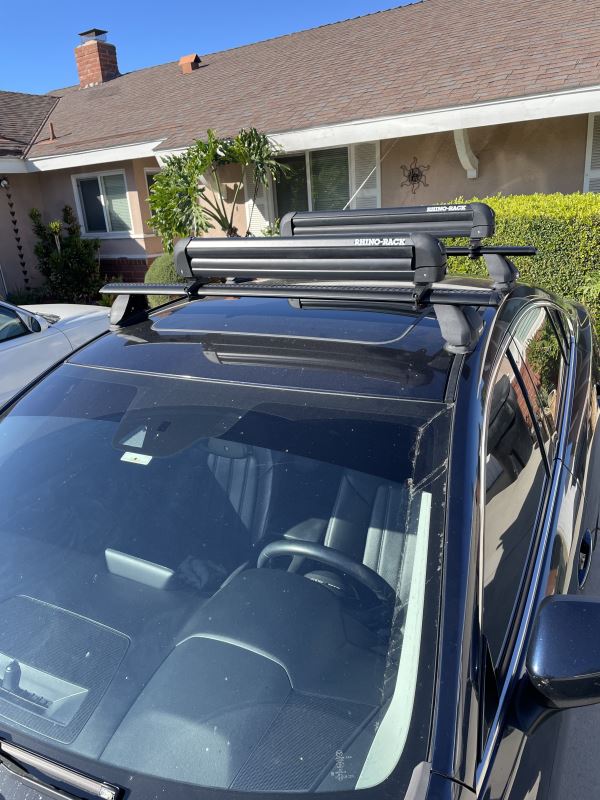
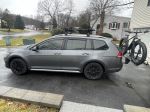
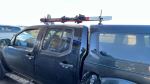
Rhino-Rack Ski and Snowboard Carrier - Locking - 3 Pairs of Skis or 2 Boards
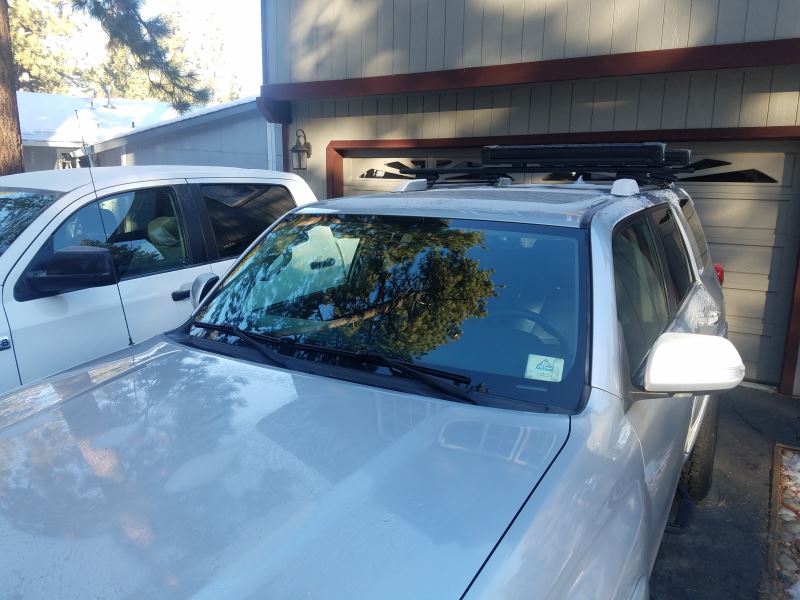
I think these racks will be excellent during ski outings for many years. I attached them directly to the C-grooves on my Aero bars rather than using the provided clamps. The C-groove attachment is stronger and slightly lower profile. I love the large release buttons!.
I can't ski, I fly fish. However my oldest decided to try downhill skiing after being gifted a pair of skis. I am budget minded should the skiing not work out and after breaking many rod tips decided this might solve 2 problem. I am very pleased w/this equipment holder. It has transported skis & ski poles too and from and no longer does my oldest have to dodge skies coming over the back seat. So far it has taken abuse from the rain (& freezing rain), snow, ice, rapid warming, road salt, and upwards of 70mph and there has been no shifting, loosening, breaking of plastic or any other noticeable problems. I am excited for spring to see how it transports my fly rods.
# 5
Rhino-Rack Ski and Snowboard Carrier - Locking - 4 Pairs of Skis or 2 Boards
Howzit etrailer.com & staff. the rack itself is sturdy and more aero than comparable units. For my 2017 Subaru Crosstrek (OEM) Aero Bars, it was necessary to shim the (rear) lower/leading edge clamp assembly with two 1/8” x 1.5” x 1.5” (EPDM) rubber pads. The bars are shaped like a wing – and these shims helped to level the rear rack with the one in front. Overall - it looks very clean and functional. I might screw on some rubber ends over the ends of the mounting bolt to complete the project. Time to make some turns. Thank you!!
The Rhino Rack was easy to put up on a 2018 Subaru Outback. Took me about 10 minutes. The only issue is that the rack bottom bracket piece is is convex with an acute angle which makes it not fit perfectly on the Subaru crossbar that has a flat bottom. Loaded 2 pairs of skis and poles and the rack kept them securely fastened during transport on the highway. There was some noise from the rack during highway driving but it was minimal.
# 6
Thule Tram Ski and Snowboard Carrier Adapter for Hitch Bike Racks - 6 Pairs of Skis or 4 Boards
This rack works well. I did however need to manufacture a rubber wedge to go between the lower cross bar (TH9033) and the bike rack so the attach point would lay flat against the bike rack. Many thanks to Cathy at etrailer.com for the excellent customer service she provided.
I just used the ski carrier. I had to get used to the small amount of movement as I drove. I checked it out several times and every thing was fine. I just put 1100 miles on it , along with the bike rack and the new hitch.
# 7
Thule SnowPack Ski and Snowboard Carrier - Locking - 6 Pairs of Skis or 4 Boards - Black
This rack easily fits 5 sets of skis for my family. It is FAIRLY easy to take on and off (could be faster if we didn't have to turn turn turn the dials). My biggest complaint is that as soon as my skis are out of it, I HAVE to remove it from my car (SUV). The noise of it empty on my roof is so loud when I am on the highway it is AWFUL! It's like it vibrates my whole car and is super loud. It only does it when there are no skis in it. It is frustrating since it would be way easier just to leave it on all winter taking my skis on and off when we need to, not the entire rack.
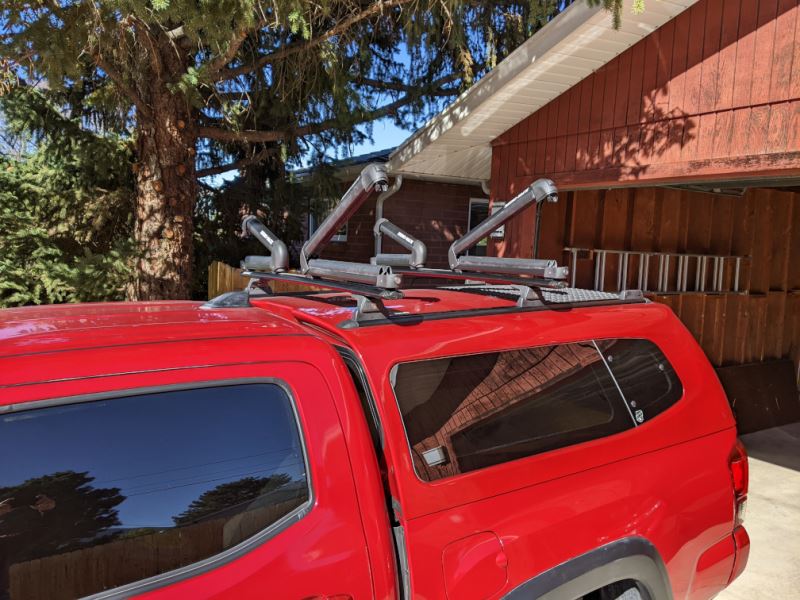
Just put this snowboard rack on my 2011 4runner mounted to Thule Aeroblade roof rack. Easy to install and use. Quality seems good. Like the look. No noise issues when driving. No complaints so far. Overall satisfied!
# 8
Kuat Grip Ski and Snowboard Carrier - Slide Out - 6 Pairs of Skis or 4 Boards - Black
Rack works great. Slide out makes loading and unloading much easier. So far we only put five pairs of fat skis on. Might have room for one more pair if I closed the gap between pairs but we didn’t need six pairs for that trip. Only problem was the rack froze up after driving through fresh rain. We had no problems with freezing while driving through salted slush. So far we’ve used it on two longer ski trips to CO from AZ. It’s quiet and strong. We once had a cheaper rack release our top model, expensive, skis onto the highway at 65 mph. That’s why I bought a Kuat.
These rack are great, I have them on both of my SUVs all winter. The etrailer seevice was excellent as well.
# 9
Thule SnowPack Extender Ski and Snowboard Carrier - Slide Out - 6 Pairs of Skis or 4 Boards - Black
Game changer! I don’t have to climb on the car to put our skis on the rack or take them off. It’s also easy to put the rack on the car and take it off. I’m got sure you could get six pairs of skis on the rack, but I haven’t tried. It’s certainly no problem getting four pairs.
I am so thankful I spent the extra money and ordered the one that pulls out to easily load/unload skies. I’ve had several opportunities where I have had 6 pairs of skies to transport. I have had others approach me to see if I would trade.
# 10
Yakima HitchSki Snowboard and Ski Carrier for Hitch Bike Racks - 6 Pairs of Skis or 4 Boards
It will, indeed fit six pair of skis back to back. It would be better if the lower bracket on each side could be opened wider to make it easier to slide the skis into position. But I've tried it with four different pairs of skis (kids skis, modern adult skis, and even early 2000s adult skis); they all fit fine. Mounting to a bike rack is pretty straightforward, and as long as the rack can hang four bikes, with adjustable hanger slot placement, the ski rack accessory should fit onto the bike rack just fine. I added an extra wrap of shock cord at each contact point just to lock it down better, but that shouldn't be necessary. It is quite sturdy. I do suggest always traveling with the upper brackets locked using the keys that come with the rack. If you want to add a little theft deterrent, hitch bike racks either have a slot for a bike chain, or have one built in. And of course use a locking receiver pin. For several years I've used a roof-top cargo box for skis, but on taller vehicles that would prevent entry into a garage, on taller cars. I got this because lately I've been using a much taller vehicle for skiing, and a roof rack or roof box just wouldn't have worked out for me. I already had a hitch bike rack, so this was the best solution.
First and foremost, this is my third order from etrailer.com and it is the absolute best online company with which I have dealt...bar none (no pun intended, but I did buy roofbars)! I have installed a trailer hitch and Malone roofbars on my 2011 Volvo XC90. With the Malone roofbars, I lost a rubber piece....totally my fault. I contacted etrailer and they contacted Malone and Malone sent me a replacement piece direct from the factory (even though it wasn't a part Malone sold separately). Outstanding service from both etrailer and Malone. I haven't been able to post this outstanding customer service work until I bought something else, so I thought I'd be remiss if I didn't take the opportunity here. [Side note on the Malone roofbars and the rubber pieces: I have since Gorilla glued all of them to the respective pieces on the bar and they'll never be lost again.] For this Yakima HitchSki rack, I ordered it at 8:30 AM and it had shipped by 11:38 the same day. I chose this rack for several reasons. First, I have a low garage, so anything on my Toyota Landcruiser's roof would have to come off before driving in and out (I only have a 7 foot garage in my house in Canada, but could drive in my 8 foot garage in Virginia in the Toyota with the roof box). I want to be able to load up all the ski stuff the night before and leave it in the garage so it doesn't get stolen....couldn't do this on the Toyota because with nothing on the roof, I only have about 3 inches of clearance now. In the Volvo, I don't quite make the garage clearance either with the roofbox, so the roofbox becomes less of a convenience (but often a necessity). Second, with five kids, each of my cars is packed with people so I need my roof box (didn't buy it from etrailer because I was overseas at the time and hadn't learned of etrailer yet), so skis on the roof doesn't help me space-wise with all the other crap I have to throw up there. Third, every ski day day is a game time decision on whether to to drive the Toyota or the Volvo depending on what other people in the family are doing that day; the ease of just unplugging the bike rack with the skis all mounted, resting it against the wall in the garage all week and then plugging it in and going in either car was the big sell. Finally, in the off season, I may just be able to leave all the skis in the rack and hang it horizontal from the garage ceiling to keep them all out of the way....not sure, but will certainly try. My bike rack is one I have had for years [again, pre my days of knowing about etrailer, it's an XSport four bike holder] and it did not measure exactly the 17.25" needed, but it was close enough and secured down just fine. I wrapped the HitchSki with foam insulation to add some rubber and grip inside the bike rack when clapped down (and scratch protection). Now for two big buts...less of a review but more of a consideration for purchasers. I bought this rack because I have 7 in my family. The skis are tall and skinny and hard to fit in the car(s), hence my Hitch Ski rack. But skis are just one piece of skiing equipment. Add helmets, boots, jackets, ski pants, etc. and that's a lot of space. So, in my Volvo XC90 or Toyota Landcruiser, while they both seat 7 people, it's very tight with two teenagers and two car seats (and one pre-teen...just so you know I'm doing the math right). If all seven of us go skiing, I still need the roof box for all the other equipment. If we go on a skiing vacation (overnight), I need other luggage too. Thankfully, Friday night and Sunday ski lessons are just for three kids, so the others will probably not always come. With the back seat down, no problem for all the other stuff. So, a Thule Transporter Cargo Box in my future? Stay tuned. Final, and most important but, I had to return the HitchSki rack because my skis didn't fit. When you have racks on the roof, they are generally 30+ inches apart. For this rack, the distance between the two racks is 17 inches. I could not, for the life of me, get the skis to fit in the racks without going through or over the ski bindings, hence, I was unable to get it closed and secured. I't s product of having so many different ski sizes (from my 4 year old to my 48 year old self). I was disappointed in myself that I didn't forecast this problem as I over thought everything else.
# 11
Yakima FatCat EVO 6 Ski and Snowboard Carrier - Locking - 6 Pairs of Skis or 4 Boards - Black
Just got my Yakima Fatcat EVO 6 ski carrier (black finish) and I am stoked. Note that this is different than the Fatcat 6 (non-EVO, previous generation) carrier. This is my first ski carrier, but I and/or my kids ski about once a week at Alta and Snowbird when the lifts are running, so I expect it to get lots of use. Etrailer shipping was fast and item was packed in a sturdy secondary box. PROS: 1. I love the sturdy build and quality finish of the carrier. 2. The design allows many micro-adjustments to fit to your vehicle and to fit the skis. For instance the spring-loaded hinge on one end and the lock on the other end can naturally accommodate different thickness skis. 3. Carrier has a usable width (i.e. width of skis side by side) of 32.75 inches (832 mm). For those that are not skiing on 75-mm-wide skis from 30 years ago, this carrier might actually allow you to fit 6 pairs! 4. Separate mounting brackets for aero or for square/circle cross bars. The aero brackets fit securely on my Acura/Honda OEM cross bars. The flat part of your skis will be about 3 inches (76 mm) above your cross bars. 5. A built-in lift bracket that lifts by an additional 3 inches (76 mm) the hinged end of the carrier, if you have really tall bindings (I don't think I'll need to use it). 6. The aero brackets use a rubber coated steel strap to wrap under your cross bars. This strap has a quick release cam on one end that can be operated when the carrier is not key-locked. This means you can remove or install the carrier without tools in about 4 minutes, once you've done the initial install-related tuning. While the carrier seems sturdy enough to leave on the vehicle all winter, I expect I'll only install it on ski days. This feature really sets this model apart and for me was its biggest selling point. 7. Yakima packages the carrier in a nice-looking sturdy cardboard box with a flap lid. I can fit the two parts of the carrier in the box, with the brackets/straps still installed, for convenient storage (see picture). CONS: None so far, though I haven't yet actually hauled skis up the mountain! After this ski season is over and eTrailer asks me for a follow-up review, I'll let you know. I'm also thinking about seeing if the ski carrier can be attached to my small hitch-mounted cargo carrier. That would make loading and unloading the skis easier than on the roof.
First off...you can't beat the service of etrailer.com. I was looking for a ski rack for my son's 2012 Subaru Impreza with the factory roof rack (base model not the sport). I could find no reviews of anybody installing one of these on one of those. I took the plunge and will say that I am very happy with the outcome. The installation is a bit tricky and four hands help, but after the first one was installed we had the hang of it and the second one went on very quickly. Even with the expedited shipping this rack was about $50 cheaper than the Subaru ski rack. Again the etrailer.com service is fantastic. I have purchased products here before and will do so again.
# 12
Kuat Switch 6 Ski and Snowboard Carrier - 6 Pairs of Skis or 4 Boards
Excellent ski rack. I purchased because I wanted absolutely no noise. This thing is super quiet went flipped up or down. Love the looks of it flipped down. Absolutely no complaints. Easy to use and set up.
Arrived fast, easy to install on my 2021 Toyota Rav4 Limited. Love that it folds down when not in use. Haven't been to the mountain yet but looking forward to putting it to use. Save the box for storage - came with nice foam ends to protect it.
# 13
Kuat Grip Ski and Snowboard Carrier - Slide Out - 6 Pairs of Skis or 4 Boards - Pearl
Awesome ski rack
Super solid, like all things Kuat makes, and even a knucklehead like me was able to mount the ski racks in short order. Plus the Pearl White looks killer on my white 4Runner!
# 14
Yakima FreshTrack 6 Ski and Snowboard Carrier - Locking - 6 Pairs of Skis or 4 Boards
Looks great on the vehicle. Had a little struggle tightening onto the cross bars but adapted and overcame!
It's a ski rack so its not all that exciting. I like that it is small for storage reasons when not using it. The fastening system to my Toyota Highlander factory rack is secure but a little cumbersome to apply and take off. I like to take it off when not using it to preserve my gas mileage. The boards and skis fit fine although they are stacked in order to get 4 peoples worth of equipment up there. A small price to pay for their compact size on the roof or in the garage.
# 15
Yakima FatCat EVO 4 Ski and Snowboard Carrier - Locking - 4 Pairs of Skis or 2 Boards
I actually ended up buying a second set so I can fit a total of 8 pairs of skis on my jeep. I love the quality and ease of installation. It’s an easy to use system and love that my skis are secured.
These are extremely easy and quick to install. Love the aerodynamics of them as well as it's quality craftsmanship. Very pleased with this item and with the delivery speed! From North Shore Oahu....MAHALO
# 16
SeaSucker Ski and Snowboard Carrier - Vacuum Cup Mounted - 4 Pairs of Skis or 2 Boards
Quite an amazing product. When it arrives, you think, "Oh man, how is this going to make it the whole trip?" But I can tell you that I traveled from Fort Worth to A-basin/Keystone and back with no issues. That's 1640 miles there and back at speeds up to 85 mph and at least 3 of the world's climate zones on just this one trip. It is best practice to give each of the suction plungers a few taps every time you gas up, but I forgot a few times and it still caused no issues. Simple assembly with 4 suction cups and 2 of the high-density plastic racks that connect to each other with an included alan key and headless screw. Also includes the high tension straps you'll need to fasten skis/boards at the front and rear of your gear. When I say this rack was solid, I mean like I'd touch it to test for stability while driving and gassing up and it felt like it was sitting in hardened cement. Absolutely rock solid. And, there's a spare strap and plunger included. A couple minor things worth noting (but none of these could justify taking away from the 5-star rating I gave this product): - The suction cups require a clean surface, so don't take this lightly. I took mine to a car wash right before mounting. - The clean surface must also be smooth and seamless. I didn't notice until I started mounting that my truck has a grooved roof, so I had to put 1 rack on the bed cap roof. It worked great. - I wish there was an option just for skis b/c these racks were about 1" too tall to fit in the garage while mounted to the roof, and it's obvious the height of this product is to also accommodate snowboarders. Like I said, minor stuff. 5-stars all the way. You won't regret it!
Only used them once for a 4 hour drive to the slopes. Transported two snowboards at highway speeds for a majority of the travel. Mounts stayed planted and were still very secure at arrival. Nice to be able to remove to when at destination while traveling around locally.
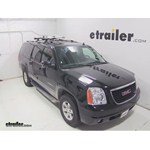
Yakima FatCat Ski and Snowboard Carrier Review - 2014 GMC Yukon XL

Today on our 2014 GMC Yukon XL, we're going to be test fitting the Yakima FatCat 6, a locking rooftop ski and snowboard carrier with a 6 ski or 4 board capacity, part number Y03088. With our factory roof rack already on our Yukon, we'll begin our test fit by grabbing the front half of our carrier and placing it onto our front crossbar. We'll bring the black rubber coated metal straps around the underside. We're going to fit the one closest to us into the foot of the carrier. We'll then open the carrier, lift up on the closest black lever, and loosen it slightly. This allows the small gray catch to move out of the way so we can close our buckle. With our buckle closed, we'll tighten that black lever a little bit and push it into its downward position.
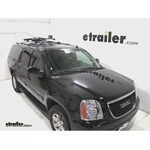
Whispbar Roof Ski and Snowboard Carrier Review - 2014 GMC Yukon XL
Today on our 2014 GMC Yukon XL, we are going to be test fitting the Whispbar locking rooftop ski and snowboard carrier with the 6 ski or 4 board capacity in silver. It's part# is WB-300. With the factory roof rack already on our Yukon, we are going to begin our test fit by grabbing the front half of our carrier and placing it onto our front crossbar. We will bring the 2 black rubber coated metal straps around the underside and fit the one closest to us into the foot of the carrier. We will now open the top jaw, reach in and lift up on the black lever located inside. This is going to release the small catch that holds our buckle closed. We will tighten up that black lever just a little bit and then push it into its downward position.
Yakima FatCat Ski and Snowboard Carrier Review - 2013 GMC Yukon XL
Today, on our 2013 GMC Yukon XL, well be test fitting the Yakima FatCat Six Locking Rooftop Ski and Snowboard Carrier, part number Y03088. To begin our test fit, well take the front carrier, place it on the top of our front cross bar and bring the rubber coated steel straps around underneath the cross bar, latching them back into the carrier attachment point. Once theyre locked in place on either side, we can then open up the carrier, tighten down the wing nut and clamp it into place. With that, our carrier on the front cross bar is secured. Well now place the rear carrier on top of the rear cross bar and repeating the same procedure, clamping it down, well secure the rear carrier to the rear cross bar. Now, with both carriers in place, we can go ahead and load our snowboard and skis.


What our customers are saying:
"Easy place to shop. Fast delivery and great products. Very happy with my purchase."