
# 1
Thule Hitching Post Pro Bike Rack for 4 Bikes - 1-1/4" and 2" Hitches
Excellent Very easy to install Quick delivery Well recommend this site to friends and family also get our future trailer items from here.
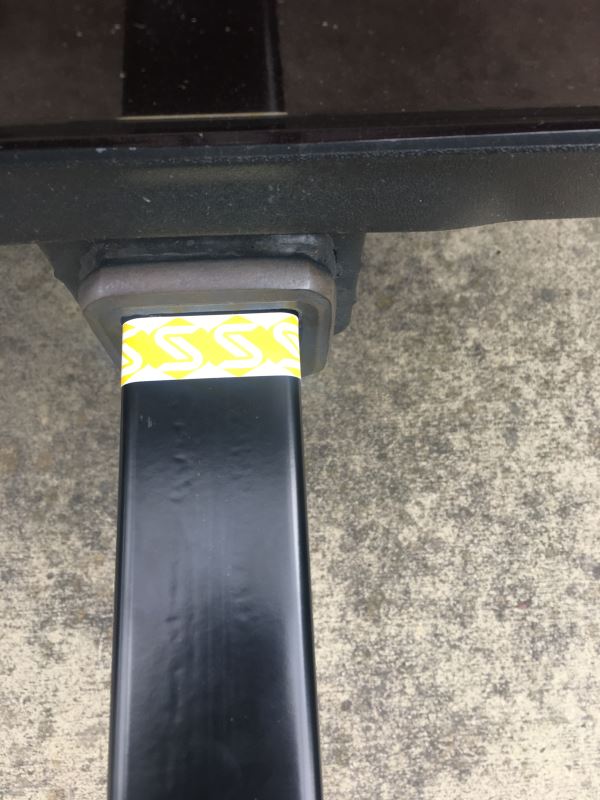
May be I’m a bit early giving this review but since I’m here i need to give my input. Was easy to put on hitch receiver but I wish it set closer to the bumper, main reason not only cosmetic but also increases vehicle overall length. Also the pin is not actually a pin but a M12 bolt that goes inside, only on one side while being threaded, but never comes out on the other side. I did not find it a robust design and also felt it lose. So I hade to purchase another longer M12 bolt that comes out all the way on the other side and use another washer/lock nut. When I ordered this bike rack I also order a Stainless Steel Lock Pin with key which I couldn’t use so it all goes to waste. Also I need to add that yesterday when I was following my wife van, where is installed, I realized that the rack bar going vertically blocks a couple of numbers on the License Plate. One night, while van was parked, my neighbor did not notice it and went so close to it almost scratched his pick up. So I’m going to put some High Visibility Tape on the sides of Bike Rack so people can see it when drive across the rear of van.
# 2
Curt Bike Rack for 5 Bikes - 2" Hitches - Tilting

It was obvious that we received a product that was returned by someone else when the box was overly taped shut, a support collar was broken, and most of the pieces were out of their ripped plastic bags. However, it was a great price to hold 5, 26" and/or 27" Trek bikes. I used a piece of the broken collar and went ahead and assembled the rack. Due to the weight of the 5 bikes it did not wobble that much when driving, as one of the bike tires was up against my car. I can only imagine that if we received an untampered product that this review would have been 5 stars. The picture is a little hard to see, but there are 5 Trek bikes on the rack on my 2020 Toyota Seinna.
Needed a 5-bike rack, loved the price of this product. My wife and 3 daughters all have challenging bike frame shapes...it was a struggle the first time figuring out how to get them on. The first 2 bikes that go on are the adult bikes, then the 2 bikerack bars narrow for the last 3 bikes to go on, which is a feature I think is good for kids bikes. I will have to get at least one bike adapter bar to make my wife's bike hang level (due to it's odd frame shape). The triangular mounting pieces on the rack bars are sometimes tricky to get through the corner of a tight, small bike frame, but I was able to get 4 bikes on (haven't tried 5, because my youngest has not learned how to ride yet). The triangular plastic pieces rotate and also slide along the rack bars for even more flexibility of positioning. I like the tilt feature, works great. I like the rubber straps included, they work great. No regrets with this purchase, at this pricepoint it's all and more than I expected as far as quality and ease-of-use.
# 3
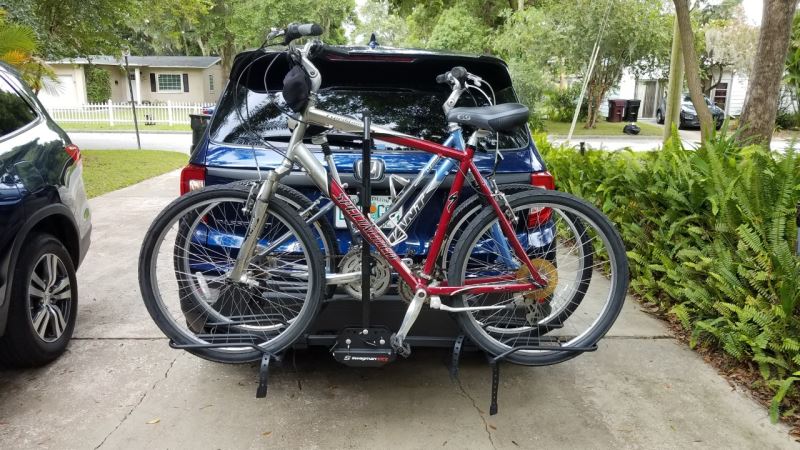
Swagman XTC4 Bike Rack for 4 Bikes - 2" Hitches - Frame Mount
We've used this bike rack with our '14 Sienna for over a year now and it works wonderfully. I especially appreciate the way the rack folds against the back of the van when not in use. After many hours of research before making this purchase, I could not be more happy with this rack.
Placed my order on a Monday and had my new rack on Friday. While the instructions for assembly could tolerate some improvement they were plenty goood enough to get the job done. Took me about an hour to assmble but I wasn't in a hurry. I attached the rack to my Curt receiver (part #C13105) that I installed on my 2011 Toyota Sienna XLE. Only problem with this setup is insufficient clearance to swing the rack into the full upright storage position. I also have to loosen the handlebars on the bike closest to the van and turn them 90 degrees so they don't touch the back of the van. Both these issues could be solved with a hitch extesion but simple enough to work around without. No biggie. Guess that's the price I pay for having the Curt receiver discretely snuggied up under the bumper. This rack is a serious hunk of steel that does a great job of holding the bikes in place. NO wiggle at all. After test fitting the bikes in place, I'm very confident that the bikes will stay put for a long road trip. Getting all the bikes on the rack and clear of each other does take some experimentation. But once you get it set, it's much faster loading on subsequent trips. The provided locking, anti-rattle pin does a great job of securing the rack to the receiver and makes it all feel like one solid piece. The provided cable lock threads through the bikes and back to the locked anti-rattle pin so nobody can steal your bikes while you're at the hotel, etc. Overall, the construction looks/feels very solid and I really don't see anything where I thought they were trying to save money on construction. This does make the rack a little heavy and it could be challenging for a smaller person to manage. I really like the way this rack holds the bikes from the wheels up as oppposed to hanging off a bar. I was afraid the other style would have the bikes swinging lik e a pedulum. Sorry for the long review, hope there's some helpful information in here some of you.
# 4
Swagman Upright Bike Rack for 1 Bike - Roof Rack Crossbars - Frame Mount
Planning on bringing bikes while camping. I mounted 2 of the Swagman bike racks to my new Sportrack on my pop-up camper. The bikes fit perfectly. The racks seem sturdy enough. Not heavy duty, but for my needs they should be fine. Assembly was relatively fast and easy.
We have used the Swagman Roof Rack a number of times when we have needed the additional bike carrying capacity. It took a couple attempts to get the initial spacing of the bike rack properly balanced on the van’s roof rack as recommended by the instructions. But it was easy to do and once set was very easy and quick to put on and take off. The rack works great, the bike is easy to put into place and secure. The bike and rack are very stable and quiet and haven’t required any mid-trip adjustments. We always put the cheapest bike on the roof (lol) but do use a bit of duct tape to protect the finish just Incase. We are very satisfied with the rack and consider it quite a deal for the money.
# 5
Thule Passage 3 Bike Carrier - Trunk Mount
2007 Toyota SiennaWorked great on back of my 2007 Toyota sienna. Holds 3 but I carried only two. Women's bike do need the additional crossbar.
# 6
Swagman XTC2 Bike Rack for 2 Bikes - 1-1/4" and 2" Hitches - Frame Mount
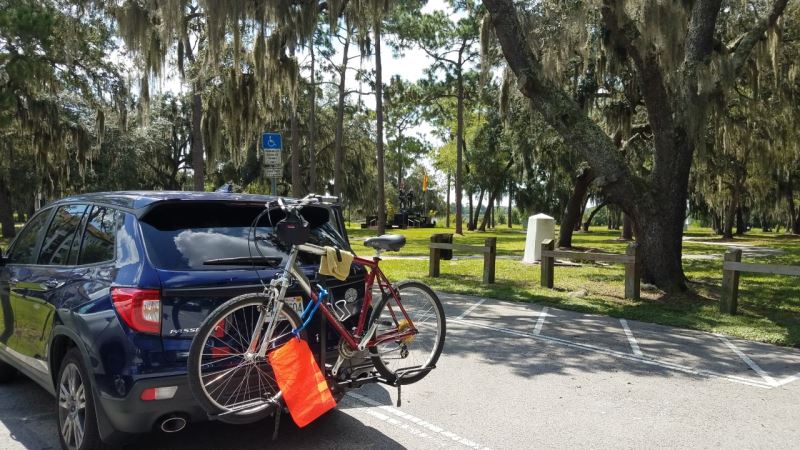
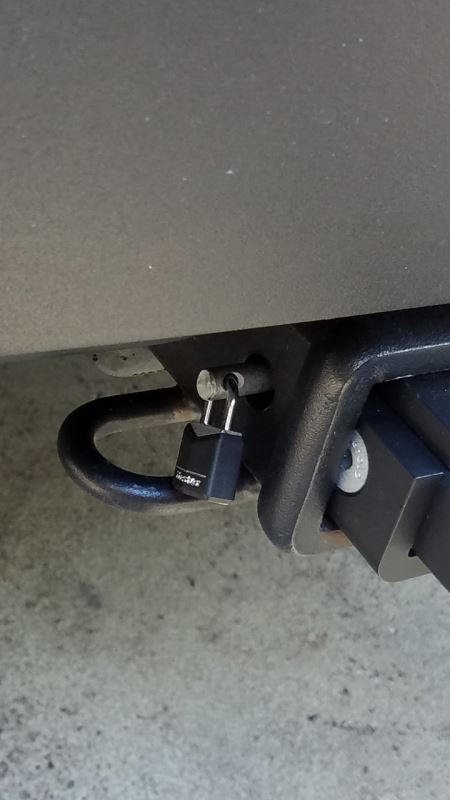
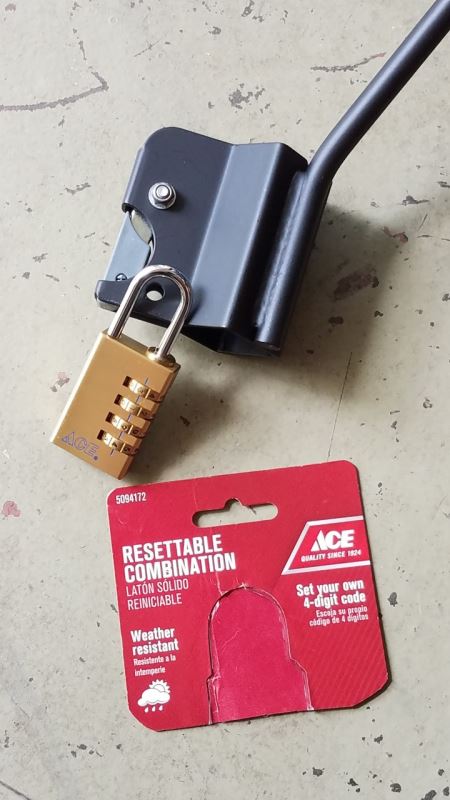
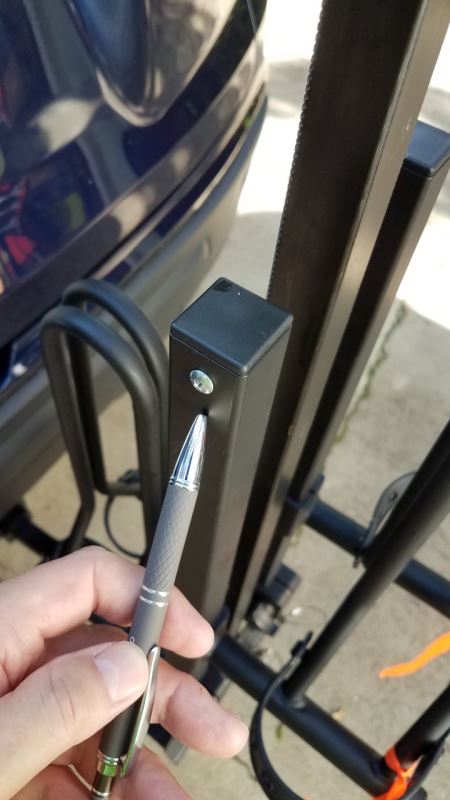
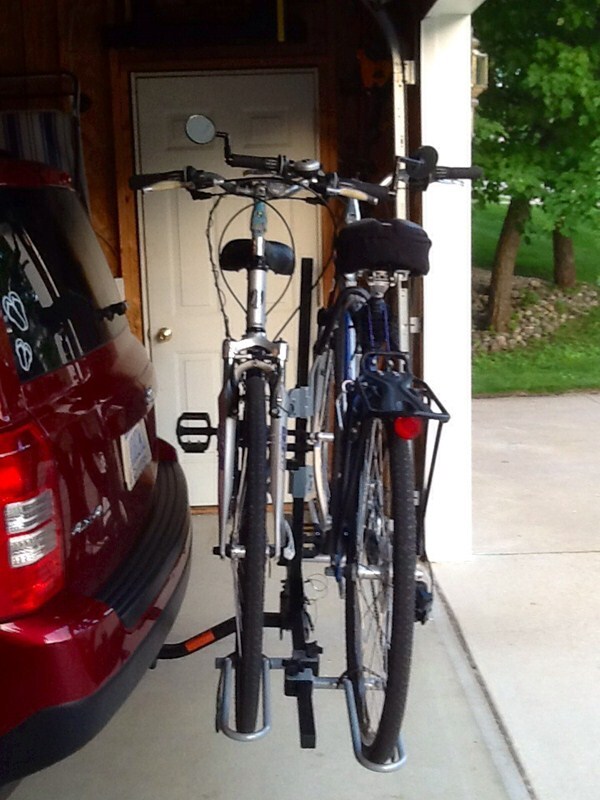
First-time rack buyer / owner / installer. The rack arrived in a timely fashion, maybe a day or 2 ahead of schedule. It was well packaged. I’m LOVING this bike rack. It was easy to put together and to mount on my new Honda Passport. Thus far, no squeaks in my 2” receiver. Hardest part of initial set-up is figuring out the best way to position two bikes. Trial & error and some patience. The directions weren’t clear as to where the 2 left-over screws went. I found the answer in another review and have posted a pic in case others have the same problem (photo with pen pointing at screw). These screws go in the underneath side of both of the folding arms. They appear to keep the wheel wells from sliding off in case in you drive with an empty, un-folded rack, and forgot to tighten down the wheel wells. The folding arm push / pull pins can be difficult at times. I coated the tips with some lube. That and a little jiggling seems to solve that issue. I guess it’s better for the pins to be snug vs popping right out. I added a small Master lock to the hitch pin (in lieu of the provided cotter pin) as a theft deterrent. I read that a 3/16 shackle lock will fit into the bike clamp down arms to also act as a deterrent. I had an old 3/16 lock that did snugly fit and appeared to be locked. HOWEVER, I yanked on the lock and it came open as there isn’t quite enough clearance for the shackle to lock. I discovered that longer 3/16 shackle locks are hard to find. Have attached a photo of the lock that actually fits and works (Ace Hardware). One lock on the upper clamp down arm will secure both arms as the lower arm can’t be removed without removing the upper arm. The clamp down arms appear to be coated to prevent damage to your bike. I’ve tried a simple rag and ultimately settled on pool noodle pieces as a precautionary measure. I CAN NOT open my tailgate (regardless of whether or not the rack is fold up and in the bike carry position). If that’s a concern for you, then spring for the more costly titling version. My back-up camera still functions.
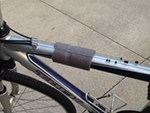
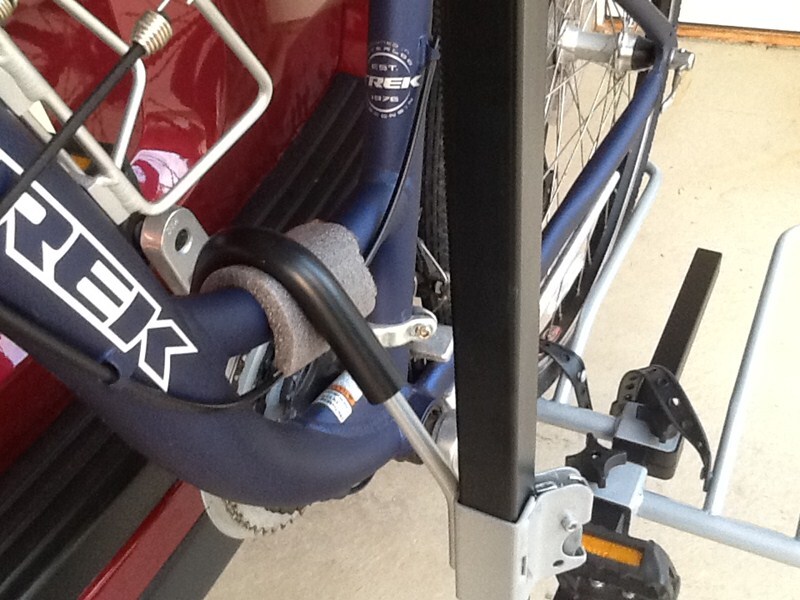
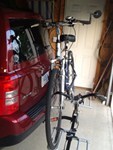
The Swagman XTC-2 platform bike carrier arrived very quickly from etrailer and in good shape, the actual carrier box is inside another shipper box, which I'm sure helped with its condition. Assembly was relatively quick and painless, even though the instructions could be a little more thorough. Installing the carrier on the back of our Jeep Patriot also was quick, it helps to have an extra ratchet & 3/4" socket laying around for just this purpose. Installing the bikes takes a little patience and trial and error the first time you try and put them on the carrier. It's easy enough to adjust the wheel holders to fit the wheelbase of your bikes, but for us at least, the challenge was trying to swing the vertical support bar up into position after putting on the first bike (closest to the Jeep). We couldn't angle the bike enough toward the Jeep to have the bar clear the bike. We learned that the easiest way to secure the first bike was to remove the ratcheting frame hooks altogether, put the bike in the carrier, swing up the vertical support bar, put in the pin, and then slide one of the frame hooks down on the bar. The outside bike is much easier because you can set the bike in the carrier at whatever angle you need, not being limited by the back of the vehicle. One thing we did to protect the bike frames was to use some foam pipe insulation as cushion between the frame hook and the frame (see pictures). Once you get a system for installing the bikes, it is very quick to load/unload them. The rack seems to be well made and doesn't wiggle excessively when traveling. All in all a good product for a good price, would definitely recommend it for anyone looking for a platform bike carrier.
# 7
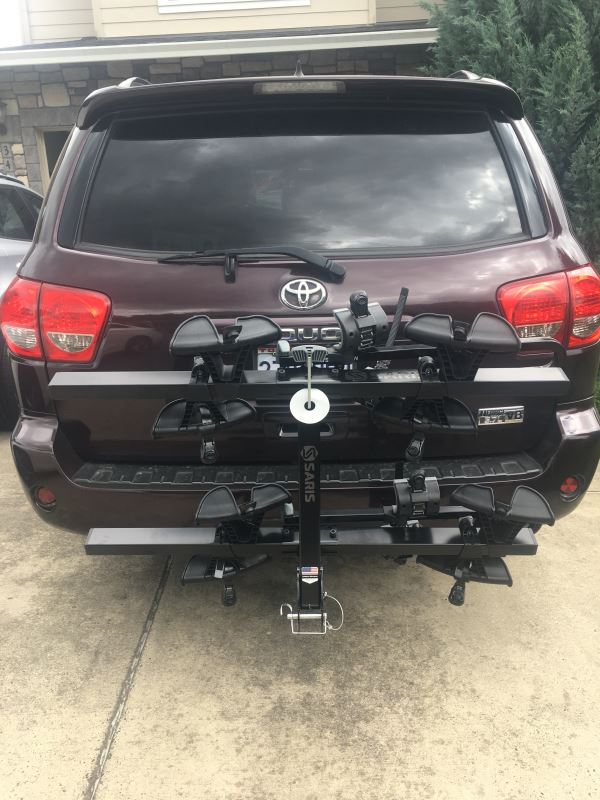
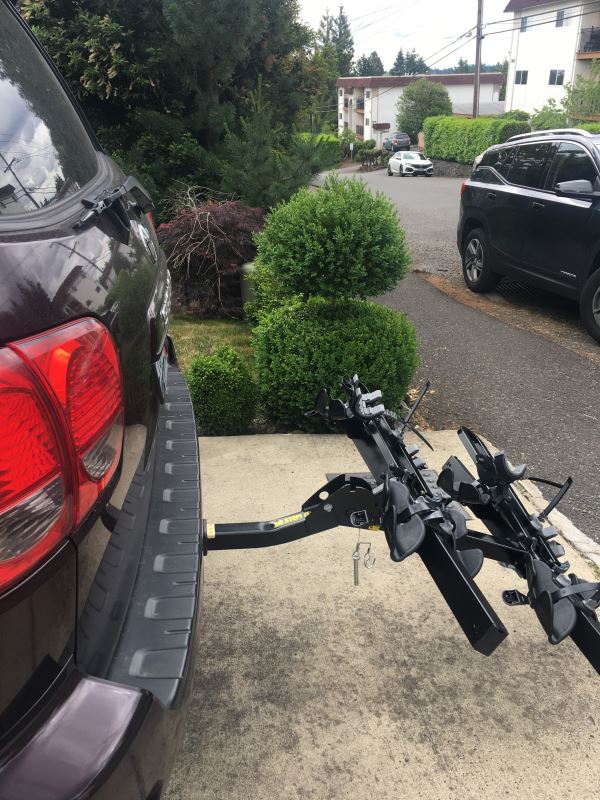
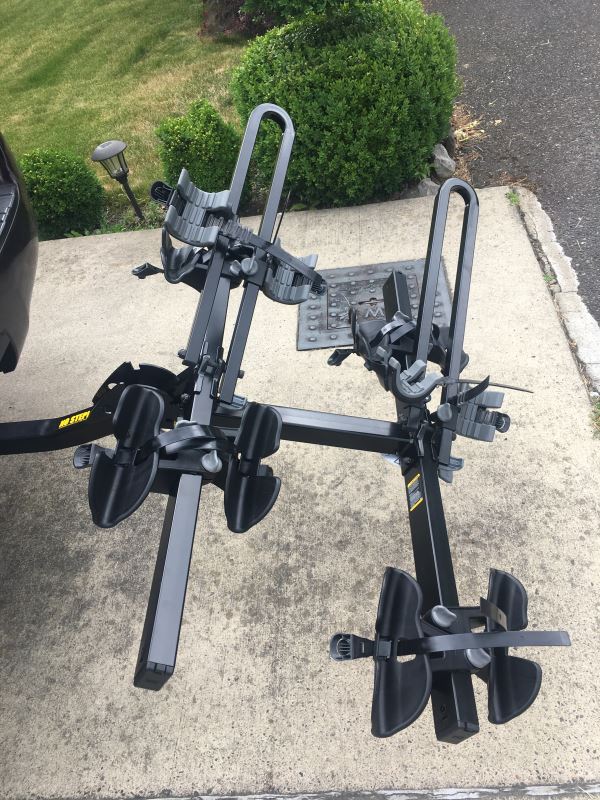
Saris Freedom Bike Rack for 4 Bikes - 2" Hitches - Frame Mount - Tilting
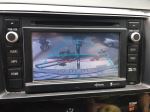
WOW WOW WOW That is what I just kept saying after installing this Saris bike rack. I have been looking for a bike rack for almost 3-4 months now. Thule and Yakima didn't have what I was looking for. Their solution for a 4-5 bike rack is too complicated, not efficient, and it would be a nightmare to manage on a regular basis. So I couldn't get myself to pull a trigger on any of those and I kept searching. Finally, I came to eTrailer and found out about Saris. That is where the love starts :) We are a family of 5 (3 kids and 2 grown-ups). I needed something that will help me load bikes fast, unload them and still be able to have access to the back of my Toyota Sequoia. Saris delivered in every way. Assemble of the item is straight forward. Instructions are clear and to the point. They even give you a yellow strip that helps you mark where the hitch needs to be in order to align hole openings for easier installation after you install it the first time ;) The back-up camera is still usable but not 100%. Tilting down the rack with the bikes on it is simple as 1-2-3. There is plenty of room left between the trunk door and the bike as you can see on the pictures. One HUGE benefit is that you do not need any extra parts for kids bikes. Not like with other brands. Saris delivers tremendously on this part too. No shaking, rattling, or anything that would make you notice that you have this amazing product on the back of your SUV/truck. I can't recommend it more. I am just surprised that this product has not been more advertised and represented compared to other products.
this thing is a beast. while i haven't used it as much as i thought i would, i'm really happy with the quality of the rack. would def recommend to others looking for a 4 bike rack.
# 8
Swagman XC2 Bike Rack for 2 bikes - 1-1/4" and 2" Hitches - Frame Mount
The rack fits very snug in the receiver and the bikes fit snug in the rack so there is very minimal movement once the bikes are in the rack for travel. 2 of the screws were missing in the original package. I contacted etrailer about that on a weekend and heard back within an hour. The screws were in the mail by Tuesday. Excellent customer service!
I bought this rack to carry one mountain bike and one hybrid path bike on my Sienna van or my 4Runner. I wanted something easier than my hanging bike rack. I received the rack in good condition with slight damage to the inner box but the shipping box was in perfect condition. Very quick delivery. The rack is mostly put together when you receive it. I just installed the bicycle wheel rings and the receiver bar. Each of the hex bolts on the receiver bar have lock washers for very secure attachment, though you need to have a hex wrench to tighten. The wheel rings move smoothly on the support bars and tighten with knobs that have secure nylon locknuts inside to prevent loosening. By the way, the two Phillips head screws go into the ends of the support bars as stoppers ( wasn't explained in the brief instructions). The fit and finish of the rack was better than expected and easy to use. I did have to spend some time, with a helper, to figure out how to position the bikes for the best placement on the rack. It was a bit of a puzzle, but I figured it out. Make sure you put the tallest bike next to the hatch with the derailure inside. This protects the back windshield from the handle bar and moves the pedal further from the door. Now, removing the bikes and replacing them back on the rack should be very quick and easy. To easily remove the holddown clamps, simply push down the top while pressing on the latch. The rubber on the holddown clamps tend to rub off on the bicycle; so, I treated it with 303 protectant and have a layer between it and the bicycle. Also, on the holddown clamps there are holes to allow you to lock each of the latches, however I typically use a cable and lock.
# 9
Hollywood Racks Destination Bike Rack for 4 Bikes - 2" Hitches - Frame Mount
Works well with the e98853 hitch I bought it with for my 2012 Sienna. We’ve used it with 4 bikes (including an electric) and solid and secure so far. It’s a bit annoying having to move the cotter pin to get access to the van hatch door if the unit happens to be left in the up position, but not so bad. I’d buy this again.
# 10
Swagman Trailhead Bike Rack for 4 Bikes - 1-1/4" and 2" Hitches - Tilting
This was super easy to install, and very sturdy. I ordered the locking hitch pin to go along with it. One good thing about this hitch is it holds the bikes high enough for plenty of ground clearance when carrying bikes on my low riding Toyota Sienna van. This is the second Swagman hitch we have purchased this year....the first is one of their platform models. Good products. Good service from etrailer!
Excellent bike rack. Holds up to 4 bikes securely. Easy to mount the bikes, very solid construction. My wife had a little trouble with the tie down straps, but managed it. No such problem for a guy. I would recommend, in fact I believe my son is buying the same rack.
# 11
Yakima RidgeBack Bike Rack for 4 Bikes - 1-1/4" and 2" Hitches - Tilting
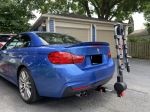
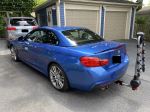
Check out my other review on the hidden hitch for a 2015 BMW 4 Series for the majority of the review, but this thing is great. Easy setup and install, does all the things it's supposed to do. Mounting and removing bikes is a snap with the included clips (big difference from some of the cheaper variants with nylon ratchet straps). Fits very snugly in my 2" receiver, and pretty solid on the highway and over bumpy roads.
First trip with 3 bikes. Nary a wobble. The anti-sway strips appear to make a big difference.
# 12
SportRack Ridge Bike Rack for 4 Bikes - 2" Hitches - Swing Away
Unit doesn't fit a Jeep Rubicon with a spare tire. I tried 4 times and contacted etrailer.com that the unit doesn't work as sold and they offered to sell me a 7 3/4 extension and reduce the load capacity 50%. The length of the 2" hitch needs to be 3" longer for a standard Rubicon to get past the spare. You not going to want to take your spare tire off for the hitch to work. It defeats the purpose. Customer service was excellent, however the product is a flawed design. Can't recommend this hitch. Its also heavy.
Solid rack for half the price of the name brands. Don’t waste your money! Thanks to the extensive reviews on etrailer and a free shipping promotion I took a chance and ordered this along with the three of their crossbars, anti rattle hitch pin and cable lock. All for well less than the name brand rack alone. Shipping was painful. Etrailer said it was in stock but then due to a delay with the manufacturer it took 35 days from order to arrival. I wasn’t in a hurry so I waited patiently, and etrailer reps emailed often to lmk they hadn’t forgotten. I thought some kind of reward for my extreme patience was in order- discount, gift card, free bag of chips- but they politely declined. Oh well. In the end it arrived when they (eventually) said it would, all in one box, in great shape. The rack was super easy to assemble. You’ll need a ratchet or two and you’ll need to crank those bolts to assemble- they don’t just “insert.” But otherwise it’s only a few steps; I had mine hanging on my truck in probably 15 minutes. Swings away and locks smoothly and requires no effort to do so. Everything feels quite sturdy and well made. No rattle on initial test drive either. This will be a once in a while rack at best for our family of four. We have two SUVs so I needed a rack that could get out of the way of the rear hatch WITH bikes on it. This will do that. And now I don’t need to stuff four dirty bikes into the back of my truck, getting them all tangled and scratched!
# 13
Yakima FrontLoader Wheel Mount Bike Carrier - Roof Mount
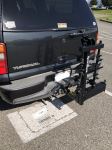
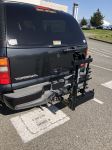
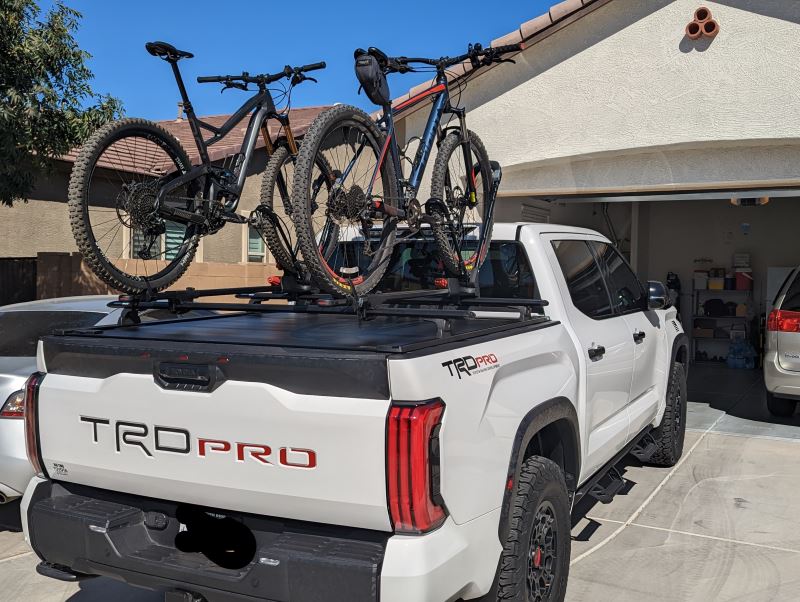
Overall I am happy with these bike carriers. They mount to the racks over the bed of my Tundra TRD Pro. Installation is simple. I think they could be just a bit sturdier because there is just a bit of wobbling when driving on bumpy roads but I'm not too worried about them coming dislodged. Take note that although they come with a cable lock to attach the bike to the carrier, the key is sold separately.
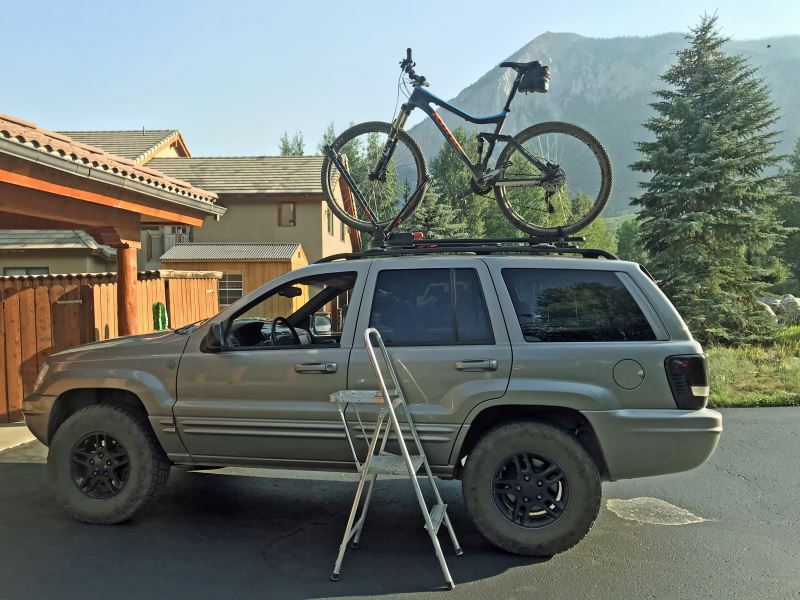
Very good product. It holds the bike securely on the roof without contacting the frame. It is easy to adjust from my road bike to my 29er mountain bike. Our drives are all relatively short, so I like that I do not need to remove the front wheel to lock in the bike. It's also nice that the SKS locking system allows me to use the same key for this rack that I use for my Yakima roof box and hitch rack. This is my first roof rack and I chose this route for a couple reasons. Some of the roads we travel to get to our trail heads are a bit rough and with a roof rack I don't have to worry about bottoming out a hitch rack hanging off the back of the vehicle. Also, it takes up less room in the garage. Our vehicle is a 2000 Jeep Grand Cherokee with an additional 4 inches of ground clearance. That makes it a bit of a reach for my 5'4" wife, so we take our two-step along to help her. This is my third time purchasing from etrailer, and each experience has been very good. They are a very customer service oriented company. I really appreciate all the additional information they provide on their products, especially all the videos they produce to aid in reviews, assembly, and use.
# 14
Swagman XP Bike Rack for 5 Bikes - 2" Hitches - Tilting
Bike carrier works great. It is built well and does what I expected.
Purchased this after reading some of the other reviews and Q&A on etrailer - i hadn't thought about the fact that how the crossbars on the bike are configured makes a difference - 3 of our 5 bikes wouldn't have fit on a two bar bike rack because the openings are two small (I ended up measuring them before selecting a rack). I still ended up having to use the adapter for one of them which works great. Installation was easy (I had uhaul put a receiver hitch on my 2012 odyssey the week before) - you do have to pull a pin on the bottom of the rack when you tilt it, which some might consider an inconvenience compared to some of the other brands that just have release levers, but i view it as less stuff to break compared to those racks. If you're going to have it on a lot and park in a garage, consider the fact that it doesn't collapse because it does add significant length to the vehicle. 5 bikes are definitely doable if you set it up correctly. I think its the most versatile rack you can get based on the way it holds the bikes and would definitely recommend.
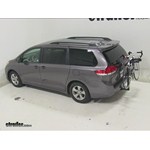
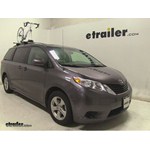
Kuat NV Hitch Bike Rack Review - 2014 Toyota Sienna

Today on our 2014 Toyota Sienna, we'll be test fitting the Kuat NV aluminum platform 2 bike rack for 2 inch hitch, part number N101. We'll start by inserting the shank of the rack into the hitch, lining up the pinholes, sliding in the pin, and securing it with a clip. At the back of the shank, there is a black knob. We turn this knob to engage the anti-rattle device. With the rack installed in this position, we have about 8 inches of ground clearance. The nearest point of the rack to the van is pretty close at about 1 inch away, and we've added about 16 inches of overall length to our Toyota. Okay, now we can lower the rack to its lowered position.
Yakima StickUp 2 Hitch Bike Rack Review - 2014 Toyota Sienna

Today on our 2014 Toyota Sienna, we'll be test fitting the Yakima Stickup two bike hitch mounted folding rack with wheel mount cradles for one and a quarter and two inch hitches part number Y02420. We'll start by inserting the shank of the rack into the hitch, lining up the pin holes, threading in the anti rattle bolt, tightening it down with the wrench, and securing it with the lock on the other side. With the rack installed, we have roughly eight and a half inches of ground clearance. The nearest point is pretty close at about inch away from the van and there is about thirteen inches overall added length to our Toyota. At the center of the mast we can go ahead and pull down the knob. This will lay the rack down and gives full access to the back of our van. With the rack in its folded down position, we have about nineteen inches of ground clearance at the rear, distance from the rack to the van is roughly two inches at its closest point and we've added about thirty inches additional length to our Sienna. Now we can go ahead and get ready to load our bike. The first step is to go ahead and pull the knob and stand the mast straight up.
Hollywood Racks Traveler Tow n Go Bike Rack Review - 2014 Toyota Sienna

Today on our 2014 Toyota Sienna, well be test fitting the Hollywood Racks Traveler Tow 'n Go 3 Bike Carrier, part number HR135. We will be installing this rack using an extended ball mount. With that in place, well slide the ball mount into the receiver, line up the pin holes, feed through the pin, and secure it with a clip. At the top of the rack mast, we can go ahead and remove the black pin, allowing us to put our arms into position. Reinsert the pin and theyre locked in. Now we can get ready to load our bike. First, well undo the cradle straps, place the bike into the frame cradles, and re-secure the straps.
Yakima FrontLoader Roof Bike Rack Review - 2014 Toyota Sienna
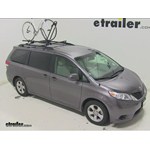
Today on our 2014 Toyota Sienna were going to be test fitting the Yakima FrontLoader. This is a wheel mount roof bike rack, part number Y02103. With our Yakima RailGrab Roof Rack System already installed on the Sienna, well begin our test fit by placing our bike rack directly onto our crossbar. Here at the front, well want the two outer legs of our clamp to be in front of our crossbar, while the single middle one will be behind it. Well then tighten the black T-handle located at the front of the rack, and that will secure our front clamp. With the front secure we can move to the rear. Here were going to loosen the black T-handle, remove the T-bolt from the lower portion of the clamp, bring that portion around the underside of our crossbar, reinsert our T-bolt, and tighten that black T-handle back down. Its now time to load up our bike. Well begin by undoing our rear wheel strap and making sure that the larger portion of our front wheel clamp is fully extended.
Yakima ForkLift Roof Mounted Bike Rack Review - 2014 Toyota Sienna

Today on our 2014 Toyota Sienna we are going to be test-fitting the Yakima Forklift, a fork-mount roof bike rack, part number Y02098. With our Yakima Rail Grab roof rack system already installed on the Sienna, we will begin our test-fit by placing our bike rack directly onto our crossbars. Here at the front, we are going to remove the skewer, which is reverse-thread. Slide back the black, plastic cover and loosen the black T handle. This will allow us to remove the T bolt from the lower portion of our clamp. We will then bring that portion around the underside of our load bar. Re-insert our T bolt and tighten down that black T handle to secure it.
Thule Helium Aero Hitch Bike Rack Review - 2014 Toyota Sienna

Today on our 2014 Toyota Sienna we will be test fitting the Thule Helium Aero 2-Bike Rack for 1-1/4" and 2" hitches, part number TH9042. We will start by inserting the shank of the rack into the hitch. We'll line up the pin holes and the included and attached pin will self-align. Next we'll go ahead and tighten down the black knob on the left side of the rack. This will secure it into the hitch. With the rack installed on the van we have about 8" of ground clearance. The nearest point of the rack to the van is about 1-1/2" and we've added about 14" of overall length to the van.
Thule Vertex 4 Hitch Bike Rack Review - 2014 Toyota Sienna
Today on our 2014 Toyota Sienna we will be test fitting the Thule Vertex 4-bike rack for one and a quarter and two inch hitches. Part number TH9029. We can start by inserting the shank of the rack into the hitch, lining up the pin holes, threading in the anti-rattle bolt, and tightening it down with a wrench. With the rack installed we have about nine inches of ground clearance. The nearest point from the rack to the van is roughly two inches and overall length is about an additional 11 inches. Now at the bottom of the mast, we can pull up on the gray lever. That will lean the mast backwards and allow us to gain full access to the back of the Toyota. With the mast back in its upright position, we can go ahead and extend the arms.
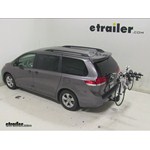
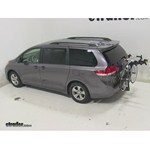
Thule Hitching Post Pro Hitch Bike Rack Review - 2014 Toyota Sienna
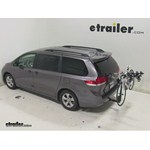
Today on our 2014 Toyota Sienna, we will be test fitting the Thule Hitching Post Pro Four Bike Rack for 1-1/4 and 2 inch hitches, part number TH934XTR. We can start by taking the shank of the rack, installing it into the hitch, lining up the pin holes, threading in the anti-rattle bolt, and tightening it down with a wrench. Now with the rack installed, we have about 9 inches of ground clearance, 5 inches from the rack to the van at its closest point, and about 14 inches of overall length has been added to the Toyota. If we pull the pin at the bottom of the mast, we can lean the rack backwards. This will allow us to gain full access to the back of our van.With the rack back in its upright position, we can go ahead and extend the arms of the rack. All we have to do is pull the pin, swing the arms upward, and reinstall the pin locking the arms into place.
Saris Porter 4 Bike Rack Review - 2014 Toyota Sienna

Today on our 2014 Toyota Sienna, we will be test fitting the Saris Bike Porter Four Bike Rack for 1-1/4 and 2 inch hitches, part number SA404B. We will start by inserting the shank of the rack into the trailer hitch. Well line up the pin holes. Starting from the driver side to the passenger side, we will thread in the anti-rattle bolt, tightening it down with a wrench, and finishing it off with a clip on the other side. With the rack installed, we have about 10 inches of ground clearance. The nearest part of the rack to the van is roughly 4 inches.
Rhino-Rack 4 Hitch Bike Rack Review - 2014 Toyota Sienna

Today on our 2014 Toyota Sienna we are going to test fit a Rhino Rack 4-Bike Rack for 2" hitches, part number RBC038. We'll go ahead and start by installing the shank of the rack into the hitch. We'll line up the pin holes, thread in the anti-rattle bolt, and tighten it down with a wrench. We can finish this off by installing the included lock. With the rack installed in this position, we have about 9" of ground clearance. The closest point from the rack to the van is about 3-1/2" and we've added roughly 13" in overall length to our van. At the bottom of the mast of the rack we can pull the black pin allowing it to tilt backwards.
Thule Doubletrack Hitch Bike Rack Review - 2014 Toyota Sienna

Today on our 2014 Toyota Sienna, we'll be test fitting the Thule Doubletrack Platform 2 Bike Rack for 1-1/4" and 2" Hitches, Part Number TH990XT. We will start by installing the shank of the rack into the hitch. We'll then line up the pin holes, thread in the anti-rattle bolt, and tighten it down with a wrench. With the rack installed, we have about 8-1/2" of ground clearance. About 13" has been added on to the overall length, and the nearest point from the rack to the van is only about 1". We can now pull the gray handle on the rack, lowering it down. With the rack in this position, we are able to gain full access to the back of our Toyota, and with the rack pulled down in this position, we've added about 28" of length to our van. Now we can pull the gray lever on the mast and put it into its upright position. Now with the mast in its upright position, go ahead and press the gray buttons, raising the frame hooks all the way up. After doing that, we can go ahead and loosen up the wheel straps. Now we can place the bike in the wheel cradles, secure the frame hook down over top of the frame, and re-secure the straps.
Swagman Titan Hitch Bike Rack Review - 2014 Toyota Sienna

Today on our 2014 Toyota Sienna, were going to test fit the Swagman Titan Four Bike Rack for 1-1/4 and 2 inch hitches, part number S63410. Well start by inserting the shank of the bike rack into the hitch. Well line up the pin holes, thread in the anti-rattle bolt and tighten it down with a wrench. Well finish that off by putting the clip on the other side. Now with the rack installed in this position, we have about 10 inches of ground clearance. The nearest part of the rack to the bumper is about 6-1/2 inches.
SportRack 3 Bike Rack Review - 2014 Toyota Sienna

Today on our 2014 Toyota Sienna, we will be test fitting the SportRack 3 Bike Rack for 1-1/4" and 2" Hitches, part number SR2403. We will start by taking the shank of the bike rack, setting it into the hitch, lining up the pin holes, threading in the anti-rattle bolt, tightening it down with a wrench, and finishing it off with the clip. Once on the van, we have about 9-1/2" of ground clearance. The closest point of the rack to the van is about 1-1/2" away, and the overall length with the arms folded is roughly 9". At the bottom of the mast of the rack, we can pull the black pin. That allows us to drop the rack backwards, and this will give us full access to the back of our van. Once the rack is back in the upright position, we can go ahead and remove the black pin at the top of the mast. This will allow us to swing the arms outward.
Softride Element Hitch Mounted Bike Rack Review - 2014 Toyota Sienna
Today on our 2014 Toyota Sienna Mini Van, we will be test fitting the SoftRide Element Parallelogram Tilting Four Bike Rack for 1-1/4 and 2 inch hitches, part number SR26248. Well start off by inserting the shank of the bike rack into the trailer hitch. We will then line up the pin hole. Well then insert the anti-rattle bolt and tightening it down with a wrench. With the rack installed, we have about 9 inches of ground clearance. The nearest point of the rack to the car is about 2 inches.
Softride Dura Hitch Bike Rack Review - 2014 Toyota Sienna

Today on our 2014 Toyota Sienna, we will be test fitting the SoftRide Dura Parallelogram Four Bike Rack for 1-1/4 and 2 inch hitches, part number SR26247 We will start by taking the shank of the bike rack, inserting then into the hitch, thread in then the anti-rattle bolt, tightening it down with a wrench, and securing in it with the lock. One nice feature of this rack is the ability to remove the arms when theyre not in use. With the rack installed, we have about 9 inches of ground clearance, 4-1/2 inches from the nearest part of the van to the rack, and weve added about 14 inches of overall length. With the arms installed on the rack, we have about 39 inches of overall length on our Toyota. Now were ready to load up our bike. The first thing we need to do is loosen up the cradle straps, place the bike into the cradle, and secure the straps.
Saris Freedom Hitch Bike Racks Review - 2014 Toyota Sienna

Today on our 2014 Toyota Sienna minivan we will be test fitting the Saris Freedom 4-bike rack for 2" hitches. It's part number SA4414B. We will start by inserting the shank of the bike rack into the receiver, lining up the pinholes, and threading the anti-rattle bolt from driver to passenger side, tightening it down with a wrench, and finishing it off with the safety clip on the other side. With the rack in this position we have about 8-1/2" of ground clearance. Our nearest point to the van is about 2-1/2". The overall length is about 18". Now we'll fold down our bike rack by pushing the gray lever at the top.
Saris Axis 3 Bike Rack Review - 2014 Toyota Sienna

Today on our 2014 Toyota Sienna van, we will be test fitting the Saris Axis 3-bike rack for 1-1/4- and 2-inch hitches, part number SA843B. First, we'll start by inserting the shank of the bike rack into the trailer hitch. We'll line up the pin holes and thread in the bolt from driver's side to passenger's side, tightening it down with a wrench. We'll finish that off by securing the bolt lock on the other side. With the rack installed, overall ground clearance is about 10 inches, and its nearest point to the vehicle is about 3-1/2. With the arms folded, it adds about an additional 12 inches in length to our van. To raise the arms on our rack, release the tabs on top, loosen them up a bit, and slide the arms towards the center mast. Rotate them to the desired position, sliding the arms back outward, tighten down and lock the tabs back in place. Now, we're going to loosen up the cradle straps on the rack, grab our bike, and secure it into the cradle by tightening down the straps. As you may notice, our bike is sitting pretty close to the back of the van, about 3 inches away.
Saris Axis Tilting 2 Bike Rack Review - 2014 Toyota Sienna
Today on our 2014 Toyota Sienna, we will be test fitting the Saris Axis 2-Bike Rack for 1-1/4- and 2-inch hitches, part number SA832. We will start our test fit by sliding the shank of the bike rack into the hitch. Now, we will line up the pin holes. We will take the anti-rattle bolt and feed it through driver to passenger side tightening it down with a wrench. Then we will secure it with the pin. When installed, the bike rack will have about 10 inches of ground clearance and about 5 inches from the nearest point to the car and an overall folded length of about an additional 12 inches.
Hollywood Racks Traveler 5 Hitch Bike Rack Review - 2014 Toyota Sienna

Today on our 2014 Toyota Sienna, we will be test fitting the Hollywood Racks Traveler 5-bike rack for 2-inch hitches, part number HR9200. We will start by inserting the shank of the rack into the trailer hitch. We will then thread in the anti-rattle bolt, tightening it down with a wrench, and then securing it with a clip on the other side. With the rack installed, we have about 9 inches of ground clearance, 9 inches from the closest part of the rack to the van, and we've added about an additional 13-1/2 inches of length to our Toyota. We can go ahead and extend the arms. To do so, we just turn the knobs at the end of the arms, spinning them all the way out, allowing us to pull the arms out and then upwards, and then back in, and then tightening back down the knobs. With the arms extended, we've added about 41 inches of overall length to our van. Now, we can get ready to install our bike. The first thing we need to do is undo the cradle straps.
Thule Big Mouth Roof Bike Rack Review - 2014 Toyota Sienna

Today on our 2014 Toyota Sienna were going to be test fitting the Thule Big Mouth. This is a frame clamp style roof bike rack, part number TH599XTR. Weve got our Thule Crossroads roof rack system already installed on our Sienna, so we begin our test fit by placing our bike rack up onto our load bars. These are the clamps. This metal bracket portions going to come around the underside of our load bar, so well need to separate the T bolts from those clamps to allow it to do that. With our T bolts separated well now move our rack backwards, allowing those clamps to come around the underside of our bars.
Prorack 4 Hitch Bike Rack Review - 2014 Toyota Sienna

Today on our 2014 Toyota Sienna mini-van we'll be test fitting the Pro Rack 4 bike rack for 1 1/4 and 2 inch hitches, part number PR8062404. We will start by inserting the shank of the bike rack into the hitch. Insert the anti-rattle bolt and tighten it down with a wrench, securing it with a clip on the other side. With the rack installed we have about 9 inches of ground clearance, about 4 1/2 inches to the nearest point of the car from the rack and an overall added length of about 34 inches. We can remove the silver pin at the bottom of the rack mast, leaning it backwards allowing us to gain full access to the back of our van. Now we can undo the cradle straps, sit the bike into the cradle and redo the straps and we're ready to go. That concludes today's test of the Pro Rack 4 bike rack for 1 1/4 and 2 inch hitches, part number Pr8062404, on a 2014 Toyota Sienna. .
Pro Series Q-Slot Hitch Bike Rack Review - 2014 Toyota Sienna

Today on our 2014 Toyota Sienna well be test fitting the Pro Series Q Slot platform style two bike rack for one and a quarter and two inch hitches, part number PS63134.We will start by inserting the shank of the rack into the trailer hitch. We will then line up the pin holes, slide in the pin and secure it with a clip on the other side. With the rack installed we have about 10 inches of ground clearance. The nearest point of the rack to the van is about five and a half inches, and it has added about 21 inches to the overall length of our vehicle. At the bottom of the mast we can remove the two pins that are securing the wheel cradles. We can then lower the wheel cradles into place.
Hollywood Racks Traveler Hitch Bike Rack Review - 2014 Toyota Sienna

Today on our 2014 Toyota Sienna we'll be test fitting the Hollywood Racks Traveler 4 bike rack for 1 1/4- and 2-inch hitches, part number HR8500. We will start by inserting the shank of the rack into the trailer hitch. We'll line up the pin holes, thread in the anti-rattle bolt, tightening it down with a wrench, and secure it with a pin on the other side. Now with the rack installed in this position, we've about 9 inches of ground clearance. The closest part of the rack to the van sits pretty close at about 1 1/2 inches and we've extended the overall length of the van by about 9 inches. Next we can pull the black pin at the bottom of the mast. This will allow the rack to lean backwards and we can gain full access to the back of our Toyota. Now with the rack back in the upright position we can go ahead and swing out the arms.
Thule Sprint Fork Mount Bike Rack Review - 2014 Toyota Sienna

Speaker: Today, on our 2014 Toyota Sienna, were going to be test-fitting the Thule Sprint. This is a fork mount roof bike rack, part number TH528. Well begin our test fit by placing our bike rack up under a load bar. Here at the front, we want to bring the black rubber coated metal strap around the underside. Well then fit it right here into the head of the carrier. On the back side, well turn this black lever.
Swagman Fork Down Roof Bike Rack Review - 2014 Toyota Sienna
Today on our 2014 Toyota Sienna, we're going to be test fitting the Swagman Fork Down. This is a fork mount roof bike rack, part number S64710. We've got the Thule Rapid Crossroads roof rack system that we've already installed on this Sienna, so we'll begin our test fit by placing our bike rack directly up on to our load bars. At the front, we're going to bring a U-bolt around the underside of our load bar and thread two wing nuts on to it. We've got a second U-bolt that we're going to fit on the front here. This one as well, we'll get two wing nuts threaded on to it. We'll then tighten down all four of the wing nuts to secure the front clamp of our rack here. All right. With that nice and secure, we can move to the rear.


What our customers are saying:
"I ordered a bike rack for my trailer hitch. It is a great product, very reasonably priced on April 10th. I installed it on my car on the 14th in time for the weekend. How can you go wrong?"