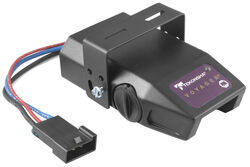
Power Adjustment Instructions for Tekonsha Voyager Brake Controller
Published 03/01/2017
Question:
How do you adjust the controller.My Tekonsha Voyager has knobs on both sides.What do each of these knobs do?
asked by: Frank C
Expert Reply:
The power adjusting instructions for the Tekonsha Voyager part # 39510 are as follows:
1. Connect trailer to tow vehicle.
2. Set Power Knob to the 12 o’clock position.
3. Drive tow vehicle and trailer on a dry level paved surface at 25 mph and apply manual slide knob.
If trailer brakes lock up:
Turn power down using power knob. (Rotate power knob toward the 8 o’clock position, counter-clockwise.)
If braking was not sufficient:
Turn power up using power knob. (Rotate power knob toward the 5 o’clock position, clockwise.)
4. Repeat Step (3) until power has been set to a point just below wheel lock up or at a sufficient force as to achieve maximum braking power.
5. Using the brake pedal, make a few low speed stops to check the Power and Level adjustments.
The automatic response (brake pedal) is initiated and terminated via the stoplight switch. When the brake pedal is released, trailer braking will cease.
When you adjust the power AFTER the controller has been leveled you will not hold your foot on the brake pedal. The leveling instructions are:
1. Connect trailer to tow vehicle, Bi-Colored Light should glow GREEN.
2. Set power knob to maximum by fully rotating clockwise.
3. Depress tow vehicle’s brake pedal and hold.
4. Rotate the Level Knob counter-clockwise (towards the back of the control) until the Bi-Colored Light starts to change colors from GREEN to RED.
5. Carefully rotate the Level Knob clockwise (towards the front of the control) until a
shade of ORANGE is visible. Bi-Colored Light should show:
DIM ORANGE for a typical setting.
BRIGHT ORANGE for an aggressive setting.
DIM RED for a more aggressive setting.
6. Release brake pedal.

Product Page this Question was Asked From
Tekonsha Voyager Trailer Brake Controller - 1 to 4 Axles - Proportional
- Trailer Brake Controller
- Proportional Controller
- Electric
- Splice-In
- Under-Dash Box
- Under-Dash
- Up to 4 Axles
- Indicator Lights
- Single Trailer Only
- Tekonsha
more information >
Featured Help Information
Instructions

Continue Researching
- Search Results: ramp transition
- Shop: Trailer Hitch
- Shop: Brake Controller
- Search Results: brake controller
- Search Results: trailer brake controller
- Shop: etrailer Rust-Resistant 4-Leaf Slipper Spring for 4,300-lb Trailer Axles - 26-1/4" - Dacromet
- Shop: Nylon Bushing - 9/16" Inner Diameter, 1.024" Outer Diameter - 1-3/4" Long
- Shop: Trailer Wiring
- Shop: etrailer Enclosed Trailer Transition Plate - Universal - 1,000 lbs - Qty 1
- Video: Ultimate Overview of the etrailer Enclosed Trailer Transition Plate
- Article: How to Measure for Trailer Hitch Drop
- Search Results: trimax
- Shop: Curt Trailer Hitch Receiver - Custom Fit - Class V - 2"
- Shop: Conventional Ramp Door Spring for 8' Wide Enclosed Trailer - Dual Spring - 250-lb Capacity
- Search Results: wheel lock
- Shop: Draw-Tite Sportframe Trailer Hitch Receiver - Custom Fit - Class I - 1-1/4"
- Shop: Draw-Tite Max-Frame Trailer Hitch Receiver - Custom Fit - Class III - 2"
- Q&A: Class V Trailer Hitch Recommendation for 2005 GMC Sierra 2500HD Short Bed
- Article: How to Install E-Track in 3 Easy Steps
- Search Results: 7 way
- Shop: Truck Bed Mat
- Shop: Off Road Lights
- Shop: Transmission Cooler
- Search Results: coupler lock
- Video: Install: Draw-Tite Sportframe Trailer Hitch Receiver on a 2015 Chevrolet Sonic
- Video: Detailed Breakdown of the Thinline LED Clearance and Side Marker Light
- Q&A: Voltage at Brake Magnets is 8 Volts with Brake Controller Set to Maximum
- Article: Brake Controller 7- and 4-Way Installation Kit (ETBC7)
- Article: Brake Controller Installation: Starting from Scratch
- Q&A: Replacement Hydraulic Drum Brakes for Dico 15638


