
# 1
Draw-Tite Trailer Hitch Receiver - Custom Fit - Class II - 1-1/4"
PERFECT FIT AND FAST...... i ordered a draw-tite class ll trailer hitch, t-one wiring harness and drawbar for my 2000 toyota camry..i had planned to have someone install it, but after seeing the instructions i did it myself in 30 minutes. great products.
 2012 Toyota Camry
Got a very good price on a trailer hitch for my '95 Camry. It was fairly simple to install (after watching etrailer.coms video). I use it to haul around my little utility trailer (Harbor Freight) and my 12 ft kayak (BassPro).
# 2
Draw-Tite Trailer Hitch Receiver - Custom Fit - Class II - 1-1/4"
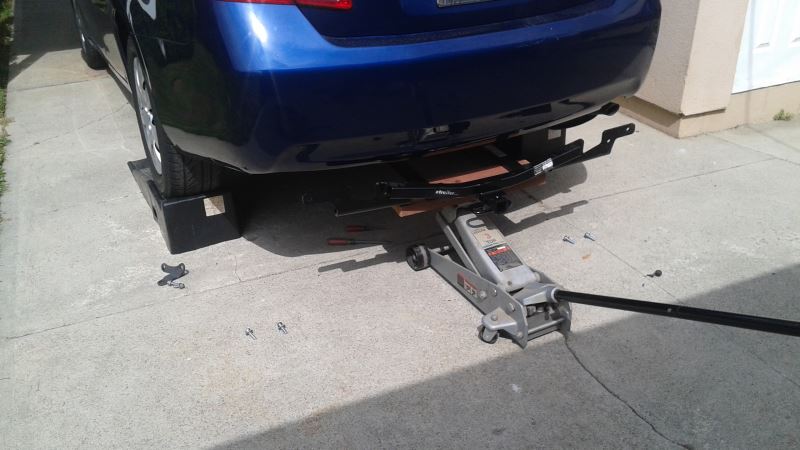
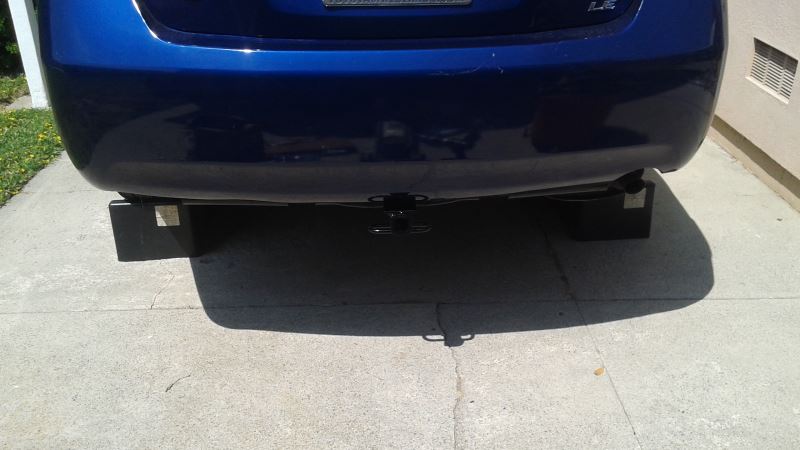
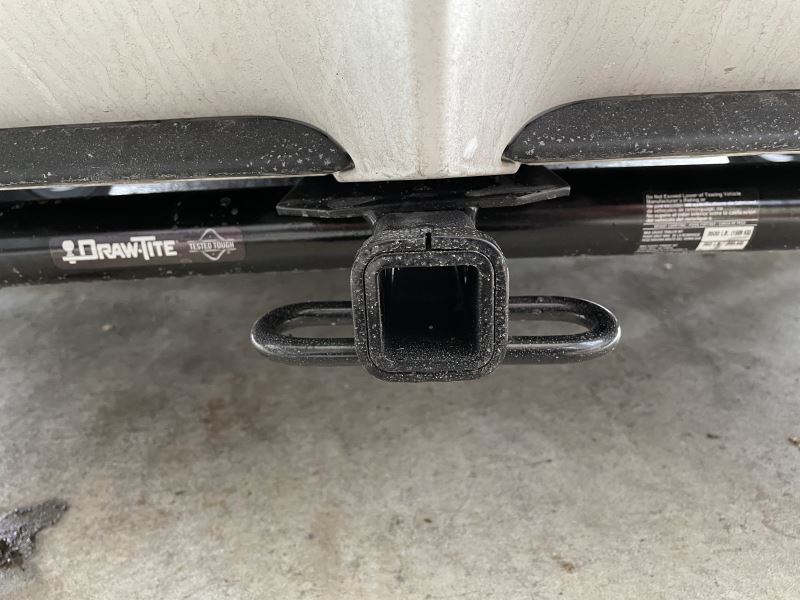
The hitch was exactly as ordered and fit perfectly. It is sturdy and a great value. It arrived quickly to CA. I really liked the videos and reviews on the site which gave me ideas and a sense of knowing I was installing everything correctly. I, like most of us, do not have access to a lift, but I used the ramps I have for oil changes on our cars. I just backed up on them and and chocked the front wheels. I also do not have lifting help and I am 71 so I set the hitch on a floor jack and my wife raised it up as I guided it in behind the bumper cover. I read a review that said he was able to install without dropping the muffler, and I did the same. Thanks for that tip, it was easy. Our Camry had weld nuts on both sides, maybe because it is one of the early 2011 models, which made it very easy. Let me say that I can see the muffler drop if you are using power tools. But if you are using good old had tools it really is not necessary. Another comment about the reviews. One review expressed concern over ware on the spare from the added bolts and the fact of permanently removing a factory bracket. This must have been a brother of mine as I had the same thoughts when I viewed the installation video before ordering. If you have a "donut" spare, like most, with it in the well look through the center hub with a flash light, the added bolts and plates are inside the rim area and never contact the actual tire. The second concern of the bracket removal, after looking at what it was bolted to, and where the added hitch, which is much stronger, is secured, I have no concerns the the bracket is now needed. After clearing the trunk, getting the tools together, and backing on the ramps. From start to final torque down of the bolts it was right at an hour. Note: My wife was very pleased with the hidden appearance of this hitch on "her" car. Always a success when the wife is happy. I recommend this model hitch and ETrailer and will refer friends.
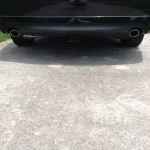
2011 Toyota CamryExcellent product. Came with good instructions for install, does require a jack, wheel chocks, possibly jack stands, wrenches and ratchet and sockets, and a drill for bracketing thru trunk basin. Does take some time and patience especially dropping the muffler to get up and under it. The hitch itself is great. I use it for my bicycle rack. Once installed it is hidden other than the receiver. Very satisfied and glad I was able to install myself with the good instructions.
# 3
Draw-Tite Trailer Hitch Receiver - Custom Fit - Class II - 1-1/4"
Finally got the chance to install this hitch. The written instructions are marginal. They did not cover my hybrid version. The installation videos on etrailer were more helpful. The hitch was a bit off and contacts the tire well on one side. Installation by loosening the exhaust did not work for me. Mine was too tight and I could not move it out of the way to drill. I had to remove the muffler. The instructions for trimming are a bit aggressive. I was able to get the under cover installed with about 25% of the suggested cutting. One thing the instructions left out is a rear edge trim (however, the video did mention this). I also added a strip from (the heat shield scrap) to tie the cover back together and prevent flutter noise while driving. Installed, this hitch appears sturdy. I am sure it will last. Too bad it did not come with a pin or cover.
This is a quality product. It’s designed to fit the car perfectly. Please not though that you’ll need special tools to disconnect/drop the muffler system to install the hitch. I did not have tools to disconnect the muffler/exhaust hangers, so I wound up taking it to a mechanic that installed it for about $100.
# 4
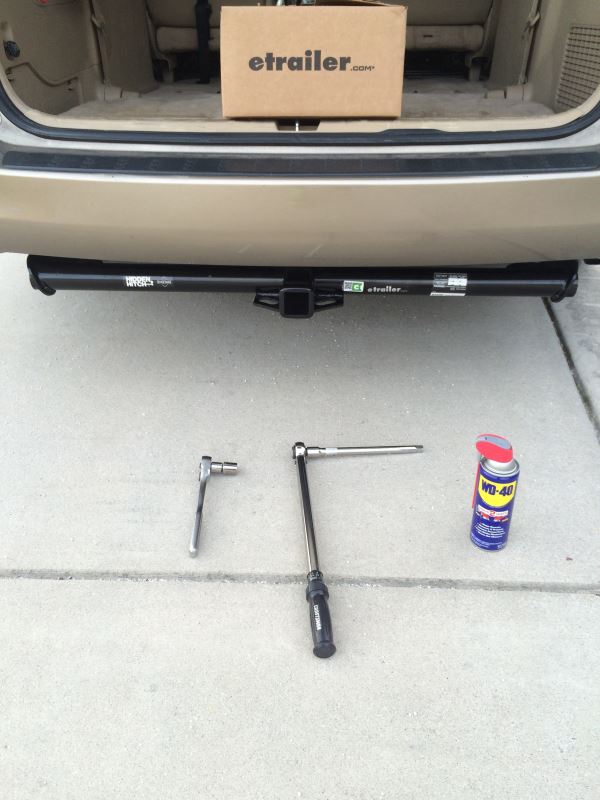
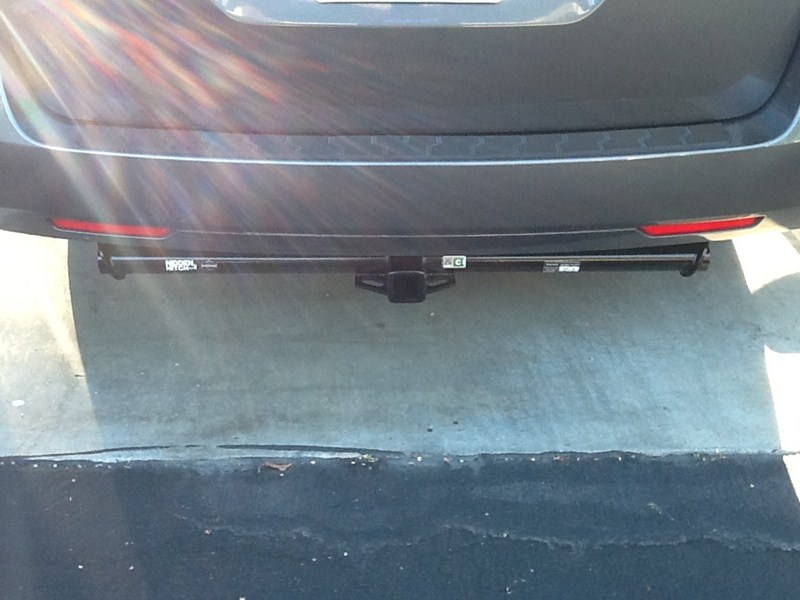
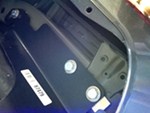
Draw-Tite Sportframe Trailer Hitch Receiver - Custom Fit - Class I - 1-1/4"
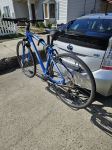
My son-in-law and I installed this hitch on a 2012 Toyota Prius V. The video for the install on a Prius is accurate for a Prius V with the exception that a Prius V does not have cosmetic cowling on the underbody that has to be removed. The install was straightforward and we had the hitch on in about 45 minutes. Other than the receiver on the hitch, you can't see the hitch without bending down and looking under the bumper. I personally like the aesthetics. We're using the hitch with the Swagman XTC-2 bike carrier and the combination is ideal for transporting our two bicycles. The fit between the hitch and bike carrier is tight and the Swagman allows us to drop the middle bar down for access to open the rear hatch of the vehicle when the bikes are not in the carrier but leaving the bike carrier attached. We bought the Prius V so we could carry passengers, gear and two bicycles on trips. The draw-tite hitch and Swagman XTC-2 give us the flexibility to do that. Here's some pictures to demonstrate as I've had a difficult time finding photos on the web showing a Prius V with hitch and bicycle carrier installed. I have a cover on the hitch receiver in some photos, sorry I took the photos at night with a flash, but hey, I did the review! Good luck. Oh, by the way, like others have written, E Trailer was on top of things from the get go and I received numerous e-mails about the status of my order and follow-up after my receipt. Only took three business days between the date of my order and delivery to my home. The hitch and bike carrier were boxed and then inserted into another heavy duty shipping box. There were a few small tears in the outer box (assume from rough handling by the delivery carrier) but the contents were not damaged in any way. I would definitely order again from etrailer.com.
Perfect fit and super simple installation (45 mins from opening box to torquing last bolt). Perfect for my bike rack and other attachments. Incredibly secure!Bought from etrailer 3x never dissapointed ?? Excellent instructions + customer service
# 5
Draw-Tite Max-Frame Trailer Hitch Receiver - Custom Fit - Class III - 2"
This receiver hitch is heavy duty and very well made. The welds are all smooth and uniform, and the powder coating was great. The bolts and mounting hardware were shipped safely in a sealed plastic bag tucked inside the receiver tube. Install on my Nissan Truck was easy. I would recommend running the threads on the truck frame before attempting to bolt the receiver hitch in place as the factory bolt holes can get filled with dirt and grime.
Excellent fit and finish. Welds are great. Bolted right up - super easy with no problems - I bet it took only 20 minutes to install it to my 22 Frontier, using only a floor jack to support out and a 19mm socket. Shipping was super fast, 2 days. Both the product and etrailer are highly recommended.
# 6
Draw-Tite Max-Frame Trailer Hitch Receiver - Custom Fit - Class III - 2"
I cannot grade the towing capability yet, but this review is on installation. Less than one hour from start till I was putting tools away on the same day of arrival. One man job with the assistance of a rolling floor jack. Put rear up on ramps, hit holes with wd40, used one bolt to test run all threads, did not unhook tailpipe, simply insert the plate in, over, and let it rest on on exhaust (majority of weight still supported by jack). Start with left side, place 1 bolt loosely and then continue to switch sides with two at a time. Used torque wrench at 68 lbs to finish securing. Done. Looks great too! Up next: electrical and trans cooler. Thank you etrailer for the product and videos. Bought the hitch bc of such great reviews.
This can be a one man job if you have ramps and a short step stool. The thing that made the install take longer than 30 minutes was that the bolts on the passenger side would not line up if the drivers side bolts were on. I had to remove all the bolts on the driver side and set the hitch on a step stool 12 inches high so that the driver side was about 3 inches away from the mounting location. This was the only way i could get all three passenger side bolts to line up. Torqued to 69 pound-feet and i was done. Three stars for those three bolts.
# 7
Draw-Tite Max-Frame Trailer Hitch Receiver - Custom Fit - Class III - 2"
I have been looking for a hitch for awhile now and then I came across your web page. I have seen Draw-Tite hitches on quite a few vehicles. So I went on to do a little research and to read quite a few of the reviews on this hitch here. After reading the reviews and the price of the hitch at that time I decided that I had found the hitch for my 2011 Dodge Grand Caravan Crew. I placed the order and the next day received a message that my order had shipped. The box arrived very quickly after I placed my order which was a pleasant surprise. One side of the box was really tore up and the hitch had come free of the strapping inside the box. The only thing inside the box was the hitch with the tongue/receiver wrapped in plastic wrap and the two pieces of cardboard that had come free. I search the inside of the box for some instructions but did not find any at this point so I would know exactly which bolts to take out. The first thing I did was to jack up the back of my van so I had a little more room to work underneath where the hitch was to go. Then I took off the passenger side rear tire to give me better access to the bolts that had to come out for the hitch and for the exhaust system to be lowered. I then took out the five bolts for the hitch and had to take out the three bolts holding up the exhaust to give me room to install the hitch. Then came the hardest part of the whole process and that was getting the hitch up to a point where I could get a bolt started. I tried using the exhaust system to help me but was still having a problem. So I got a cinder block I had in the garage and put it under one end of the hitch which was a better platform and really helped me getting the other side started. From that point on it went really well getting the other side started and then all five bolts in and tightened down. I then stepped back to see what it looked like and at this time I saw something white deep in the hitch receiver/tongue. When I pulled it out I noticed it was the instruction I had looked for earlier. It would have been nice to have these when I first started. A suggestion would be to put a notice on the plastic wrap that is wrapped around the receiver/tongue of the hitch that states "Instruction Enclosed" or "Packing Slip Enclosed" or just tape them to the inside of the box, not hidden inside a wrapped receiver/tongue of the hitch. I then went back and torqued the five bolts to what it stated on the sheet I found. I then put the three bolts back in the exhaust system to get it back in place which basically completed the installation of my Draw-Tite Max-Frame Trailer Hitch.
Went on like a charm. This is my 3rd rodeo with Etrailer. Two receiver, hitches, and a weight distribution camlock. All of them were exactly as promised.
# 8
Draw-Tite Max-Frame Trailer Hitch Receiver - Custom Fit - Class IV - 2"
Major packaging damage to box carton recorded and photographed immediately upon delivery. Trailer hitch (Class IV - 2” X 2” opening) appears, so far, to be NOT damaged (?). Three (3) pictures of damaged carton are attached. I haven’t attempted to instal hitch, yet. My guess is that UPS is possibly incapable of processing heavy items like a trailer hitch. OR The packaging design is probably not strong enough and/or sturdy enough to protect a heavy trailer hitch. I’m hoping the hitch is not bent so all the bolt holes line up during installation.
Excellent product. Mounting took about 30 minutes or so as promised. The wires that were included to thread the 2 bolts through the square channel is genius. I’d recommend this product to anyone.
# 9
Draw-Tite Sportframe Trailer Hitch Receiver - Custom Fit - Class I - 1-1/4"
I couldn't beat the price on this trailer hitch. Ordering the part on the website was easy. Shipping was within the expected time of arrival. The hitch arrived well packaged at my front door. The hitch itself looks and feels quality made. Installation took me by myself about 2 hours to complete. I do advise that removing the rear bumper makes installation of the hitch A LOT easier. Overall, 5 stars all around.
Mostly easy to install on a hatchback Yaris. The upper bolts are in a tight area so you'll need a short ratchet or one with a higher tooth count since you will only have 10-20 degrees of movement on your ratchet. Everything else is fine. Good positioning and low visibility.
# 10
Draw-Tite Max-Frame Trailer Hitch Receiver - Custom Fit - Class III - 2"
Excellent Hitch for the 2012 Honda Odyssey. The installation is easy if you've got some mechanical skills. Watching the video was a huge help - thanks for those. With a little ingenuity, I was able to do the entire installation alone. Some notes on install. I used a set of ramps, and an ATV jack with some wood to hold the bumper as I removed/installed it. I used the same setup to hold the hitch temporarily as I mounted it using the underside bolts. When it comes to putting the bumper back over the hitch, something the install videos missed - the top bolt holes in the metal bumper have a triangle cut out, meaning you can put the bolt and washer into the top hole a few threads THEN hang the bumper on the bolts ensuring you get the bumpy washers on the inside of the bumper. Then put the front/bottom bolts through the front holes with a socket extension as shown in the video. Cutting the bumper - there is a better way if you know to use a utility knife. I propped the bumper up on sawhorses, then from the inside, I used a 12" framing square and utility knife with a new sharp blade to cut the rectangle and exhaust areas. The trick is to just score lightly first, don’t go crazy, and using the edge of the square, and then progressively cutting deeper - It looks totally pro and is way easier to cut than you may think. Rust – This was actually the hardest part. If your vehicle is older, I highly recommend running the hardware into the rusty holes (likely the exhaust side) all the way to mounting depth before attempting to install anything. Just take your time, and get this right, knowing the bolts will seat before struggling with anything. I ended up using one bolt as a tap, and the other to go to the hardware store to replace the one I modified/damaged. I also removed a very large dent from my bumper with the hot water trick while I had it off. All told, it took 3 hours, alone, and I don’t do this type of thing often. Overall, I'm super happy with the product and glad I took on this little challenge.
The install process itself is easy enough to do on your own but I had problems with cross threading that added additional time and frustration. Cutting the bumper fascia can be done with just a box cutter and elbow grease. It definitely could be done in under 2 hours or even less with help. The only issue I had for not giving 5 stars is the 3 welded pieces in the center of the metal bumper really make it difficult reinstalling the bumper fascia and getting a good fit. I had to disconnect the bumper again and modify the welded pieces in order to get the bumper to fit right without having an obvious imprint on the surface, did what I could but kind of a pain to deal with. I had to use zip ties underneath where the 2 clips are supposed to go as the final alignment wasn't perfect, but it works. Satisfied with it overall.


What our customers are saying:
"hitch arrived on time, and it took me about 10 min to put it on . thanks alex"