Customers compare 84556UC3 to these similar products
Products Featured in this Video
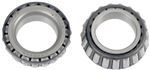
We get many many questions on how to make sure trailer hubs and brakes are safe for travel. Here Joe addresses some of those questions demonstrating how to thoroughly inspect the hubs, breaks and bearings. I know many of us take the performance of these assemblies for granted but if you are planning a long trip or just make short trips around town you should be aware of their condition. I like to say it is time well spent when it avoids break downs on the side of the highway.
Today we are going to show you a typical hub inspection, check out the brakes and check out the bearings and see if it needs to be replaced and what not. This is just routine maintenance. First up take off the grease cap here then we will get to the castle nut on the inside. Then we can take off the hub and start inspecting things. Take the dust cap off, sometimes you can sneak a screwdriver or a punch tool in there and pry it off. If it is real tight like it is here you just have to tap on the side a few times to help break it loose. Depending on the condition you have it when you get it off it might be better to bang it off and just buy a new set. You want to clean up as much of the grease that is on the outside. Some hubs will have a cotter pin that goes through the center you bend it back and pull it through and pull the washer off. Or some spindles have what is called a tang washer, it slides in behind the nut and there is a little tab that comes up and flips up. Then there is a third type like you see here where the nut has a cage going around it and that just simply pries off. The way that little cage works is it fits on the flat part of the spindle so it can not turn. Thus the nut can not come off either. Then you simply unscrew the nut. At this point you can just slide off the whole hub assembly.
Take a look at the brakes here. What you want to do is check the thickness of the brakes shoes. Once they get down to 1/8 of an inch or 1/16 of an inch chances are you want to go ahead and change them out. These here look like they are pretty decent just a little rust, they can be cleaned off and thats about it. On the magnet, it actually rides against the inside of the hub. The magnet rides in this polished part here, it just rides it. That is what it is supposed to do. When it gets energized the magnet sticks to the hub that is how it works. But the magnet is designed to wear down over time just like the brake shoes. The magnet here itself has to wear down, if you look closely you will see some fine lines. Looks like wires or real fine hair. When you start seeing that is when it is time to replace the magnet. But in this case we do not have that it looks like everything is wearing down like it is suppose to. So on this hub we just need to clean it up and repack the bearings.
What we will do is go ahead and clean up the brake pads and the magnet with the spray brake part cleaner you can get at your local auto parts store. Just dose it really good and just wipe it clean. Thats all it takes. You can use it on the greasy parts to clean it off. Also one other thing you might want to check out is the shoes, they can float around pretty freely in here. Because they have to expand a little bit like so with the magnet. Then if you can bang it with your hands reasonably easy then you are okay. If it is real hard to do chances are it is rusted together. Then you may just want to take it apart a little bit. Clean it up or dab just a little bit of grease in the moving parts. Since we got the spindle clean we are going to show you a few things you can watch for. If you see here there is a line going over here. That is where the bearing has been sitting. As long as it does not cut the spindle itself. If you can take your fingernail and catch it on the scratch then the bearing has been put on too much load or shock. Then the spindle has been damaged and you are looking at a replacement spindle at that point. The same thing applies back here also. You should rub your finger around it and see if you catch anything. If your finger does not catch anything then you will be fine. Then back here on the shoulder you see that little black line. That is where the seal itself rides on the spindle. That keeps the grease from going out back. You can tell that the rubber over time will rub a nice finish on the seal. Occasionally you will have to replace those also. Now about this spindle in here if you see the Zerk ending here. That is what you would call an EZ Lube Spindle. What happens is when you put your grease gun at the end here it shoots grease all the way down the middle here and then it comes out to this hole in the side. The grease comes out this hole which is in between where the bearing rides and the seal rides. So between that whole cavity there it fills up with grease. Once it gets filled up with grease it packs itself through the bearing on the way back out eventually through this bearing and then out the end. So when you reassemble this we will put grease all around here then we will assemble it and pack our grease in here. It will actually self pack itself.
Now what we need to do is remove this old seal here and there is a couple different ways of doing it. One way is flipping the hub upside down. Taking a wooden doll and going through the inside and beating the bearings from the inside out. Then pushing the seal out with it. Sometimes you get away with it but you run the risk of damaging the bearings doing it that way. What we will do is work it around and try and get an opening and pry this up. There are special tools but most do it yourselfers will just use a punch or screwdriver, like we will do it here with simple tools. Now we have the bearing out. I am going to show you a couple things on inspecting bearings. One thing you will notice is that the bearing to the right is nice and clean thats been used. This one on the left is from the outside and they both came off the same hub. You can see the outside bearing has gotten a little hot or has gotten to much pressure at one time. You can tell the discoloration. When you see something like that chances are it has been through a lot of stress. You should replace both sets of bearings
Info for these parts were:
At etrailer.com we provide the best information available about the products we sell. We take the quality of our information seriously so that you can get the right part the first time. Let us know if anything is missing or if you have any questions.
Jim L.
9/1/2014
How much play should I realize with brand new hubs installed on my 2015 interstate victory trailer?