
Curt T-Connector Vehicle Wiring Harness with 4-Pole Flat Trailer Connector


To see if this custom-fit item will work for you please tell us what vehicle you'll use it with.


Thank you! Your comment has been submitted successfully. You should be able to view your question/comment here within a few days.
Error submitting comment. Please try again momentarily.


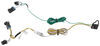
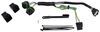
Wiring your trailer lights doesn’t have to mean cutting into factory wiring. The Curt T-Connector plugs directly into your vehicle’s existing taillight connectors to create a 4-pole flat trailer connector. That gives you stop, turn, and tail signals without the hassle of splicing or guessing which wire does what.
Some vehicles use sensitive LED taillights or powered circuits that can’t handle extra trailer load. This harness includes a powered converter that draws power directly from the battery instead of through the taillight circuits. That keeps your LED lights safe and ensures consistent trailer lighting every time you tow.
The included 4-flat connector is the most common plug for small trailers, cargo carriers, and utility haulers. It provides running lights, brake lights, and turn signals in a simple, reliable connection. If you ever need to adapt to a different setup like a 6-pin or 7-way round, the 4-flat easily works with adapter cords for flexible towing options.
With its hidden plug-in design and vehicle-end connector layout, this harness tucks neatly out of sight when not in use. The wiring routes through existing grommets or trim for a clean look and long-term durability, ready whenever you need to hook up and go.

Videos are provided as a guide only. Refer to manufacturer installation instructions and specs for complete information.
Rob: Rob here at etrailer.com and today you're going to be taking a look at the Curt T connector vehicle wiring harness on our 2019 Buick Encore. Now our wiring is going to provide us with a four pole flat trailer connector so we can have all the required lights to get our trailer down the road safely, like our running lights, our turn signals, and our stoplights. Now our wiring's not only gonna work for trailers, it is going to work with all accessories that have lights on it like cargo carriers or even a step. It's going to ride all those signals that we can be safe and everyone knows that there's something in the back of our Buick. Now they are going to provide us with a dust cover so we can keep all the dirt, debris and moisture out of there whenever we're not using it. However, our wiring is designed to stay on the inside of the vehicle when we're not using it.And you can see we'll drop it out the hatch and let it lay whenever we do want to use it.
You can see there's plenty of wire to reach to your trailer connector. Whenever we want it to store it, we can simply open up the hatch and we can actually store it underneath this cover right by our spare tire. So it's really convenient to store it down there. It's out of the way. Now a lot of you may be wondering, well, if I had to drop it out the hatch, is it going to get damaged when I close it Well, no, it's not so long as we stay away from the latch mechanism itself.
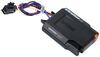
The weatherstripping here is going to provide enough cushion to where when the door closes it's not going to damage the wire.Now the way we're going to get our signals for wiring is we're going to have a T connector behind each one of our taillights. Those are going to take the signals from our car and transfer them to our wiring. But before they come out it's going to go through our converter box, which is going to do two things. It's going to take that raw signal and convert it to a working signal for our trailer or whatever accessory we have. But at the same time it's going to protect our vehicle from any kind of back feeding if there was a problem, any shorts or anything else.
It's going to prevent any damage to our vehicle's electrical system because it won't feed back through.Our converter box is going to be powered. So during installation we are going to have to run a wire up to the battery and have a fuse holder in place. Now that's gonna help out making sure that we're not going to overload our taillights and cause fuses to blow. Now as far as the installation goes, it is going to be very straight forward. Just going to have to remove some interior panels and plugins and connectors, but again, we're not going to have to cut or splice anything.
In fact, let's go ahead and do it together.To begin our installation, we want to open up our rear hatch. We're going to remove the floor coverings. But we can leave the spare tire still in there. Then on the back of the threshold at the edge on each side, we're going to have a tie down hook. We need to remove them. So we want to grab a 10 millimeter socket and we'll pull the bolts out, holding them in place.You should be able to grab the threshold panel and we're just going to lift straight up. You want to work your way across the center until we can get all the clips loose. We'll pull it out and set it aside. Now we'll have one more tie down hook. This is going to be towards the back seat on each side, but again we'll grab that 10 millimeter socket and pull the bolts out holding it in place.The foam trays that are in the cargo area need to come out as well. But if we look towards the back of the opening, we'll have a plastic screw holding it in place. You're going to want to grab a T45 torx bit. And they shouldn't be that tight, but we don't want to do any damage to the plastic fastener. So we're just going to gently unscrew it so we can get it out. Once we have that removed, go ahead and grab the panel and there is going to be some double sided sticky tape that's kind of holding it in place in the back. You just want to work it loose. And once you have it at worked loose, you going to want to pull that panel out. But again, there is some of that tape that's holding it in place. You don't want to pull too hard. You want to work your way across, pulling it up evenly so it doesn't cause any damage to the foam. We're gonna do the same thing over on the passenger side.Now the threshold and all the panels removed out of the bottom of our cargo area. We need to get access to behind the side panels. So you're going to want to use a plastic trim panel tool. It may help just pull the weather stripping away just a little bit. Start releasing the clips. Now if we come back here, right behind our taillight, we're going to have a connector. You want to squeeze the tab on the connector and we can disconnect it. Just press down and we can pull it out. Now we can grab our wiring harness. You want to take the T connector with the yellow wire on our harness. We're going to plug in the matching plugs. And then the other plug is going to plug directly into the back of our taillight. So everything is making a complete circle.Now we're going to take the T connector with the green wire on it. We're going to run it along the threshold over to the passenger side and connect it the same way. Now we're gonna have two more wires coming off of our converter box. One of them is going to be a white wire with the ring terminal on it. This is going to be our ground wire. Now we have a few different options of how we can ground our system out. We have plenty of room to put a self tapping screw in that comes with our kit. However if we look inside, we have a lot of studs that are open and that would be a really nice spot to put our ring terminal. We won't have to put any additional holes and we know it will reach.So I'm going to slide my ring terminal over that stud and then I'm going to use an M6 flange nut. Now this does not come in your kit, but it will make it a lot easier if you pick one of these up. And that'll thread directly onto that stud right there. And again, we won't have to drill any holes. We won't have to find anything to mount our ground to. It's right there, really easy for us to access. Once we have it in place, just going to grab a 10 millimeter socket and tighten up the nut. Make sure that ring terminal doesn't move around.For our black wire, we want to grab the yellow butt connector out of our kit. We'll slide it over the end of our wire. You want to make sure you have enough stripped wire there. If not, we'll just strip a little bit back. Slide our butt connector over and we'll crimp it in place.Now this wire's going to need to go all the way to the battery. Now clearly this isn't enough, but that's why they provide us the length of 12 gauge wire, so we can run it to the battery. You're just going to find one end, strip it back and we'll crimp it into the other end of our butt connector. Now before I start routing this, what I like to do is I like to mount my converter box because that way I know how much slack and how much wire I'm actually going to need. In your kit, they are going to give you some double sided foam tape, so I'm gonna go ahead and remove the backing off one side. I'm going to stick it directly to my converter box.Press down, make sure it sticks really well. Then I'm going to remove the backing off the other side and I'm actually going to tuck my box on the inside here to somewhere flat behind this panel. That way I know it's out of the way, but it's still close to all my connections. Then you just go kind of low on the body here, nice flat section right behind the bumper. Now it's a good idea to take your wires and make sure they come through the center or underneath that side panel. We don't necessarily have to put everything back, clip it all back in. But you want to make sure that the box and everything else is going to fit behind there. Now for our black wire, like I mentioned, we are going to have to get into the battery. There are a few different ways you can do it.You just want to make sure that nothing is going to damage the wire either by rubbing it or causing a lot of heat on it. So you just want to pay attention to how you route it. You can route it along the inside of the car, following along all the trim panels and then go through the firewall or we can find somewhere back here to go down through and follow along the frame until we can reach the battery. I found a plastic plug right here at the back right underneath where those foam panels we're and right underneath this plastic panel. Now you do, you want to double check underneath to make sure there's no electrical wires or anything that could get damaged. But I'm going to use this plug to my advantage. So I'm gonna take about a quarter inch drill bit and I'm going to drill through the plastic plug so that I can reach my wire all the way down to the bottom.Once you have your hole drilled, we'll just find the end of our wire and started feeding it down. So here's where my wire came out. Now I will mention you do want to feed a good amount through because it probably is going to get stuck in the frame, but the more you feed through, the easier it's going to be able to see and reach. So we're going to go ahead and run this up to the battery, but again, you want to stay away from any moving parts that may damage the wire or any extreme heat sources and they may burn it. So I'll go ahead and route it up there and I'll show you how I did it.I started routing my wire along the brake line, zip tying it in place, went around my fuel tank and the Evap canister. I went underneath this plastic cover here. Then once I got to the other side, I actually ran it through the frame, just using the holes as an access hole to reach through and feed it along. Once I got to the end of the frame, zip tied it to this support. Then I went up top to the engine bay and dropped some airline tube down. That way I could attach it to my wire and pull it up through. Then we'll grab our airline tube, we'll pull our wire up. You just want to pull all the slack up. It's not a bad idea to check underneath to make sure a wad didn't get stuck under there.I went ahead and zip tied my wire to some existing wiring up here to make sure it's not going to fall back down and there's no slack. We don't need all this excess wire, so I'm going to go ahead and cut it about where the positive post on the battery is. Before we attach it though, I'm going to strip back a section of wire. We're going to grab another one of the yellow butt connectors from our kit, crimp it over the bare end of our wire. Then we want to grab the fuse holder out of our kit. And it doesn't matter which end, but we'll just take the insulation off. It's pre-stripped, so we'll just pull a little bit off, put it into the other end of our butt connector and crimp it in place. The other end of our wire, we'll remove the insulation. We'll take the ring terminal from our kit, crimp it on that end of the wire.We can open up the cover to our battery and we're going to have a post right here. Be a good spot that we can attach everything to. You want to grab yourself a 12 millimeter socket. We'll remove the nut on top. We'll just slide our ring terminal over the top of it. Make sure you have enough room, it's not going to interfere with anything. then we'll replace the nut. Make sure our cover still closes. Then we'll take the provided 10 amp fuse, put it in our fuse holder. And now would be a good time that we can go back to the back side of our Buick and put all the panels back and tidy up any wires in the back. Now where we drilled our hole and our wires going through, it is a good idea to go ahead and put some silicone around it, seal it back up. That way we don't have any fumes or anything else leaking to the inside of our car.The final step of installations going to make sure that everything's working properly. So if I turn on my headlights, we can see the taillight circuit is working. As well as the left turn signal, our right turn signal and our brakes. All we'll have to do now is hook up to our trailer and hit the road. But that'll finish up your look at the Curt T connector vehicle wiring harness on our 2019 Buick Encore.
Customer Satisfaction Score:
94% were satisfied with this product
6% of customers were not satisfied
Ratings & Reviews

Great service
Easy to install, works great!
Good price fast delivery
haven't installed yet,all the directions look simple enough and easily understood for factory installation
Quick delivery, and the wiring harness was a perfect match.
Excellent quality product easy installa tion
Wiring harness fit perfectly and the instructions were excellent. Very easy to use
had my mechanic install as I did not feel comfortable trying to pull side panels and running wires to the front.
Product was just as described! Which made it very easy to install. Saving time and money! Buy here you won’t be disappointed !
Do you have a question about this Custom Fit Vehicle Wiring?
Info for this part was:
At etrailer we provide the best information available about the products we sell. We take the quality of our information seriously so that you can get the right part the first time. Let us know if anything is missing or if you have any questions.



























Mike L.
8/25/2026
Thank you Alan, we appreciate it!!