![]()
![]()
Videos are provided as a guide only. Refer to manufacturer installation instructions and specs for complete information.
Video Transcript for Mount: PSX24W LED Fog Light Bulbs on a 2013 Jeep Wrangler Unlimited
Hey everybody, Ryan here at E trailer. Today on our 2013 Jeep Wrangler unlimited, we're going to be taking a look at it and showing you how to install the Arc LED fog light bulbs. So here's what the LED light is gonna look like. And more or less it's a factory type replacement. So it's going to have the plastic connector on there that allows you to just plug this right into your factory light's housing more or less. And these are also gonna have a built-in LED driver.
So if you're familiar with other types of lighting upgrades a lot of times you'll have like a separate box that requires you to plug in and mount the box. So a little more convenient, you know less components to worry about installing and worry about failing down the line. It's going to be more or less plug and play. So if your connector looks like this you'll be able to plug it right in and convert that power to work with the LED. A LED light, the polarity does matter.
So you're going to have a positive and a negative. So that's something to pay attention to. If you go to hook these lights up and they're not working you can usually flip that connector around and get it powered up. So something I just wanted to mention, but overall it feels like a pretty decent light actually. This is aluminum here.
Feels like the light housing itself is either really thick plastic, potentially aluminum. It feels more like a plastic to me though. The casing is a nice plastic so, even gives you an overing there to keep moisture out of everything else. So, overall feels, feels pretty decent. So now we have the full deal here.
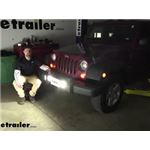
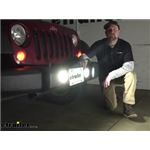
We have both of our fog lights replaced and I'm thoroughly impressed. Honestly, these things are super bright. They're almost lighting up this whole room. And after getting both of them in, we get a lot of coverage. I did notice to even just on the ground, kind of right in front of the Jeep, it's well lit. I really didn't notice that with the traditional, you know, incandescent bulbs. So kind of fills that dead zone there that otherwise wouldn't be lit. And I mean, it's it's not hard to realize how bright these actually are. Not only, you know, more light, but also wider light. I feel like these fog lights kind of really throw out a wide angle and we get a ton of coverage. So, you know, these could kind of be the difference maker you know, for, for maybe some of you going off-roading or something like that, you know. These may prevent you from having to get an aftermarket light bar and putting that on your Jeep or something like that. Not to mention just kind of everyday driving. If you don't go off road and they're not like that the good news is these are actually street legal. So that's not the case. Usually with these really bright lights, you know usually they recommend it for off-road use only type of thing. So you'll be perfectly legal driving around with these on the road at night. And because of that, kind of that wide angle its throwing, I feel like this would do a great job at getting underneath that fog on those dark nights or even just using them on a regular clear night. I live kind of in a rural area, a lot of back roads, and these would really be beneficial for me. One of my biggest concerns, I get a lot of animals crossing road, deer, and other types of critters. And these could kind of be the difference of you being able to kind of spot that animal off the side of the road and be able to hit the brakes. You get out of the way or, just running right into it. So a little bit extra light really does go along way. So these bulbs are going to have an effective lumen rating of one thousand nine hundred ninety-five per bulb. And more or less what that means, a lumen is just a measurement of light. And so that's gonna let us know how much light these are actually producing. They are gonna have a, what's called a color temperature of six thousand five hundred K. So as you could see it makes like kind of that cool white, color. You're not going to get, you know, the lights that are leaning towards the pink color spectrum or the dark deep blue. These are kind of right in the middle. And personally, my favorite as far as actually usable light, you know. It helps you see the best. As far as everything else goes, some vehicles are going to require an additional harness. It's called an anti flicker harness. And those are the vehicles that have a canned boss and other types of systems that communicate with the lights and you turn them on. So for example, if your vehicle lets you know that you have a bulb out, for instance, many times that's going to use that special type of harness that you're going to need. So if you put these in there your vehicle uses that communication system you could potentially get a warning light on the dash saying, hey your bulbs are out even when it's not. So if that's your case. You can pick up that additional harness right here at E trailer and that'll solve the issue. So at the end of the day an upgrade, you really can't go wrong with, you know, just even generally speaking these LEDs are going to last a super long time. So chances are pretty good. You're never going to have to mess with your fog lights again. Bulbs are probably never going to burn out on you. And honestly, just about anything you throw on a Jeep is gonna look good. These take accessories really well. And not to mention, you know, you get a lot more light too. It's going to be a little bit safer when you're driving down those dark roads. Now, as far as the installation goes, really not too bad for the most part they're plug and play. So really shouldn't give you a whole lot of issues. Speaking of which, let's go ahead and hook them up together now. So since these lights are LEDs, they should throw out much more light and much cleaner or crisp light, if you will, compare to traditional style incandescent bulbs So before we start getting them installed and everything else, I figured it would be a great time to make a comparison. So right now we have our factory bulbs and today we're using a Jeep and replacing the fog lights. Keep in mind though, these work with a ton of different vehicles. Whether it be for your headlight or fog lights. So you can find that information in our fit guide to make sure that these are going to work with your particular vehicle. But that being said, what I think we're gonna do is shut the lights off, turn on our fog lights here. That way we kind of have something to compare them to. So I went ahead and shut off the overhead lights turned on the fog lights and pretty typical, nothing too special there. We look at our garage door kind of gives us a clear picture on how much light these actually put out. And they're gonna help but, I feel like there's definitely room for improvement. So I went ahead and just changed one of our lights. That way we can kind of just check them out side by side. And I'm not gonna lie. When I turn off the overhead lights cut on the fog lights I was thoroughly impressed. Just by looking at the lights themself, you can tell there's a big difference. This has that nice modern look that cool bright crisp light. And this one just honestly looks old and worn out. But that being said though, more importantly, how much light is it going to throw out So on the garage door, the one light pretty much overpowers our traditional style incandescent bulb. So this is all our LED and we see, just one little portion of that incandescent bulb down there. Looking at the lights side by side, I mean the old one kind of reminds me of those big huge flashlights, that barely put out any light. You're kind of disappointed. There's so big, turn them on and you know kind of get let down. And that's not the case with the LED. So I'm really anxious to get the second one in and see how much more light it's going to put off. So to begin our installation, first thing we're going to need to do is remove this small panel here behind our bumper itself. And we're going to have a fastener like this on each side. And we'll try to get this out the way it's intended. A lot of times these are plastic and kind of get chewed up and stuck pretty easy. In the center there, there's a Phillips head, plastic screw. And a lot of times, what will happen is they'll kind of just strip out just like this one here they get dirt and stuff in them. So it can be really hard to work out. So yeah, it looks like it's just kind of spinning in there. So if that's the case, you may have to kind of take a flathead screwdriver, kind of try to pry it up and out. And there's just really no other way around this sometimes. To get it out though, you should be able to pull the base out. We'll just do the same thing over on the other side. So now that you have those fasteners out, you're actually able to kind of move this around. And I guess you could try to remove it completely. But what I'm going to do is, we're gonna replace the driver's side first. I'm just gonna kind of push this over towards the passenger side and back. And that'll give us enough room to get our hand back there and disconnect our bolt. So if we look back here behind our fog light, we're going to have a couple of things we need to unplug. The first one being the electrical connector. So all you're going to do is push down on the center tab of it and pull it back. And that'll separate it. So kind of push it off to the side. And then we need to remove the bulb itself. So this is kind of encased in almost this plastic type connector. And the way you're gonna get that out is, there's gonna to be these tabs on each side. So a total of two. And you can squeeze those together, kind of pull back and that will free the bulb. So here's our connector plug for fog light itself. And what I did was turn our fog lights on. And that's because we have to plug this in a certain way. The polarity matters with these LEDs so I'm going to try it one way, and it's not turning on. So if we flip it around, it should kick on which it did. So now that I know it needs to get plugged in this way, I can just set this down and go turn our light off, that way we don't have it shining in our eyes. So something I did want to mention the way that we need to plug it in like this, there's not going to be a catch, the kind of hold that keeper there. So this can get pulled out somewhat easy. I mean, it doesn't slide right out. But, just to be on the safe side what I think I'm going do, is just take some tape maybe wrap it up and maybe a zip tie or two just to really ensure that over time, this doesn't you know, bounce around and eventually wobble out. So I went ahead, just used some electrical tape there where it gets connected. And a couple of zip ties. And now there's no way, not a chance, that this is accidentally coming disconnected. So just so we can kind of see this a little bit better we're gonna need to make sure when we plug our light into the housing, so these points will go into a fix spot. We want to make sure that our light itself is gonna be facing this way, sitting like this, inside of our fog lights. So you can kind of eyeball it, hold it and line it up. If you loosen up that set screw, if you need to make an adjustment. You can rotate that how you need it to be. Tighten this back down and then that'll keep it in that position so we can plug it right in and have it set up like it's supposed to be. So now that we have our bulb positioned correctly, we can go ahead, slide it in, and simply just push it right into place. So once you have this one wrapped up, you can go ahead and repeat that same process over on the other side. So once you get that other light installed we'll go ahead and put your panel back into position. And re-secure it using the push pin fasteners. And before we wrap everything up, good idea to test our lights, to make sure they're working. So go ahead and turn them on. And it looks like we're good to go. And that'll finish up our look at, and our installation of the Arc LED fog light bulbs on our 2013 Jeep Wrangler Unlimited..


Thank you! Your comment has been submitted successfully. You should be able to view your question/comment here within a few days.
Error submitting comment. Please try again momentarily.