
 Product Experts Available Now!
Call 1-800-940-8924


To see if this custom-fit item will work for you please tell us what vehicle you'll use it with.


Thank you! Your comment has been submitted successfully. You should be able to view your question/comment here within a few days.
Error submitting comment. Please try again momentarily.


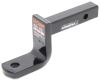
When you need to tow a small camper, boat, or utility trailer, this Curt Class II hitch has you covered. With a maximum 3,500 lbs gross trailer weight and 350 lbs tongue weight, it’s built for light-duty towing without overkill. The 1-1/4" x 1-1/4" receiver is sized for common accessories like small ball mounts and cargo carriers, giving you the versatility to haul gear safely and securely.
You don’t need to weld or make modifications to get this hitch installed. It mounts directly with a bolt-on setup and comes with a complete hardware kit and installation instructions. The precision, robotic welding ensures every mounting point lines up the way it should, so you can get it attached without hassle or guesswork.
This hitch is made from fully welded, square-tube steel for reliable strength trip after trip. A gloss black powder coat finish over a protective base coat adds superior rust resistance, so it stays looking good and performing solidly even after years on the road. It’s a simple, strong design that holds up no matter how often you use it.

Videos are provided as a guide only. Refer to manufacturer installation instructions and specs for complete information.
Speaker 1: Today on our 2009 Jeep Liberty, we're going to be taking a look at and showing you how to install the Curt Class II Custom Fit Trailer Hitch Receiver, part number C12245.So, here's what our hitch is going to look like. It's going to sit right below our bumper, and the crosstube is going to be visible just right underneath. Now, it is a Class II hitch, which means it's going to give us an 1-1/4" x 1-1/4" receiver tube opening, and it's got a reinforced collar just giving an overall nice finished look but also added strength.Now, the way we're going to mount all of our accessories is going to be through the hitch pinhole here on the side, and it's going to accept a standard 1/2" pin and clip, and these are both included in our kit which is always a nice bonus. The safety chain connection points are going to be a plate style welded to the bottom. We're going to have these oval holes here. We're not going to have too much trouble getting most size hooks on or off.As far as weight capacity is concerned, our hitch is going to feature a 350 pound tongue weight along with a 3500 pound gross trailer weight rating.
Now, I always want to recommend that you double check you Liberty's owner's manual and that you don't ever exceed the manufacturer's recommended towing weight.Like to give you a few measurements that'll help you when deciding for accessories for your new hitch such as a bike rack or even a cargo carrier. The hitch pinhole is going to stick out past the outermost edge of the bumper right about 1/2", and from the ground to the inside top edge of the receiver tube opening, that's going to be right about 20-1/4". S, now that we've seen what our hitch looks like and gone over some features, let's show you how to get it installed.To begin our installation, we're going to come to the very back of our jeep, and right behind the rear tire we're going to come to the frame. Now, we're going to have two threaded holes in our frame, and then we're going to have one bolt for the support right here. We're going to need to remove that bolt because that is also going to be a mounting spot for our hitch.
I'm going to be using an 18mm socket to pull it out. On the driver side here, we should have the hole that we just pulled the bolt out of and then two more going down the frame.Going to take a little bit of spray lubricant. I'm going to spray it into each one of these holes. I'm going to come back with a nylon brush. Then I'm going to clean out the threads make sure there's no rust, any kind of debris, or anything else in there so that the bolts can go in nice and easy, and we don't have to worry about them cross-threading or anything jamming up.
We want to clean out all the holes on the driver side here as well as the three on the passenger side.Now with an extra set of hands, we're going to lift our hitch into position. We're going to line up the holes on our hitch. I'm going to get one piece of hardware on each side just to support it, so I don't have to worry about it falling down. Then, we're going to get the rest of our hardware in place.I'm going to come back with a 19mm socket. I'm going to snug up all my hardware.
I'm going to come back with that same 19mm socket. I'm going to torque down all my hardware to the specified amount in the instructions, and we'll repeat that for all of our remaining hardware. That'll finish up your look at the Curt Class II Custom Fit Trailer Hitch Receiver, part number C12245, on our 2009 Jeep Liberty.
Ratings & Reviews

Mike P.

6/19/2018
Easy to install. The hardest part was cleaning out the bolt holes on the Jeep. Be very thorough or the supplied bolts will want to cross thread. As always amazing customer service and prices from etrailer.

David
11/12/2022
Hitch works perfectly. After some advice from your customer support installation was a breeze. I would purchase from CURT again. Thanks for your help.

Lisa
4/19/2023
Our Jeep was rear-ended and the tow bar was damaged. It saved our vehicle from being damaged more. We purchased the same tow bar as a replacement since we were very happy with the original one.
Do you have a question about this Trailer Hitch?
Info for this part was:
At etrailer we provide the best information available about the products we sell. We take the quality of our information seriously so that you can get the right part the first time. Let us know if anything is missing or if you have any questions.

























Lisa
3/4/2024
Great!