
Blue Ox Base Plate Kit - Removable Arms


To see if this custom-fit item will work for you please tell us what vehicle you'll use it with.


Thank you! Your comment has been submitted successfully. You should be able to view your question/comment here within a few days.
Error submitting comment. Please try again momentarily.


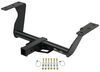
If you want your setup to stay sleek and unobtrusive when you’re not towing, this base plate nails it. The hidden design keeps the front clean, and the bracket arms come off with a simple twist. When removed, nothing sticks out past the front, so you don’t have to worry about bumping into protruding hardware. Snap-in receiver covers keep dirt and debris out of the sockets for a finished look that stays tidy between trips.
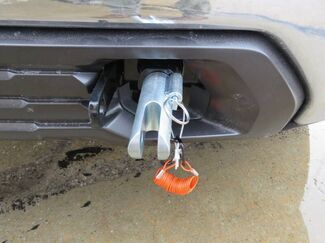

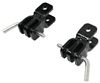
The removable arms attach easily—just insert them into the receivers, twist until they lock, and secure them with the pull pin. When you’re done towing, pull the pin, twist again, and slip them out. It’s a quick, solid connection that makes solo hookups simple whether you’re in the driveway or at a campsite. The distance between brackets is 20" and the bracket height is 13", so you can line up your tow bar with confidence.

This base plate bolts directly to your chassis—no welding needed. The sturdy design spreads towing force evenly, helping protect your suspension and frame over thousands of miles. The durable steel construction is powder coated to resist rust and corrosion, so it holds up through all kinds of weather and road conditions trip after trip.
You don’t have to start from scratch if you already have gear you like. The sturdy lugs pair directly with Blue Ox tow bars for a reliable hookup. It’s also adaptable for use with Roadmaster tow bars using adapter RM-031 or RM-031-5 (sold separately) and with Demco tow bars using adapter DM9523041 (sold separately). Integrated mounting points let you attach an electrical connector plug bracket (sold separately) to keep your wiring organized and easy to reach.
This kit is made for simple installation at home. It bolts securely to the chassis using the included mounting hardware—no welding required. Once it’s on, you’ve got a durable, low-profile setup ready to tow whenever you need it, without changing how your vehicle looks day to day.


Videos are provided as a guide only. Refer to manufacturer installation instructions and specs for complete information.
Alright, today on this 2010 Ford Focus, were going to install part number BX2199 from Blue Ox. To start our install, we got to remove the front bumper cover, starting with these four pushpins right here. Alright, now we can remove the grill assembly. Okay, to remove the grill, you have to pull it straight out. We start from the end and work our way towards the center. Next, remove the headlights, one, two, three fasteners.
After removing our fasteners, this tab we have to pull up a little bit and also theres a tab in the back too. And then at the very bottom underneath, theres another fastener which you have to pop it up and then pull it out. And then well go ahead and remove our electrical. Push down this tab right here and it comes apart. Alright, our next step is to remove two pushpins here and here.
Were looking at the drivers side. Well repeat the same thing on the passengers side. Now, were getting down to the wheel well here. Well remove this screw here and its two pushpins. Were done on the drivers side, move on to the passengers side and do the same thing.
Alright, now looking underneath the vehicle, we got six fasteners we need to remove. Well remove these fasteners here, here, and here. This is the drivers side. Well repeat the same process on the passengers side. Were going to bolt the hardware here and here, and those two fasteners allow us to remove our bumper cover.
Were done on the drivers side. Lets do the same thing over on the passengers side. Alright, at this point, we can go ahead and remove our bumper cover. Next, well remove the air dams. This is the one on the drivers side and the same one on the passengers side too. Well go ahead and remove the plastic rivets. Next step is to remove the windshield washer tank. This is actually stocked on top of the base plate when were done. Were going to disconnect this line. Well actually attach a small rubber line to it and this will run it up to the top so it matches the water line. That way, we wont lose it all. Well disconnect the electrical. Well take a tap and look up just a little bit, then you can pop it off. Okay, now we have four fasteners removed. Well go ahead and loosen up the jug fort and it freezes well. Actually, what we got to do is remove this panel right here. Theres a fastener were about to remove in the wheel well and there are three pushpins in the center that we have to remove as well. And also, one more screw on the passengers side. At this point, we can go ahead and lock the tow bar in position. What were going to do is slide up from underneath and then clamp it in place using some vice grips. Alright, thus, when we tight it fit, we got to pop it up and over deep bulges in the frame. So were going to line up this hole here. From the edge of the bumper bracket to the edge of a frame will be 1-1/2 inches. Now, it will be the same on both sides. In this edge here, Ill match the edge on top of the frame. And thats just same angle and it should be good to go. Well double check the passengers side here. That looks good. Make sure its even with the top of the frame and there are wires really close to. So when you pull it up, you want to make sure its not pinched or anything like that. Once the tow bar is in place, well go ahead and use the 3/8 bit to mark our centers with the holes. Then well drill a pilot hole and go back at it with 13/32 bit. Before we drill our remaining holes, I'm going to use some included hardware to use it to help keep it steady because even though its clamped in place, it may pivot a little. The drill a bit wonders inside the hole. Okay, now we can go ahead and continue drilling up the rest of the holes. When we drill up to your holes, especially on the passengers side, there are some wire and other components there. Make sure you dont run into that when you drill bit. Alright, now the hole is drilled out on the drivers side, lets go ahead and repeat everything we did here on the passengers side. Now, well go ahead and remove our hardware and put our fasteners into place. Alright, well pull a little bit real lock tight on our bolt, and well run it through and put a lock washer and nut on the other side. Well do the same thing with its holes in the bottom. For our hardware installed, well go ahead and snug them down then torque them down as specified in the instructions, then repeat the same process over on the passengers side. Okay, when we drill out our holes, the two holes in the top will be the same as the drivers side. However, on the passengers side, were going to use these two holes here and here. Our base plate is installed. Now, move ahead to the bumper and do a trimming we need so we can put it back onto the car. Right here if this bump thats on the housing for the fog lights if this vehicle is equipped. We need to trim that down, just the bump itself, and we will go about 1-1/2 inches. And then the bottom one, well do the same thing, but well go down 2 inches. Well do that on both sides and well do a test fit, and were going to trim it more. Well do that before we put everything together for good. Now, we can use a utility knife or a rotary tool like were using to cut it out. Okay, get an extra set of hands to help you hold the bumper cover in place and will help mark out the sections that were going to cut out to go around our tow bar. Were making a cutout for our base plate. Okay, once were able to reinstall the bumper cover, well go ahead and sand off the edges and make them as smooth as possible. With our cutouts on our base plates, now we need to make one more cutout here. Were going to make a hole for our wiring bracket. Now, the next thing we need to deal with is the air dam mounted right here originally with the base plates in the way. So basically, were going to measure from the top edge down 2-3/4 inches and across, and cut it in half. That way, well have room to put it back into place. With all our trimming done, well take our safety cables and well run them around the edge of our frame and over this bracket right here, and well use a link to connect it to the convenience link here. Okay, were done with our drivers side. Lets do it one more time on the passengers side. Alright, now we can go ahead and reinstall the windshield wiper fluid, we have a jug for it. Now, the kit comes with a longer bolt to reinstall the jug at this side. Alright, well go ahead and reinstall our wiring and our line. Now, well get one more fitting on top to reinstall. We can replace the plastic panel underneath the bumper cover, the head lights, and the grill. Well show you how to tab assembly works. Inaudible straight and then push it so the pin comes out and then rotate it, and its locked in place. To unlock it, pull out the pin and rotate it up. It comes out. Okay, and with our bumper reinstalled, were finish with our installation of part number BX2199 from Blue Ox.
Ratings & Reviews


Heather A.
5/1/2026
The install looks great Ed! Where are you planning on taking the Encore? I will let Royce know you reached out.


Mike L.
9/9/2026
Thanks Douglas, nice truck you've got there! Nice job on the install.....

Nick S.
1/5/2026
I am glad you were able to get it installed with no issues and a little help from our video! What kind of coach are you pulling the Kia Soul with?

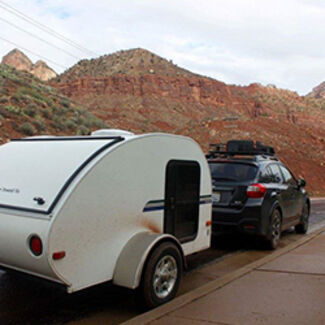
Roger

12/12/2025
Still the same no issues...fine product
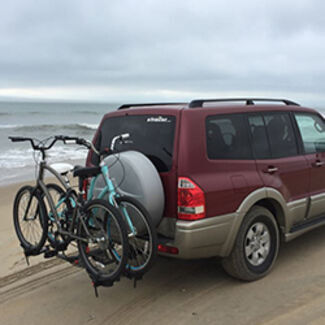
Matthew
10/12/2026
Its been two years since installation of the Blue Ox Baseplate. Since then, Ive flat towed the CRV from NJ to FL and back three separate times with many other shorter trips in between. Paired with a Blue Ox Tow Bar, the system has worked flawlessly since installation.


Kate F.
12/17/2025
Thanks for the detailed review Chris, and the pointers! This will be most helpful to others. What was your favorite stop in those 7,000 miles? Where did you go, what did you see?
Perry
10/1/2026
Follow up. Ive put about 8000 miles on the setup and its been great. A 34 ton suburban pulls nicely behind my Dutch star, and they dont have a steering lock so its nice not to have to retrieve keys when stopping for the night. I have used the safety cable attachment a few times for straight line pulls with a small shackle when working as a rally racing volunteer, its been fine but I wouldnt side pull on it.
Nick S.
12/1/2025
I am glad it worked well for you! What kind of coach are you pulling that Jeep with?

Andrew N.
10/21/2026
Hey Luis, thanks so much for the detailed response and photos. Install looks great on your Mini Cooper! I know the instructions sometimes aren't perfect, but I'm glad you got it installed correctly!
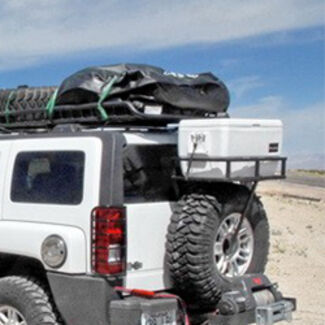
James
10/16/2025
Perfect
Jon J.
5/21/2026
It has been a good system. I would still give it 4 stars a year later just because it was a difficult job to install. Not for the faint of heart. So far have about 6k miles of towing with it. Would I do it again….Yes as it was worth the effort.
Do you have a question about this Tow Bar Base Plate?
Info for this part was:
At etrailer we provide the best information available about the products we sell. We take the quality of our information seriously so that you can get the right part the first time. Let us know if anything is missing or if you have any questions.



















Louis
2/7/2022
It is working fine, have not had any issues. I installed it, fit as described.