
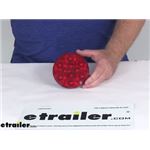
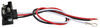
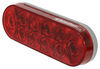
4-5/16" Waterproof light displays brake, tail, and turn signals on your trailer. Mounts in a cutout with a grommet (sold separately) and works with 3-prong plugs. Works with 12V and 24V DC systems.
Features:
Specs:
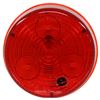
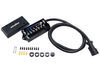
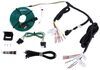
This light has a standard 3-prong plug that connects to your vehicle or trailer with a PL-3 pigtail adapter. Pick up the right-angle pigtail (A47PB - sold separately) or the straight pigtail (A45PB - sold separately) if you don't have one already.
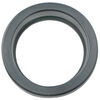
This light installs in a grommet (A45GB - sold separately) and requires cutting a hole into your trailer if it doesn't have one already.
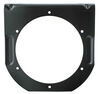
If you'd rather not cut a hole in your trailer, you can use an optional mounting bracket (BK45BB - sold separately) instead. You will still need the A45GB grommet.
California residents: click here
Videos are provided as a guide only. Refer to manufacturer installation instructions and specs for complete information.
Ryan: How's it going Ryan here etrailer.com. Today we're going to be taking a look at and showing you how to install the Optronics LED Trailer Tail light. This tail light is going to be either a great replacement or even an upgrade over a traditional style incandescent light, and that's because this one is an LED. And it's going to have 10 diodes, so it's going to be much brighter. It's also going to be fully submersible, but I do always recommend, if you plan on submersing the light, just to turn the power off to it before you go. And since these are LEDs, you're not going to have those brittle filaments to worry about with those traditional style incandescent bulbs.
And overall, the light's going to be really well built and last a really long time. The light's going and provide us with three functions. The tail lights, the turn signal, as well as the brake lights.And the light itself is going to be four and 5/16 of an inch in diameter, and it's going to be one and 15/16 of an inch thick. So that'll be from the lens to this plastic portion here that helps cover up our electrical connector. It's going to have a polycarbonate lens as well as a polycarbonate housing, which means it's going to be really reliable and lasting long time and that's a really common problem with a lot of lights like this one that we're actually replacing today.
As you can see that housing has a bunch of cracks in it and those cracks will allow moisture to get in and eventually ruin the light. The light is going to work with both 12 and 24 volt DC systems and it's going to accept the standard three prong plug. Now if your plug is actually damaged, you can find a replacement here at etrailer.com.So whether your old lights broken, burned out, or you're just ready for an upgrade, once you get this one put in, not going to have to worry about it. Speaking of which, let's go ahead and put it in together now. To begin your install, you're going to come back to the light that you're going to replace and get it removed.
In our particular case, it's going to be this one here. To get these out, what you can do is kind of just push on one side of it. That'll kind of free the light and if you have a grommet, you kind of just pop that out. It'll give you a little more room to work. Pull the light out and then we will disconnect it simply just pulling back on the plug.With the light disconnected, now would be a good time to kind of take a good look at your electrical connector here and make sure that the terminals are in good shape, which ours are.
Then we can grab our light and plug it in. Now the light already comes with some dielectric grease on the terminals. However, I like to add just a little bit more just because it can't hurt and it'll help prevent rust and corrosion. Want to do is just line up the terminals on it or connector at the back of the light. Just push it all the way down to connect it.So at this point, what we can do is grab our grommet, slide that over, push it back into the tail light buckets here, and just take our light and work that in as well. Now these can be a little tight, so you might have to just kind of carefully work that light in to get it fully seated. So with our light in place, it's always a good idea to test it. So we'll go ahead and put it to power and turn on our tail lights, our left turn, and our brake lights.And that'll finish up our look at and our installation of the Optronics LED Trailer Tail light.
Ratings & Reviews

Great product should come with harness.
Info for this part was:
At etrailer we provide the best information available about the products we sell. We take the quality of our information seriously so that you can get the right part the first time.


Thank you! Your comment has been submitted successfully. You should be able to view your question/comment here within a few days.
Error submitting comment. Please try again momentarily.