
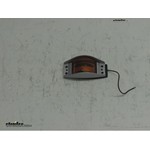
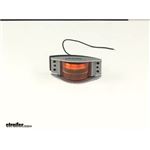
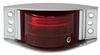
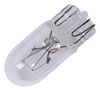
4-1/2" x 2" Rectangle. Incandescent trailer light functions as a clearance and side marker light. Heavy-duty steel housing. Snap-on lens. Surface mount to trailer - hardware not included. 1-Wire design. PC rated. (1) 194 bulb.
Features:
Specs:
Manufacturer Cross Reference
Light will work as an exact replacement for:
Truck Lite # 26315Y
Grote 45173
Peterson # M119A
A PC-rated light produces a 90-degree angle of light to either side of its centerline for a total of 180 degrees of coverage. This beam pattern can be clearly seen when you are standing directly in front of the light, as well as when you are standing on either side of the light. When properly installed, this type of light can function as both a front clearance light and a side marker light or as a rear clearance light and side marker light.
California residents: click here
Videos are provided as a guide only. Refer to manufacturer installation instructions and specs for complete information.
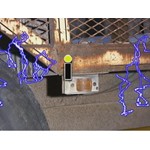
Today on This Old Trailer, we are going to install part number MC82AB from Optronics. This is their armored clearance light. This is the new one that we are going to install and this is the old one we are going to replace. It is a pretty similar design but they are two different manufacturers. This one has seen better days so we are going to replace it. The first thing you need to do is unscrew the plastic cover here. Then you have the base behind it. One has already broken off and this one will probably break when we take it off. Yep, just like that. Now you want your surface completely flat. So here is the remainder of one of the screws that was holding it in place. So we will have to grind that off. Now basically at this point, we are just going to go ahead and just mount the light to the bracket that is already on the trailer. We are just going to do this to mark our holes. We are just going to install it temporarily. Now we will take it back off. We have our mounting holes drilled out. Loosen it up. Alright we will just go ahead and take it off. 1:01
The next thing we want to do is make room for our wire. That means we will have to drill another hole out. We are going to mark from the center of this hole over to the center of the wire coming through the light. And that is around, maybe just over, an inch. Let us go ahead and mark it over about 1 inch. We will mark our hole. Come back with a 1/4 inch or so drill bit for our access hole. Now let us go ahead and reinstall out light. Now take a moment to kind of pull on the wire a little bit. If you can move the little fixture inside, it means your wire is not pinched or anything. Go ahead and cinch it down and then all we have to do is go ahead and connect our wire to our known running wire circuit. And you can use any type of attachment you want. You can solder it, tape it or, in this case, we are going to use a quick splice. Alright, with that that will finish our install of part number MC82AB from Optronics.

Nice WEB site, quick to ship
product as expected !
Info for this part was:
At etrailer we provide the best information available about the products we sell. We take the quality of our information seriously so that you can get the right part the first time. Let us know if anything is missing or if you have any questions.


Thank you! Your comment has been submitted successfully. You should be able to view your question/comment here within a few days.
Error submitting comment. Please try again momentarily.