
T-One Vehicle Wiring Harness with 4-Pole Flat Trailer Connector


To see if this custom-fit item will work for you please tell us what vehicle you'll use it with.


Quickly and easily install a 4-way trailer connector on your vehicle with this custom wiring harness. T-One connector plugs directly into existing wiring. Powered ModuLite reduces strain on wiring system.
Features:
Specs:
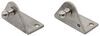
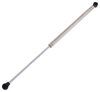
This custom-fit T-One connector plugs into your vehicle's wiring harness, which is located in your rear cargo area on both the driver's side and the passenger's side. You will have to remove the rear threshold plate and trunk liner to access this harness. Once you've plugged in the T-connector, run the hot lead up to your car battery. Connect the lead to the included fuse holder, and then connect the fuse holder to the positive terminal on your battery and insert the provided fuse.
Once installation is complete, the 4-way flat connector will be stowed in your rear cargo area.
It is recommended that you use a small amount of grease on all electrical connections - the plugs on your automobile and the 4-pole connector itself - to help prevent corrosion.
A ModuLite power module is built into this T-One connector. Because most trailers run on a two-wire system - wherein the brake and turn signals are carried on one wire - the separate brake and turn signals from your vehicle's three-wire system need to be combined so they are compatible with the wiring system of your trailer. This power module functions as a tail light converter to combine the brake and turn signal functions of your automobile so that they run on one wire to properly activate your trailer's tail lights. Note: This will not affect how the tail lights on your vehicle operate.
With a ModuLite, your trailer's lights will be powered without overloading your vehicle's electrical system. Because the module draws power directly from your car's battery and bypasses the electrical routes that are used by a basic wiring harness, there is virtually no draw on your tail light circuits.

California residents: click here
Videos are provided as a guide only. Refer to manufacturer installation instructions and specs for complete information.
Today, we're going to be taking a look at the T-1 vehicle YN harness with 4-pull flat trailer connector. This product is going to fit certain years and models of the Hyundai Elantra. It's going to provide your 4 way flat trailer connector at the back of your vehicle to power your trailer's signal lights. This is compatible of 5 pull, 6 pull, and 7 pull adapters. Adapters are sold separately. It's going to come with a dust cap for the 4 to 5 connector, that way you can cover up the connection points when plug's not being used. The black box on unit is going to be the included modulate. This is a power converter that's going to ensure that your vehicle's 00:00:30 matches that of your trailers. The power module's going to connect directly to the vehicle battery through the wiring, and that's going to help overloading the vehicle's electrical system. One of the main benefits of this system besides providing your 4-way flat connector at the back of the vehicle, is how quickly and easily it's designed to install. It's going to come with very detailed installation instructions, those are going to help walk you through the installation process, step by step. Basically to begin, you'll need to locate the connection points in your rear cargo area, and then you're going to have 00:01:00 2 sets of connectors.
The set with the yellow side's going to go to the driver side of your vehicle. The set with he green and red sides are going to go to the passenger. This is a custom fit vehicle wiring harness, so these plugs are going to match up perfectly with the ports on the vehicle. They're going to plug into one another and snap-lock together for a nice, tight, secure fit. After you get those connected, you'll need to make a ground connection. That's going to be your white wire with the ring terminal attached to it. You want to get that grounded to a nice, clean, metal surface, using the included grounding screw. Then you can go a head and mount your converter box.
Your converter box can be mounted using the double-sided 00:01:30 adhesive tape that's provided with the kit. The you'll need to run the hot lead to the vehicle battery. The hot lead is going to be the black wire right here, coming out of the black box. That's going to get connected to the bundled black wire with one of the included butt-connectors. The other end of the black wire runs to the vehicle battery, gets another butt-connector attached to it, and gets connected to one half of the fuse holder, which is this this yellow piece right here. The other half of the cheese holder gets a ring terminal attached, and that's going to get attached to the positive post on the vehicle battery. It does come with your 15-amp 00:02:00 fuse to get installed in there, and it's got the fuse cap to keep it safe and secure. Once you have all that done, you can go ahead and secure any excess or slack in your wiring with the included zip-ties.
Once your install is complete, the 4-way connectors are going to be stowed within your rear cargo area. When it comes to the maximum amp-age for the stop and turn lights, we're looking at 4.2 amps per circuit, for the tail lights, we're looking at 7.5 amps per circuit, and it's also recommended that you use a small amount of dielectric grease on all of your electrical connections, like the plugs on your vehicle, and the 4-pull connector itself 00:02:30. That's really going to help prevent corrosion. That is sold separately, so if you need some, you can find it right here at etrailer.com. I did mention that this is a vehicle specific wiring harness, so you can see here, all the areas where we have wiring bundled up together. Don't worry about not having enough wiring. It's going to reach perfectly, it's going to give you plenty of wiring to make your connections here at the T-connectors, it's going to give you plenty of wiring to extend this out the back of your vehicle and make your connection to whatever it is you're towing behind you. It's going to give you plenty of wiring right here, 00:03:00 to reach from the back of the vehicle to the vehicle battery. That's going to do it for today's look at the T-1 vehicle wiring and harness with the 4-pull flat trailer connector..
Ratings & Reviews


It was a great investment for my business. I started doing Lawn and Landscape work and I didn’t have a truck yet. The installation and wiring harness were step by step in a video.
Do you have a question about this Custom Fit Vehicle Wiring?
Info for this part was:
At etrailer we provide the best information available about the products we sell. We take the quality of our information seriously so that you can get the right part the first time. Let us know if anything is missing or if you have any questions.


Thank you! Your comment has been submitted successfully. You should be able to view your question/comment here within a few days.
Error submitting comment. Please try again momentarily.