


To see if this custom-fit item will work for you please tell us what vehicle you'll use it with.


Thank you! Your comment has been submitted successfully. You should be able to view your question/comment here within a few days.
Error submitting comment. Please try again momentarily.


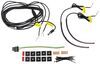
Wiring a trailer can get messy fast if you have to splice into factory wires. This Curt T-Connector keeps things simple with a true plug-and-play setup. It connects directly to your vehicle’s existing wiring for a 4-flat trailer connector. No cutting, no guesswork—just plug it in and it’s ready to go.
Many newer vehicles use sensitive electrical systems that need isolation from trailer wiring. The built-in powered converter handles this for you, pulling power directly from the battery instead of the tail light circuits. That means your lights work reliably without overloading the factory wiring.
The connector stays tucked away until you need it, thanks to its hidden plug-and-lead layout. When it’s time to tow, pull out the 4-flat and hook up your trailer lights for running, turn, and brake signals. When you’re done, coil it back up and keep things neat behind the hitch.
If your vehicle didn’t come with a tow package, this harness fills that gap. It provides everything needed at the vehicle end for safe and functional trailer lighting. You get all the key connections in one ready-to-install harness that performs like factory equipment.

Videos are provided as a guide only. Refer to manufacturer installation instructions and specs for complete information.
Speaker 1: Today on our 2017 Chevrolet Cruze, we're going to be installing Curt's T-Connector Vehicle Wiring Harness, part number C56354. This vehicle wiring harness is going to live inside the vehicle. When you need it, it's behind your driver's side panel, you can just pull it out, drape it over the back, hook it up to your trailer, making sure that you avoid your rear hatch latch when you close it and you close your latch. It'll pinch the harness between the weather stripping. This won't cause any damage but it'll hold it securely in place.This harness is going to provide you with all the necessary lighting, this includes your left turn signal, right turn signal, tail lamps, and brake lamps. It's going to be DOT compliant in all states.
This wiring harness has a control module that taps into the lights by just plugging in to the existing connectors and it receives its own power from the battery so that way, it provides the signals back to your trailer. So none of the lighting signals that are going to your trailer are coming from your vehicle lights, they're coming from the control module. This protects your vehicle lights from any shorts that may occur in your trailer and your control module that comes in the kit is fuse protected, so in case there is any shorts, that fuse will open and you can simply replace it without damaging the module.Also included with your kit, you'll get a dust cap. This just slides over your connector and what's great about this dust cap is that it does live inside the vehicle, it's not too much dust and debris, but it will keep out dirt, dust and debris but it can also be used to hold your nice wrapped up cable and keep it wrapped up by wrapping around that harness and plugging right back in. You can just stuff that in there.We'll start at the back of our vehicle and we'll need to remove the back paneling, then remove the spare tire.
Now, we'll take out all of the foam inserts here. These will just pull out, set these aside. Now, we'll remove the side panels on each side, these will simply just pull off. We'll now remove our driver's and passenger side tail light. Use a flat bladed screwdriver to pop off the covers, over your screws then remove the screws with a T15 torque socket.
Use the trim panel remover tool to pop your tail light out.We're going to disconnect this electrical connector here, you'll need to push back on the red tab, and use a flat bladed screwdriver to lift up on the release tab on the other side and pull the connector off. Then set our tail light assembly aside, and repeat that same process on the other side. Then, on each side you'll want to push your grommet towards the inside. We'll then take our wiring here, we're going to peel back the white wire and we're going to take the connector with the yellow and red wire, going to come from the inside of that open panel and come out to where our grommet just was.We'll plug the female end of our vehicle into the male end of our harness and put your lock back in place. We'll then cut a slit down our grommet to make room for our wiring.
Then take our wiring and poke it down that slit we just cut and then reinstall our grommet. Next we'll connect the white wire that we separated earlier. This is our ground wire, we're just going to use a self tapping screw that comes provided in the kit to run into the body here. We'll use a quarter inch socket. Peel off the adhesive backing to the double sided tape that comes in your kit. We're going to stick it on the backside of the module and we're going to peel off the other side of the adhesive tape. We're just going to stick that right here and press it into place.We'll now take our green wire, we're going to run it down our panel here and poke the wiring out down the bottom. Pull that all the way through and we're just going to run it across, just kind of tucking it underneath our plastic paneling as we go. Once we get to the other side, we're going to work it underneath this paneling here, we'll push it out through our passenger side opening, plug the two together. Then we'll need to slit our grommet on this side. Push our grommet through, making sure that we have our wire down through our slit that we made. Then reinstall the grommet.Now, we'll take the silicone that comes in our kit and open it up and we're just going to apply it to the slit that we made on our grommet and all around our wiring just to help seal it up and make sure that no moisture enters the vehicle. We'll also do this on the other side. Then I'll take the black wire with the fuse harness attached to it, we're going to run it down, poke it out just like we did our connector. Then, we're going to wrap this over to the battery positive here and we'll connect it right to that screw there. We'll disconnect the screw with a 10 millimeter socket. Slip our fuse harness on there and then reinstall that bolt.Now install the 10 amp fuse that's provided with your kit into the fuse harness and reinstall your tail lamp assemblies. Make sure you plug the end of our new harness into the tail lamp assembly and push the lock tab in. Then reinsert the tail lamp assemblies, reinstall both screws, then we can now reinstall all of our paneling, then the spare tire. We can now hook it up to our trailer or our tester and verify that everything's working properly. You can pick up one of these testers here at etrailer.comAs you can see here we've got a left turn signal, right turn signal, tail lamps and brake lamps. With everything working properly, we're ready to hit the road. That completes our installation of Curt's T-Connector Vehicle Wiring Harness on our 2017 Chevrolet Cruze.
Customer Satisfaction Score:
92% were satisfied with this product
8% of customers were not satisfied
Ratings & Reviews

Install was more difficult than explained, but everything works great.
Very easy to install after watching the video. Works great
Everything went together well. The install video was extremely good.
Wire harness went great. Easy installation. Fit my 2019 Cruze desiel hatchback perfect. Couldn’t be happier

Do you have a question about this Custom Fit Vehicle Wiring?
Info for this part was:
At etrailer we provide the best information available about the products we sell. We take the quality of our information seriously so that you can get the right part the first time. Let us know if anything is missing or if you have any questions.


























Jenny N.
5/24/2023
I see that the review was blank and I wanted to see if there was anything that I can help you with.