
Air Lift Ride Control Air Helper Springs - Rear Axle


To see if this custom-fit item will work for you please tell us what vehicle you'll use it with.


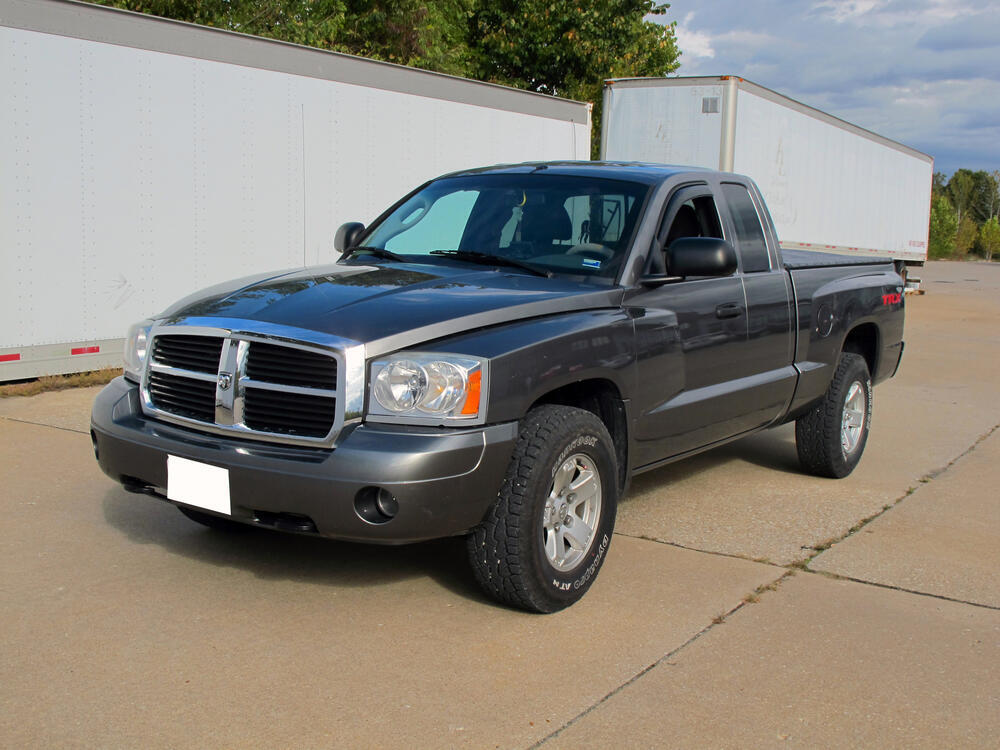
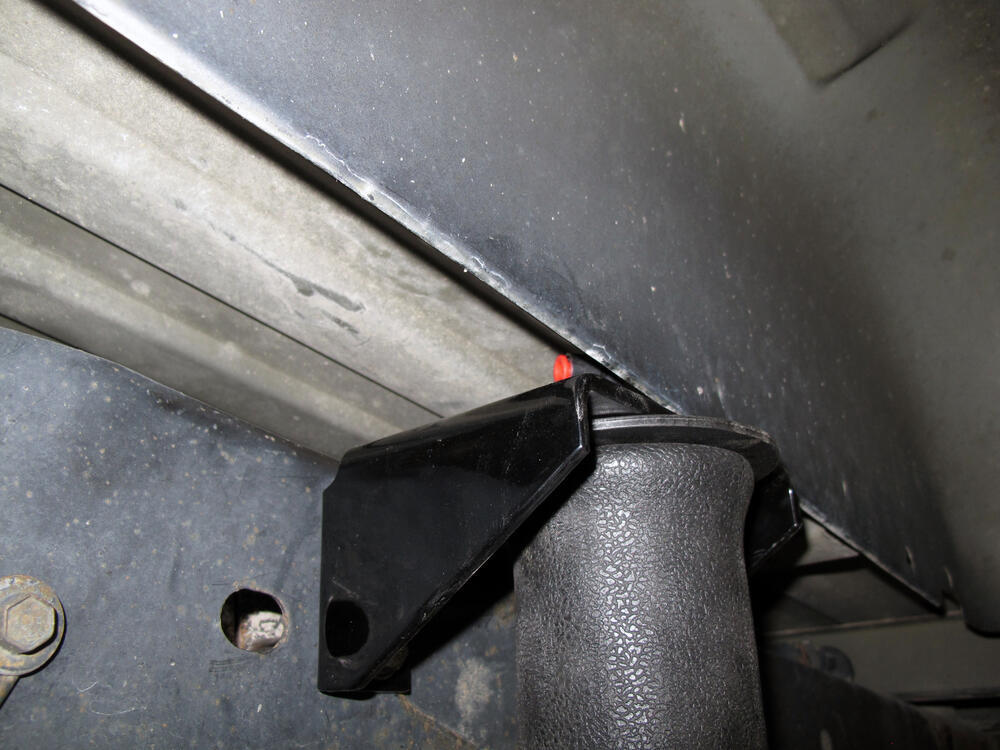

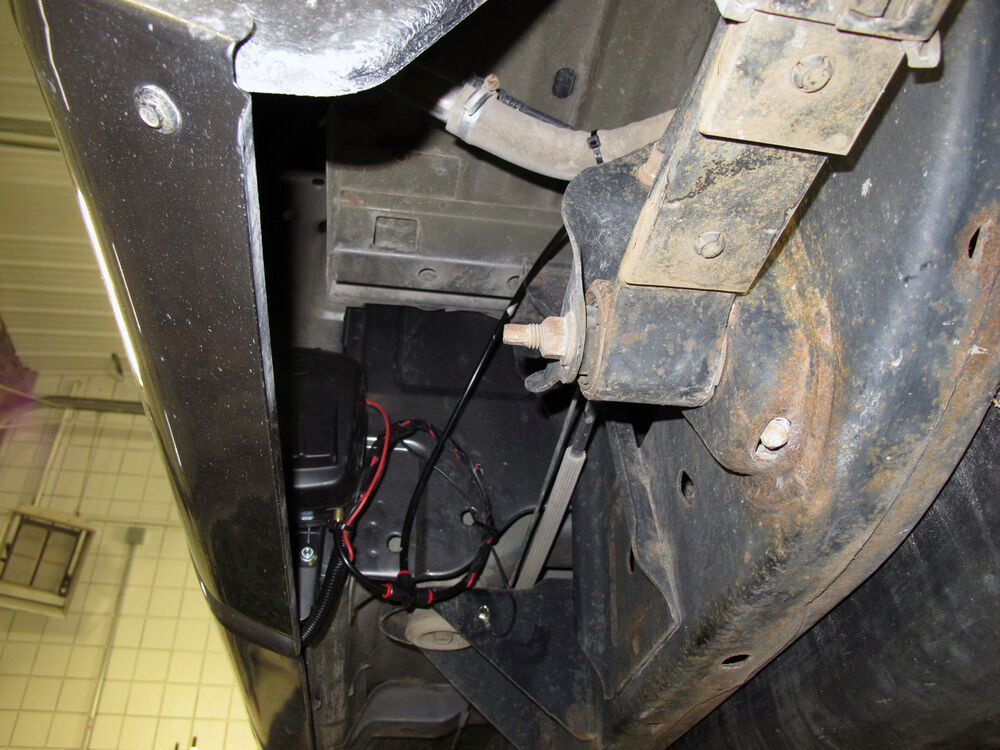



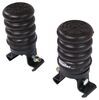
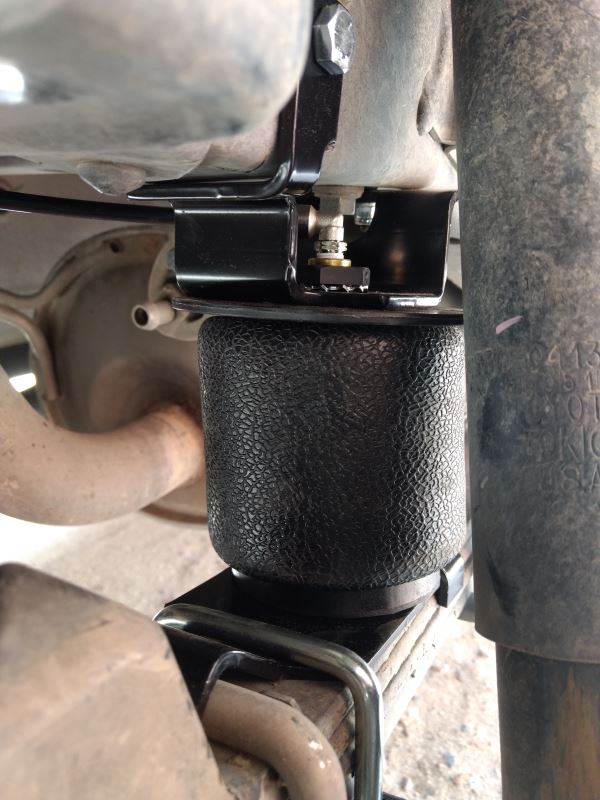
When you’re hauling a heavy load, rear-end sag can throw off your steering, braking, and headlight aim. The Air Lift Ride Control Air Helper Springs add up to 2,000 lbs of load-leveling support to keep your truck riding level and steady. Mounted between the frame and leaf springs, they share the work with your factory suspension so you maintain proper ride height, even with tools, campers, or gear in the back.
Every load is different, and these springs let you dial in the right support for each trip. Inflate anywhere from 5 psi to 100 psi to balance your ride—firm it up when towing or hauling and drop pressure when unloaded for a smoother drive. Each spring can be inflated separately for side-to-side leveling when loads aren’t even. With manual Schrader valves mounted on the bumper, quick adjustments are simple and reliable.
Heavy loads can make your ride feel loose or bouncy over bumps. These air springs improve overall stability by absorbing road shock and reducing sway. The result is steadier handling through curves and smoother braking on rougher roads. By distributing weight more evenly across all four tires, you also help maintain proper tire wear and safer traction under load.
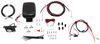
The Ride Control kit comes complete with two air springs, mounting brackets, hardware, tubing, an alignment tool, and Schrader valves for manual inflation. The included alignment tool centers each spring between the frame and leaf spring to prevent rubbing or damage during use. The setup is straightforward for a DIY installation using common tools, so you can get dependable suspension support without shop time or extra parts.
Ride Control springs come backed by a lifetime warranty with no mileage restrictions plus a 60-day satisfaction guarantee. Once installed, you get lasting suspension support that keeps your truck level, stable, and ready for work or travel no matter what you’re hauling.

Videos are provided as a guide only. Refer to manufacturer installation instructions and specs for complete information.
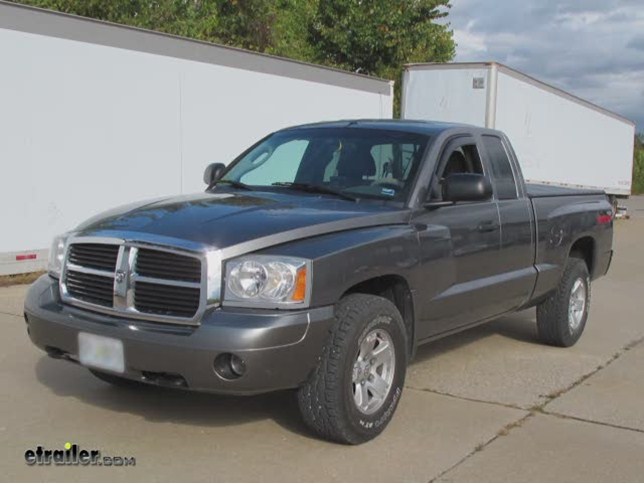
Male: Today in a 2007 Dodge Dakota, were going to start Part Number AL 59555. This is airlift ride control air helper springs. Also were going to install Part Number AL25592. This is the airlift load controller 2 compressor system. First off were going to start our work with the airbags. Were going to secure the upper bracket and lower bracket together to put the installation tool.
Top bracket will get large throw section with two nylon nuts and the bottom bracket will get a half inch flat washer and half inch bolt. Well go ahead and loosely attach these parts together for now. One thing you want to do is make sure you keep the half inch flat washer and bolt for re-installation later.Okay. Next, well go ahead and attach a lower bracket to the top of the springs. First well lay it on the top of the springs.
Sometimes inaudible 00:00:49 springs point up too far where they cant sit on the bracket. In this case, well go ahead and use the spacers. We want our upper bracket to touch the weld where the two frame sections come together. Once we have it in the right position, well go ahead and attach the lower bracket to the spring. Well use a U bolt, a flat washer, and a lock nut. Then well go ahead and tighten these down.
As we tighten them down, its a good idea to go ahead and double check the alignment on the top bracket. Youll have to loosen it up and move around, when you tighten it down the bracket, itll move a little bit on you, so just make sure you have it in the right position. Also you want the lower bracket to be pulled as closer to wheel as much as possible. That way the lower bracket has enough clearance with the frame. In this case, try to have a little over half an inch.
Once we are secure with the lower bracket position in the top bracket then well go ahead and tighten the lower bracket down for good. We will torque them down as described in the instructions. One other thing you may want to check is make sure you get about 2-1/2 inches of clearance around our installation tool. Thatll make sure we have enough room for our air spring. All right now, well go and attach the upper bracket to the frame. Well go ahead and drill a small power hole first and then go back it with 3/8ths inch drill bit. Then well mark and drill our upper holes. Again, with a inaudible 00:02:25 then going up to a 5/16th. Now well go ahead and remove the installation tool. Now remember, we need to keep the nylon nut on top and the bolt on the bottom. Okay with double bracket out of the way, well go ahead and drill a inaudible 00:02:48 holes all the way to the backside of the frame. Now therere some brake lines and some wires back there, so its a good idea to go ahead and loose up the wires to get them out of the way, but then we will go ahead and put the cardboard between the brake line and frame. This can also be piece of wood. Well go ahead and mark our holes and then drill out this time with a quarter inch bit being careful to go through the other side of the frame. Then well go ahead and drill an option 3/8th size. Now on the 3.8ths holes on the outside portion of frame, well need to drill those out to half an inch to provide enough room from frame inserts. Once our holes are drilled out, well go ahead and install the inserts. Now its a shorter one and a longer one. The shorter one will go towards the rear of the truck. Then well install two, 3/8ths x 4-inch long Hex bolts with flat washers. Run those to the lower holes and into the spacers.Once we have them all the way through, on the other side, well install the large flat washers and nuts. Leave those loose for now then on top two holes, well install two self-threading bolts. Well get them started and then tighten down as indicated in the instructions. Then well go ahead and torque down our lower two bolts. All right, at this point we can go ahead and install our air spring. First of well install a 90 degree air swivel fitting to top the air spring. Well start by hand until it hits the seal and then well go ahead and tighten down with one and a half turns. Okay, well guide the fitting to the center of a mounting hole on the upper bracket. Then well attach the air spring to lower bracket using a flat washer and a bolt that well use from the installation tool earlier. Now, work in place this will take some patience, but well leave it loose for now. Then well install the nylon nut over an air fitting on to upper thread post of the air spring. Then well go ahead and tighten it down. At this point, well be installing the air lines that will go to the bumper or some other location. This is getting an air compressor kit installed, well go ahead and will meet that step. Were still going to fill air in a bag to help it center up and then tighten down the bottom bolt. In this case, were going to use an extra air line and air fitting we had, and well go ahead and use it to fill the bag, just enough to give some shape then we can go ahead and adjust it. Then we can go ahead and tighten down the bolt.At this point, we can go ahead and start our installation of the compressor kit part number AL25592. Our step starting with the compressor is find a location for air gauge and the controls. You find a small place underneath the dashboard in the center console, never going on to the bottom edge. The bracket for a gauge sticks out little further than the area were going to install, so were going to trim off the tabs and drill new holes into it.Okay, with the tabs trimmed off and new holes drilled, well go ahead and give it a test. Once were satisfied with it, well go ahead and leave it alone for now. Well actually mount a dash. That will be one of the last things we do.Next well go ahead and find a location for our air compressor. Now were going to mount our compressor on the inside edge of a sheet metal on the bed of the truck itself. Now the kit comes with self-tapping screws for this were going to use some quarter inch hardware instead to help mount it to the sheet metal.Then well take a block wire with the ring terminal, we need to run that to ground. Well go to the frame and well use one of the screws that come with the kit to install it from ground. Now when you go back up to our air gauge and wed install the wire harness number 1. First off well take the air line, push it on to the barb fitting. Then we will take two wires with the terminals and run those into the back of the switch.Now well go ahead and work up harness number 2. Well go back down to the compressor, well take the air line and push it down to the barb line on the air compressor. Then well take the one red wire with the ring terminal and connect it to the red wire on the air compressor. Now the end of the air line that were using going straight to our compressor would be one with the tee. The other end will go up to wire harness number 1.Now, well go ahead and route a wire up to the cab. In this case, were underneath the body work along some edges to help keep it up and out of the way. Then well run through a grommet for a parking brake cable. Well remove the driver side threshold panels with a panel-removal tool. Now we got the panels removed, we will go ahead and pull back the carpet underneath the pedals and pull it off to a side. Well go ahead and make a hole in it to run a wire and an air line through it but just big enough were going to run an air line and wire through and still be snug.Then well take the excess length and well just loop it up and hide underneath the carpet. Next, well go ahead and connect the two harnesses together, and to make a connection, well go ahead and take an air line and push into the tee that goes to the pressure sensor. Then well do a small tab on the pressure sensor for other wire. Well go ahead and push that on to the tab.Now well go ahead and start working on our air lines going from a compressor to our airbags. Well go ahead and take a length of line that comes with the air compressor kit and push it into the tee thats right behind the air compressor. Then we will route that over to our back axle and then into our airbags. When were into airbags, were into the driver side. Well also place a tee between air compressor and driver side airbag so you can run it over to the other side to the passenger side and well connect directly into the airbag there.At this point, we can go ahead and hook up a power wire. This will be a wire with a blue fuse holder already installed on it. Then well need to run this out to our fuse box. Now in this case, the wire is going to be a little bit short, so were going to add the suction to it to make it longer to reach up to the fuse box. Well go ahead and cut it and were going to save the other end and nail the slice in and make sure the length of red wire. This wire does come with the kit as well as a couple of bolt connectors. Well go ahead and poke a hole through the rubber grommet on the firewall then well be using the other piece of air line tubing to use it run force it through. Then well pull it to our fuse panel.Now once we get to fuse panel, well need to find one circuit that light turns on with the ignition. Well go ahead and test our fuse with the key off until we find one that doesnt have any power to it. Then well check it with the key on. In this case, the circuit that were using would associate with the radio. Now well go ahead and remove the fuse and then we find out which side of the socket for a fuse is hot and well go ahead and use our tester for that. Okay. Now that we know which side is hot when we turn the ignition, well go ahead and add our fuse tap to our fuse. Its a small brass piece that slips over one leg of the fuse and snaps over a top. Then well just reinstall the fuse. Okay. Then we can go ahead and take our terminal and pull it through a fuse tap. Then well route a wire out to the fuse box. On the final location, well go ahead and make a small notch in it, so that we can reinstall though it and not pinch the wire. All right with this connection made, our system is actually ready to work. Well go ahead and try it out before we work on anything else. Well get into inaudible 00:11:28 turns at the arm position and check for operation. It should turn on right from the back and inflate the airbags to about minimum 10 PSI. Okay, looks like everything is working. Right. The next step is go ahead and provide some illumination for a gauge. Weve got take our wires that come with the kit, add two terminals that will plug into the back of a gauge and a black wire will run to ground, and then a red wire will connect up to for power. Now well connect our power up, were going to use a wire that comes out right behind the switch for headlights. Were going to disconnect the wire harness that goes into the switch by simply pushing down on the small tab. Those will be impossible to see yet to go by feel. Then we can go ahead and pull it down and make our connection. Itll make your connection to a running light circuit, we notice that there are two of a same color wires. You then double check to make sure which one is lit up when you turn on the running light circuit. To make your connection, youll be using the provided quick splice connector. Now youve everything working, were going to go ahead and mount the gauge at the bottom of our dash and then we go ahead zip tie and hide our wires in air lines as needed. Okay with all wires stashed away underneath the dash, well go ahead and do the same thing for wires in the air lines underneath the truck. Right, well go ahead and put on the rear wheels and then well go ahead and take it out for a test drive.With that thatll finish part number AL25592 and AL59555 from Air Lift on a 2007 Dodge Dakota. .
Ratings & Reviews

Had fun with a few friends installing this. A good garage day. Instructions are easy to follow. If you have basic mechanical skills you can do this.
Just going to help my Colorado pull our Camper.
Install was simple. Took me 2 1/2 hours by myself, plus my buddy 1 hour to weld on a nice bracket for the air valves on the back bumper (see pics). Instructions were confusing and nomenclature did not match parts, but I eventually got it figured out. There are also two spots in the instructions that tell you not to tighten certain nuts down so that you can adjust the bags later, but it never tells you when or how to tighten them later.
I recommend you jack up the rear axle and remove the rear tires so you have plenty of room to move around and install this.
System looks really nice on the pickup, and you can hardly tell there's anything on there unless you are looking closely. Even while almost empty, the bags push the rear of the pickup up a little bit which looks cool. And it seems to ride smoother now too. I have not tried it with pulling cargo or a trailer yet, and will update this review if I don't notice anything good.
Smoothed out the ride helps with the heavy loads ( sm. Pickup) did not lift quite as high as I thought (loaded) very happy with the purchase, install was a breeze.
Had this kit installed by pros. It seems to work as advertised on my E150 Ford van
Product arrived in just a couple of days and was very easy to install. Only took an hour. When I filled the system with air I found a leak on the bag itself. Called Rebecca at etrailer and she gave me the number to air lift and she would check with me in a couple of days. I called airlift and had a new bag in two days. Rebecca did email me and ask if everything was ok. Hooked the camper up and tried it out and man did it work great. This was a great buying experience and will soon purchase the on board air compressor from etrailer
I purchased and installed this kit on my 2008 Hummer H3 Alpha to assist the rear springs for towing my heavy jet ski trailer, and it preformed flawlessly. Straightforward install, great quality product, and the bags are holding up really well to the abuse I've put them through. I definitely recommend this kit to anyone considering purchasing it for their rig.
Install these on my 2015 Chevy Colorado. I pull a fairly big travel trailer and although it's no problem pulling it I had noticed that over the last couple of years the rear of the truck was gradually sagging more. The AirLift fixed it right up.
The ride now inspires more confidence and I definitely have more control over the whole rig.
Installation was fairly easy. I'm pretty handy but quite green when it comes to vehicles so I would say it's accessible to anyone with a handy thumb. I even managed to install them without removing the wheels. It took a bit longer and required more up and down with the car jack but since I did it a couple of hours at a time over a couple of days it allowed me to still drive during the installation process.
I'm am a huge fan and would recommend it to anyone.
The product is as described. My springs are starting to sag and I wanted to return the ride without replacing the springs. I was able to adjust the ride. This will definitely help when loaded or trailering.
The install was good with the instructions, but note that the hardened steel frame sleeve (2003 GMC Astro) was a bear to drill through and chewed up drill bits. Just a note for your install. Had it on for three days. I'll update review if things change.
I found needs to be extremely helpful. I have a 1997 Econoline 150 Ford van. It was a conversion van so lots of extra weight. The back leaf springs were obviously struggling as it rode low without a trailer or any significant load. After installing the air springs, and charging them 1/3 of capacity Or 35 PSI, the ride drastically improved. Shortly after installing them I pulled a 24 foot trailer with a medium load on it, and it drastically improved the ride compared to pulling a trailer previously. Highly recommended and cheaper than new high-quality leaf springs.
The AirLift system we talked about a couple weeks ago was sent to my daughter, Kristi's house. I installed it yesterday. I'm on the road, which isn't the best place to do the installation. My father in law didn't have any socket wrenches so I started with a couple 9/16 open end wrenches. These don't work for everything. I went to the local hardware store and bought what I needed. The driver side went on much easier. The hardest bolt was the top one requiring the socket wrench to hold the nut inside the frame. I had to feel for the nut since it was hidden next to an existing frame bolt. I was able to simply jack the back of the truck up at the hitch to gain clearance. I didn't have to remove the wheels. The nylon lock nut was fun to tighten. AirLift should have supplied a simple wrench for this. I found a vice grip needle nose plier worked well enough.
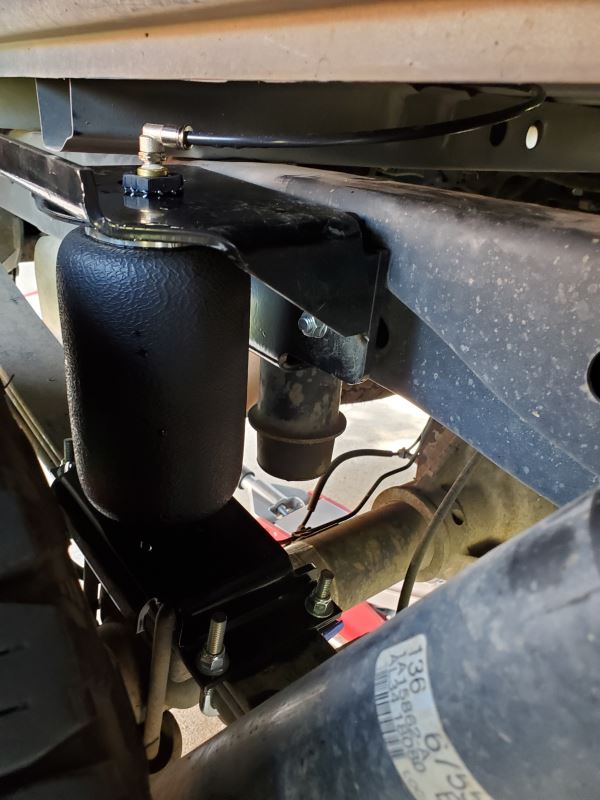
Here are three photos. First is passenger side, second tries to show where top nut goes, third is drivers side. I have then filled to 28psi and will check them this morning.
Great experience working with everyone at etrailer. Very helpful and attentive to what I needed. Thanks again to all of their team!
2019 F150 FX4 W/suspension level kit. Straight forward install. Easily leveled the truck back out while towing a 24' bay boat with bed loaded down too. recommend for similar applications!
Yeah really good. I haul heavy wet firewood often. 2000lbs is a guess in my Toyota pickup. That weight not possible without these airbags. They get used often. No leaks. Really happy with them. Love carrying a bike pump around and pumping up after weight is on. Instal wasn't too bad as I recall. Has to bring out the grinder for a second or two.
great company to work with, they sent me a new air bag when mine had a leak and the shipping was fast. the install was a little difficult, had to drill holes in the frame. i have the silverado 1500 classic 07 so most aftermarket parts need some modifications anyways. i’m now able to haul comfortably without “trailer squat”
2024 Chevy Colorado Trail Boss. These Airbags far exceeded my expectations. Installation was straightforward and took less than an hour to install.
I carry a lot of tools and equipment in my bed and these airbags keep my truck level. I put 30 PSI in each bag and haven’t lost any pressure in 2 months since they were installed.
I highly recommend this product. Also awesome Customer service when ordered
Product was as advertised, and the install went smoothly. Toyota Tacomas are infamous for sagging rear ends, and these air springs handle that well. For now I can only comment on installation, as I've yet to load the truck with a heavy trailer. All parts can be mounted comfortably by jacking up the rear axle and removing a wheel. I didn't have any alignment troubles, and the instructions were specific to these parts and my truck. Buyers should be aware that air springs require regular checks to make sure they are inflated to a minimum pressure. I can easily reach in and squeeze the spring to check inflation, and it's faster than pulling out a pressure gage.
I bought these to take the bounce out of the truck when pulling my front end heavy enclosed trailer. Worked fantastic. Kit came with everything needed and only took about 30 minutes to install.
It was pretty straight forward it took me a bit longer to install but I was being overly cautious. Also a bit hesitant to drill holes in the frame but after installing it, i wasn't to worried about it. My friend ordered the same set up for his toyota and we'll be installing it the week. It helps the ride wether you are hauling or empty. I give it 5 stars on installation and final performance.
I was pulling a heavy trailer and wanted the airbags for stabilization and leveling. It worked even better than I expected. Was very easy to install too took less than two hours.
Great system installation was not too hard. I drive a Ford E150 van full of tools, and it was sagging in the rear now I'm ridding level again and going over speed bumps without bouncing all over the place. Nice system at a good price.
This kit is exactly what I wanted. The weight of my trailer tongue varies between 150# and 300#, depending on the loading of the trailer. I need the ability to account for the trailer tongue weight. This air lift kit allows me to easily level the truck with air pressure to account for various loads whether in the truck or trailer. PS - ETrailer.com is the place to purchase. They are an excellent business with great support.
These have been awesome and totally changed my truck. I have a 1st Gen (2000) Tacoma. These have allowed me to load/tow right up to max recommended weight. Before these the truck was scary to drive when it was 1/2 loaded. It is much safer and easier to drive now. I love being able to add air when I need it. Since I already had a lift kit on the truck, the installation required me to fab a small bracket to make things fit, but it wasn't a big deal. Customer support was excellent answering questions.
I love this system. It is perfect for leveling up my truck when hauling and towing.
Straight forward installation. E trailer video was very helpful. Operating as described. Certainly will assist in overall stability and ride control when towing.
Glad I decided to pursue the purchase with E trailer.
Do you have a question about this Vehicle Suspension?
Info for this part was:
At etrailer we provide the best information available about the products we sell. We take the quality of our information seriously so that you can get the right part the first time. Let us know if anything is missing or if you have any questions.































Thank you! Your comment has been submitted successfully. You should be able to view your question/comment here within a few days.
Error submitting comment. Please try again momentarily.