


To see if this custom-fit item will work for you please tell us what vehicle you'll use it with.


Thank you! Your comment has been submitted successfully. You should be able to view your question/comment here within a few days.
Error submitting comment. Please try again momentarily.


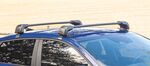
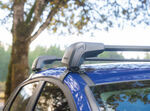
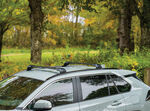
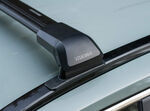
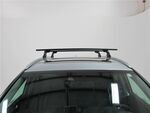
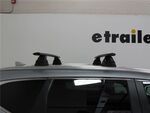
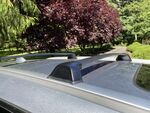
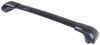
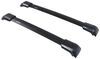
The flush design keeps the crossbars tight to the roofline, giving your setup a clean, from-the-factory style. Nothing sticks out past the sides, so the rack blends in with a streamlined look. The integrated tower and bar system makes it all feel like one solid piece instead of something bolted on after the fact.
When you’re on the highway, wind noise can get annoying fast. These aero-style aluminum crossbars are shaped to cut through the air more smoothly. The push-down rubber strips in the top channels not only make it easy to attach accessories but also help reduce wind noise and vibration while you drive. It’s a quieter ride without having to mess with extra covers or tape tricks.
Whether it’s a kayak in summer or a cargo box for a cross-country trip, this rack can handle it. The bars work with most bike, watersport, snow, and cargo carriers that mount in top channels or clamp around the bars. That flexibility means you can use what you already have and still add new gear down the road without needing a whole new rack.
Strength matters when you’re hauling your gear. The aluminum construction gives you a solid platform that feels sturdy under load while keeping weight down. With a 165 lbs capacity—always within your vehicle’s roof load limit—you’ve got plenty of muscle for typical outdoor setups and road trip gear.
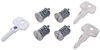
If you want to lock things up tight, this system is ready for Yakima Same Key System (SKS) lock cores (sold separately). Once added, those locks help deter theft of both the rack itself and any channel-mounted accessories—great for when you leave your setup parked at a trailhead or overnight on the road.
 Alternate Instructions
Videos are provided as a guide only. Refer to manufacturer installation instructions and specs for complete information.
Hello, neighbor. This is Curt at etrailer and today, we're gonna be taking a look at the Yakima SkyLine FX roof rack system on a 2023 Jeep Grand Cherokee L. Now the SkyLine FX is a flush mount system. And by that, it just means it's got these really clean edges and the crossbars themselves dead end into these towers. There's not gonna be any overhang to it, so it does give a bit of a cleaner, more of a factory look on the top of most vehicles. However, what we're gonna be missing out of that is gonna be some of that extra overhang to add more space up to the crossbars and also make them a bit more accessible.
This is a very tall vehicle, so for anybody considering these, just keep in mind that anything that we're gonna mount up here is gonna be further away from the edge of the vehicle. So if you're a shorter person, it could sometimes be a little bit hard to reach up here, but we've got a remedy for that. This item here is what's called the Moki doorstep. Now the way this will work is you'll open it up just like that. It's gonna work inside this door hook right here by lifting up and over, and creating an extra step to get up on the vehicle.
It's going to have a 400 pound weight limit. So don't be afraid to get, you know, two feet up here if you really need to. But if you're a shorter person that might have trouble accessing this up here, this is gonna be something that's gonna come in very handy as far as being able to reach over inside of a cargo carrier. Maybe help, you know, get some bikes down, or anything else that you're transporting on your roof. Now I had mentioned that being a flush mount system, we're gonna have less bar space up here than we would normally with an overhang system.
So let's take a look and see exactly what kind of room we have up here to mount our accessories. So as far as usable bar space, we're gonna end up with just a hair under 29 inches here, and it should be pretty similar to the back. The back actually is just a hair less than 28 inches. So as long as the mounting system on your rooftop accessory doesn't exceed that 28 inches, we should be able to use it up here on the roof. Now some other concerns that you might have would be clearance: Just how much taller the does this system make my vehicle Now on this system, the tower is actually taller than the bar.
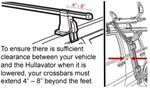
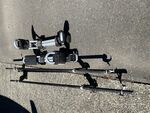
So if we take that measurement, this system is going to add about 4 and 3/4 inches to the overall height of your vehicle. And if we've got concerns with clearance underneath the bar, if you have a working sunroof or moonroof, the clearance underneath the bar comes out to just about at three inches. So bear that in mind if you're carrying anything up here, you have just the bars up here and you want to open that sunroof or moonroof. The last measurement that we want to take is what is our crossbar spread These are on fixed mounting points so you won't be able to really adjust the width of the bars for different accessories. So it's good to keep in mind exactly what kind of room we have to work with. So if I'm going from the center of the track system to center of the track system, we end up with 26 and 1/4 inches, and I actually think that's pretty good. Usually anything between 24 and 30 inches is able to accommodate most rooftop accessories. Now that we've gone over some of the features and specs of this roof rack system, let's take a look at how we got it installed. So now that we're up here on the roof of the vehicle, we're gonna have to go ahead and prep these rails. We have already installed the front bar, but you may want to take a look on the '23 Grand Cherokee L. You actually have three sets of mounting points up here. If you're gonna do a roof rack like we're doing today, we would suggest the front two mounting points. That way, you get the proper crossbar spread, and loading and unloading it is gonna be a bit easier since the door, the rear door on this vehicle is much closer to this area right here. So to get that ready, what we're gonna do is take a simple flathead if you don't have a trim tool, and we're gonna go ahead and lift under and pop these little plugs out to expose the bolt holes that are gonna allow us to mount our landing pads. Now that we've got that done, we'll grab our landing pads and mount them up here on the rail. Okay, so we brought our landing pad up along with the bolt and washer to mount it and the Allen key that comes with the kit as well. So you're gonna notice that there are two holes up here in this slot. And what we found is this front mounting point here, despite this interfering with it a little bit, actually still fits the best. So it's a bit of a tight fit, but being that this is a rubber on the landing pad, you can actually kind of squeeze it in there and make it fit properly. So we're gonna go ahead and take our first bolt and washer, thread it through, and we're gonna put it through this mounting point right here. Once we get that in, we'll take our Allen key, and we'll go ahead and tighten that down. So you see there's a few options as far as the front mounting hole that you can use. We played around with a little bit. And while you can use this front mounting hole, these tow hooks really do interfere with how it goes on. It's possible because of the soft rubber back here to really maneuver it. But honestly mounting it through this hole here, you do have to press it down a bit to get that mounted right, but we're finding that this is the proper mounting hole for the back. In the front, however, the proper mounting hole does look like it will be the front hole here. And then, of course, the slotted hole so that you can maneuver it back and forth little bit if necessary to find it. But now that we've got the proper mounting holes in position, we're gonna go ahead and tighten this down, and then we'll get our crossbar prepped to put up here as well. Now we we inchesre mentioning how it could be a little bit tricky to get these mounted. And there will be times when you want to perhaps drive the vehicle without the bars on 'em at all, whether it be for clearance or any other issue similar to that, or running it through a car wash because you really don't want to do that with crossbars on your vehicle. The Yakima kit comes with these covers though, so you can leave these on after removing the bars and protect them by just simply snapping these covers on. And they look really nice and clean on the car and you're ready to hit the road without the bars if necessary. Now that we've got our landing pads mounted, let's take a look at the bar itself. So this is a flush bar system. It is, what they call, an aero-style bar, so it's got a bit of an ovular shape. Now aerodynamically, this is really gonna help cut down on wind resistance and therefore, a lot of the noise you can get from a roof rack when you're traveling down the road. You can mount rooftop accessories either through the clamp system, which would wrap around the bar completely, or you can use the track-mounted system. Now on overhang bars, you're able to access those tracks from the outside by pulling off the end caps. On a flush mount system, we're really not gonna be able to do that. They leave the opening in the middle here so that you can press down on this rubber strip and then slide those track mounted accessories over. Now to prepare for the install, the first thing we're going to do is remove this end cap here. We're gonna also pull this tab down once it's unlocked. So you see right here, we're gonna be able to use a flathead to turn it to unlock in the vertical position. Now this area right here can actually be replaced with a key core. So Yakima uses what they call the SKS or same key system. They can be bought in multiples that are all keyed alike so that you can put a lock core at the ends of all of your bars and some of your rooftop accessories and still use the same key for all of them. So we're gonna go ahead and get this unlocked. Once we do that, we'll be able to pull this tab down. Now let me flip this over and show you the underside because this is how it's going to attach. So with this disengaged, as we push it down to close it, you'll notice these pistons come out and that is what's going to be attaching it to our footpad. The next place we're gonna pay attention to is this area right here, which you could still access even with this closed. Using the Yakima tool that comes with the crossbars, you'll be able to take that in. We're gonna loosen it up just a little bit, just a couple turns is usually all that's needed. And what that's gonna allow for is this to slide back and forth and adjust to the perfect width to go on this particular vehicle. Now when mounting these on your roof, it is important to remember that the wider part of the bar is always gonna be facing forward. If you need a reminder of that, they do actually etch a little bit of a diagram right here that shows which direction it needs to go in case you need a reminder. So right now, we're going to disengage those pistons. We'll get it up on the roof and mount it to our foot pads. With the pistons open and disengage, we're gonna go ahead and lay one right in over here in the mounting track. We kept it loose so we can make sure that we can adjust the length of it to come over and attach in on this side as well. Okay, now that we've got them seated properly, we can go ahead and take our tool and make the adjustment to tighten this down so that it doesn't try to slide back and forth. And then we'll close these up and have it locked in place. Okay, so now that we've got everything seated correctly, we're gonna go ahead and close this gray part here. Make sure it goes down all the way and clicks into place. That's gonna engage those pistons and secure it to our feet. Now, we'll be able to take our flathead and lock it here. Now of course, if you replace that with the SKS key core system, this is the point where we'll just go ahead and lock it. We've got that down. Now what we're gonna want to do is take our Yakima tool again and we're going to tighten this down until we hear a good pop. Just like that. This is a torquing tool, so it'll let you know exactly when we've got it tight enough. At this point, we've got everything secured down. We're ready to replace our end cap. Once it's in there, we're gonna go ahead and give this a good shake. Make sure everything is secure. This seems all nice and tight and ready to go. So it looks like we can load a rooftop accessory and hit the road. So overall, the Yakima SkyLine FX roof rack system is a good roof rack for your Grand Cherokee L as long as aesthetics are a little more important than utility. I think if you really want to get more up here on your roof rack, we're gonna maybe perhaps visit an overhanging bar system. However, aesthetically this is a much more pleasing look as it does look more of a factory feel than an overhanging bar would. And being at 165 pound weight capacity, and double check your owner's manual because we wanna make sure that your roof can handle at least that much as well. But with that weight capacity, it is actually comparable to even most of the overhanging systems. So as long as you're okay with the limited bar space, this does offer a cleaner look. It is a very easy system to remove if you need to. If you're going somewhere worried about clearance or if you wanted run it through an automatic car wash, you'd wanna remove the bars. So I would say overall, this is a good roof rack system as long as you know what you're using it for and know what kind of limitations you might have with it. So once again, this is Curt at etrailer. Thanks for stopping by.
Ratings & Reviews

The system fit perfectly. Thank you!
Works great!
Excellent service
Great customer service
Stacey was very helpful to ensure I ordered the right part for my vehichle. Excellent customer service!
Excellent customer service! I felt like I had a personal shopper in the care Sherry S. offered!
Great product. Easy to install. Arrived quickly.
Yakima Towers and Pads arrived on time and all in order. Service was extremely fast and the price was better than every other site I looked through.
I like the strength of the Yakima brand and it looks great. It does seem a bit more complicated than might be necessary. I know they have to fit to many different cars but the matching of components is confusing and the installation less than intuitive. The end result is great and etrailers is awesome in every way!
In the confusing world of roof racks, the etrailor site had a locator tool that made it easy to identify the correct landing pads and towers for my vehicle.
Yakima racks are always a good choice. Etrailer made it easy for me to know all the parts I needed and it was so easy to install!
I have a Buick Envision and it seemed as if it would be difficult to get the correct rack, but it turned out to be easy. I entered my vehicle info and was directed to the Yakima Skyline with flush rails. It was easy to install and they look great. I will be able to take my canoe out with no problem! Joe
Yakima Landing pads are vehicle specific. Good quality mounts are supplied with good stainless steel fasteners. Required as a base for the towers.
Great service and timely delivery!
I love the ease of removing my crossbars at the end of the season with these landing pads. Highly recommend these.
Exactly what we needed to use our old Yakima bars and kayak sharks with our new Ford Explorer. Our old car, a Ford Expedition, used the same round Yakima bars and kayak sharks but had a different roof rack. Instead of paying $800+ to get a whole new kayak rack system... the adapters we got from etrailer helped us used all the old equipment :)
I had cross bars and landing pads on my Jeep Grand Cherokee. I bought these to put on my wife’s new Grand Cherokee L. They were extremely easy to install and now I can easily move the roof rails between the two vehicles. They are a great product as is most of Yakima’s products. I highly recommend them.
Came quickly, and I appreciate the free shipping – which is why I went with etrailer instead of ordering directly from Yakima.
All worked as described. Installation was easy and quick.
Dont waste your on cheaper products, it will bite you eventually
Makes for easy and secure crossbar on/off. Covers stay on during car washes.
Easy website, fast shipping, quality pr oducts
My 2014 Jeep Grand Cherokee used landing pads 18 to mount to the roof my newer 2023 JGC uses landing pad 19. I was able to change the pads thanks to etrailer and install my older roof rack on my newer Jeep. I love that the majority of my roof rack is upgrade-able.
These landing pads allow for the quickest and easiest install and removal of cross bars. This will be the only ones I use going forward.
I have these installed on a 2022 Honda Pilot. I could not get them to fit on my raised roof rails with the included rubber gaskets. I have mounted them without the gasket but this leaves a gap between the rail and the landing pad. This seems secure but does not have a finished look. I will be trying to see how to get the gaskets to fit.


Andrew N.
10/15/2022
You definitely want to use the gaskets and I dont recommend using the crossbars without them. Here is an install video that might help you out with this part. Let us know if you still some assistance after watching.
I was between the Yakima Skyline FX and the Thule Wingbar. While both have an aerodynamic profile, I decided to get the Yakima. The major selling point for me is the landing pad system. You can easily remove the cross-bars without having to unscrew bolts. This is very convenient for washing the car or storing the bars when not needed. The landing pads also provide a clean and flush fit.
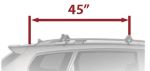
Info for this part was:
At etrailer we provide the best information available about the products we sell. We take the quality of our information seriously so that you can get the right part the first time.























James
8/24/2025
The rack base has worked perfectly. I took my Yakima rack off my Tacoma and transferred it to a Honda Pilot and eTrailer had the correct bracket.