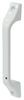
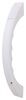
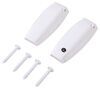
When you need a solid place to grab while stepping in or moving around your RV, this handle gives you a fixed handhold. It mounts directly to a wall or panel so you have support where you need it.
Videos are provided as a guide only. Refer to manufacturer installation instructions and specs for complete information.
Hi, I'm Matt with etrailer, and today we're going to be talking about RV Designer's Grab Handles. So let's take a closer look at them. Now, you can get this in white or black, whatever fits the outside of your trailer a little bit more, kind of up to you. Now a reason why you might want to get this replaced is a couple reasons, is maybe the old one you had after years of use, then it just broke off here, maybe didn't have a good footing or a standing here, whereas this will secure that. One of the other big reasons though, I think is if you just have an old one. And you can kind of see the difference here.
When this is sitting outside, there's going to be a lot of sun, rain, and eventually it's going to start to deteriorate some. So if you want a nicer look for the handle, that's a reason to replace your old one. Now one of the things I do like about these handles is kind of just the simple design of them. There's not a whole lot going on with them. It's smooth all the way across, which is going to make them look good on most trailers out there.
Now these are going to be more of a slim design. We do have some other handles here at etrailer. There's going to be the JR Products, which are going to be a little bit wider. Sometimes that feels a little bit nicer in some people's hands. But that's pretty much it.
The last thing I would recommend for you is when you do install these, make sure you got them in a good spot because they're going to be very sturdy, but if you don't have them secured onto a piece of wood behind your wall here, just kind of hanging off into nothing it is not going to be able to do its job. So make sure it's properly secured onto something. Now speaking of installation, we do go over some tips and tricks and get the most out of this. So if you want to see that, just stay tuned. We'll walk you through the process.
All right, so what we want to do is kind of get our spot kind of marked out. So it's going to depend on if you're going to be using your old holes or not. If you're using your old ones, just make sure everything lines up. Now I would also recommend if you go on this route, also grab some black silicone, put it on the screw itself, put it in there so no water gets in. Probably a good idea to also put some butyl tape around the edges of that. So it'll also help prevent water from getting in. But if you're going to be going the route without using new holes or you're going to be using new holes, grab a drill bit, mark that out first and then you can start installing this. Now I'm just going to be using my old holes, and I'm not going to be using any type of sealants because I'm just using this for demonstration purposes today. But I like to start with the top one. (drill whirls) Now we want to make sure we don't do that all the way. I'm going to leave that loose just so I can make some adjustments. Make sure I'm lined up with the hole beneath here as well. (drill whirls) And once you get that bottom one on, I'll come up here to the top, finish this one off too. Make sure that's fully tied and all there. Give it a good pull. And there we have it. Now if you guys have any other questions, let us know here at etrailer. And again, I'm Matt. Thanks for watching.
Ratings & Reviews
Haven't installed yet
The perfect solution at my front door . I call it my “senior assist”.
Info for this part was:
At etrailer we provide the best information available about the products we sell. We take the quality of our information seriously so that you can get the right part the first time.


Thank you! Your comment has been submitted successfully. You should be able to view your question/comment here within a few days.
Error submitting comment. Please try again momentarily.