


Customers prefer these similar products
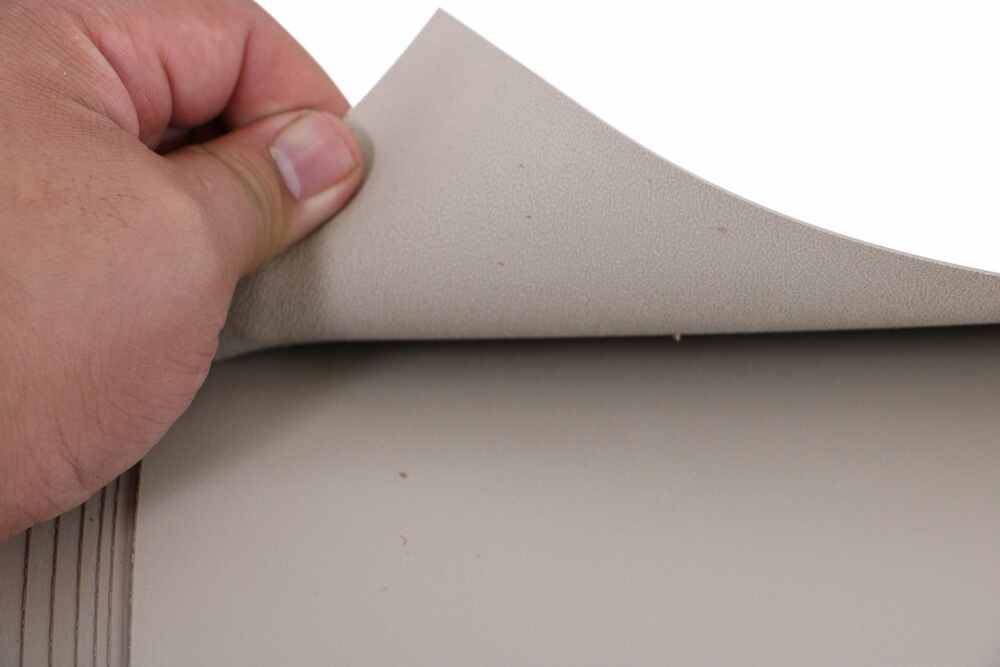
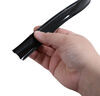
Replace or upgrade your RV roof with this lightweight, rubber roofing membrane. Single-ply, TPO material doesn't contain plasticizers, which degrade over time, making it more durable over the years. Measures 15' x 4-1/2'.
Features:
Specs:
How Often Should I Clean My RV's Roof?
It is recommended that you clean the roof at least 2 to 3 times per year. Alpha Systems membranes do not require any special cleaners for maintenance. You can use typical household cleaners - something non-abrasive, used with a medium-bristled scrub brush. It's also a good time to check the seals around the rooftop accessories and edges of the roof. If you find damage or something that may compromise the integrity of the structure, you can apply more sealant until it is either time to take something down and reseal it entirely or time to replace the whole RV roof.
How Often Should I Replace/Reseal My RV's Roof?
Most RV roofs will last around 20 years, but after about 10 years, it's a good idea to start looking closely for leaks, cracks, or other damage that may lead to replacement of the entire roof. For the best results and the longest-lasting roof, it's best to check the seals and edges of the rooftop at least once a year.
How Do I Replace My RV's Roof?
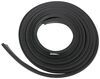
You will need a few tools to install the membrane on your RV's roof. These include butyl tape, adhesive, sealant, a neoprene head squeegee (for no streaks in the membrane surface), and a utility knife.
To begin, remove all your rooftop accessories - A/C units, vents, fans, etc. - and clean off the rooftop. After you have applied the adhesive and laid the membrane flat, squeegee out the air bubbles that will inevitably form, and cut off any extra material hanging from the sides of the RV. Using a utility knife, cut out the areas where your rooftop accessories will be installed and place them in their respective positions. From there, you can apply butyl tape, self-leveling sealant, and non-sag sealant to finish off the installation process.
Videos are provided as a guide only. Refer to manufacturer installation instructions and specs for complete information.
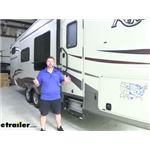
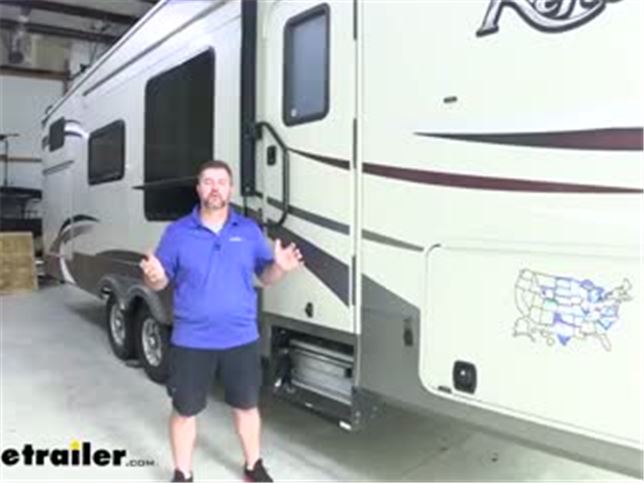
Hey, everyone. Shane here with etrailer.com. Today, on a 2015 Grand Design Reflection fifth wheel, here in just a few minutes, I'm gonna be walking you through how to install a new roof membrane. But I wanna go over a few things, maybe how to determine if you need a new roof or if maybe you just need to replace the sealant. Now, you know you don't necessarily have to replace your roof. You haven't find any soft spots.
You haven't find any leaks. But you maybe found a tear or two in your roof. There are patch kits here at etrailer that you can get. One thing I will say is if you have a rubber roof, the patch kits, I'm not really excited about 'em. I don't know if they really work as well as they're supposed to as far as staying down.
So if you put one of them on, it could be just a temporary fix. I would suggest that you do put it on, get up and check it once in a while to make sure it's still on there. I wanna do is I wanna go up on the roof, kinda walk around a little bit, and I'm gonna show you what the old membrane looks like, what it kinda looks like now, and why we're replacing it. Hopefully, I can help you determine whether you need to replace yours or maybe you just need to reseal the edges to keep any water from getting underneath that membrane and damaging any of the wood components. This is what our roof looks like now.
As you can see, it's pretty wore out. It looks like it hasn't really been maintained very well. When you have the rubber or these synthetic rubber roofs, you have to maintain 'em. You have to clean them and put a conditioner on at least once every two years. Once a year is probably best.
If you don't, you can see this is broke down. It doesn't have a texture to it anymore, which your rubber and synthetic rubber does have a texture. This doesn't have a texture anymore. So it's really broke down to where it's not really giving you a benefit. It's really not helping you anymore. So what happens after it breaks down is it tears really easy. If it tears, you can get a leak. It's not holding out water as good as it used to. What happens is it's gonna get underneath here. You have wood panels that run across like this. The water gets on there. You're not gonna see it. It's gonna cause it to mold. It's gonna get soft. I know there's a few soft spots in this roof, I just don't know where they are exactly. We'll know better once we start taking the old stuff off and get down to the wood. Another thing you wanna look for is the sealant that runs along all the edges. Anything like around here, around your vents, around your steps if you have stairs coming up the back, sealant that runs along the outside edges, anything going to your roof membrane. If you find it's cracked, and it's gonna happen, it happens on every single camper, it's inevitable, but you need to look at it. If it's cracked and you allow it to keep going, the crack's gonna get bigger and it's gonna allow water to seep in underneath all those edges. It could be a small crack. If it's a small crack, you're gonna determine whether you just need to put a little bit of sealant over the top. If it's a very large crack or maybe the sealant from one side, one end to the other looks pretty bad, maybe a good idea to take all that sealant off and just reseal the whole thing again. Keep in mind, this is your sanctuary away from your home. You want this to stay as nice as possible. You wanna save yourself a lot of money. Don't allow it to get damaged on the inside. Again, it's gonna cost you a lot of extra if you don't. Before you actually start your installation, you have to prep for it. That means anything that's on top of your roof that you can see or your air conditioner, your vents, your skylight, your antenna, all that stuff has to be removed before you can get the membrane off. What you're gonna have to do is you're gonna have to go inside, you're gonna have to take off anything that is connecting that part to the inside. Once you get all of that taken off, you can come outside, you can take all this stuff off. Another thing you gotta do is all of your trim pieces that run around the outside of the camper, including the top of the nose, you're gonna have to take all that trim off. Also, your steps that come up the back. You're gonna have to take off the screws and disconnect that just at the top of the roof. You don't have to disconnect it all the way down the wall, just on the top of the roof, so we can pull our membrane out. And also, when we go to put the new one in, we can get back underneath of it. Your slide boxes. Those are gonna have the same membrane that your roof does, so you wanna make sure you check them. What I highly recommend is if you don't have a slide topper, put one on. If you have to replace that membrane that's on your slide, most likely you're gonna have to take the slide box out because that membrane actually goes inside, stays inside underneath or inside the wall here. So it can be a little bit difficult to do that. Put a slide topper on, you know, stay covered. You don't have to worry about it turning out like this. You don't have to worry about cleaning or anything like that. Kinda note some sticks and stuff that are on there. Any water that gets on it when you slide your box in, if you don't clean it off, it goes right inside the camper. So now, not only your roof here could be causing damage inside, your slide box as well can be. Just to give you an idea, a couple things that you're gonna have to remove from the inside. As I mentioned earlier, air conditioners, you have to remove the stuff from the inside first. You're gonna have a cover over your air conditioner on the inside. And then, underneath that, you're gonna have something similar to this. This necessarily isn't gonna be yours, but you're gonna have a piece like this that separates your return from the air that's blowing into the camper. Just remove the screws from that. You're gonna have wiring in there that is gonna have to be disconnected. So when you get to that portion, make sure you don't have any power connected. Make sure you disconnect all power from any outside source, and you may even, if you wanna take an extra step, turn your main breaker off to the camper. Another example, your vents. You're gonna have a piece that kinda looks like this, a trim piece, and it should just have four screws in it. And then, of course, anything that you're gonna need to take out on the inside as far as the vent part here before you can go outside and take the vent off the roof. Skylight. If inside your camper you have something like this, which is just a cover to go over it, I would go ahead and remove that to give you a little bit more room when actually putting on the membrane. 'Cause you can see the membrane here, the old membrane, when we put the new one on, we're actually gonna bring it down and staple it just like that along this edge. So try and give yourself as much room as possible. And then of course, if you have a crank-style antenna like we have here, it has a crank with a spring on the inside, and then a cover of course, we're gonna have to take that off so that when we go up top, remove all the screws and stuff, we're able to pull that antenna out from in here. I will say, when you're taking this stuff off even on the roof, save the screws 'cause the kit to replace your membrane does not come with new screws. If you are gonna replace your screws, you can find those pretty much anywhere. They're a square bit, so yeah, look around at a local hardware store or something like that. So we're gonna start removing all of our trim pieces along the outside edges. As I mentioned, we're gonna have a nose piece. That's this piece here. You see two screws. The rest of 'em are gonna be underneath this sealant here. We have a gutter. And then, if you have this plastic piece in here, a lot of times these can get brittle over time, so they will need to be replaced. I'm gonna try to pull it out to where I can save it. Maybe we can clean it up and put new or clean it up and put it back in. But we'll just have to wait and see on that. Phillips or square bit, you can remove the screws holding it in. And we're gonna do this all the way around the camper. Any trim piece that the top is going underneath, you're gonna have to remove it to not only take the old stuff off, but put the new stuff on. Once you get all your trim pieces removed, we'll come up on the roof. We'll start removing all the stuff on the top here. Along your vents, you're gonna have screws. We're gonna take all of 'em out. I mentioned before, they're most likely square head. You may have to kind of get some of the sealant out of the way. Once we get all of the screws out, we're not gonna have to worry about any sealant on the membrane 'cause we're gonna be taking it off. So what we're gonna do is we're just gonna cut around the edge. We'll just pull it then off. And then, of course, once we get down, we'll have to clean off the old sealant so that when we put 'em back in place, we'll put new sealant on top. Once you get your vent cutout, you're gonna repeat this for any other vent you're removing. And then, when it comes to your air conditioners, the only thing different about those is they're held in from the inside. They're not gonna have anything bolting 'em down on the outside. But I will suggest getting a couple people to help get those down. Once we got all this stuff off the roof, I was kinda going around, checking things out for any soft spots that I may need to pay attention to while I'm walking around up here especially, other than the big holes, I noticed right here, right around this hole where our second air conditioner was, this is all soft. So what I'm figuring is either the air conditioner was installed too far back and it was allowing water to get under it, the seal was bad, or it wasn't tightened down enough in this corner. If it's not tightened down or the seal's bad, you can see where the water was getting in here. And what it did is it saturated all this wood, basically just like this. And now, all this is gonna have to come out. It is two separate pieces. This is the seam where the support brace runs across the roof here or the truss, if you will, and you have two pieces that are connected here. So we're gonna have to replace this piece and this piece. And then, other than that, once I pull up the rest of the membrane, we'll see if there's any other parts that may have gotten some water damage. We may just go ahead and replace those as well. Now, we can go ahead and start removing our top. The easiest way that I found to do is to cut it in sections. 'Cause as you pull it up, there's an adhesive under this that kinda glues it to the wood or holds it down, if you will. And if you try to pull this whole thing off in one piece, it's gonna be really tough once you get all the way to the other end. So you can either cut sections this way and peel 'em off, you know, across, or I think what I'm gonna maybe do is I might cut it across halfway in the middle, and then straight up the center, and then peel it off in four different sections. We're gonna just start at one corner, one end, and just start pulling it up. Once you get enough of it up. I've done a few different roofs. Each roof is a little bit different when you're pulling a membrane off. This one actually took a little bit longer. I'd say it took about 45 minutes to an hour. It's a good idea to have a second person to help you because pulling that membrane off where it is actually glued down to the wood can be a little bit tough and it can get a little bit tiring. So have a second person with you to help you do it, it's gonna go a lot quicker then. Next, we need to remove any pieces and replace any wood pieces that may be damaged. I've already had one removed. I wasn't quite sure what I was gonna come across underneath. I didn't know if the manufacturer, can they glue this to the bottom of the panels, so I wanted to be sure. What I found was it was just screwed in right along the edges all the way around. And then, you'll have a few that run up the center. So the screws are gonna be kinda hard to see, see all of 'em. When I was taking this off, I think I missed like four or five of 'em here in the center 'cause they we're so small. So once you get it removed, remove any of the extra screws that you have sticking up, so that when you go put your new piece down, they're not getting in the way. Also, there's seam tape that runs along the edge here. This tape here, this black tape, and also this tape, there's a drywall seam tape, this you're gonna need to run along all your seams. This tape, if you have it on there, is gonna run from the top over to the side. Now, we don't have the black particular stuff that they used here. It almost feels like a real thin type of tape, but we do have this seam tape from Alpha Systems. This is what we're gonna use to replace this once we take this off. It's waterproof. It's made to seal any edges, end caps, stuff like that. And it sticks to, you know, pretty much anything, wood surfaces, wood paneling, concrete, metal, stuff like that. So this stuff's really good. It's not real thick. So replacing something that thin, you're not gonna have to worry about it when you go to put your top on, having an edge that's sticking up higher. Now, we got one panel removed. I made sure there weren't any debris on top of our insulation there. I noticed that some of the wood that was underneath here, the trusses that run across right where this leak was, we're a little bit damp. This piece here is just a little piece, but these trusses here, they we're a little bit damp still. So what I did is I put a fan on it for a couple hours and kinda let 'em dry out. And they still seemed pretty solid. So you know, I don't hear any cracking or anything like that. So I don't think the integrity of the wood there is too bad where it's gonna have to be replaced. But we do wanna make sure it's dry so that once we put the wood, these two panels in place, and then put our new stuff on, and then get all our stuff put back up here. The cavity inside there is gonna be, there's not gonna be any air flow in there. If that's damp, it's just gonna mold. So make sure that is dry before you start putting anything back in place. When you get to put your panel on, the easiest way to do it, luckily on this end over here behind me, they marked it where the truss is run across here, but they didn't mark it on the other end. So we're gonna go ahead and do that now. They have pencil lines here, but when you put the board on it, it's gonna cover that. So what I'm gonna do, I'm gonna put a mark here for the center of the truss, so that my board doesn't cover these marks, and I know where to put my screws in place. There. So now, we'll get our new board put in place, and then we can start screwing 'em down. Now, we've got our second board in place. And if you remember, there was a hole here and that was for our air conditioner. This is our spot that was pretty bad on the two boards that we're up here before. What we need to do is we need to cut that out. There's a couple different ways you can do it. You can either measure the distance before you put the board on to find a hole and hope that when your marks are right when you cut it out. Or you can do what I'm about to show you, and make it a little bit easier on yourself. Now, we're inside the camper. And what I'm gonna do, I'm gonna use a longer bit. Probably don't need one quite this long, but long enough. The way you can do is get right in the corner, each one of the corners, drill a hole straight up through it. And we'll go up top, we'll use that to mark our square, and then we can cut it out. We'll repeat that for each corner and again, then we can go up and we can cut it out from the top side. Now, what I'm gonna do is take a straight line. I'm using a yardstick. We'll go to the outside edge of the holes. Put a line in between all of 'em. That'll make our square. And then, come back with a jigsaw and cut 'em all out. We'll take our blade, make sure your drill bit's big enough that your blade's gonna fit through it. And we're just gonna follow the lines. So what I'm gonna do here is I'm gonna cut straight across the opposite corner, and cut this triangle out because our plug sits right here. I wanna make sure when I run these two lines that I don't hit that. From here, what we can do is if we came off our line a little bit, we can go ahead and clean it up, and we know how close we're gonna be away or to the inside edge here without cutting into it. So now, we'll just come back and just clean up our edges. Once we got it all cleaned up, we're gonna take some drywall seam tape. It'll look like this. We're gonna run it where these two pieces come together. And you don't necessarily have to go over the edge because once all your edges are cleaned up, you get all the old stuff off, we're gonna come back and we're gonna re-tape all of that as well. This stuff does have, it's sorta sticky on one side. Once we get our sealer on here before we put our membrane in place, or adhesive, it will run through that and it'll help seal those two pieces together, as well as hold the tape down. So as I mentioned, we're gonna do our edges as well. You wanna make sure you get off any of the sealer that was on the sides from underneath of your side rails. Once you have that cleaned off, and you can clean it off with a plastic scraping tool, make sure you take out the staples 'cause we're gonna be putting new ones in. So once you have the outside edge of your camper cleaned off, all the extra butyl tape, anything like that, we can come back and we can install our seam tape. I cut mine in sections like this. It makes it a little bit easier to install rather than trying to hold the roll and go down the whole edge of the camper. One thing we gotta keep in mind is because we are putting this from the top to this outside edge, when we go to put our new membrane on, our membrane has to stick to something on this side, and then we'll pop a staple on it. This being fleece, the butyl tape will not stick to this. So we have to make sure we stay high enough that when we put the butyl tape on, it actually sticks to the side but still goes over top of the edge of the fleece, if that makes sense. And we'll show you that here in just a minute. So we're gonna take our tape. It'll just peel off like this. Make sure your area's clean. So what I'm gonna do is I'm gonna stay up towards the top edge a little bit. And I might be down maybe 1/2 inch to an inch down. Probably closer to half, I would say. And we're just gonna go down the side and stick the tape on. It can be a little trying until you get started with it. We're gonna take this. Roll it up on top like that. Just work your way from one end to the other. Just kinda press it into place. We're gonna do that from one end to the other on both sides of the camper, anywhere you need to cover up a seam. Once you get your seams covered up, just along this outside edge, as I mentioned, we're gonna have to put butyl tape on this outside so when we put our new membrane on and we pull it over to kind of stretch it over to keep it tight, we can stick it right to the butyl tape, pop a staple in it, and that will hold it in place and keep our membrane from kinda bunching up into the center. Once you have all your seam tape in place, then we're gonna come back and we're gonna put the butyl tape on. The first line of butyl tape, we need to take and get it up to the top edge of this panel. So right up here is where we're gonna place it or place the edge. We're not gonna peel off the tape or the paper yet, not until we get our top up. We get our sealant on top, at least get the top of it rolled out. And then, we can come back and we can roll the flap up, pull this off, pull our top down, kinda stretch it, stick it to it, pop a staple on it. That'll keep it taut. We wanna make sure we do this around any of the edges that require butyl tape. Most of the time, it is gonna be this side and the opposite side, driver and passenger side of the camper. On some, they will also be done in the back as well, depending on what type of trim piece you have back there. For this camper, it does not have it. We're only putting on the two sides here, underneath our new material. Once you have everything cleaned off, you have your butyl tape and seam tape on your outsides, we're gonna start installing the membrane. It's gonna take a couple people, a couple ladders, to let this up. I'm gonna make sure that the textured side is facing up. And this slick side is facing down towards the wood. You wanna make sure that it's centered, you have the same amount hanging off both sides, and then it's not twisted. I'm going by the seam between the two pieces of wood here to kinda line it up to make sure that I'm centered. This seam right here, to make sure that it's centered. Even if it's off just a little bit, it'll be okay. You just don't wanna really twist it because by the time you get up to the other end, you're not gonna have enough overhang on one side. Next thing you're gonna need is you're gonna need to grab your acrylic water-based sealant, a large paint roller, a small paint roller, I'm gonna use just a sponge, and a pan. What we're gonna do is we're gonna do like a four-foot section at a time. So I'm basically gonna do from our seam here to this line across. We're gonna roll it on there, and we're gonna take this and roll it over the top. We're gonna take this roller, start in the center, and we're gonna roll the bubbles out to the edges. It would be a good idea if you had a second person to help do this. Because as we start pushing up towards the front of the camper, there may be a few times where you're gonna have to kinda pick this up to tighten the fabric or tighten the material before you can set it back down. It's gonna be kinda hard if you're on one side doing it, trying to pick it up with one hand to tighten it up, and then keep rolling. It also goes a lot quicker if you have a second person that can run the roller and spreading this as you're pushing and pushing out the bubbles. Keep in mind, before you start laying anything out, you have enough overhang on the backside so that it comes down past where any of your trim pieces are gonna be. You can come back. Once you put your trim on, we can trim all this material off right underneath it. 'Cause we want this cover to seal all the way along the sides and along the front and back. So what I did is I rolled a bit of it out. I don't have any sealant back here, but it gives me something to lean on or to be on. I'm not sticking to any of this board. I did take my shoes off, that's completely up to you. One reason I did is 'cause I've been walking on this roof for a couple days and my shoes got a lot of crap on 'em from the old glue. So your sealant or your adhesive, take something and mix it up a little bit, especially if it's been sitting in a warehouse for a little while. Grab your paint roller, put a little bit in there, and then we're gonna start rolling it from one side to the other. And you can kinda see how it's milky. You wanna make sure that it looks like that. When we get out to our edges, you wanna make sure you go over that seam tape. Don't just get to the seam tape and then stop. And you don't have to worry about, you know, going from one side to the other and that drying too quick. You have plenty of time to take your time with it, and get this stuff spread out. So get it to a certain spot here. So kinda stop it. And then, we'll just start rolling everything out, out towards the edges. Now, what you're gonna do is you're just gonna keep working your way forward, all the way till you get to your first pipe that may be sticking up out of the camper. Once we get there, I'll show you what to do next. That's the pipe I was talking about. So it might be a good idea to have a couple people on ladders on each end. What they're gonna do is they're gonna lift it, and they're gonna come right over to the opposite side of it, just where there's enough pressure where you can see it. We're gonna start to cut a small triangle or an X in it. Push it down like that. You're gonna repeat the same thing for any other pipes you may have sticking up. So now that our membrane is in place, I did let it sit over the weekend because it seemed like it was pretty damp and moving around quite a bit. Now that it's fairly dry and it's kinda stuck in place, what I'm gonna do is we need to cut all of our holes out for air conditioners, vents, skylights, stuff like that. So for a square hole like this, which is where one of our vent was, we're gonna find a corner. And so we'll find two corners. That one here and one here. Gonna take the utility knife. We're gonna cut from one side of the other, and then something like this. Once you get the triangles cut, what we're gonna do, we're gonna fold down tight. Best thing to use is an air stapler if you have one. We're gonna fold down in here tight, and then we're gonna put a couple staples in to make sure that it stays there. And we're gonna do this all the way around. You're gonna repeat that for any opening, for anything that goes on top of your roof, including your air conditioners. Once we get that stapled down, we need to reinstall our event. You wanna make sure you clean off any of the old sealant. So you can see on the top, I've cleaned everything off. The bottom, I've cleaned everything off. We're gonna be putting new butyl tape that comes in the kit on the bottom side. You wanna make sure you cover the screw holes. Once you get that on, you wanna make sure that the hinge part of the event is facing the front of the camper. So that way, when you're driving down the road, the lid doesn't get pulled up by the air flow. Try to line this up as close as possible. Kinda push it in place. Now, I'll take screws that we removed when we we're taking everything apart and reinstall 'em. Once you have your top sealed up, we're gonna move to the sides. As I mentioned before, we need to make sure we clean off any of the old butyl tape or sealant that was on here. Then, we're gonna come back, and we're gonna put new butyl tape along the very top line. Once we get that on, we'll peel off the top paper. We're gonna take our top, We're gonna pull it down like this. We're gonna use the same stapler that we used when we did the vent holes and air conditioner holes on the top side. We're gonna pull this down tight. Make sure we're not stretching this, but we wanna pull it down tight. We'll kinda stick it against the butyl tape. And what we're gonna do is we're gonna put a few staples in underneath of it. We're gonna do this from one end to the other. And all this is doing is ensuring that the top stays tight and taught right along this edge right here. Once you have your staples in all the way down to the end, might be a good idea to take something sharp, a pick like this, kinda lift it up and find the factory holes that we're in there, and then take the pick, just kinda poke a hole in it. I did a couple of 'em. That kinda gives me an idea. Once we get a few of 'em in there, the rest of 'em should line up directly. Might be a good idea if you have a second set of hands to hold the end of this while you put those screws in. You wanna make sure you put butyl tape on the backside where your screw holes are so that when you drive the screw in, it's gonna grab some of that, and it's gonna pull it into the hole and help seal it. It doesn't really matter if you start in the front or the back, but again, make sure you're grabbing the correct one. As I mentioned way earlier when we we're taking these off, mark each one as you're taking 'em off, so you know where they go. We're not gonna put the very end one in because we have to put a gutter back here, so I'm gonna start on the second one. I'll grab a screw, I'll line it up with that hole, and we can drive it in. We're just gonna work our way down. Once we get a few of 'em in, as I said, the rest of 'em should line up. Go ahead and get our gutter installed. It's gonna go back behind our trim piece. You can see the factory hole in it. Just get those to end up like that. And then, we'll run a screw in. Once you get one and done, you're just gonna follow the same procedure with your trim pieces, and then your gutter at the other end. Once you have all your trim on from one end to the other, we're gonna come back and we need to trim off this excess. We're gonna take a utility knife right up against this bottom edge down to the end. What we don't wanna do, 'cause we don't wanna foul this line up and over, what we're gonna have to do is we're gonna cut this straight out. And on our backside, we're gonna cut it straight. Then, we're gonna fold this over, and staple this right on this back corner. And this corner piece is gonna fill our top to cover it. And then, we can come back and seal it all. Just wanna make sure when you're trimming this corner, you take your time with it. It's better to leave more than you need and be able to come back and trim it, than to cut off too much and not be able to put it back on. So now, we'll take our stapler. We're gonna fold it like this, and we're gonna throw a couple staples right here in this corner to hold it down. Now, we'll take our corner piece, and get it to sit in place. Screw it down opposite of the way you took it off. Well, a couple here on the very back that we need to put in. Next, we're gonna come back with non-sag sealant. We're gonna seal the top edge of our rails down to the corner, this edge, around this side, the back edge here, and then the bottom side of this top rail on the back. You also wanna make sure you get right here on this edge of this gutter, right on this edge, and come up, you know, a couple inches here, and then around this bottom edge. We just wanna make sure we seal it as good as possible, so we don't have any water that gets in. The way we do the top of this, we're gonna cut a small cut, just a little bit of the tip off. We're gonna put a small bead here. Take a wet cloth, a little bit better than a paper towel, get it wet, and wet the end of your finger. Now, all you're gonna do is you're gonna take your finger and you don't wanna push. You just wanna run it across there. You're gonna do that from one end to the other on top of your rail. Once you have all your trim pieces put back on, you sealed everything, go ahead and install the little trim piece that goes over the top of your screws for your trim. Then, you can go inside and install any of the components for your air conditioners, your vents, anything like that. You're ready to go. That's gonna do it for a look at and installation of the Alpha Systems SuperFlex roof membrane on a 2015 Grand Design Reflection fifth wheel..
Average Customer Rating: 4.6 out of 5 stars (39 Customer Reviews)
Replace or upgrade your RV roof with this lightweight, rubber roofing membrane. Single-ply, TPO material doesn't contain plasticizers, which degrade over time, making it more durable over the years. Measures 15' x 4-1/2'.
Don't buy from anyone else! etrailers shipping is awesome. Because they ship it in a tube it makes it easier getting it in the roof. The roofing material is just as good as factory, if not better. Very satisfied with what this job cost me.

The new roof install went well and we will enjoy our Travel Trailer for many years to come.
The roof mri was the same thickness as the brand names and was less expensive. I also got the installation kit and it had everything I needed except I had to order more of the butyl tape
Very pleased with this product. etrailer goes out of their way to make things right!
I was so pleased with Cristy and Etrailer. The roofing material came on a roll as promised and was packaged better than I could have hoped. Will definitely be using you for future purchases.
This is exactly what I needed! The best part is that it is rolled no creases or tears to deal with, the description of product is exact. Definitely will buy more products from them!
Well made product. Would recomend to a nyone.
Good service
The packaging was excellent and came qu ickly
GREAT TO WORK WITH. KEPT ME INFORMED ABOUT MY ORDERS PROGRESS. WILL DO BUISNESS WITH ETRAILER AGAIN.
Excellent quality and just what we wanted. Thanks again etrailer!!
Wonderful
Info for this part was:
At etrailer.com we provide the best information available about the products we sell. We take the quality of our information seriously so that you can get the right part the first time. Let us know if anything is missing or if you have any questions.


Thank you! Your comment has been submitted successfully. You should be able to view your question/comment here within a few days.
Error submitting comment. Please try again momentarily.