
To see if this custom-fit item will work for you please tell us what vehicle you'll use it with.
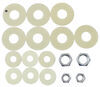
These premium mud flaps are easy to install and digitally designed for a perfect fit. Protect your vehicle and your trailer from road debris. Flaps are constructed of durable thermoplastic resin with stainless steel fasteners.
Features:
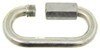
Precision fit, durable components and ease of installation make WeatherTech NoDrills your first choice in mud flaps. Installing mud flaps has never been this painless. Patent-pending QuickTurn stainless steel fasteners makes installation quick and easy - no drilling required.

Videos are provided as a guide only. Refer to manufacturer installation instructions and specs for complete information.
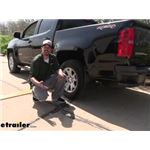
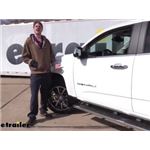
Hey everybody, Rob here at etrailer.com. Today, we're going to be taking a look at the WeatherTech No-Drill Mud Flaps. Now, these are available for the rear, as well as the front separately, or you can get the whole set so you can make sure you have that protection for your Colorado.Now, one of the things I like most about these mud flaps is how seamless they look on the back. They just have a really clean look, because they're going to follow that body line perfectly and they're not going to be a universal type of design where you just have a big flap and it doesn't really follow the body lines. You can see it follows perfectly and almost looks like it was from the factory like this.And the front mud flap's no different. In fact, it even matches the plastic we have already at the bottom of the wheel well area here on our Colorado, and it just has a really clean factory appearance to it.The big benefit to having mud flaps on your truck is that it's going to keep all the debris off of your truck, whether it be rocks, mud, snow, water, anything like that.
And it's going to make sure that it stays protected and it's not flinging all that back up. Especially on a black truck, you can already see, we have a lot of watermarks and a few little scratches here on the rocker panels, and we also want to make sure that our running boards are going to stay protected, as well. Each one of the mud flaps is going to be made out of a thermoplastic resin, so it will be nice and strong, and hold up to all the elements.And honestly, my favorite part about these mud flaps is how easy they are to install. Whether it is the rear, the front, or the full set, it's extremely easy, there's no drilling required, and it uses all factory holes. In fact, WeatherTech even provides you with the tools you need to get it installed, they just need to provide your own driver to get it in.To begin our installation, you want to grab your mud flap.
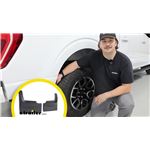
We're starting on a right front and they are going to be labeled. We'll have an RH for right hand. And if you kind of hold the mud flap up, you can see that it's just going to follow the contours of the body. And clearly, this is the front mud flap that's supposed to go right here.Now, we can grab the included bit in our kit. They're not going to include a driver, but you just need a bit driver, or if you don't have a bit driver, another trick you can do, is you can take a quarter inch hex socket, and this'll fit right in there.We'll move to the front wheel, right behind the tire.
We're going to find three fasteners. We'll have one here at the bottom. We move in a little bit, right behind the tire. We'll have another one and we'll have one just a little bit higher towards the center of that liner here. We need to pull all three of those out.
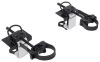
Let's take that T15 bit and loosen them up. Now, you do want to hold onto them, because they are going to get re-installed, but we need to pull them out for now.On the back or the inside of our mud flap, you'll see that we have this silver bolt. You'll also see that it has a lock and unlock position on there. We want to make sure we take the included Allen key. We're going to rotate it to where it's in the unlocked position. Now, you want to make sure it stays in the unlock position. Then we'll take our mud flap, you're going to line it up where the holes line up with those factory holes. And then I kind like to just push against the mud flap, against the body, right where that mount is. And again, we'll take the included hex key, we're going to turn that silver knob until it moves over to the locked position, and we're going to continue to tighten it just enough to where it gets nice and snug. You don't want to crank on it too hard, just to where it has a little bit of pressure and it's nice and snug.Now we can take that bit again, and we're just going to place the three screws that we removed earlier. We'll have three holes where they line up, and we'll just put them all back in place.And once you have those bolts back in, that's all there is to it. The other side's going to install the exact same way and just be a mirror image of this side. Now, if you showed us, you got the full set with the front and rear, we're going to go and move to the back and install those.To get the rear installed, we're going to have three bolts on the inside of our liner here at the very back, right behind our tire. And again, we'll use that included torx bit. We're just going to put all three of those out.When we grab the rear mudflap, we'll notice that we got that silver bolt. Want to make sure we rotate it to where that tab is in the unlocked position, take our mud flap, get it lined up to where it sits nice and flat against the body of the truck, the holes will line up with the factory holes. And again, I like to push on it just to kind of hold it in place. And we'll take our Allen key, we're going to rotate it to where it goes in that locked position, and then continuing to tighten it up to where it's just nice and snug. We don't want to go too tight, we just want to get it nice and snug.And then we can just simply replace the factory bolts we pulled out. Just throw them back in. All of them should line up, and use the bit to tighten them back up. Once you have that last screw in place, you can move over to the other side and install the other mud flap. But that'll finish up your look and installation of the WeatherTech No-Drill Mud Flaps on our 2019 Chevrolet, Colorado.
Ratings & Reviews

Excellent fit and finish, great customer service and follow up.
Great
Info for this part was:
At etrailer we provide the best information available about the products we sell. We take the quality of our information seriously so that you can get the right part the first time.


Thank you! Your comment has been submitted successfully. You should be able to view your question/comment here within a few days.
Error submitting comment. Please try again momentarily.