WeatherTech Mud Flaps - Easy-Install, No-Drill, Digital Fit - Front and Rear Set
with wheel lip molding
without wheel lip molding
Will this fit?
To see if this custom-fit item will work for you please tell us what vehicle you'll use it with.
- All Info
- Reviews (1560)
- Q & A (0)
- Videos (4)
- Photos
2025 Ford F-150 - WeatherTech Mud Flaps - Easy-Install, No-Drill, Digital Fit - Front and Rear Set
- Front and Rear Set
- Custom Width
- Custom Fit
- Plastic
- Wheel Well Mount
- No-Drill Install
- WeatherTech
- Single
These premium mud flaps are easy to install and digitally designed for a perfect fit. Protect your Ford F-150 and your trailer from road debris. Flaps are constructed of durable thermoplastic resin with stainless steel fasteners.
Features:
- Install easily
- No drilling or tire removal
- Attach securely with "Quick-Turn" stainless steel fasteners
- Molded from high-quality thermoplastic resin
- Contoured digitally to fit your vehicle
- Protect your vehicle, your trailer and other motorists from dirt and debris
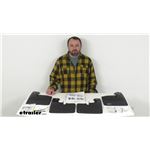
- Quantity: 2 front flaps and 2 rear flaps
- Made in the USA

Precision fit, durable components and ease of installation make WeatherTech NoDrills your first choice in mud flaps. Installing mud flaps has never been this painless. Patent-pending QuickTurn stainless steel fasteners makes installation quick and easy - no drilling required.
110134-120134 WeatherTech Custom No-Drill Mud Flaps - Front and Rear Set
Installation Details

Videos are provided as a guide only. Refer to manufacturer installation instructions and specs for complete information.
Video Transcript for Beginner’s Guide to Installing the WeatherTech Mud Flaps on a 2023 Ford F-150
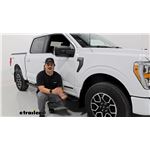
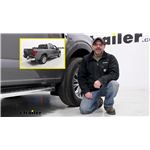
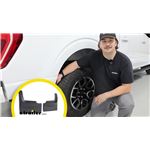
Hi, everyone. Aiden here with etrailer. Today, we're gonna be taking a look at and be showing you how to install the full set of WeatherTech no-drill mud flaps on our 2023 Ford F-150. So full set means front and rear, driver and passenger. So four mud flaps in total giving you full coverage around your vehicle. The fronts are gonna help with kicking rock up onto your paint, keeping dirt and debris clear of that painted surface, and the rears can help with the the exact same thing.
Or if you're maybe towing a trailer or something, maybe a camper, it's gonna help provide a little bit of protection there. Now, these are gonna be custom fit for your F-150, and at the rear we can see that particularly well with this small plastic bump out right here. The mud flap will contour around that shape and match up perfectly to the vehicle where it sits. On the inside, the installation, like the name suggests, is going to be no-drill. That process will look slightly different for the front or the rear, but basically you don't have to worry about any modifications to your vehicle regardless of what set you have installed.
And the material is going to be a thermoplastic resin. It's a bit more of a rigid material but still has some flex to it, and it's gonna match all the black plastics on your vehicle really well. But as far as that installation goes, like I said, no drilling acquired and it's pretty straightforward. The rears are gonna be a little bit easier than the fronts just because there's a little more room to work in this wheel well here. But we'll show you how we got both of 'em installed right now.
Starting off your installation, you just wanna make sure you find the right mud flap for the correct side. On the inside of the flap, there should be some lettering that says RH or LH, right hand for passenger, left hand for driver. Or, worst-case scenario, you can just take the mud flap and line it up inside your wheel well and make sure the contours all line up. And then you can carry on by removing some factory hardware. For the rear, we just have two push pin fasteners.
You can see them poking out the other side inside the wheel well liner here. And these are not gonna get reused. So grab yourself a trim tool, something with like a forked end. Flathead screwdriver can work here, but these are pretty tricky, and you might find that you have a little bit of trouble getting them out. But if you mangle them in the process, since they're not getting reused, that's okay. So that bottom one was giving us some trouble. These fins, especially when the clips are brand new, can be really tricky. What I found was squeezing them and just kind of crushing those fins made it a lot easier to pop out the bottom side. You might consider doing that, and especially since they're so easy to reach in that wheel well, it's not too bad. Now, on this intersection right here where the mud flap will end up sitting once it's fully installed, your kit's gonna come with a small bit of paint protection film. I'm just gonna spray off the area with some soapy water, kind of wipe it down, dry it off. Now, these will also have a right-hand and a left-hand side, and just do your best to get this right up to the edge. And press it firmly in place. This doesn't need to be super precise. You can get really precise with it if you want, but really this is just gonna be covered up by the mud flap anyway. We just wanted to protect the paint of it. The mud flap is gonna have this small quarter-turn lever. Make sure that's flipped down for right now. And line up the mud flap with that wheel well. You're gonna take your included Allen key and turn that lever by tightening the screw. And you should see a small tab right about there. You want that all the way to the right to know that that lever is fully engaged. I'm gonna tighten this down just a little more so that we can hopefully let go of the flap. And it'll hold itself in place so we can get the rest of our hardware in. The newly provided hardware will be a bit hard to see with my hands in the way, but it's essentially a Phillips head screw with a flat washer and a flange nut paired up together going through the previous locations where those plastic push pin fasteners were. I'll push that bottom one up first and tighten the flange nut up top. And the reason we're doing this first is because, once we have that screw poking through the side, it's gonna kind of cover that up. So it's gonna be pretty much impossible to tighten it. So get it hand tight for now and come back with my tools to fully snug it down. They include a Phillips head bit, so something to hold that bit will be needed. You need to provide that yourself. And the same goes for a wrench or socket. We're using a 7/16th wrench today. And we'll just repeat that process for the hole going through the side, or both holes if our F-150 or your F-150 has that. Now, if you find that the hole isn't lining up super well, you might just find that threading the bolt through works. In which case, then we can just carry on by tightening up the rest of the hardware. Once you have that tightened down, just go back through and try to shake it around a bit, see if any of the hardware is loose. And once you're happy with the fit, you can repeat that process on the other side, and then we can move on to the fronts. Moving on to the fronts, we just need to start by removing some factory hardware present in our wheel well. That factory hardware will be two hex head screws that we can loosen up and fully remove with a seven-millimeter socket or wrench. Hang on to these because they will get reused later. Now, this is pretty loose right now, but there's still one push pin fastener underneath. It's pretty far recessed, but you might just find better luck pulling straight out and releasing both the push pin fastener and this plastic clip. This whole piece is actually not gonna get reused. So if you mangle it in the process, that's fine, just toss it in the trash. Now, there's gonna be one more factory screw that we can remove with a 10-millimeter socket. Now, if yours is anything like ours, it's gonna have some paint on it. This side's actually fine. The 10-millimeter socket is fitting the driver's side. We did notice that the paint was gooped up quite a bit, so just watch out for that. You might have to break some of that paint away. But you wanna fully remove that screw. And once we get that removed, set it in a safe place because this will also get reused. And just like the rear, we did install a bit of paint protection film for the fronts. This piece, a bit larger matchup with the slightly larger profile of the front mud flap overlaying the paint. Just like in the rear, we're gonna start with attaching the mud flap and securing it with that quarter-turn lever up top. Now, our front wheel well does have a wheel well liner. So as you're tightening this down, you do wanna make sure that you feel it kind of grab in between the fender and the wheel well liner. If you can let go after tightening it down and it stays up, then you're probably pretty good. Then all we have to do is reattach our factory hardware. I'll start with that 10-millimeter screw at the bottom and do the two seven-millimeter screws last, being sure to just get them all loosely installed before finally tightening them all down. And once you're happy with the fit, you can repeat that process on the other side, and you're all done. That'll do it for our look at and the installation of the full kit, front and rear, WeatherTech no-drill mud flaps on our 2023 Ford F-150. Thanks for watching.
Customer Satisfaction Score:
98% were satisfied with this product
2% of customers were not satisfied
- Did not arrive in time
Ratings & Reviews
4.8
1515 reviews
Great
See what our Experts say about this WeatherTech Mud Flaps
- What Front and Rear WeatherTech Mud Flaps Fit My 2022 Ford F-150 with Wheel Lip Molding? For front and rear mud flaps for your 2022 Ford F-150 with wheel lip molding, the correct set is the WeatherTech Mud Flaps - Easy-Install, No-Drill, Digital Fit - Front and Rear Set # WT56JJ. These flaps are digitally contoured to fit the exact contours of your truck's wheel wells. They include an easy installation that requires no drilling or tire removal.
view full answer...
Info for this part was:


At etrailer.com we provide the best information available about the products we sell. We take the quality of our information seriously so that you can get the right part the first time. Let us know if anything is missing or if you have any questions.


Thank you! Your comment has been submitted successfully. You should be able to view your question/comment here within a few days.
Error submitting comment. Please try again momentarily.