Saris MHS UNO Bike Rack for 1 Bike - 1-1/4" and 2" Hitches - Wheel Mount
- All Info
- Reviews (1)
- Q & A (0)
- Videos (5)
- Photos
Saris Modular Hitch Rack - SAR52MR
- Bike Rack
- Saris MHS
- 1 Bike
- Saris
- Base w/ Accessories
- 1-1/4 Inch Hitch
- 2 Inch Hitch
This modular bike rack is perfect for carrying a bike with fenders, or a bike with a carbon frame or custom paint job. An available 1-bike add-on lets you convert the carrier to a 2-bike rack. Tilts with bikes loaded.
Features:
- Modular platform bike rack carries 1 bike using your vehicle's hitch receiver
- 1-Bike add-on (sold separately) lets you convert to a 2-bike rack
- Pivoting upright arm holds your bike by the front wheel
- Wheel tray has groove in the track that accommodates narrow road bike tires and mountain bike tires
- Sliding ratchet strap secures your rear wheel to the tray
- Front-mounted hand lever lets you tilt and fold the rack with ease
- Tilts down with bike loaded to access cargo area
- Anti-rattle hitch pin reduces movement of rack in hitch receiver
- Removable adapter sleeve converts the rack for use with 1-1/4" hitches
- Keyed-alike locks deter theft of rack and bike
- Durable steel and aluminum construction with black powder coat is rust resistant
Specs:
- Application: 1-1/4" and 2" trailer hitch receivers
- Carrying capacity: 1 bike
- Weight capacity: 60 lbs
- Wheel diameter: 20" - 29"
- Maximum tire width: 3.0"
- Maximum wheelbase: 50"
- Distance from center of hitch pin hole to:
- Closest part of the rack: 7"
- Farthest part of rack: 27"
- Farthest part of rack when folded up: 14"
- Weight: 52 lbs
- Limited lifetime warranty

4641 Saris MHS UNO 1-Bike Platform Rack Tray
4610 Saris MHS 1-Bike Platform Rack Receiver Base - 1-1/4" and 2" Hitches - Tilting
Installation DetailsCalifornia residents: click here


Videos are provided as a guide only. Refer to manufacturer installation instructions and specs for complete information.
Video Transcript for Saris MHS UNO Bike Rack for 1 Bike Review
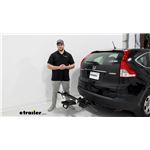
Hi, Matt with etrailer. And today, we're talking about our kit, which is going to include our Saris MHS One Plus One Base and our UNO Tray with it. Now this is going to be a kit where you can find it on our website and we have the individual parts. You can also check out their webpages and their videos, but today, we're going to be focusing on how they work together. So how this kit's going to work together is your base is going to be the foundation of our system today and we're going to have this collar that wraps around it so we can secure our UNO carrier. Now, our UNO tray is going to have a weight capacity of up to 40 pounds and if you want to put something on in the add-on location of our base carrier, then that's going to have a capacity hold up to 35 pounds.
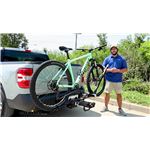
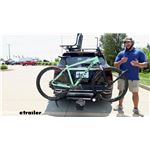
But when they are both put together, that's when it really starts to become a bike rack. And I can show you how to use it, we're going to load it up with a bike. First, we're going to have a button on the back of this hook. We'll just push this up and keep it out of our way and leave it here for the time being, and make sure that this rear strap is loosened up. I'm just going to grab my bike now.
To load it up is a fairly simple process. All I gotta do is lift up, line it up with my tray, and push it in against this rear cradle. Once that's in place, I'll maintain control of my bike, lift up on this hook. Sometimes you're going to have to push this hook forward, so the trick you can do is just pressing that button on here and pushing it all the way out. And it's letting you lift up on here.
Now you're going to have two options when you get to this point. If you have a bike with fenders, you can push this down and secure it from over here so it's out of the way, but we don't have any fenders on today so we can push it closer to our frame. With it being this type of mounting system, this is going to be great if you have any alternative or carbon frame bikes because we're not going to make any frame contact. And the final thing you want to do when you do secure this down is come to the back and secure this back strap. (strap clicking) Something I do want to point out again is where you put this hook.
Now how we have it today on our mountain bike, you can notice this does come pretty close to our forks and if you are worried about that, you can move this hook. And something I want to reiterate too is earlier when we we inchesre putting it down at this point, that also has an option to lock into place. If you just work with this button back here, you just press it in, you'll notice it locks and I can't move it any further, and then you can tighten it down. That's great, like I said earlier, if you do have those fenders or if you just want to avoid your forks. That's part of the reason why Saris designed this, just to help you take out some of the guesswork. You notice we have this hole right here on the hook and what that's going to be for it is to lock it in place. Now your base is going to come with two lock cores. That are going to be keyed alike with the lock that's already on it. And that's what's going to go right into this hole right here. And one's going to be for this tray we have right here, and then if you get an add-on on the very back of this, you'll be able to use a lock core for that as well. What's also nice about the system we have today, it does have the ability to tilt back. And to do that, you're going to find this lever we have and you're just going to squeeze that, which can be a little bit difficult to do sometimes at this angle. Make sure you watch out for yourself, you don't bump your head on it. Something else you'll notice too is we got this bumper on the very end of it. And what that bumper is going to do is if you have a car or vehicle with low ground clearance, this is going to be the first thing that makes contact. What that's going to allow you to do is gain access to your trunk or your hatch like the one we have today. And that's going to be great if you need to access any gear back here, but there's going to be a lot of variables to this. So the first one isn't just going to be your vehicle, but it's also going to depend on the bike you have that day too, whether you have longer handlebars or you have a different size frame. But to put this back into the seated position, all I have to do is come back here and lift up on the rack. And that's one of the nice things about this being the smaller one is it's actually not too heavy, I can do this with one arm, even with the bike on here. (bike rack clicks) We took our bike off, just to give you a closer look at the bike rack. Now this is going to be the same process as putting it on as taking it off. We're going to look at some specs now. The first thing I'm going to check out is going to be the strap we have. And this is going to be able to accommodate tires up to three inches in this tray. You're also going to have the ability to push this down to about right here and the widest wheel base we're going to be able to accommodate is going to be 50 inches. Now for your wheel diameter, that's going to range from anywhere from 20 inches all the way up to 29 inches. We're going to get some measurements now. The first measurement I'm going to get is going to be the distance from the center of our hitch pin hole to the end of the carrier, which is going to be a little bit over 30 and a half inches, which isn't too bad. This going to give you more of an idea how this is going to sit on the back of your vehicle. And if you do want to save up on some space, you do have the ability to fold this up. So what you have to do to do that is squeeze that handle, same one we used to tilt it earlier. And we'll push up and it'll lock in place right here. And this will going to be a good position if you have anything on the back of your vehicle like a spare tire, you'll be able to accommodate that. That distance is going to be from the center of our hitch pin hole to the back of the carrier, a little bit over 21 inches. And again, you can fold this up even further if you don't have anything that's going to interfere with it. And now that's only going to sit at just about 16 inches from your bumper back here. As far as actually maneuvering it, I really don't mind it. It is a little stiff, but it's a good stiff because as you see, I'm not even touching it here, it's not locked in place, but it's still pretty sturdy. But I barely have to pull on it or push on it to maneuver it. (bike rack clicks) Now this system's a little bit different from the other MHS configurations because this one actually has an inch and quarter option to it while the other other ones don't. Now if you are worried about that because you only have a two inch receiver, we also have a two inch sleeve adapter, so you can still use this in a two inch receiver. You are also going to have this 5/8 inch anti-rattle bolt that's going to go through and connect to that lock core that I talked about earlier. That's just going to provide some extra security. As far as how well that anti-rattle bolt's going to do in tandem with that sleeve adapter, it's a pretty solid fit. I'm shaking this thing and it's shaking the whole car with it. Overall, this going to be a great system for you if you are looking for something that is sturdy like the other MHS systems. And it's also going to be lightweight and compact, unlike the other ones which take a little bit more space and it's a little bit heavier to take on and off your vehicle. Now, like I said earlier, with the base, you can get other attachments on here since it is modular, whether you want to put on the UNO add-on or the DUO add-on. And you can even replace the UNO tray that we have today with a DUO tray. The only caveat off of that is with the DUO tray, you're going to get a higher weight capacity of up to 80 pounds, but it's going to be heavier and harder to maneuver. And now we can take a look at how it performed on our test scores. The test scores, I'd say it did a pretty good job. There was a little bit of shaking every now and then, but nothing too crazy, nothing I wouldn't see with any other bike rack. And that was just a look at some of our features of our kit today with the Saris MHS One Plus One Base and our UNO Tray, thanks for watching.
Ratings & Reviews
5.0
1 reviews
See what our Experts say about this Saris Modular Hitch Rack
Info for this part was:


At etrailer we provide the best information available about the products we sell. We take the quality of our information seriously so that you can get the right part the first time. Let us know if anything is missing or if you have any questions.


Thank you! Your comment has been submitted successfully. You should be able to view your question/comment here within a few days.
Error submitting comment. Please try again momentarily.