
Stealth Hitches Hidden Trailer Hitch Receiver w/ Towing Kit - Custom Fit - 2"


To see if this custom-fit item will work for you please tell us what vehicle you'll use it with.


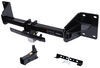
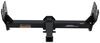
You don’t have to give up your vehicle’s clean lines to get real towing and hauling capability. This hitch hides completely behind the bumper, keeping the cross tube out of sight for a from-the-factory look. When you’re not towing, remove the ball mount or 2" receiver attachment with no tools and stow them away. You can cover the opening with the included hitch plug so nothing shows.
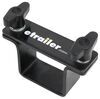
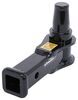
Swapping between towing and carrying gear couldn’t be easier. The 2" receiver or ball mount attachment latches into the stainless steel center block in seconds—no tools required. Tight tolerances keep everything secure with no rattling or movement when starting or stopping. A built-in lock keeps your setup safe, and when you’re done, the attachments pop out just as fast.
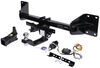
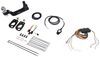
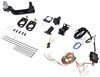
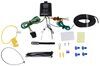
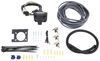
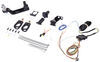
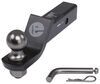
This setup comes with everything needed for both towing and hitch-mounted accessories. Tow a small trailer using the included 2" ball mount rated up to 8,000 lbs gross trailer weight and 800 lbs tongue weight. For accessories like bike racks or cargo carriers, use the 2" receiver attachment rated for 600 lbs tongue weight. The included trailer wiring powers your trailer lights through a 7-way connector that mounts beneath the hitch.
The solid stainless steel construction resists corrosion and keeps its strength over time, even in wet or salty conditions. The black powder coat finish adds another layer of protection against rust and wear so you can rely on this hitch for many trips ahead.
Videos are provided as a guide only. Refer to manufacturer installation instructions and specs for complete information.
Hi, this is Scott with etrailer and today we're taking a look at and installing our Stealth Hitches with Tow Package on our 2025 BMW X7. Now with our Stealth Hitch, after you get it all installed, you're gonna have this little plug underneath, you're gonna wanna pop that out because inside of there you're going to have your keys. Now I have our keys installed now because I wanted to unlock our knob and I have that set up where I can get my receiver for bike racks installed. All we're gonna do is line this up with the hole. Now after I have the handle turned, (receiver thuds) push up and that's gonna lock in place and our little dial is gonna hold that there. Now you're also gonna have the option of locking that if you want to or you can go ahead and pull out your keys by just turning it and pull your keys out.
You're gonna have two keys that comes in your kit. Now say after you're done towing, maybe you're done towing for the season, you can always take your receiver off and you can plug this up with your plug. That's gonna keep any road debris, grime, salt, snow, anything from getting up in the bottom of your receiver. Now, one of the nice things about this setup is, is this is gonna have chain loops on it so you're gonna have your chain loops hanging down. That's gonna allow you to pull a trailer.
So that's really nice to have on something like this. It opens up a lot of your options on what you can do with your hitch. Now with this one, it's gonna come with a seven-way so you're gonna have your plug in underneath of here. What that's gonna allow you to do is hook up your trailers either with a seven-way plug or this is also gonna come with an adapter that you can plug into the bottom of here and that's gonna give you your four-way connection as well. Now with this setup, this is gonna be good for bike racks or cargo carriers in this form.
It's not recommended to tow with this. So in your kit, another thing that you're gonna get that's really nice. You just turn your dial and you pop that out. You're gonna get your ball mount with this. This is what's gonna allow you to tow a trailer.
Now it's gonna have a ball that comes with it. This is gonna come with a two-inch ball and all we're gonna do now is just get this popped up into and push that up and that's gonna lock in place. Now we're all set to pull the trailer. Now as far as weights go for this hitch, we're looking at a tongue weight rating of 600 pounds. Now that's gonna be the weight of your bike rack loaded down with your bikes or your cargo carrier loaded down with all of your gear pushing down on the lower portion of the inside of the receiver itself. Now for in tow mode, we're gonna have a gross trailer weight rating of 8,000 pounds. That's gonna be the weight of your trailer and everything that you have loaded on that. Now keep in mind it's always a good idea to take a look in your owner's manual and make sure you're never exceeding the maximum towing capabilities listed in there. Now if you have any questions or comments about this hitch for your BMW, you can always get a hold of us here at etrailer. We'd be glad to help you out. Now as far as installation goes, this one's really tricky especially with the tow package. There's a lot of wiring involved. You're gonna be taking a whole lot of panels apart and it took us all day to get this one done. Now, if it's something you don't have time to do yourself, you don't have the time or the tools of the place, you can always take a look at our installer locator, get something done for you locally. If it's something you feel like tackling yourself, stick around, watch our video and we'll help you get it installed. To start our installation, we have the back hatch of our BMW opened up and one of the first things we're gonna need to do is remove our taillight housings. So on either side, we're gonna have this little cover. We just wanna pull down on that latch, lift up, set that aside. We'll do that on both sides. Now inside of our panel that we took off, we're gonna have a 10mm nut way over here by the outer fender and we're gonna have this little felt stuff. You may have to move that back out of the way. Right back there, we're gonna take an 11 millimeter socket and remove that nut on each side. Now when you're doing this, be careful. I like to take a finger or something and hold on that nut. You don't wanna drop it down in there. Go ahead and pull that out, set that aside, and we'll do that on both sides of our vehicle. On each side of our vehicle, we're gonna have this plastic trim that goes around this area back here between our taillight and inside of our gate. What we wanna do is get behind this with a trim panel tool, just enough that we can pull back on that, and as you pull that, work your way down, pull back, pop that out and we'll set it aside. Underneath of that little panel, we're gonna have two T30 Torx screws. I'm gonna go ahead and use a T30 bit. Go ahead and get these removed. Now when we remove these, you wanna be careful. Make sure you're holding your taillight so it doesn't just fall out when you get down to your last one. (screw clicks) With all of our screws out, we can go ahead and pull out on our light and behind that, we're going to have our plug down here. Just wanna pull back on our tab, push down on that, pull out, now we can set our housing aside. Right down here, right underneath of where our taillight housing lives, we're gonna have this little 8mm screw. We're just gonna remove that with an 8mm socket, (drill whirring) Down below on our spaceship, we're gonna have our reflector. We're gonna need to pop this off. Behind here, we're gonna have fasteners. What I do is I put a little blue tape here and I'm gonna be going in here with my panel tool. I just wanna make sure I'm not scratching anything. Now all over our vehicle, everywhere you see, we have blue tape. Anywhere there's a seam that comes apart or a possibility of a body panel rubbing against each other, I like to hit those with blue tape just to make sure we don't get any scratches on our finish. Now what I wanna do is take my trim panel tool and just get in behind this. We wanna be very careful with these. Make sure we're holding on to this. Kind of put your hand over it so it don't come shooting out when it unclips. What I'm just gonna do is just kind of pull back on that. That's gonna unclick. Now these are in there pretty tight. Just work it across nice and easy. You'll get that to pop out and set it aside. If you look back in there where we just took that reflector out, you're gonna see an 8mm screw. We'll go ahead and get that removed on both sides. (drill whirring) One of the tricky parts about doing this and removing this fascia is going to be this trim piece that runs up. We're gonna have two fasteners behind here that we're gonna need to get to. So we need to pop this out and I'm just gonna use a trim tool and get up in behind there. Now these can be on there really tight so we just wanna get up in behind it and get that to start to come out and just work our way up with our trim tool. You're gonna have a little latch in there which I'll show you once I get this popped off. (material pops) As you can see here, this is what's gonna hold this in place. I got this to pull back and if you can get your tool in there just enough to get that to come down a little bit. But these are really hard to get to push down so just keep working on pulling tension on that, and you should be able to get that to pop out. So what I'm gonna do now is I'm just gonna work my way up and I did shoot a little bit of dishwashing liquid along with some soapy water mixed back in here and that's gonna kind of help let this pop out. So after we have this out so far I'm just gonna take a blue shop rag and get that put in there so this is gonna hold this back away from our fascia when we remove this. So now we're gonna have two 8mm fasteners behind here we're gonna need to remove. With an 8mm socket I'll remove our two fasteners. (fastener whirring) Underneath of our BMW we're gonna have these panels that we're gonna need to remove underneath. Now these are gonna be 10mm fasteners and I'd say we'll probably have about 20 of these we're gonna need to remove. I'm gonna come along with my 10mm socket and just start getting all these out. (drill whirring) As we're moving along we can start taking these out in sections and set them aside. (panel cluttering) With our panel out of the way right underneath of here on our back area underneath of our fascia we're gonna have two 10mms on each side. We're gonna go ahead and get those removed. (drill whirring) With all of our fasteners removed, now we can start pulling off our fascia. I'm just gonna start over here by the wheel well and I'm gonna start working my way out. These seem to pop out fairly easy as we're going along. Once we get over to here you may have to have our trim panel tool just push down on that little tab, get that to pop out. Now right up here this wants to get jammed in so if you get under that with a clip tool and just kind of pry up and out you can get these little clips to undo. There is a few of them that run down. Now what I wanna do is we'll lift up our gate get that out of our way. Now, we'll start working our way across and remove our fascia. Now, with an extra set of hands we'll go ahead and pull our fascia back. Now on our passenger side we're gonna have this electrical connector and you're gonna have two tabs just push in on those, push down, you're gonna have one on either side. We can remove our connector, now we can set our rear fascia aside. Right here we're gonna have a little panel and we're gonna have a 10mm nut up in here. We're also gonna have a plastic clip right here to get our clip out. Just wanna take a flathead screwdriver get up underneath of that, pop that up and pull that out out of the way. Now we'll take a 10mm socket and we wanna move our tailgate just right we're not gonna be rubbing on that and carefully remove that nut (drill whirring) and we'll do that on both sides. Now we'll have one more tuck up underneath of there just undo that little clip and we'll pull that out. With that removed we should be able to pop our panel up (panel pops) that's gonna unclip and pull that out out of our way. On the other side of our bumper beam we're gonna have this little wire clip just wanna get under that with the clip tool, pop that out. Now, we'll work our way across our kick sensor panel and we're just gonna take a flathead screwdriver and start removing all of our clips. With all of our clips removed we're gonna have our wiring harness that comes down to this. What we wanna do is push down on that little tab, pop that out now we'll set this aside. Underneath of our vehicle now we're gonna have to remove our exhaust brackets that attach to these isolators that is attached to our bumper beam which we're gonna need to remove. So we're gonna use a 13mm socket and take out our 13mm nut on both sides. (drill whirring) Using an 18mm socket and a long extension on each side we're gonna have four nuts we're gonna need to remove to remove our bumper beam. (drill whirring) With all of our nuts removed we'll pull straight back on our bumper beam be careful of your wire harness. Now we'll set that aside. Behind your bumper beam you're gonna have this plate we wanna remove this and we'll set it aside. Now we can lift our hitch into position again being careful of our wiring harness. I like to line that side up first, get my harness out of the way and push our hitch up onto our factory studs. At this point we'll be taking our nuts that we removed and we're gonna put them on the upper studs first on both sides. I'll just put our two up top on each side. Now replacing our brackets that are for our exhaust hangers in your kit you're gonna have this L style bracket. Now, for orientation you wanna make sure that you're getting this correct you want it to go this way and then have this part down this is gonna come up and meet up with that. After you've got that in place we'll just come back through with our factory nuts and get those installed. With all of our hardware in place we'll come back through with our 18mm deep well socket and we'll just snug down all of our hardware. (drill whirring) After everything is snugged down we'll come back through with our torque wrench and we'll torque down all of our hardware to the specifications listed in our instruction manual. Now if you don't have a torque wrench you can pick one up here at etrailer we do have some options available for these or you can take a look at your local auto parts store you should be able to rent one there. After we have everything torqued down now we can lift up our exhaust and we'll get our bracket set up. Now, in your kit you're gonna have this bolt and a washer and this is gonna come in your bag for your brackets and you're gonna also have this flange nut with it or run that from underneath you'll have your washer installed on your bolt, bring that up through, hold that up, install your nut, now take a half inch wrench and a half inch socket and we'll go ahead and tighten those down. (drill whirring) On each side we'll go ahead and get our panel put back in place now we're gonna do this very carefully just get that up in there because we do have to work around our tailgate go ahead and snap that in place and we'll get our 10mm nut and our two plastic clip fasteners put in place. At this point, we can install our latch block. Now when we install these, we're gonna have our block up here. We're gonna have our handle on the passenger side and our keyed side on the driver's side. We're gonna have these chain loops that come with our kit, and we wanna get this over top of our handle. Now with that, we're gonna take our bolts and our bolts are gonna go in from our passenger side. We're gonna get this lined up into our hitch. This can be a little bit tricky to get these to line up. (bolts clutter) Those go through. (bolts clutter) For our other side, again, we wanna make sure our hole and that little point is going forward. We'll put that on the ends of our bolts. And since this is the tow kit, we are gonna have this bracket that's gonna go for our wiring. We wanna install that over our bolts. Then we'll install both of our nuts. With a 15/16 wrench and a 15/16 socket and a long extension, we'll go ahead and snug down our hardware. (drill whirring) Now, we'll torque down our bolts to our latch block. Now, we'll come back through and install our panel for our kick sensor and we'll use three of our push pin clips that we removed. After you get that done, don't forget to plug that back in. To start our wiring, we're gonna have a little plastic clip back here at the back. Now I was able to pop that out. We're gonna have to remove our two side panels here because underneath of here we need to get at our battery. So we're gonna have a series of clips on both of these panels. We're gonna start getting these popped out with a flathead screwdriver. And we'll have those on both sides. Now, we'll pull out our panels on each side. (panel pops) Now, we'll push our floor covering forward and we'll get this pulled out and lift it out of the way. Now for our wiring, what we ended up doing is getting our control module mounted in place. As you can see, we put it over here on the passenger side. And I used the self stick tape and stuck that to a box that's over there. Gave it a good mounting location. It allows us to hide some of our wiring. So now I found a grommet inside of down in that compartment and ended up getting my outside wiring run down through that. I just pulled that out and drilled a hole in it and ran my wiring through down to the outside. Now that fit pretty tight so we shouldn't have to use any sealer on that. So what we're doing now is just getting everything laid out where everything's gonna go. We have our white wire and our black wire. This is gonna end up over here at our battery. That's gonna be our positive in our ground. Now we have our brown wire, our yellow wire, our green and our red. We're gonna have extension wires that are gonna run forward. So we have a roll of wire that came in our kit. And what I'm gonna need to do with these, I'm gonna have to extend these and run these all the way forward up to the front passenger side footwell. So what I'm gonna do is I'm gonna run them wires forward and get those tucked into all of our panels and then get the wires up there. And then we'll get figured out what we're gonna do with those. And then we'll work, get back here again and we'll work on our brown and our red wires. So we ended up running our wires all the way forward and we just went ahead and tucked them in, down inside of our panels from the back to the front. Now the hardest part was getting them to fish through from the very back in through the seat and then down to come up and start meeting up with these panels that run up the side. So after we got all that done, we ended up with our green wires up front. So what we wanna do now is we need to get behind here. So this is where we're gonna make our connection. But right up here, we're gonna have this panel and it's gonna have a couple thumb nuts. And just wanna turn them quarter turn. And you're gonna be able to pop this down. And down inside of here, we're gonna have our plugin for our LED and we'll have another little plastic clip that holds that there. Just pop that out as well. Now we can set that aside. Now that we've done that, we need to get this kick panel out of the way. So we're gonna have this piece of trim right here. And we're gonna need to pop this up because we're gonna need to get up under this to get this panel to pop out. I'll get up under that with a trim tool. We're gonna have some clips under here. (clips popping) Work our way back, get those to pop up. (clips popping) Now we can pull that out. Pull over on our panel. We'll have another LED under here, unplug that. Now we can set that aside. So now we got our wires tested and we went and found our bundle. You're gonna have this blue latched one right here. And then you're gonna have this one with the green right next to that. And that one is black. Follow that bundle down. And I pulled our bundle over where I could get it that. And I pulled back the sheathing on that, just opened that up and got my wires separated. And I looked for the wires that they recommended in our instructions. I was looking for the blue wire with the yellow stripe and I was looking for the solid blue wire itself. So now after I did that, I went ahead and verified that these are the correct wires by going and using a tester. So we just turned on our left turn signal and our right turn signal and tested these both. Made sure we know which ones we have. Now, for the solid blue, this is the one we're gonna end up connecting our yellow wire to. And then the blue wire with the yellow stripe, that one is going to go to our green wire. So what I'm gonna do is I'm just gonna to use our connectors and we're gonna get these connected together. And I'll show you how we get that done. Now how these little connectors are gonna work, is what we're gonna do with these is we'll have one side that runs to our factory wiring harness. And that's just gonna go right through there like so. And now that one being the blue with the yellow stripe, that is gonna go to our green wire. So when we do that, we'll take our green wire and we'll run that through our other side. Then we'll just close this over on top of that. Just make sure you keep it in its contacts. You may have to push your wire in a little bit. Now once we get that to start over our wires, what we can do is take some pliers and we'll just get around the side of that. And we'll just squeeze that down and that's gonna bite into both of our wires. And that will complete our connection there. Now, I'll follow that same procedure with our other wire. Now, to get our brown wire and our red wire hooked up, we're gonna need to get behind this panel. We're gonna have a wire bundle back here. So up here we're gonna have this little thing that says airbag. Just wanna get behind that with a pick tool. Pop that out and that's gonna hang there. Behind here, we're gonna have a fastener. And that on ours is gonna be a T30. Now yours may be a T20. So either one of those are gonna work. Wanna get that backed off. (drill whirring) Now with that nut removed or the bolt, we just wanna pull back on our panel. (panel pops) Steady pressure. And we're just gonna pull back and that's gonna unclip. (panel clips) Now once we do that, we can pull that down, take out our bolt and set that aside. Now for our connections in the back, we have our panel out of the way and we looked for the wires that they recommended in our instructions. And for ours, it's going to be this thinner solid black wire and it was back in this bundle. We had to pull that out of its little clip that held it back against the wall over there. So now we took our red wire and ran that with the black with our little crimpers. And now for our brown wire or our gray wire with our brown stripe is the other one that they recommended. Now, I did go through and test these. Now, this one is going to be our taillight signal. This other one is going to be our brake light signal. And we're just following the same procedure we did up front with our crimping of our wires with our little connectors. Now we have our black wire that comes out of our harness. This is gonna go over to our positive terminal. So I'm gonna leave a little extra line on this so we can tuck that away. Go ahead and get that cut off of the access. Now in our kit, we're gonna have this ready-made fuse holder. I wanna go ahead and pull our fuse out of there. After we make all of our connections, we'll go ahead and get our fuse in that. And I'll strip this wire off. Give that a twist. We'll put that into our butt connector that's already on our fuse holder. We'll get that crimped in place. Get a really good crimp on that. Now for our negative side of our battery, we're gonna have our white wire. And we're just gonna leave a little extra with that as well. And we'll get that cut off. Now the same thing. We're gonna go ahead and get our wire strip back. This is gonna be a little bit different. We're gonna have this prong style connector. And what we're gonna do, is just get that crimped in place as well. Now, here on our battery is gonna be our negative side. We're gonna take a 10mm socket. We're gonna back that off. Take our wet wire with our prongs. Push that underneath of our nut, and we'll tighten that down. For our positive terminal side, we're gonna have a 10mm right back here. Let's back that one off. That one we can fully back off. We'll take our ring terminal that comes on our fuse holder. Get that installed over that. Reinstall our nut and we'll tighten that down. Now after we've made all of our connections, we'll come back through and we'll install our fuse. Now, one thing I recommend when we get back here to our plug is get your bracket installed. I went ahead and got that screwed up there. And you're gonna wanna take your wiring harness and run that down through the back of your plug after you disassemble it. And then that way you can run this up and through into your plug. Now follow your instructions when you're putting this on because the back of here isn't correct. So go by your instructions when you get this hooked up. Don't go by what it says on the back. Just follow it. It is gonna be a little bit different because you will be looking at it from the front. So just make sure you look for your proper slot where it's gonna line up in the inside of a plug itself and go by that and then just follow it on around. And after we've done that, we can go ahead and get that pulled through into our plug. And we'll just have to line up our slot. Get our seal put in place. Then we'll just take our two little keeper screws and we'll get those screwed back in place and I'll mount this up to our bracket. Now that we have everything hooked up, before I mount up my plug connection here or my connector, I wanna go ahead and check everything, make sure everything's working. So I'm gonna check to see that we have our marker lights, which we have. We're gonna do left turn. We're gonna do right turn. We're gonna do brakes. Now all of our functions are working. Now all we have to do is we'll mount up our connector and then we'll go ahead and start getting everything put back together. Now we have our underbody panel and in our instructions, it give us some dimensions that we need to follow to get this all cut out. So we just got those all marked out. Now I'll take my reciprocating cutter and we'll just go ahead and get cut out and we'll get it put back in place. (drill whirring) After you get this cut out, be careful because these back edges of this aluminum can be really sharp. So what I'm gonna do is come through here with a file and just kind of get everything cleaned up. Not only is it gonna make it look better, but it's gonna take away that sharp edge off of that aluminum. Now that we have that all cleaned out, we'll go ahead and get our underbody panels put back in place. That was a look at our stealth hitch with tow package for 2025 BMW X7. I'm Scott with etrailer and thanks for watching.
Ratings & Reviews

Info for this part was:
At etrailer we provide the best information available about the products we sell. We take the quality of our information seriously so that you can get the right part the first time. Let us know if anything is missing or if you have any questions.














Thank you! Your comment has been submitted successfully. You should be able to view your question/comment here within a few days.
Error submitting comment. Please try again momentarily.