
# 1
Thule Passage Trunk Bike Rack for 2 Bikes - Hanging Style
 Pontiac Trans Sport Van
The Thule Passage Trunk Bike Rake for 2 bikes is a good product. I used it to transport my mountain e-bike. I choose this particular unit because it can handle the weight 2 of bikes (non-e-bikes) and the weight of my e-bike is equivalent to weight of 2 bikes. Note: Must readjust the straps after mounting the bike to the rake.
great! works really well, and a lot easier to attach than I anticipated. We drove with bikes across the country from south west all the way to North east. solid rack!
# 2
Swagman XC2 Bike Rack for 2 bikes - 1-1/4" and 2" Hitches - Frame Mount
This is a well designed rack. Adding and removing bikes is quick & easy. Just set the bike on & slide the padded hook down onto the bike frame to secure it; no straps required. If only one bike is transported, it does not interfere with opening the trunk on our Tesla Model 3. With 2 bicycles the trunk cannot be opened. For 2 bikes the Swagman model that can tilt might be worth the extra 22 bucks. This rack uses a bolt in the receiver hitch instead of a pin. This locks it securely preventing it from moving in the hitch & rattling. It also requires a wrench to remove it, good for theft prevention but one more thing to keep track of. For storage on the vehicle the top bar folds down. For storage in the garage, the left & right bars fold up & you can hang it using one of the hooks.
So far so good. The rack wiggles a bit, but that is expected. I have it on my 2007 Corolla and I have hit 65+ on the highway with it and have not had a problem. I would recommend getting a locking pin. The one included is threaded, which aside from security, makes it harder to take the rack on and off. I would also look into a DIY way to secure the wheels better. I am using some bungee straps which do the job no problem. The two bikes I carry are at the racks capacity.
# 3
Swagman XTC2 Bike Rack for 2 Bikes - 1-1/4" and 2" Hitches - Frame Mount
I was sent additional mounting materials that don't correspond with my hitch or my bike rack. See the photo below. Are these materials for my Swagman STC2 Bike Rack Item #S64670?
Very stable and simple to use bike rack that works great with my road bike AND with my 29" Big Rippers. It makes loading and unloading the bikes a snap and they are safe and secure for traveling once loaded and secured. I have already logged over a thousand miles hauling bicycles with this rack and highly recommend it. I am a big fan of Yakima roof racks but, honestly, wish I would have went with this setup for my bikes from the beginning.
# 4
Thule Passage 3 Bike Carrier - Trunk Mount
Way too light duty for what is advertised. It seemed to be made out of 1/2 inch electrical conduit. I would never put three bikes on that rack. I only had two bikes on the rack. While on trip through Idaho the wind was so strong that one of the bikes partially blew off the rack. We traveled 1,800 miles and upon arriving home I actually sawed the bike rack up and threw it away so that no one else would use it and cause an accident. I've already found a different brand that is HEAVY DUTY and I will stick with that brand.
This is definitely more of a 2 bike carrier vs 3 bikes. I had to take the front wheels off two bikes to get three bikes on this carrier. Also, it rubbed the paint off on the trunk of my Subaru legacy.
# 5
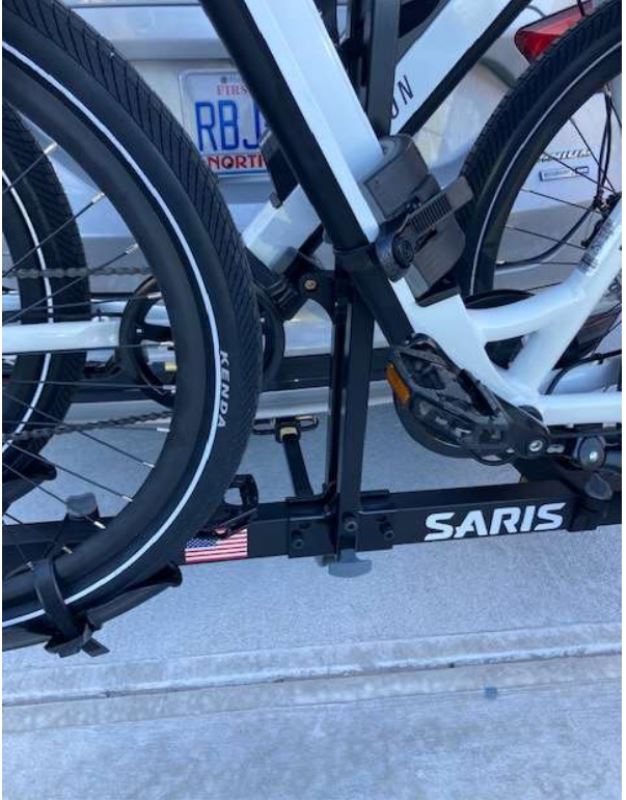
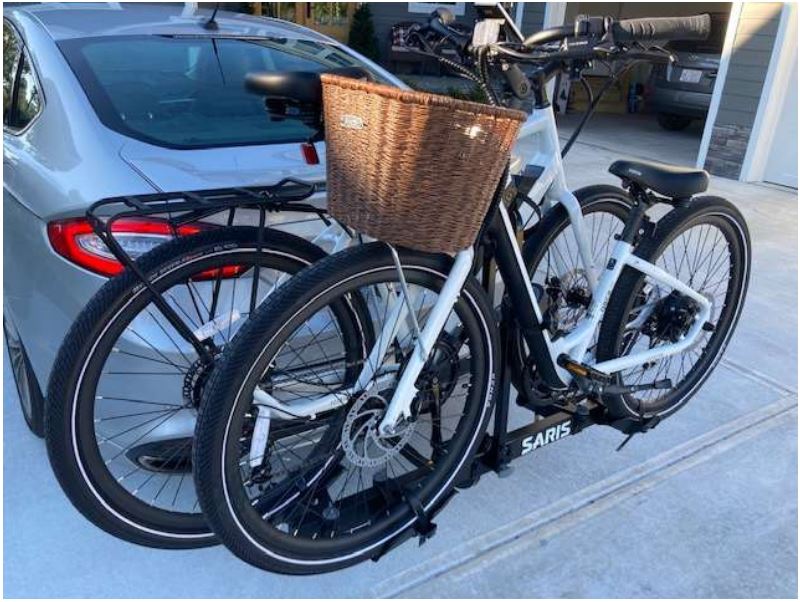
Saris Freedom Bike Rack for 2 Bikes - 1-1/4" and 2" Hitches - Frame Mount
Seems like a good rack for the price, especially when compared to others with the same weight rating. It was very easy to assemble, just a few bolts and that's it. I put two 62lb e-bikes on it (Ride1Up Turris) and it has minimal wobble and movement as expected. The straps that come on the center cradles were too short to go around our bike's frame and battery so I had to purchase a separate set of long straps from Saris for an additional $20. So be aware if you have an e-bike with a fat frame where you plan to use the cradle on, you might have to spend another $20 on a pair of long straps. While I waited for the straps I just used a velcro-strap and it worked fine. So far I am content with this rack overall and hope it lasts many years.. I gave it 4 stars instead of 5 because I had to purchase additional straps to make it work.
I had to put my electric bikes into this rack, backwards, to make them fit. Not ideal, but it works.The receiving 'trays' that are intended to provide support for holding the bikes, by being placed under the bike tires, are forced to be moved to a location that is not directly under the bottom of the bike tires. While it works in this manner, it is not ideal.For the support that attaches to the diagonal bike frame, we had to remove it from the vertical rail of the rack. We reinstalled it, upside down, because that's the only way we could make it fit, or 'grab', the bike frame. Again, we made it work, but it's not ideal. We chose to keep the rack because it was so much less expensive than the Thule rack we considered buying. The bike shop owner didn't agree with us. He observed that we are putting $3000 worth of bikes on the rack and risking that investment. So far, no problems, other than the ill-fitting installation.
# 6
Swagman Chinook Bike Rack for 2 Bikes - 1-1/4" and 2" Hitches - Frame Mount
Works for my fat tire bike. Once it's set up, it's easy to install and remove. I had to cut out some of the plastic cladding on the underside of my bumper on my 2014 Subaru Outback. Good value. I've had no issues.
GI love the Rack, it is easy for me to handle, (as a 89 yearold rider.), two bikes ride and fit very nicely. Like how it folds down,and how it folds to open the tailgate . Great quality for the money, I would highly recommend this rack
# 7
Malone Runway Trunk Bike Rack for 3 Bikes - Adjustable Arms
I have a sedan and was able to mount two bikes on it. To my surprise there wasnt much or if any movement once I tightened everything. I did put few extra bungee cords and a towel in sone places to prevent from rubbing other than that its a solid product, solid construction and everything is simple yet effective. If I would improve anything that would be to add some foam protection in some areas where it would possibly Could hit ot touch bur thats it. I do like what I paid money for and my bikes are about 25 lbs each so according to capacity i could fit another one onto the rack but I feel like it would be too tight even though its meant for 3 bikes, I feel Like i definitely would need to wrap sone some in towels. But it would probably work. Anyway, looks like the products of this company are legit, If you need a bike rack Im sure you will be able to find what you looking for here.
The bike rack was easy to put on and off. I had a question regarding my invoice, and Tyler took care of it quickly and efficiently. The quality of service is exemplary. Thank you.
# 8
Saris Bones 2 Bike Rack - Trunk Mount - Adjustable Arms
So far really great! I love the stability my bike has on the rack, fit for my 2021 Honda Civic, and the quality of the material engineered into the design to prevent damage to the cars paint/parts.
Works great even using an electric bike like my Aventon Soltera.
# 9
Hollywood Racks TRS Bike Rack for 2 Bikes - 1-1/4" and 2" Hitches - Wheel Mount
This rack has been great on my 2016 Nissan Rogue SUV, very sturdy and holds bike(s) securely. I've used it with a fat bike, a regular mountain bike, and a road bike. Amazingly this rack gave me a couple inches MORE clearance in my small garage than my previous hanging-style rack. The aluminum trays themselves are still in great condition, though other parts are showing some rust after 1+ years (and since I use it in the winter as well I leave it on most of the time). The tilt-down feature is great, but pulling the pin and reaching the knob to do this is awkward with bikes in place. When removing the bike, it can be hard to squeeze the lever on the hook that holds the front tire. (Maybe because of pressure when the hook is against the tire?)
I've had this hitch for a day and used it just once on my Miata (class 2). Going on a trip tomorrow and will use it on a Nissan Frontier pickup (class 3). It seems like a quality hitch for a very good price. I feel like buying one of those other brands (named after cities) you are paying a premium for the brand name. Hollywood provides a great value without gouging my wallet. I like the aluminum rails and the entire system is easy to use. Just holding off one star since I've only had it for a day. As a bonus it arrived a day earlier than it was scheduled!
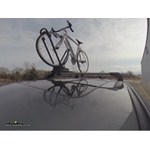
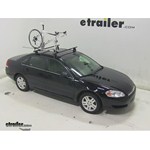
Does the Yakima HighSpeed Roof Bike Rack Suit Your 2018 Chevrolet Impala
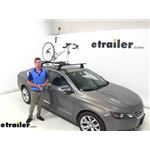
Adam: Hi everyone, Adam with etrailer.com. Today, we're going to be taking a look at the Yakima High Speed on our 2018 Chevrolet Impala. There's going to be a great bike rack for your roof rack system. In this case, we do have the Yakima core bar and it works very well. It's very easy to get your bike off the rack as well, so let's just go ahead and do that together.This is going to be a fork mount in front. So once you have that in place, it's going to clamp down on that, giving it really, really sturdy fit.
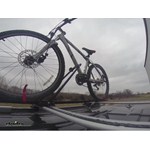
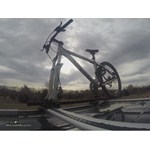
Fit Verified: Yakima HighRoad Roof Bike Rack on a 2018 Chevrolet Impala
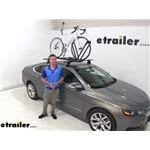
Hi everyone, I'm with etrailer.com. Today we have the Yakima HighRoad on our 2018 Chevrolet Impala. So this high road is going to be ideal for your higher end bikes. It has no frame contact, which is fantastic. It does have a pretty unique design. It clamps down on your front wheel, you get it nice and sturdy into place.
Will the Kuat Transfer V2 Bike Rack for 1 Bike Fit Your 2016 Chevrolet Impala?

Hi everyone, it's Evangeline here at etrailer.com and today we are looking at our Kuat Transfer V2 1-Bike Rack here on our 2016 Chevrolet Impala. Now this is a great bike rack, if you are looking for something that is compact, as well as it can accommodate bikes of different shapes and sizes and it has all the nice premium features you'd want in a bike rack. So the first features that it can tilt away. To do so, hold onto your bike rack and step on that lever. It then tilts down nice and easy. Now you would use this on like your truck to access your, to open your tailgate.
Test Fit: Inno Tire Hold Bike Rack for 2 Bikes on a 2016 Chevrolet Impala

Hi everyone, it's Evangeline here at etrailer.com. And today we are looking at our Inno Tire Hold 2 bike rack on our 2016 Chevrolet Impala. Now, this is a great bike rack if you are looking for something that is ridiculously easy to mount and dismount your bike with, as well as if you have heavy electric bikes this is a really good option for you. Now, one of its features is that it can tilt away. To do so, you need to pull on this lever right here and then it tilts down. Now usually use this if you want to lower your tailgate or open your hatch door.
Test Fit: Hollywood Racks Destination Bike Rack for 2 Bikes on a 2016 Chevrolet Impala

Hi everyone. It's Eve Angeline, here etrailer.com. And today we are looking at the Hollywood Racks Destination, 2 bike rack here, on our 2016 Chevrolet Impala. Now, this is a great bike rack if you are looking for something that is light weight and you don't want something that's too heavy or overburdening your car, as well as if you have bikes of different shapes and sizes this will work with that. First things first is that the way our bike is mounted to this bike rack is by these two wheels straps as well as this frame mount here in the middle. So our wheel straps, if you wanna take them off you just press that lever, pull up on that strap.
Saris Trunk Bike Racks Review - 2016 Chevrolet Impala
Today on our 2016 Chevrolet Impala we're going to be taking a look at the Saris SuperBones Trunk Mount 3-Bike Rack. Now as you can see we already have our bike securely mounted. You're going to have three mounting points, two on top and one on the vertical support. Now the way we're going to bike off is simply push in on this tab which will release the strap and pull it up. We'll do the same thing for the other two. We can lift our bike right off.
Yakima Trunk Bike Racks Review - 2016 Chevrolet Impala

Today on our 2016 Chevrolet Impala we're going to be taking a look at the Yakima Half Back Trunk Mount 2 Bike Rack, part number Y02636. As you can see we already have our bike securely mounted to the bike rack, and they're going to have two points on top, and one on the vertical part of the frame here. To take the bike off simply push in on the tabs, pull the zip strip out, and our bike will come right off. Now it is a good idea to always go ahead and replace these, that way we don't have to worry about them getting lost or damaged. With our bike off we'll go ahead and take a quick few measurements. Overall this bike rack's going to add right around about 24-1/4" to the overall length of the vehicle. Now we do have the option to rotate the arms down to give us a little bit more room.
Fit Test: Yakima FullBack 2 Bike Rack on a 2016 Chevrolet Impala

Today on our 2016 Chevrolet Impala we're going to be taking a look at the Yakima FullBack trunk-mount 2-bike rack, part number Y02634. Now as you can see, we already have our bike securely mounted on our bike rack. You're going to have two points here at the top and one here on the vertical support. To remove the bike, simply push in on the tabs, pull the Zip Strip out, and now we can take our bike off. It's a good idea to put these back so they don't get lost or damaged. They just slide right into place. Now with the bike off, we'll get a quick few measurements.
Thule Trunk Bike Racks Review - 2016 Chevrolet Impala

Today on our 2016 Chevrolet Impala, we're going to be doing a test fit of the Thule Gateway XT Trunk Mount Two-Bike Rack. As you can see we already have our bike securely mounted to the bike rack. You got three mounting points, two on the crossbar here and one right here. To take it off, simply pull the straps off, and we can take our bike right off. With the bike off, we'll take a few quick measurements. Overall, we're going to be adding right about 13-1/4" to the total length of the vehicle. Now, we do have the option to swing our arms down to give us a little bit of extra room.
Thule Trunk Bike Racks Review - 2016 Chevrolet Impala TH9001PRO

Today on our 2016 Chevrolet Impala we're doing a test fit of the Thule Raceway Pro trunk-mount 2-bike rack. That part number is TH9001PRO. Now we already have our bikes secured down. We're first going to show you how we do that. We have two cradles on top of our frame here and we have one as our anti-sway cradle in the back. We're going to pull down and lift up to release those.
Thule Archway Trunk Bike Racks Review - 2016 Chevrolet Impala

Today on our 2016 Chevrolet Impala we're doing a test fit of the Thule Archway XT Trunk Mount 2-Bike Rack. That part number is TH9009XT. Now we already have our bike secured down. We're first going to show you how we do that. We have three cradles in total, two on top here at our frame, and one as our anti-sway in the back. We're going to start by pulling down and lifting up to release those, and we'll be able to pull our bike off, and set it off to the side.
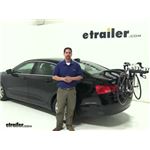
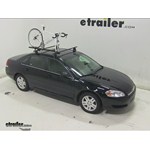
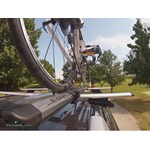
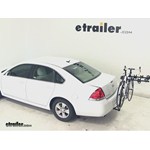
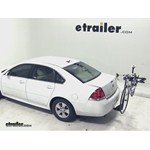
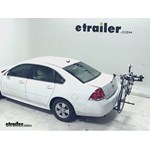
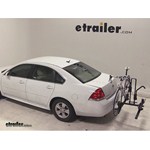
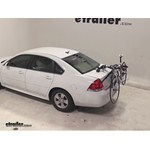
Fit Verified: Thule Passage Trunk Bike Rack for 2 Bikes on a 2016 Chevrolet Impala

Today on our 2016 Chevrolet Impala we're doing a test fit of the Thule Passage trunk-mount 2-bike rack. That part number is TH910XT. Now we already have our bike secured down. We're first going to show you how we secure it in place. We have three straps altogether. We've got two over the top frame of our bike and one here at our downpost.
How Does the Malone Runway Trunk Bike Rack for 2 Bikes Fit on a 2015 Chevrolet Impala?

Hi everyone. It's Evangeline here at etrailer. And today we're looking at the Malone Runway two bike, back of the car, trunk mounted bike rack here on our 2015 Chevrolet Impala. So the Malone Runway is a nice and simple bike rack, especially if you're looking for something that is quick to put on your vehicle, as well as affordable. Also, if you are looking for a compact bike rack that you can store in the trunk of your Impala, this may be a good option for you. So first let's take a look at the way our bike is mounted to this bike rack.
Fit Test: Yakima ForkLift Roof Mounted Bike Carrier with 2014 Chevrolet Impala
Speaker: Today, on our 2014 Chevy Impala, we'll be test fitting the Yakima Forklift Roof Mounted Bike Rack, part number Y02098. With the Yakima and Q Towers Roof Racks system on our vehicle, well begin our test fit by placing the bike rack up on to the vehicles cross bars. Starting at the front, you will need to remove the skewer first so that you can slide the security cover and access the wing nut. Well need to loosen up the wing nut to position the front bracket around the underside of the front bar. With this done, well need to insert the silver T bolt into this slot on the bottom part of the bracket. Then we can go ahead and tighten it down.
Test Fit: Yakima FrontLoader Wheel Mount Bike Carrier on a 2014 Chevrolet Impala
Today on our 2014 Chevy Impala, we'll be test fitting the Yakima FrontLoader Roof Mounted Bike Rack. Part number Y02103. With the Yakima Q Towers Roof Rack System on our vehicle, we'll begin our test fit by placing the bike rack up onto the vehicle's crossbars. We'll need to make sure that the bar goes between the two sets of teeth at the front of the bike rack. Before tightening that down, we'll move to the rear and adjust to make sure the rear bracket is around the rear bar. Once that's done, we'll slide the silver T bolts into the slot of the bracket and turn it so it locks into place. We'll then tighten down the black wing nut to secure the rear part of the bike rack to the rear bar.
Test Fit: Swagman Upright Bike Rack for 1 Bike on a 2014 Chevrolet Impala
Today on our 2014 Chevrolet Impala, we'll be test fitting the Swagman Upright roof mounted bike rack, part number S64720. With the Yakima Q-towers roof rack system on our vehicle, we'll begin our test fit by placing the bike rack up onto the vehicle cross bars. Starting at the front, we'll need to pull out our hardware and take the silver U-bolts, go around the underside of the front bar and off through the predrilled holes of the head of the carrier. We'll then take our black wing nuts that thread down onto the silver U-bolts. Once both U-bolts are installed in the front, we'll go ahead and move to the rear, where this time where we'll take the silver U-bolt to go down through the predrilled holes of the bike rack. The silver U-bolt will go through the holes in the back plate. We'll then take our black wing nuts to thread down onto the silver U-bolts.
Fit Check: Swagman Fork Down Roof Mounted Bike Carrier on a 2014 Chevrolet Impala
Today on our 2014 Chevy Impala, we'll be test fitting the Swagman Fork Down Roof Mounted Bike Rack, part number S64710. With the Yakima Q Towers Roof Rack System on our vehicle, we'll begin our test fit by placing the bike rack up onto the vehicle's crossbars. Starting in the front we'll take the silver U-bolts to go around the underside of the front bar, and up through the pre-drilled holes of the head of the carrier. We'll then take our black wingnuts to thread down onto the silver U-bolts. Once the front is secured, we'll move to the rear, and this time we'll take the silver U-bolt to go down through the pre-drilled holes of the bike rack. We'll take the black plate, which the silver U-bolt will go through the holes of the black plate, and we'll take the black wingnuts to thread down onto the silver U-bolts. Once everything is all tightened down and secured, we're ready to load up our bike. We'll need to double check to make sure the skewer is loose at the front and that our cam buckle strap is on down at the rear.
RockyMounts TieRod Stretch Roof Bike Rack Review - 2014 Chevrolet Impala
Today on our 2014 Chevrolet Impala, well be test fitting the RockyMounts TieRod Stretch Roof Mounted Bike Rack, part number RKY1011. With the Yakima Q-towers roof rack system on our vehicle, well begin our test fit by placing the bike rack directly onto the vehicles crossbars. Well need to remove the black plastic cover at the front. Well then bring the rubber coated steel straps around the underside of the front bar and hook them into the connection points.Once thats done, youll notice the silver bolt that runs through the head of the carrier. Well use the included allen wrench to tighten down the silver bolt, which will bring the straps tightly around the front bar. Once thats done, we can replace the black plastic cover, and move to the rear.
Test Fit: Kuat Trio Roof Bike Rack on a 2014 Chevrolet Impala
Speaker: Today on our 2014 Chevy Impala, well be test fitting the Kuat Trio Roof Mounted Bike Rack, part number RU01.With the Yakima Q Towers Roof Rack System on our vehicle, well begin our test fit by placing the bike rack directly onto the vehicles crossbars. Now move to the rear. Well loosen up the two wing nuts, so that we can position the rear bracket around the underside of the rear crossbar. Once this is done, we can reinstall our black wing nut and tighten it down to secure the rear part of the carrier to the rear crossbar.Moving back up to the front, well take the rubber coated steel U bolts to go around to the underside of the front bar, up through the predrilled holes at the head of the carrier. Well then take the cylindrical nuts, which will thread down onto the U-Bolts. Well then use the included wrench to tighten down the cylindrical nuts directly down onto the U-Bolts, which will secure the front part of the bike rack to the front crossbar.
Installing the Hollywood Racks Traveler Bike Rack for 4 Bikes on your 2012 Chevrolet Impala
Today on our 2012 Chevrolet Impala, well be testing fitting the Hollywood Racks Traveler four bike carrier, part number hr8500. Now to begin our test fit well slide the shank of the carrier into the opening of the hitch, line up the pin holes, thread our anti-rattle bolt through the pin holes, and tighten it with a wrench. Now well go ahead and go over some clearance measurements to see how the bike carrier and this vehicle will fit together. There is about ten inches of ground clearance. The closet part of the vehicle to the closet part of the carrier is about two inches. With the cradle arms folded out weve added about 34 to the overall length of the vehicle.
Hollywood Racks Sport Rider Recumbent Bike Rack Review - 2012 Chevrolet Impala

Today on our 2012 Chevrolet Impala, well be test fitting the Hollywood Racks Sport Rider 2-bike Carrier Platform Style for Recumbents part number HR1000r-1G. Now to begin our test fit, well slide the shank of the carrier into the opening of the hitch, align up our pinholes, thread our anti-rattle bolt through the pinholes and tighten with a wrench. Now well go ahead and go over a few clearance measurements to see how the bike carrier and this vehicle will fit together. Theres about 11 inches of ground clearance. From the closest part of the vehicle to the closest part of the carrier is about 1 inch. We have added about 26 inches to the overall length of the vehicle.With this bike carrier and this vehicle, you can access the trunk with the platform folded up or we can pull the three pins at the bottom of the platform to fold it, which will also allow you to have access to your trunk.Now to load the bike, well make sure that the mast is in its upright position. Well put the frame hooks to the top of the mast and well undo the cradle straps. For demonstration purpose, well not be using a recumbent but well be using a normal road bike.
SportRack Escape 3 Hitch Bike Rack Review - 2012 Chevrolet Impala
Today on our 2012 Chevy Impala, we'll be test fitting the SportRack Escape 3 Bike Carrier, part number A30403. Now to begin our test fit, we'll slide the shank of the carrier into the opening of the hitch. Align up our pin holes, thread our anti-rattle bolt through the pin holes and tighten with a wrench. Now, I'll go ahead and go over a few clearance measurements to see how the bike carrier and this vehicle will fit together. There is about 10-1/2 inches of ground clearance. The closest part of the vehicle to the closest part of the carrier is about 1-1/2 inches.
Hollywood Racks Road Runner Hitch Bike Rack Review - 2012 Chevrolet Impala
Today on our 2012 Chevrolet Impala, we'll be test fitting the Hollywood Racks Road Runner 3 Bike Carrier, part number HR310. Now to begin our test fit, we'll slide the shank of the carrier into the opening of the hitch. Align up our pin holes, insert our pin through pin holes secured at the lock. We'll then turn the black handle located at the back of the base of the carrier to engage our anti-rattle device. Now, we'll go ahead and go over a few clearance measurements to see how the bike carrier and this vehicle fit together. There is about 10 inches of ground clearance.
Yakima StickUp 2 Hitch Bike Rack Review - 2012 Chevrolet Impala
Today, on our 2012 Chevrolet Impala, we'll be test-fitting the Yakima Stick Up 2-bike carrier, part number Y02420. Now, to begin our test-fit, we'll slide the shank of the carrier into the opening of the hitch, align up our pinholes, thread our anti-rattle bolt to the pinholes and tighten with a wrench. Now, we'll go ahead and go over few clearance measurements to see how the bike carrier and this vehicle will fit together. There's about 11 inches of ground clearance. Closest part of the vehicle to the closest part of the carrier is about 1/4 inch. With the platform folded up, we've added about 11 inches to the overall length of the vehicle.
Yakima QuickBack 2 Bike Rack Review - 2012 Chevrolet Impala
Today on our 2012 Chevrolet Impala we'll be test fitting the Yakima QuickBack 2 trunk-mounted carrier, part number Y02621. Before we begin our test fit we'll first need to check out the instructions or the Yakima fit guide to determine the placement of this on our vehicle. We'll go ahead and set the carrier onto the vehicle. You may need to adjust it by undoing the red knob located directly behind the cradle arms. We'll then put the top hooks to the top part of the trunk, the side hooks to the side part of the trunk, next to the taillights and the bottom hooks at the bottom part of the trunk. We'll then tighten down the straps to secure the carrier to the vehicle.


What our customers are saying:
"Just used my new combo bike rack/trailer hitch and it worked great! Actually towed a little smoother then just the plain hitch I had before and the bike rack part is very sturdy and stable - products arrived in a timely manner and packaged well - bravo!"