


To see if this custom-fit item will work for you please tell us what vehicle you'll use it with.


Thank you! Your comment has been submitted successfully. You should be able to view your question/comment here within a few days.
Error submitting comment. Please try again momentarily.

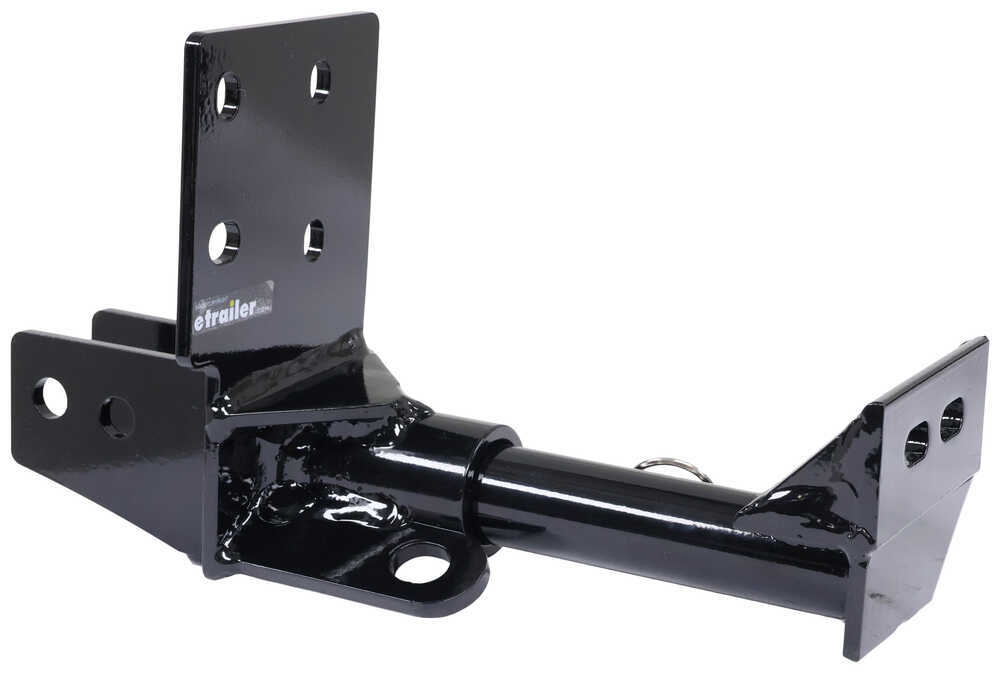
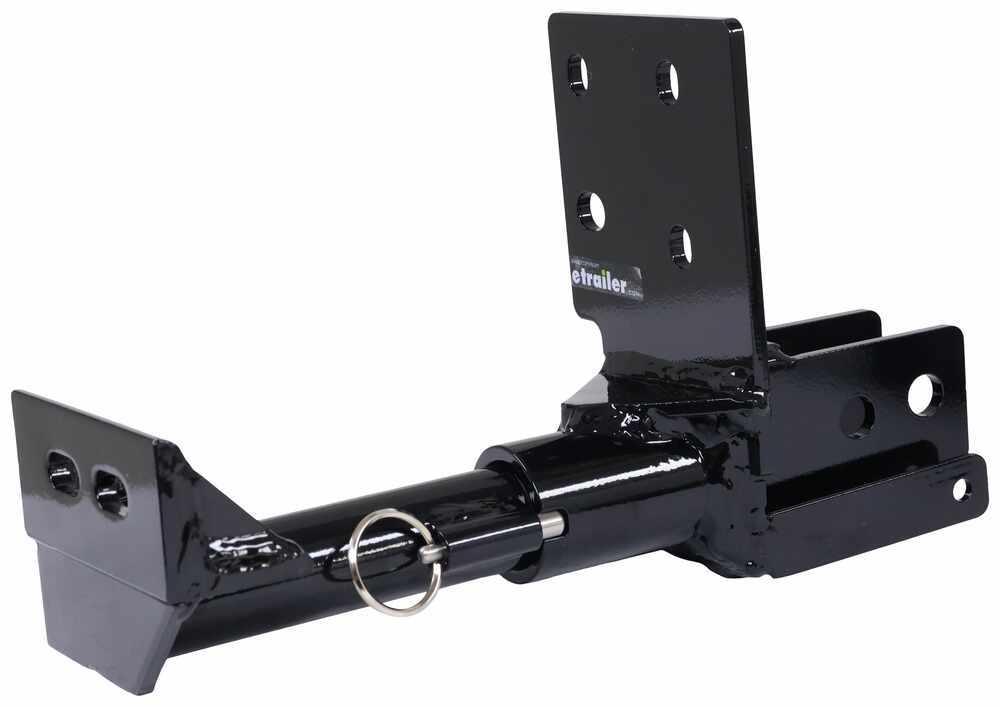
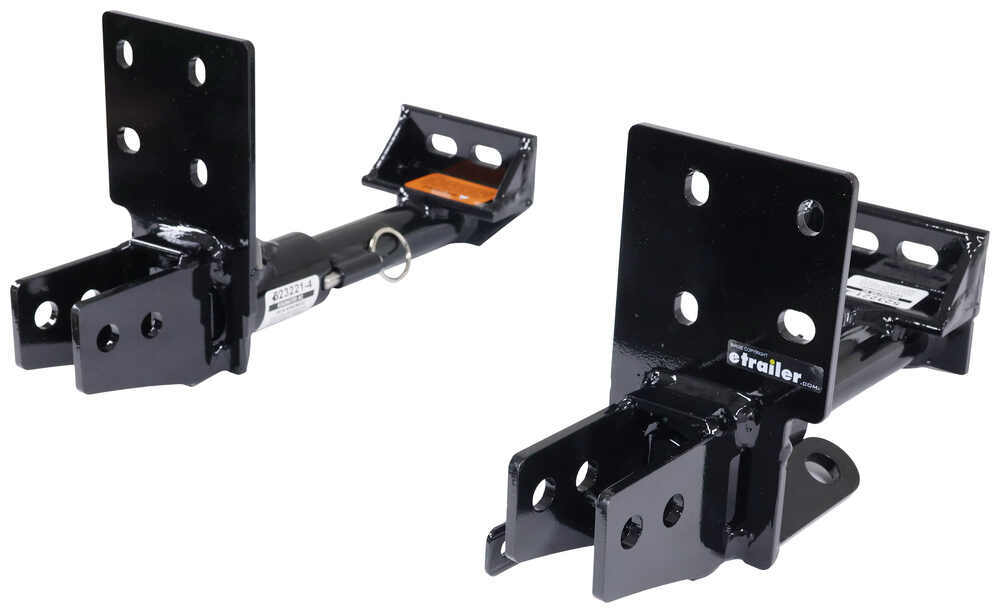

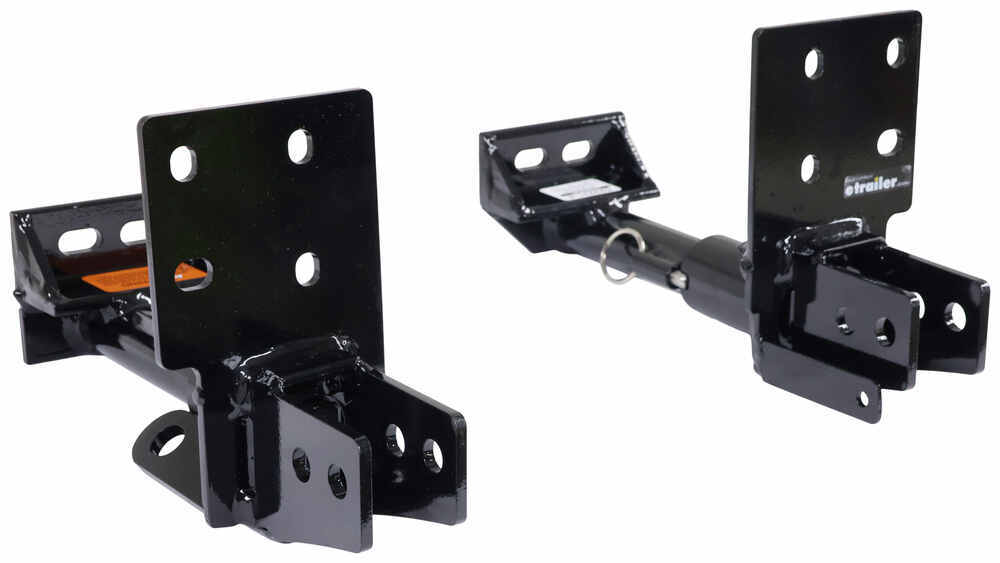

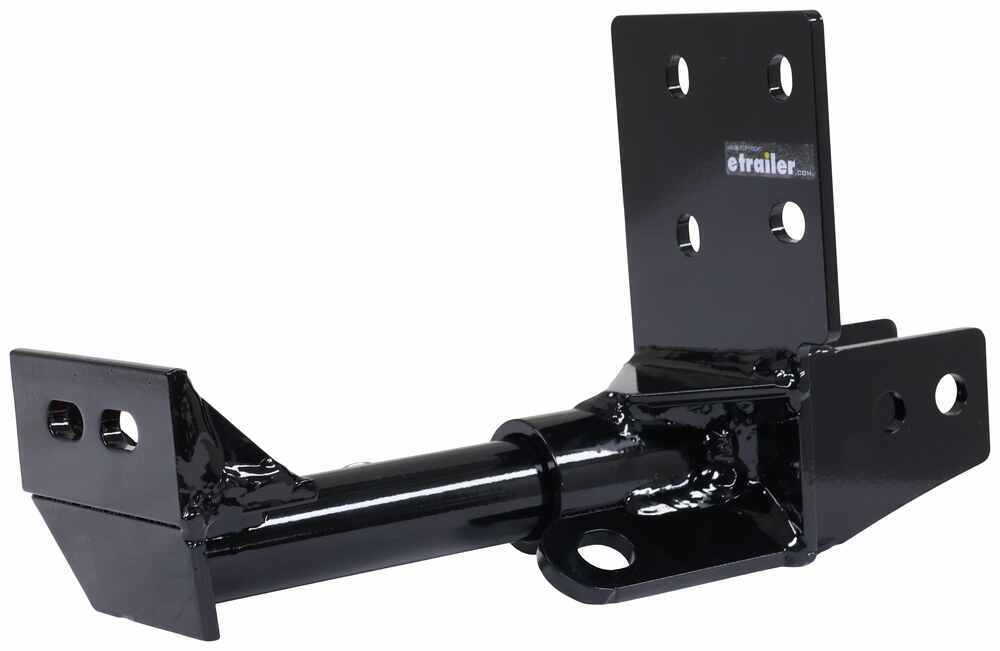
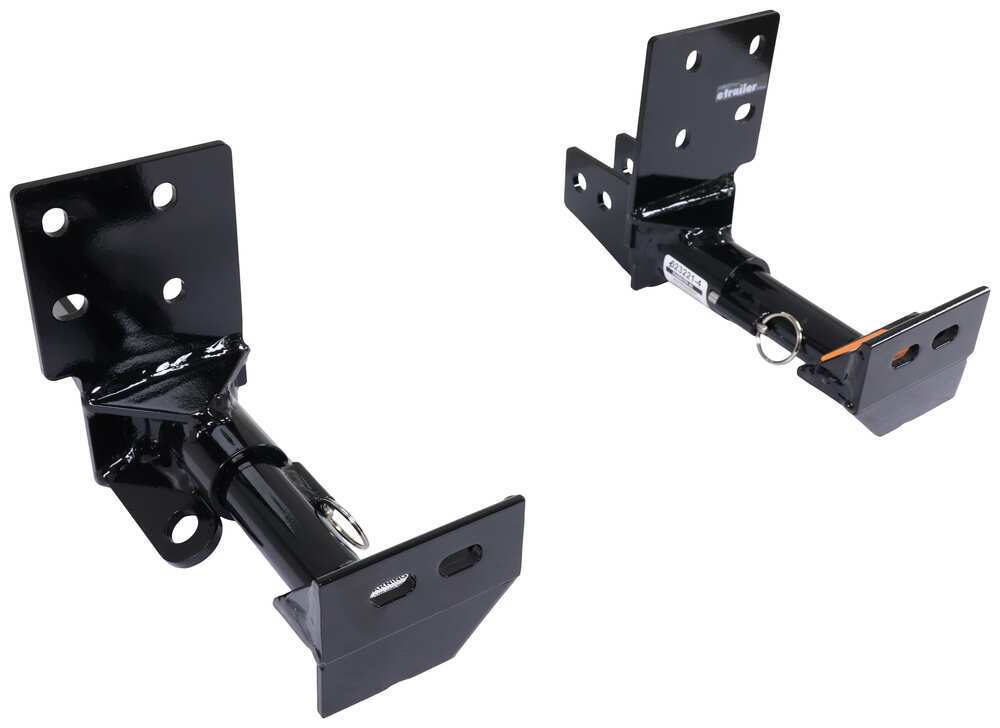
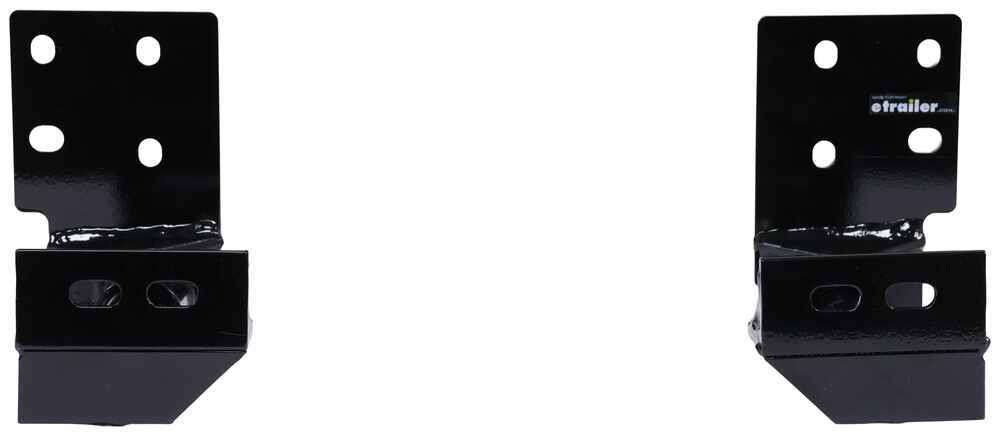
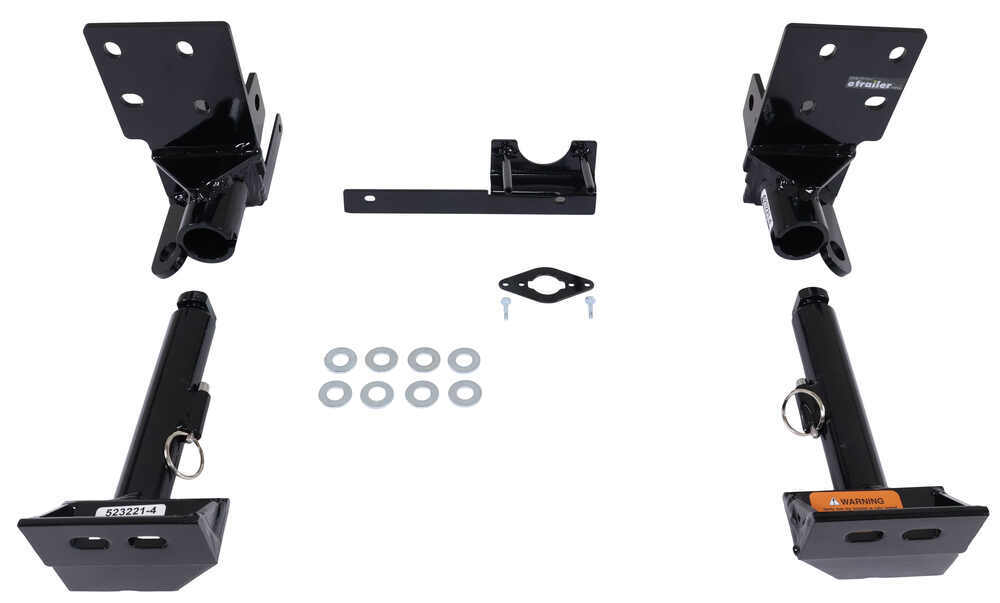
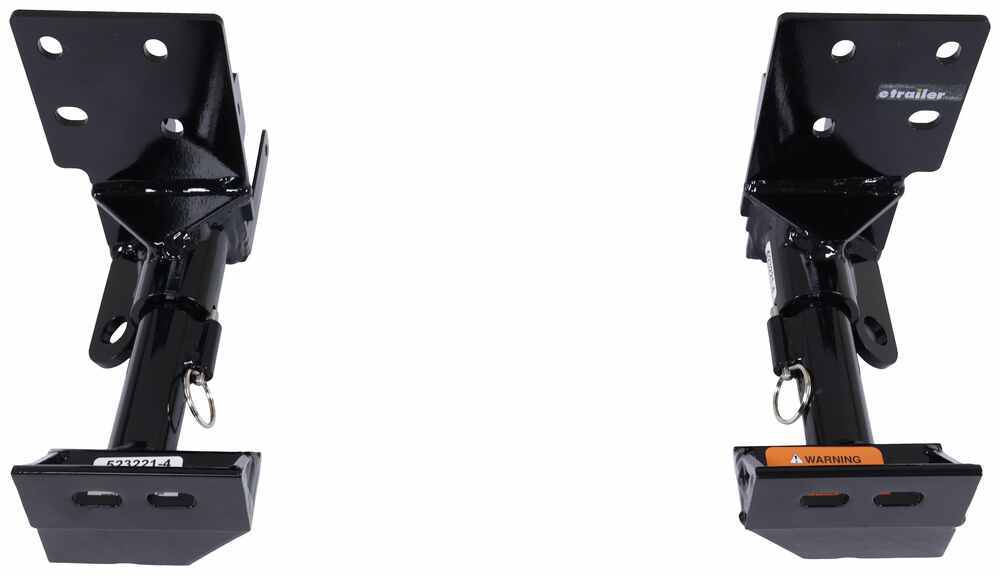
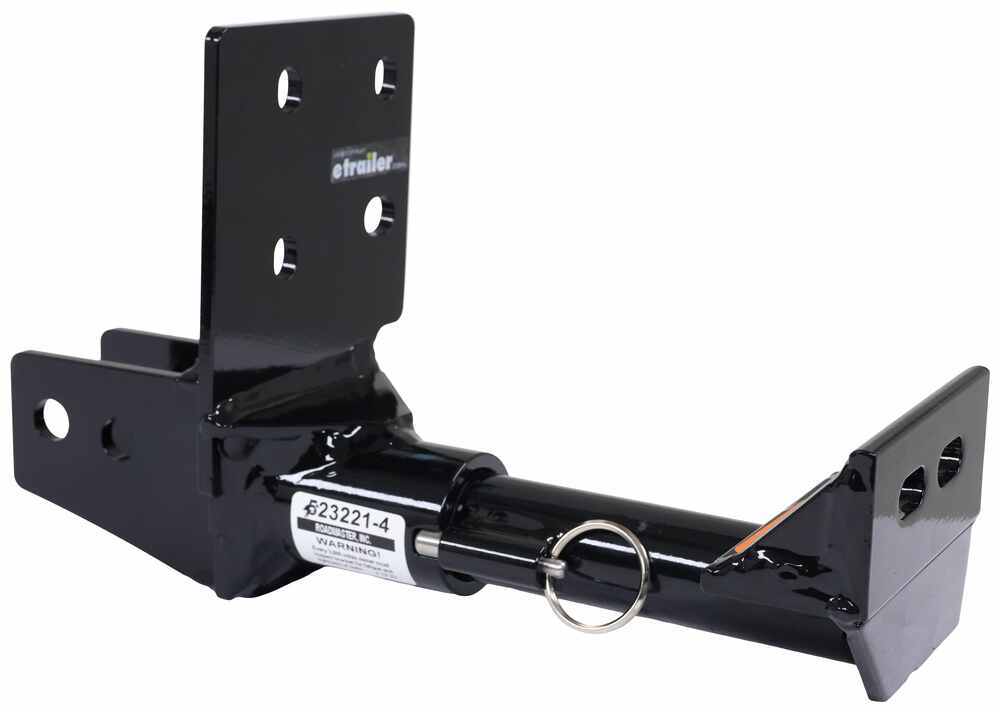
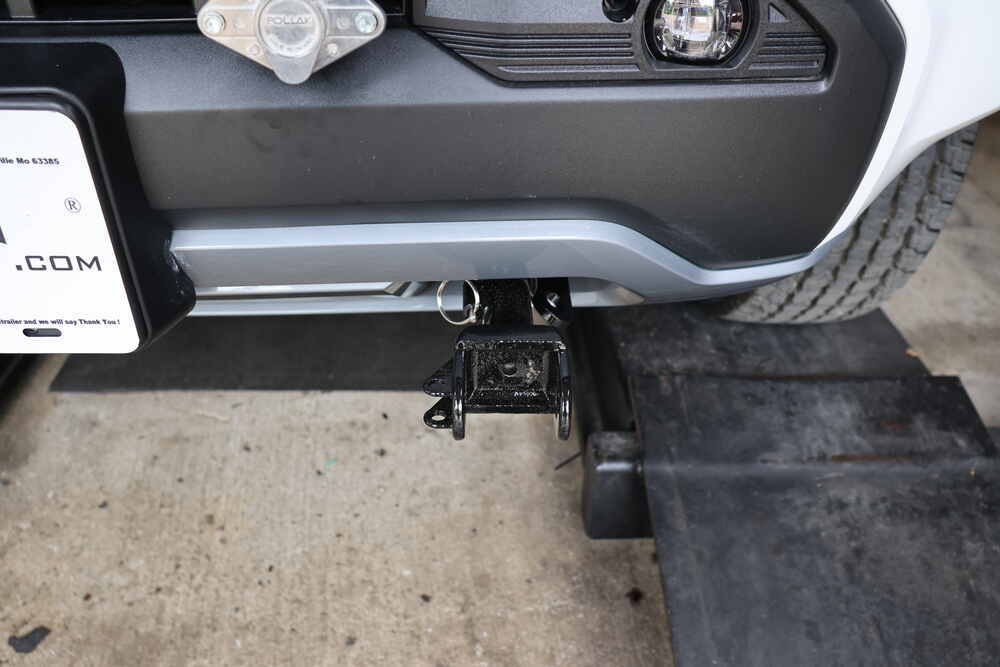
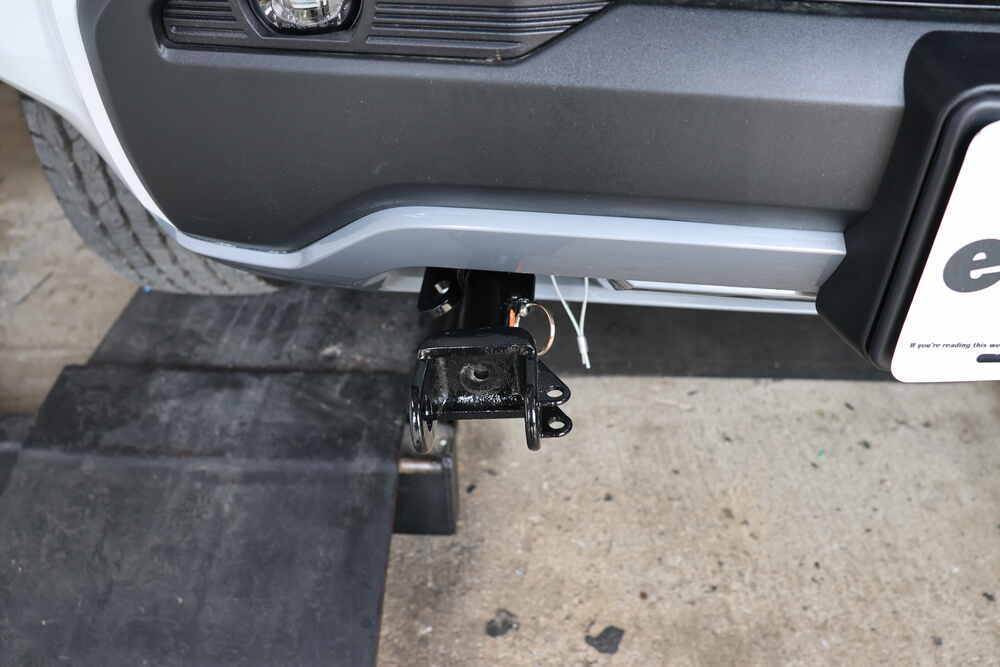

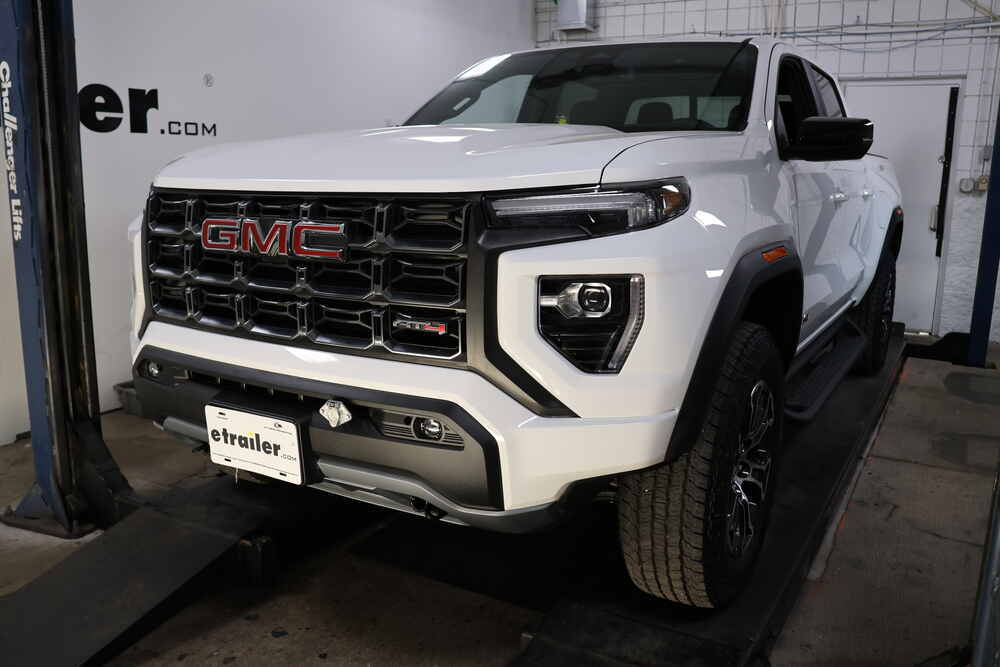
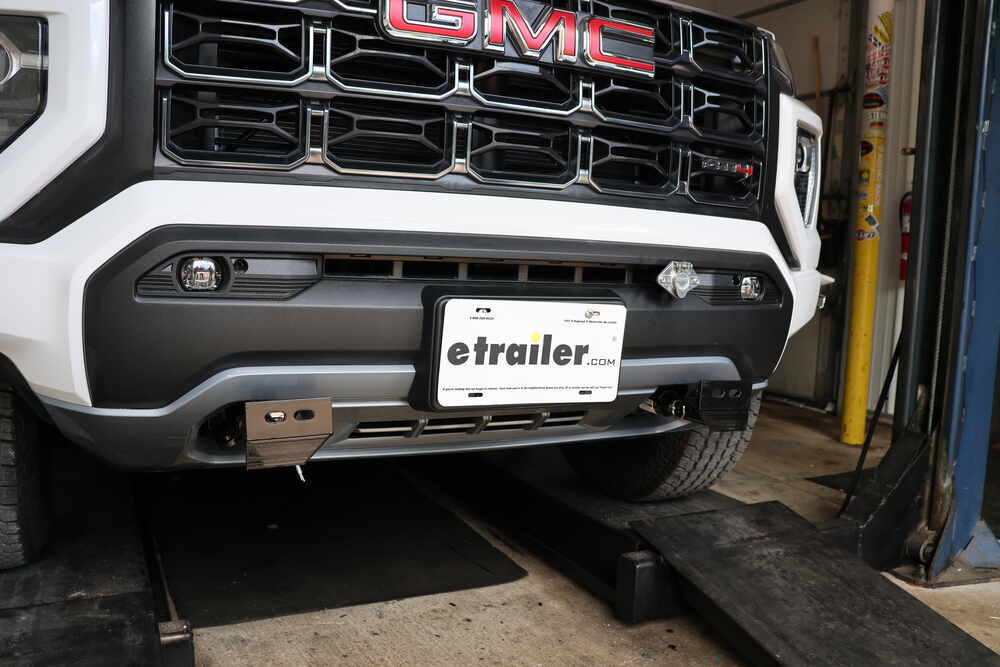
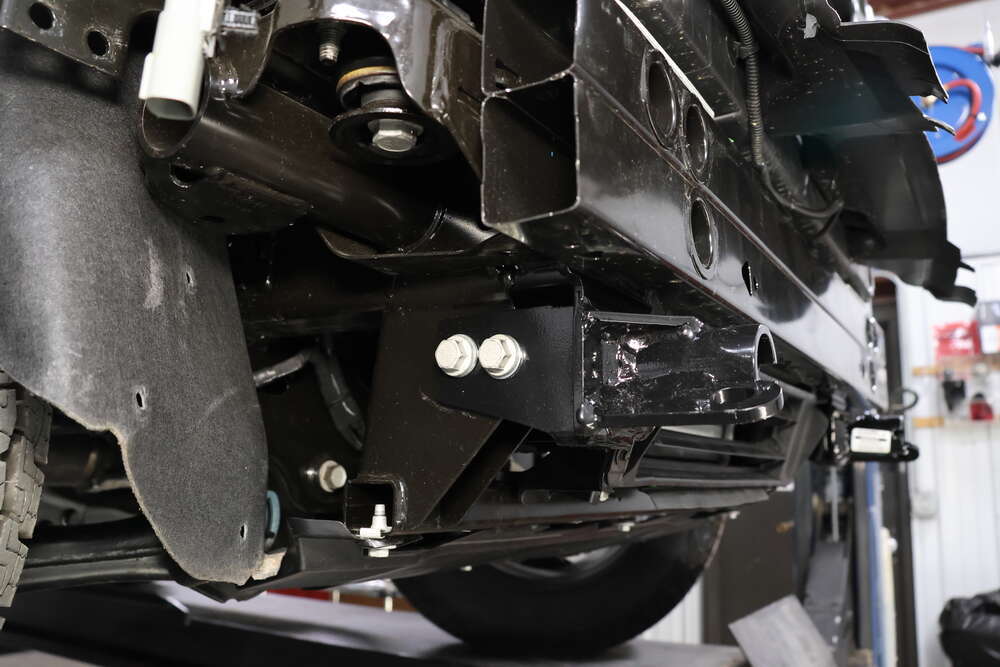
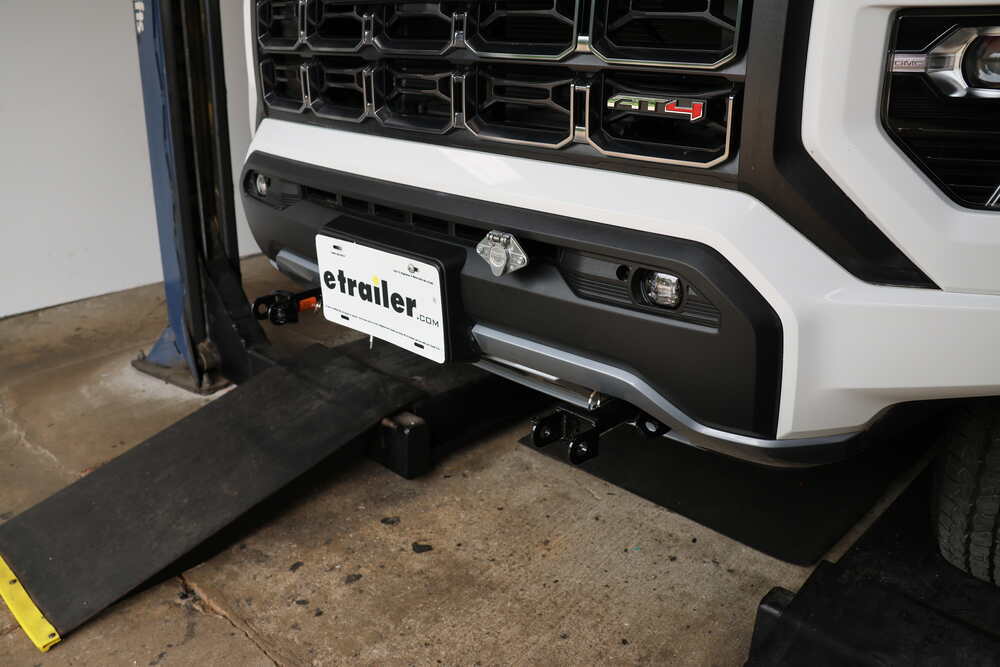
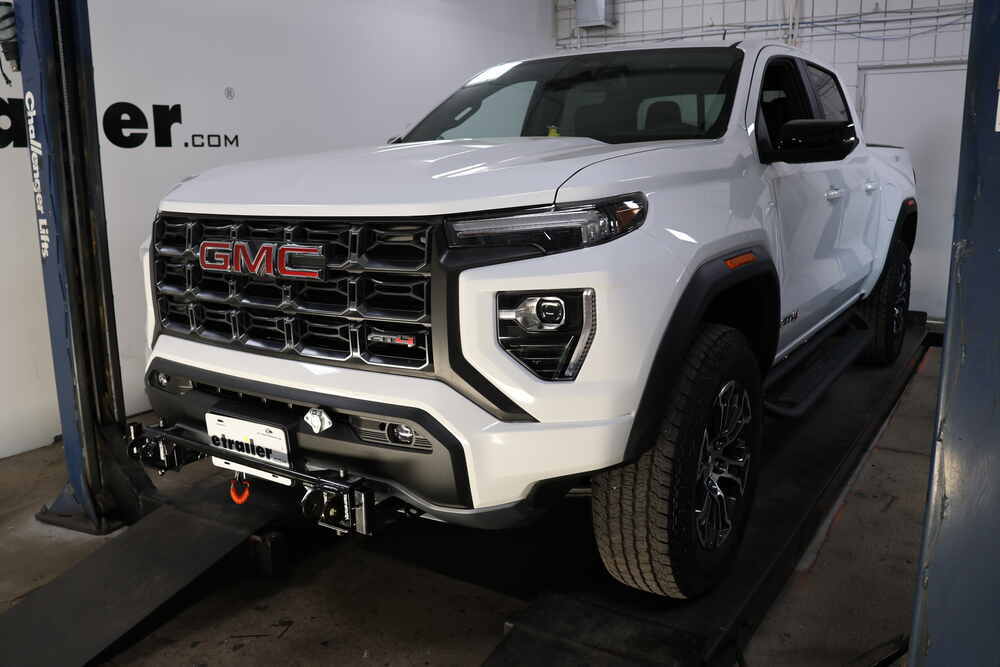

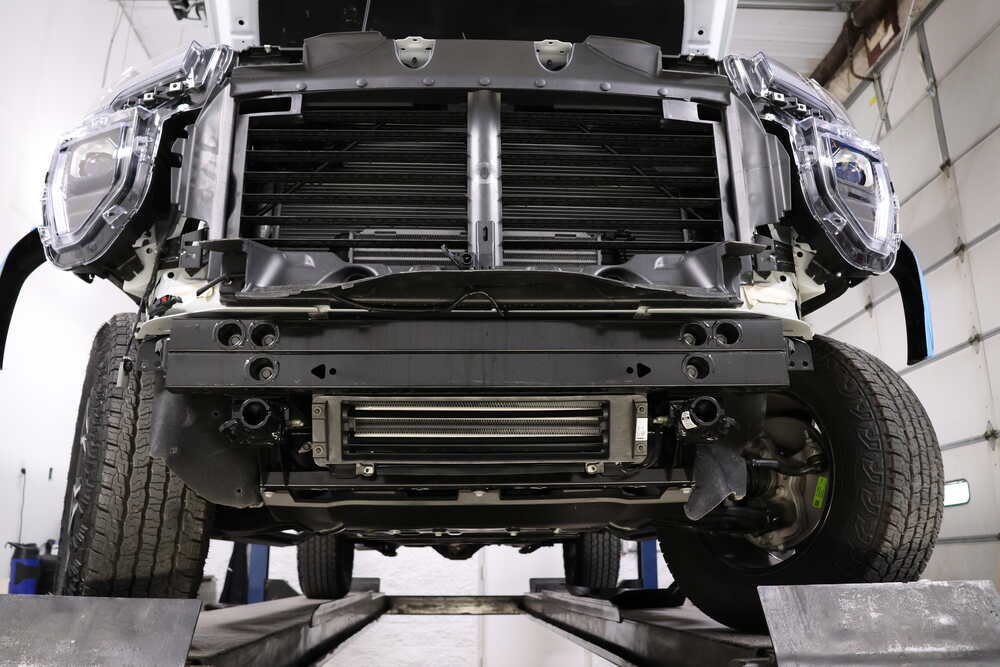


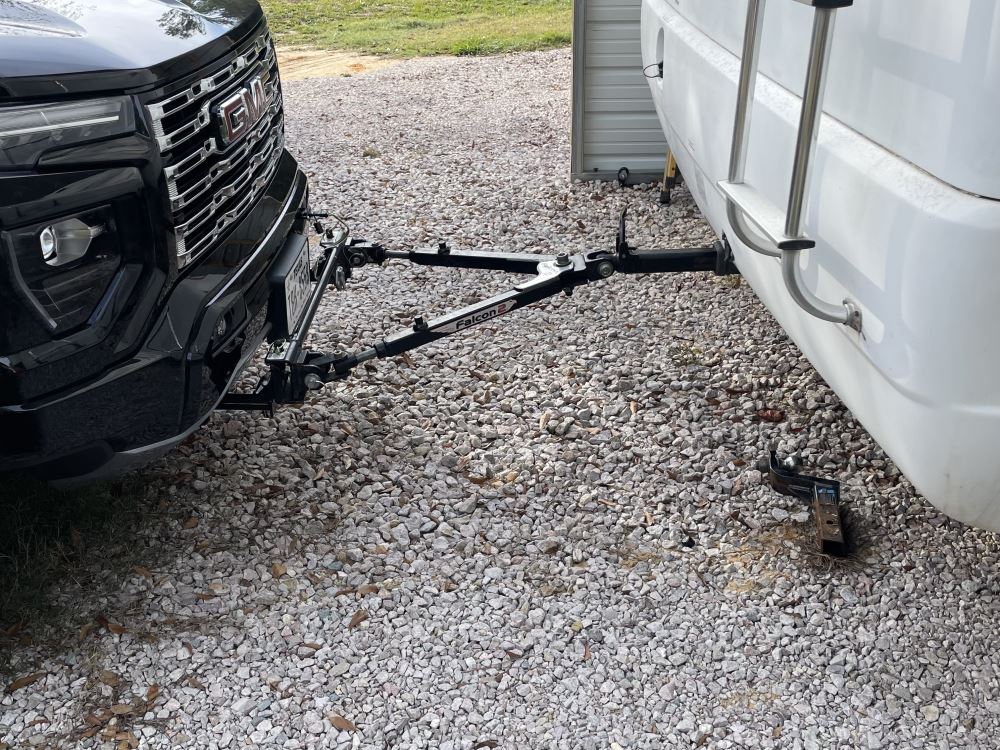
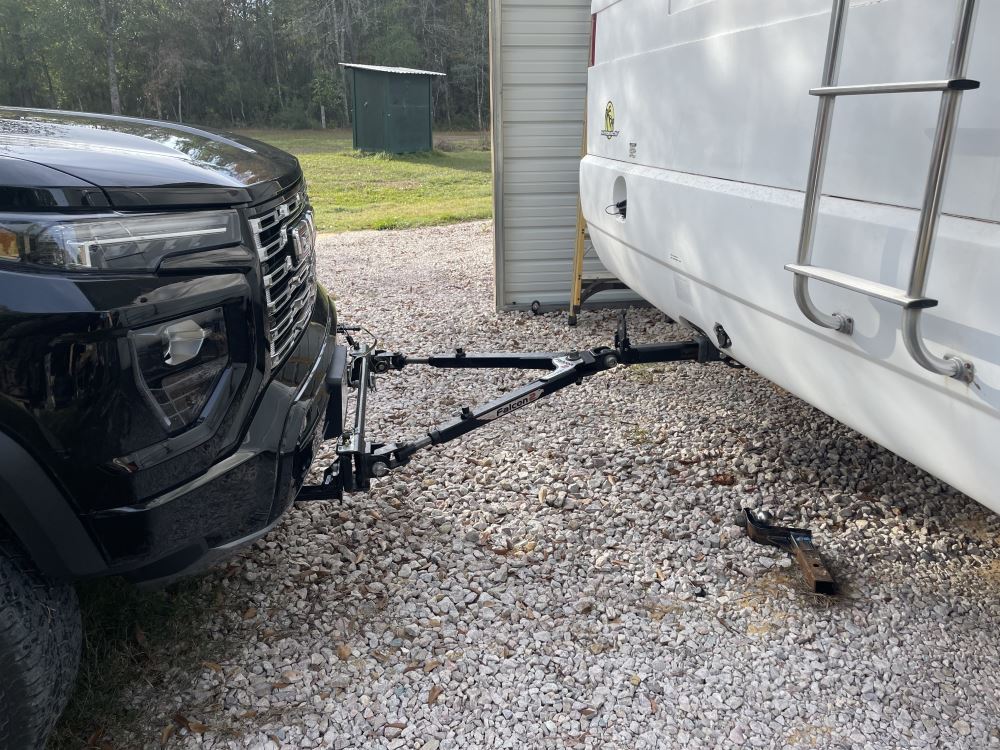

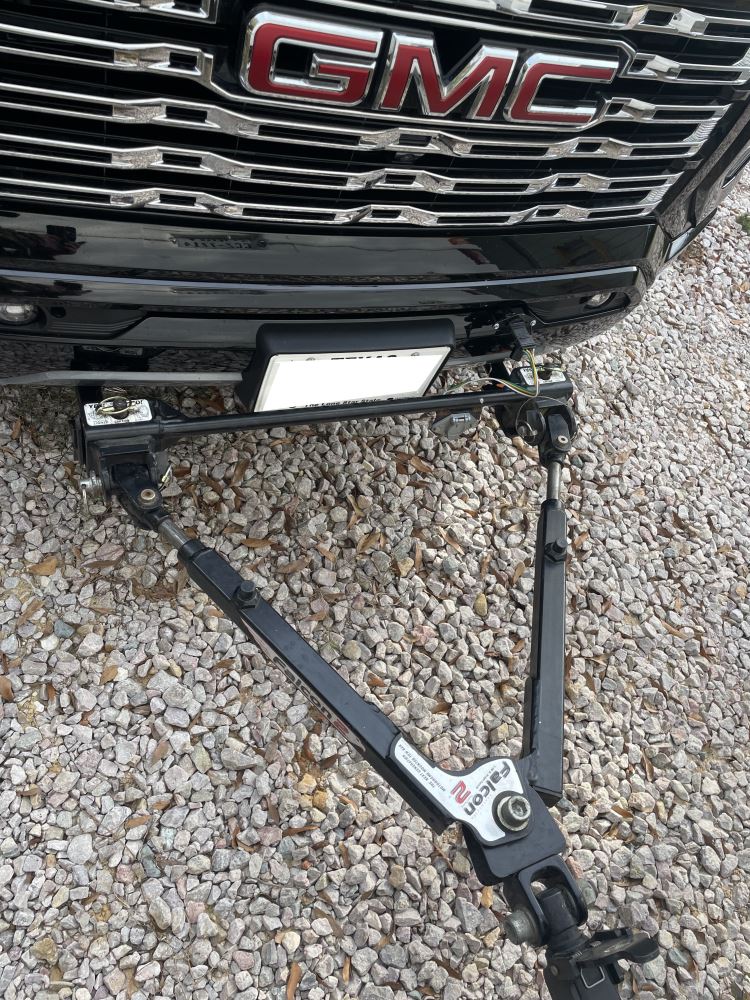

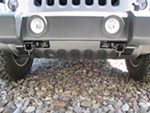
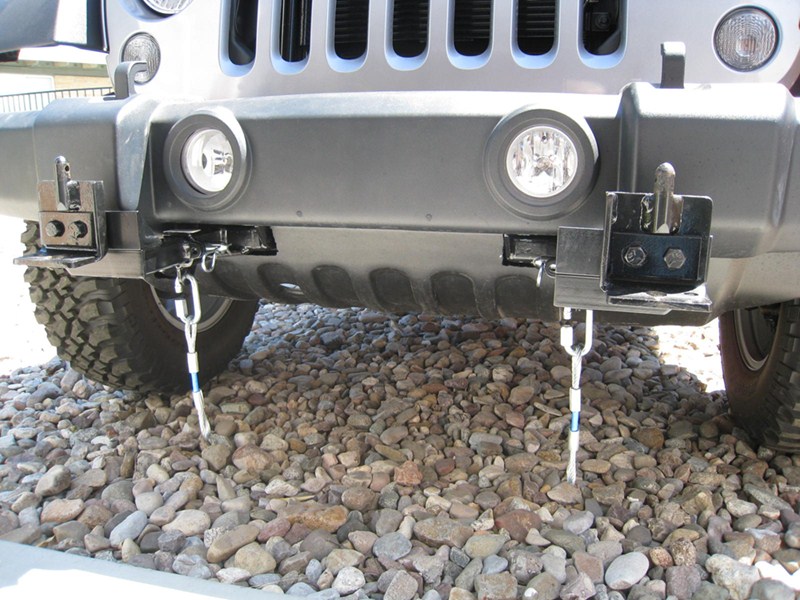
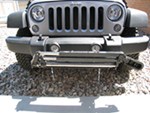
Roadmaster’s crossbar-style brackets sit far back on the frame, giving the front end a clean, uncluttered look when you’re not towing. Once the removable drawbars are out, the remaining brackets are virtually invisible, tucked within the grille for protection from scrapes and scuffs. It keeps things looking neat while still being ready to go whenever you are.
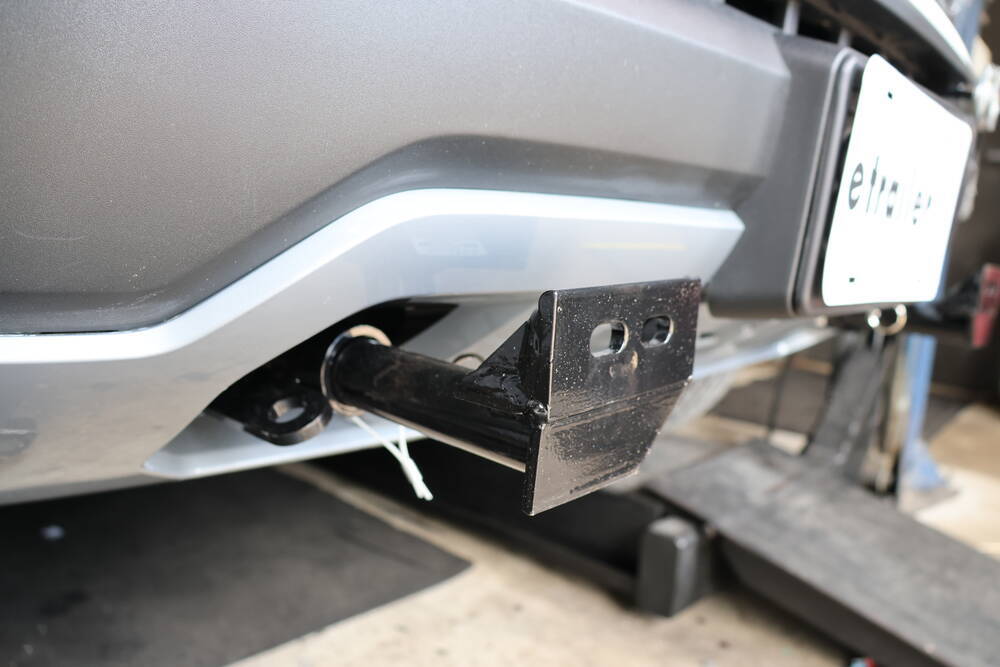
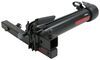
The removable drawbars are designed to make connecting fast and simple. Each arm slides in, clicks to lock in place, and releases with a built-in pull ring so you can twist and remove it just as easily. The process feels secure and repeatable, whether you’re hooking up at home or on the road.
This kit uses computer-cut, all-steel components for exceptional strength and precision fitment. The black powder coat finish resists corrosion and holds up through long miles of use. It’s built to handle the load while keeping your setup solid and dependable trip after trip.
Installation is simple—no welding required. The custom base plates bolt directly to the frame using the supplied mounting hardware and clear instructions. Integrated mounting points let you add an electrical connector plug or bracket (sold separately) so your wiring stays organized upfront.
The design works with Roadmaster tow bars when used with a quick-disconnect crossbar (910021-00?– sold separately). That means you can pair it easily within your existing system while keeping the same reliable connection style throughout your towing setup.

Videos are provided as a guide only. Refer to manufacturer installation instructions and specs for complete information.
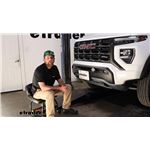
Hey everyone, Ryan here at Etrailer. Today on our 2024 GMC Canyon, we're gonna be showing you how to install the Roadmaster Crossbar Style Base Plate Kit. But before we do that, let's just take a minute, we'll check this one out and make sure it's gonna be the right setup for you. I would like to address one of the big questions that a lot of people ask in regards to being able to set up their Canyon to be flat towed down the road. And that's what parts am I gonna need. And there's five main components or major components.
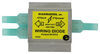
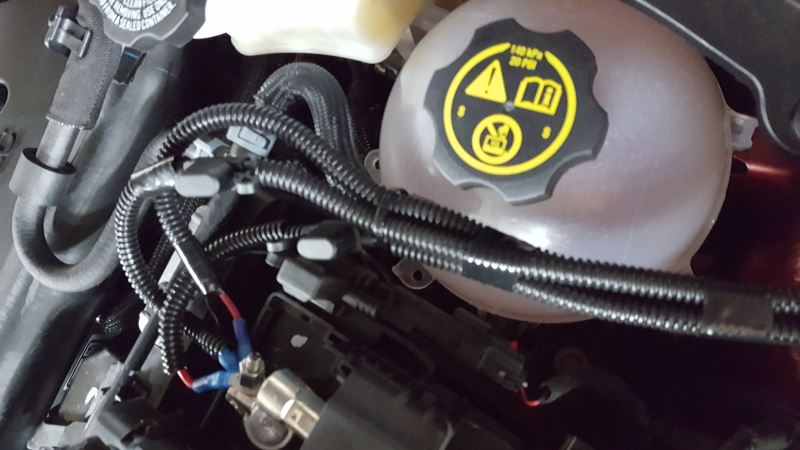
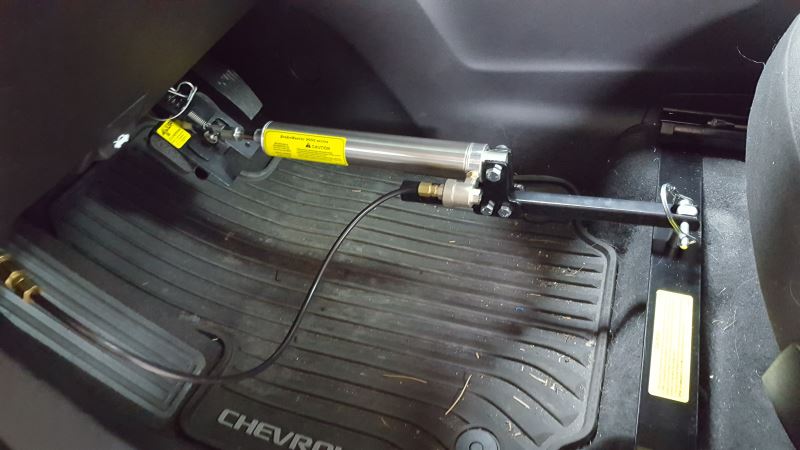
You'll have your base plate, the tow bar, your safety cables, your diode wiring, and a supplemental braking system. And then there's a few other things I like to recommend for the Canyon. One of 'em being a battery charge line kit. With these Canyons, you also have to disconnect the battery when you flat tow. So I like to use the automatic battery disconnect switch and then depending on what braking system you end up going with, for example the Stay-IN-Play Duos like we have here today with the Roadmaster InvisiBrake, you may need to pick up a Roadmaster Stoplight Switch as well.
And when it comes to the base plate, this is how it's gonna look on the front of your Canyon and I don't really think it can get much better to be honest with you. It just comes out of the openings here that your tow hooks we inchesre originally in. So you know, it doesn't really catch your attention by any means or anything like that. Does a pretty good job of blending in. I also really like too that they include brackets like this one for example, to allow you to mount up some of your other components like your wiring connector, which is here.
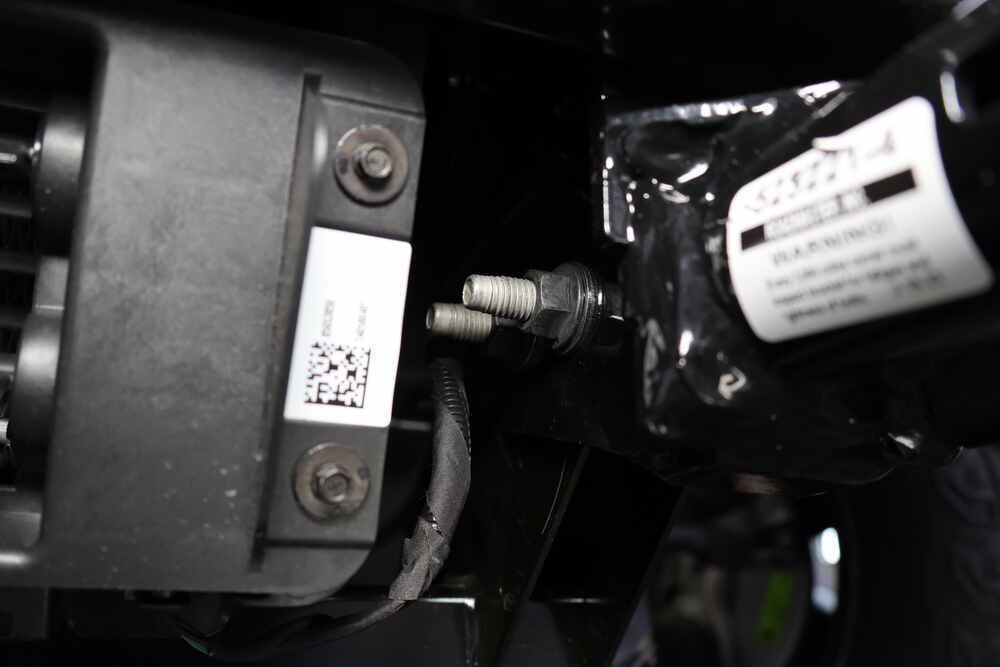
And then on this side of the base plate, they give you a bracket that's already built onto it to allow you to mount up your breakaway switch for your braking system. So that's super convenient, you know, you don't have to bother with trying to find a good spot or anything like that. But more importantly, how all this is set up, you're not gonna have to really modify the front of your Canyon at all. It's already gonna utilize openings that are already there so you don't have to trim and cut up the front of your truck. When you are ready to hook up to your motor home, you can take your removable arms and these are just going to slide into the base plate and lock down.
Now with that said, this is gonna be a crossbar style base plate, all right, meaning once you put these in, you'll have a bar that runs across the top of it like that and then you can hook your tow bar up to it. This is gonna work with the vast majority of the Roadmaster tow bars out there as well as a lot of the other manufacturers, they're getting real good now. Let's say if you had a Blue Ox tow bar that you like already and you want to keep it but you want this base plate, you know you can get adapter in, so it'll let you change 'em out to this Roadmaster style and allow you to pair it up. But something to think about with this crossbar style. All right, the base plate is only gonna come with this arm portion. You're not gonna get these brackets that bolt to the arms or the actual crossbar. So you can always grab this stuff separately if you don't happen to have it already. Our neighbor here today, it's been flat towing several vehicles for a while and already had this on hand. It's what he's used to and so that's what he wanted to keep going with, which is definitely understandable. In some cases, you know, it's a couple extra parts that you have to deal with, but in some cases, it's not a bad thing. So let's say for example if you happen to have a motor home that sits up really high, by using the crossbar style, you know, it's gonna raise that attachment point up several more inches. So if your motor home's high and the hitch on the motor home's up real high, having this higher attachment point might eliminate the need to use a high low adapter to keep your tow bar straight. If you're looking for something a little more simple in design and and less parts or don't really have to worry about that type of thing, then the other option would be to go with the direct connect style, which is usually what I recommend in a lot of cases. But the crossbar style does have a place, but with the direct connect style, you're gonna have arms that look like this, all right and no crossbar or anything like that. And with these, you put 'em into the base plate like that, lock 'em down and your tow bar would attach directly to it. As far as what models the base plate is gonna fit, it's gonna fit all of 'em, with a couple exceptions. If you happen to have the AT4X, so like the beefed up, off-road style edition, it is not compatible with that. Or if you happen to have the underbody camera system, it's not compatible with that either. But the standard AT4 like we have here today works just fine. The Denalis, it sounds like a lot of people are using 'em, you know, even more on the more base model type trucks even as well. So should be in pretty good shape there. But ultimately at the end of the day, you know, whatever base plate you go with, it's gonna look good when you're not hooked up and pretty easy to use and it's nice you don't have to chop up the front of your truck to get these parts on. Now as far as the installation goes, putting the actual base plate itself on really isn't too bad. It utilizes a lot of factory attachment points and things like that, so nothing too crazy there. The most difficult or time consuming part would be getting that fascia off. You know, it's really tight, a lot of plastic and stuff so just be careful, take your time and hopefully, and along the way, I can give you a couple pointers to make that a little bit easier on you. And if this is something you just don't feel comfortable doing or don't have the time or place to work on it, I definitely understand that, you can always check out our dealer locator and hopefully that can kind of get you going in the right direction as far as finding a shop that can help you out with this. But with that in mind, why don't we go ahead and get started installing this one now. To begin our installation, we're gonna be here at the front of our Canyon and you can go ahead and pop the hood. We're gonna have to remove our front fascia. So we'll start with removing the four fasteners up along this edge here. So we'll have two on each side. The fasteners are gonna be T15 Torx bit styles, so we'll grab our bit here, get 'em both removed, and from this point on, whatever we do to one side of our truck, we'll also do to the other side because it'll be set up the same way. Moving underneath the front of our vehicle on each side, we're gonna have three T15 Torx bit screws. So go ahead and pull those out. (tool buzzes) Moving to your wheel wells now, we're gonna have more Torx bit screws, along the edge, we're gonna have a total of five of them and definitely helps if you turn your wheel in or out one way or the other, give you more room. But we'll go ahead and just work our way up here and get all these pulled out. (tool buzzes) This one up here is kind of tricky to see. You'll just have to kind of go by feel, further down in the wheel well, there's gonna be four more T15 fasteners, Get 'em all removed here. (tool buzzes) Once you get all those removed, you can take your fender liner, just kind of pull it out up till about, till about there. Since we're gonna be working in this area, kind of prying on it, I took some painter's tape, put it around the seams, that way we don't scratch anything up but we're gonna have to partly remove this fender trim here. And so if you kind of just start to pull down and out on it, there's some fasteners behind there and they're kind of hard to get to, to be honest. So you can just work your way around and then if you come in from the back, you can get to a couple of 'em. Once I get this more free, I'll show you what I'm talking about here. You can pull out on it and what I was doing, this push pin, you coming from the back, you can kind of squeeze it with your fingers while you're pulling out on it. It'll allow it to release and we can just work our way up here and as we go, and as you get you know this removed further and further, you can continue to kind of work the wheel wall liner back, to allow you to get your hand in there and actually get to those fasteners. You want to remove your wheel well trim to about here. I just took a piece of foam, kind of stuffed it in there to help keep it pulled away from our vehicle. And we're doing this, that way we can get access to this fastener right here and we're gonna go ahead and remove that. It is also a T15 Torx bit head, super tight, so as long as you can kind of break it loose and then you can usually just grab your bit with your hand and get it completely removed. Back in the wheel well, you know, if you just continue to kind of push your liner out of the way, that will expose these two T15 screws right here holding the fascia to this bracket. So we'll pull both those out. Just over here on the passenger side, we're gonna have an electrical connector that we need to disconnect. Depending on your model you may have two, another one right next to it, but we just have this one. So what I'm gonna do is take a little trim tool, there's a push pin, kinda holding it in, I'll release it. And then to disconnect this, there's a red tab, push down on it and then if you kind of push 'em together more and push down on the center there, you can release it. Moving to the front of our vehicle on each side here, inside of these little openings back little ways, you're gonna have a 10 millimeter head bolt. So if you grab an extension and of course your socket, what I like to do in the socket is take a little paper towel, put it in there, that way it'll kind of grab the bolt and when we go to remove it, way less likely to fall out and get lost. So that's what we're gonna do. Here's a better look at that fastener and we'll do what we talked about here. (tool buzzes) Hopefully have to kind of finesse it out. If you do drop it, it's not a huge deal but probably easier just to do it this way. Now with an extra set of hands, what you can do, you know, once you kind of start working everything apart, you can grab the corner of the fascia here and get to about this point on each side and you'll work everything free and get our fascia removed and set off to the side. When you are pulling this fascia off, you know it's gonna be kind of tight, you know, that's why we were working it back and forth to kind of loosen everything up and you know you might have to take, you know, a little bit of pressure. You know ours came off relatively easy but you might have to pull straight on it and that's because there's a lot of clips, classic fasteners kind all over the place that are holding this on. If a couple of 'em end up staying on the front of the vehicle, you wanna remove 'em, I'm just taking a pair of pliers, kinda squeezing 'em in, pulling 'em out and then you want to reinstall 'em back on the fascia, right, that way when we go to put the fascia back, they'll be connected already and actually slide right into place. You can get our tow hooks removed now and there's two bolts holding in, of course, you got a nut on the other side and we're gonna use 18 millimeter wrench to hold the nut from spinning and an 18 millimeter socket, (tool buzzes) pull those out. (tool buzzes) Let's go ahead, get our tow hooks removed as we will not be reinstalling them. If your truck happens to have the shutters on the lower grill like ours does, you will have to remove this faster here on each side, it is a seven millimeter and pretty tight so you almost have to use a box wrench here to get it removed. Can remove our bumper beam now. So on each side, you have three 15 millimeter head bolts (tool buzzes) and I got the three on the other side out already. So when you go to take this last one out, make sure you support it a little bit. You should be able to work this off and set it to the side. Looks like in our case actually, we'll have an electrical connector we need to disconnect. Ideally you'd do this beforehand but this is something I missed. I'm just gonna put a bolt back in to keep this supported so I can get to this here. This connector is similar to the other one. There's a red tab, I'm just using a small screwdriver 'cause it's pretty small there but push down on the center and release it. We should be able to get this removed. I just pulled those other two out that I put back in and we will completely remove it from our truck here. Take our base plate now. And these are side specific so make sure to check your instructions, make sure you got the right one, but pretty easy way to tell the safety chain opening there. That should be facing towards the outside of the truck. These two holes are gonna line up with these two holes where our tow hooks originally were. Slide that in place and then you'll take your factory tow hook bolt and they give you a flat washer and put that on, push it through. Same thing here. We can move to the outside of the bolt where we can get the rest of our hardware. We'll take another flat washer and then the factory nut and just get it started a couple of threads for the time being. Be sure now to take some red Loctite and put it on the threads of the hardware and we're gonna use red Loctite for all of the fasteners that we're gonna use to secure the base plate and I'll tighten 'em up pretty much all the way by hand. And what I'm looking to do here, 'cause the bumper beam is more or less gonna sandwich the base plate into position and if we just blindly tighten it down, you know, the holes might not line up as good as we want 'em too. So ours are off just a little bit. So what I'm gonna do is take a pry bar and hold it into position like that and then snug up (tool buzzes) those tow hook bolts (tool buzzes) And that way everything will stay in position, making it easier to get our bumper beam and those fasteners back in. We'll grab our bumper beam, of course, once you get both sides of your base plate on, wind this back up. Take that factory hardware, put your Loctite on it and we'll get all of them started hand tight. With everything in, you can take your 15 millimeter and snug all the hardware down. (tool buzzes) I wanna make sure to come back with a torque wrench now and torque all the hardware down to the amount specified the instructions. I'm gonna start with the bumper beam bolts and then we can change our sockets and do these factory tow hook bolts there. Now that we have everything torqued down, what I've done is came back and put those 10 millimeter head bolts back in that we removed when we had the fascia on. Just easier to get to now, you know, with it out of the way, I plugged our electrical connector back in for our lower shutters and reinstalled those two seven millimeter head screws. And at this point, it'd be a great time to, you know, start setting up some of your other flat towing components like your braking system or your wiring. And I say it because of the fascia removed, you know, we have a lot more room to work so that's exactly what I'm gonna do and once we have that wrapped up, we can, you know, revisit this and work on getting the fascia reinstalled. I got our other components installed on the front of our truck and now we're ready to get the fascia reinstalled. They do give you this electrical bracket here, which is pretty convenient. I'm gonna utilize it, it's gonna be on the driver's side and go through that opening there. And so we'll remove these two screws, this is 7 millimeter head and put that in place, and then simply just re-secure the screws. When you set up your other components, particularly your diode wiring and if you're doing a charge line, make sure when you route those wires over here to put 'em through the bracket, you know, before you get your fascia completely put back on and make sure you give yourself plenty of length to work with too. So just kind of a tech tip there. So we'll get that set up here, get the fascia put back into place and resecured the opposite way that we removed it. And that'll finish up our look at and our installation of the Roadmaster Crossbar Style Base Plate Kit on our 2024 GMC Canyon.
Customer Satisfaction Score:
93% were satisfied with this product
7% of customers were not satisfied
Ratings & Reviews

Great product for my 2014 Wrangler. Good materials, solid attachment to vehicle, and looks good. The e trailer installation video was great for assisting installation. Made the install much quicker and easier. The most difficult procedure for me was disconnecting the wiring harness on the back of the bumper. An old tack puller (or tool of similar design) would have been great for leveraging the pins out of their holes. Cutting the air dam was a slow process to ensure I didn't cut too much. A paper template to mark where to cut the air dam would make this process much simpler. Again, I can't emphasize enough how great the installation video was for making the steps easier.
Fast shipping
After comparing Demco, RoadMaster, and Blue Ox base plate costs, mounting procedures, etc for my 2012 Fiat Sport, I decided to go with RoadMaster (Kit #522013-1A) for two main reasons: 1) I had the tow bar and mount adapters from another product that were the same specs as the RoadMaster tow bar and adapters to attach to the base plate, and 2) no drilling or other modifications required to mount the base plates. Blue Ox (Kit #BX2800) required I buy their tow bar and other unique configuration adapters PLUS drill two half-inch holes on either side where the base plate mounted AND hammering flat the tips on the corners of the bumper bracket the frame where the base plate mounted. Blue Ox did provide better details on the removal of the facia and bolt removal and torquing actions required for the Fiat. My biggest challenge was the removal of the facia without damaging the clips or other damage to it. Once it was off, the action of removing the bumper core from the end of the frame rails and bolting on the base plate was slick! I took a little over 4 hours to do this, but it was because I wanted to do it right, without damage, and have the confidence I could tow without issues. (Not sure how sequence will show, but labeled the pictures as "Before," "Removal," "Installation," "Finished," and "Ready to Tow.")
This was the second base plate kit from etrailer that I have installed, the first being on our ‘03 Outback and this one on our new to us 2015 Subaru CrossTrek. As usual the response, shipping and delivery from etrailer was prompt and curious. They are my go to place for anything towing related.
Installation of this kit went well with only a few issues, most of which were related to our vehicle not the kit. I knew the car had been hit lightly on the LF corner, but could find nothing of concern body or frame wise when I looked the car over before buying it. Turns out the front bumper reinforcement had been tweaked a tad which made lining the bolt holes up with the holes in the base plates a tad challenging. This made the small angle brackets that go inside the frame heads tough to line up, but in the end it all fit. I did find that it was unnecessary to pull the washer reservoir or the left headlight to access the nut and washer for the long 1/2” bolt. You can easily reach and see the place from underneath after pulling the plastic encapsulation panel. When drilling that 1/2” hole be sure to angle the drill bit UP a tad otherwise you may end up having to grind a flat on the side of the large, thick washer as you can see in my picture from underneath. I used shrink wrap over the nut and bolt since there’s a wiring harness right against it. The picture of the baseplate differs a bit from the pictures so I guess they made some changes. All in all a great kit!
The installation took me about 7 hours, the facia removal was tedious , between the installation videos and instructions, I performed the task. This bar has one con, the pull rings on the removal bars are flimsy , my first pull stretched one out. I’m sure trailer has a fix for this under warranty, I hope.
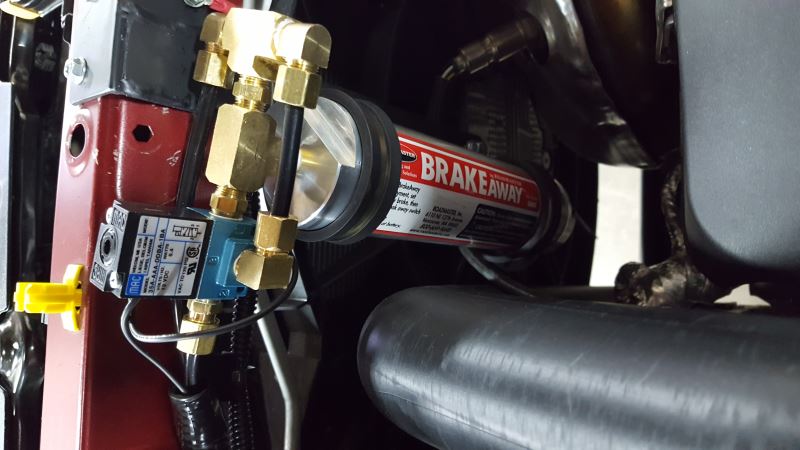
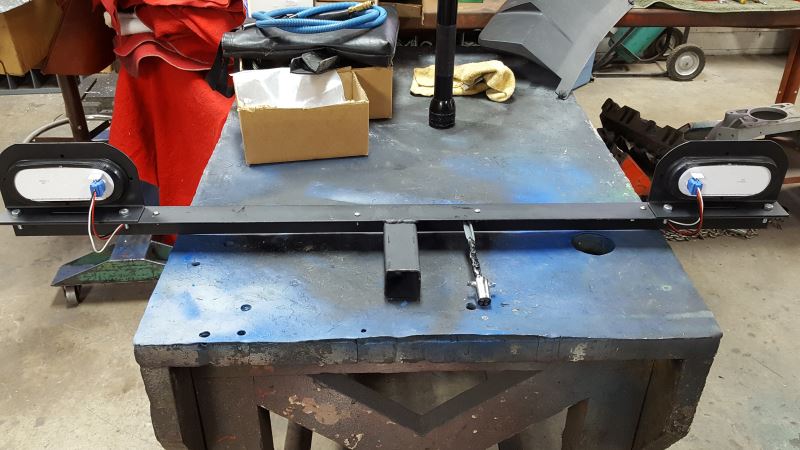
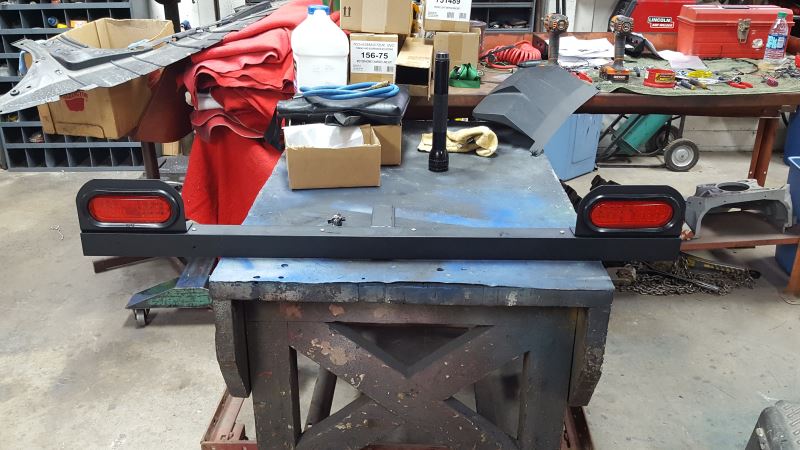
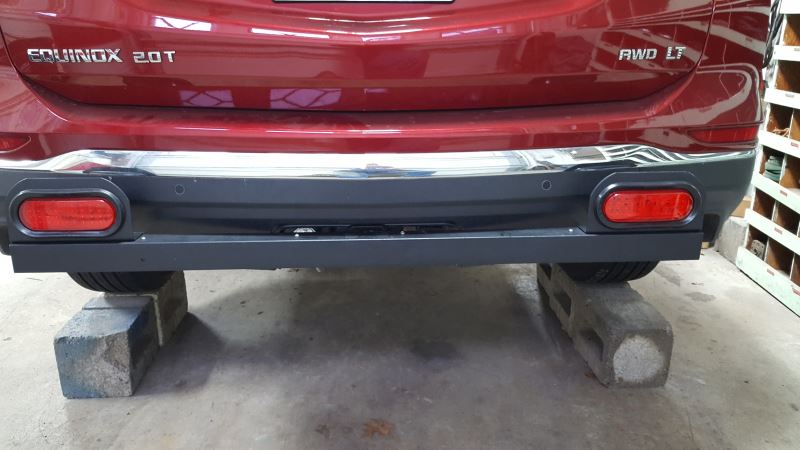
The Jeep project went very well everything fit great and worked well. I really love Roadmaster products and quality and your company is the best place to purchase them. I sold the Jeep and replaced it with a new 2019 Chevy Equinox 2.0 L AWD and just purchased and installed the following items from you and installed them, RM-156-25 & RM-156-75 Battery Charge Line Kit, RM-146-7 Flex Coil Kit, RM-523193-4 EZ4 Plate Kit, RM-88333 Custom Seat Adapter, RM-751489 Stop Light Switch Kit and a RM-98160 Second Vehicle Brake Kit w/brakeaway. All these parts were in stock and arrived quickly and normal with you people, I really enjoy the o-line vidios as I do all my own installs. Thank you so much for your great service.
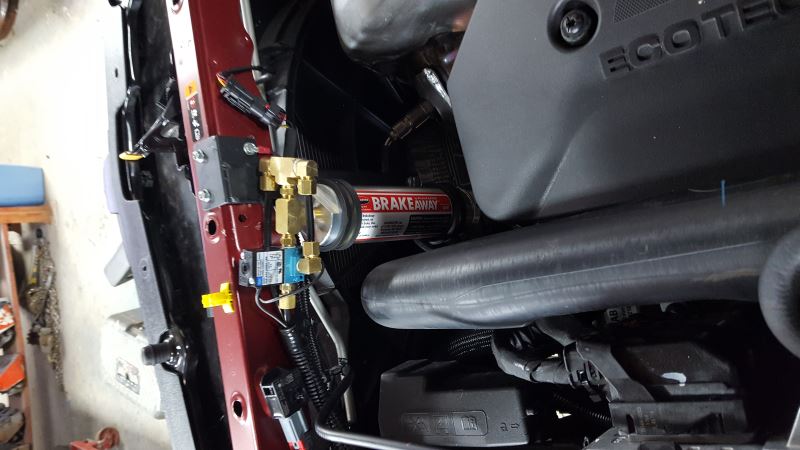
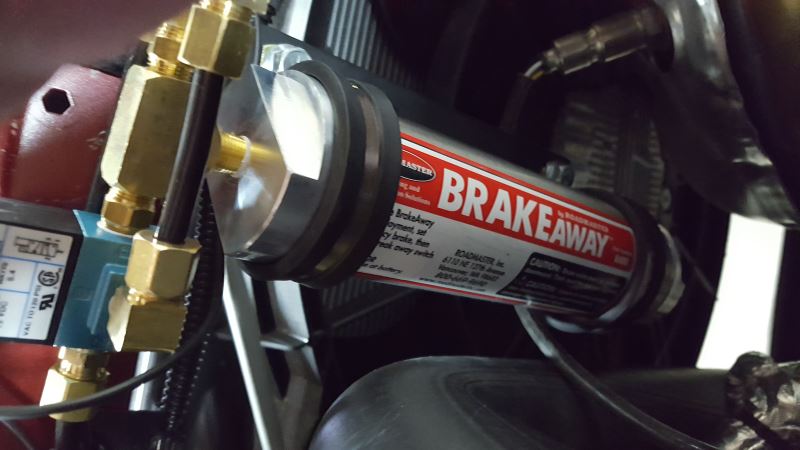
I will attach pictures of my install, you will see how I was able to fab a bracket and attach it to the existing mount on the base plate to mount the brakeaway switch and the air connection for the brake system.
I also fabricated a tail light bar as I didn't want to use mag-lights or splice into the factory lights and bulbs installed into the lights would not work as the factory brake lights will come on when the brake system is applyed and the turn siginals would not be visable.
Thanks for all you do, I would and do recommend you people to everyone who needs your products. Rob
The representative (Sarah) was very helpful and knowledgeable, the prices are very reasonable and all my items arrived on time. When I called with a question, she was very polite, friendly and genuinely sounded like she enjoyed her job. When I discovered one of the items I ordered wasn’t needed, getting help to return was hassle free. I would recommend etrailer to anyone that needs anything RV or trailer related. I will definitely do business with them again. I am impressed.
Etrailer was very easy to do business with and made it simple to ship my order directly to the RV shop that was going to install it. This was my first order from them, but I will definitely consider future purchases from them if I'm in need of something for my RV.
We towed our 2004 Subaru Impreza WRX STI 3000 miles last year, this is an ideal setup, discreet when not in use, solid, and easy to get on/off. Very please with the support I received from Roadmaster as one of the bolt was missing, was sent super quickly.
Not an easy install on a Trax but it is very well made and gives a clean look. I did customize by cutting down the 6 pin bracket supports to get it flush with front of the car.
Install pretty easy. You will have to change directions of one bolt due to obstruction ( frame). Cannot torque a few of the bolts. These are the ones with wire attached.
Rock guard needed addition trimming from factory instructions.
Awesome delivery speed, and a well made base plate for my 2007 Element. Installation was a breeze (thanks to my son’s heated shop) and I had to do no cutting to make this fit. I had a Stowmaster tow bar that came with my RV and etrailer was able to steer me to the correct missing parts to make this a really affordable installation. Now to get out of this snow!
I’ve been purchasing products from ETrailer since 2005 and all the products I’ve purchased have been a great value. The products mentioned above installed perfectly and with the direct assistance from ETrailer everything fit as suggested. I will always interact with ETrailer as needs present themselves.
Fit and finish is great, the illustration for what you trim on the bumper isn't great but otherwise pretty easy install (I ended up measuring between the mounts on the draw bar and just trimmed accordingly)
After ordering the wrong crossbar, etrailer sent the correct one for our Mini Cooper quickly. However I did have to modify most of the holes as the cross bar didn’t quite fit (but close). I had to drill the three main bolt holes to 11/16 so that the bar would go over the Mini’s 3 main bumper bolts on both sides. The two lower bolt holes (each side), needed to be drilled out 3 sizes larger to accommodate the 4 bolts that come with the kit. I had to drill out the Minis lower holes to better align with the crossbars lower holes. I would also like to note it being a pain in the knuckles to reach one of the three (each side) bolts to put the stock nuts on the bolt and then try and get them tight. (The main bolt pattern for the upper bumper is diamond shape, one up tow bolts lower. (The lower “inside” bolt on each side is the one that is hard to get to and tighten.) Sorry I didn’t get picks, I was in a rush to get the car back together. There’s an angle piece on the cross bar that blocks the hard to reach bolt, it would be helpful if that could be made more accessible to reach.
Overall the installation was great, however the process of drilling 3 - 1/2" holes in that little bumper that has a Rockwell Hardness of about 60, seems to be a bit over the top.The instructions are spot on, delivery was great, the quality of product was accurate. I am a happy boy!
Replaced same part that was damaged in a crash. I had used my original one for close to ten years without issue. Fast shipping from etrailer.
The Base plate kit is well made and came with all the necessary hardware.Installation is relatively straight forward. I did have to enlarge two of the holes that didn't quite line up. But overall I'd recommend it.
Bolted right up. Installation should be done with bumper on, as you can't fit the ends through the louvers without some convincing. Works great so far. Was able to use a Stowmaster 5000 with it.
Installation was a bit trying. Ended up looking very clean and almost invisible.
Using the tow bar worked super easy and our motorhome hardly noticed the Mini Cooper back there.
Came quickly and is very high quality. Great directions/video from road master makes the installation step by step easy to follow.
Skill level is probably at the intermediate level depending on experience.
The #118-3 is a perfect fit on my 1995 Geo Tracker. When you pull off the removable arms you would never know they are there. The Quality is very good easy to put on all you have to do is drill 4 holes the tube on the base plate fits into the tube on the frame of the tracker and with the 2 bolts it is a solid fit. I was worried about the plate nut getting it inside of the frame but it went in easy when you put it over the frame tube and use a thin piece of metal to slide it in place. I’m very happy with it. I probably could of got it on without taking my bumper off but with only 4 bolts holding my bumper on it made it easier
Perfect fit no trimming to grill
Joseph B.

11/30/2024
Working great very well satisfied thank you for asking
It looks easy to install. I haven’t yet. The brackets look awesome.
Info for this part was:
At etrailer we provide the best information available about the products we sell. We take the quality of our information seriously so that you can get the right part the first time. Let us know if anything is missing or if you have any questions.













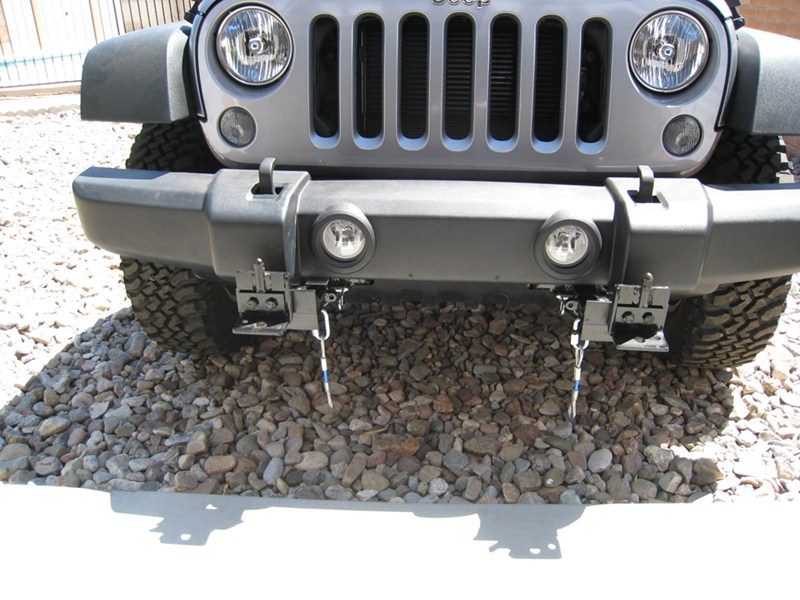
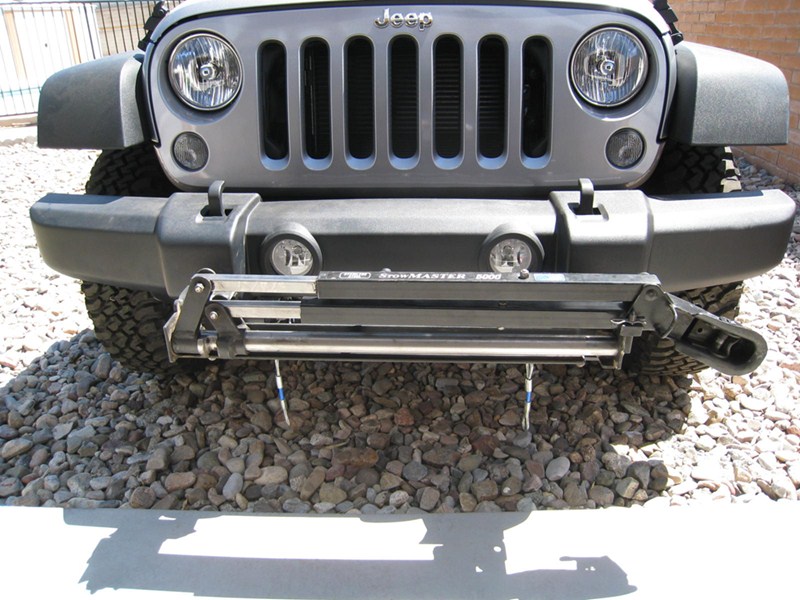















Joseph B.
12/6/2023
Great so far