
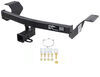
Curt Custom Base Plate Kit - Removable Arms


To see if this custom-fit item will work for you please tell us what vehicle you'll use it with.


Thank you! Your comment has been submitted successfully. You should be able to view your question/comment here within a few days.
Error submitting comment. Please try again momentarily.

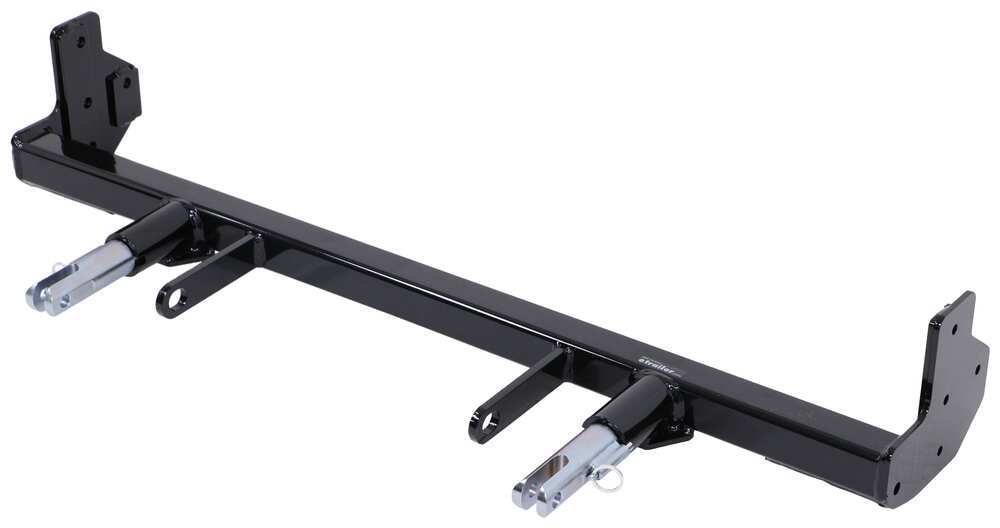
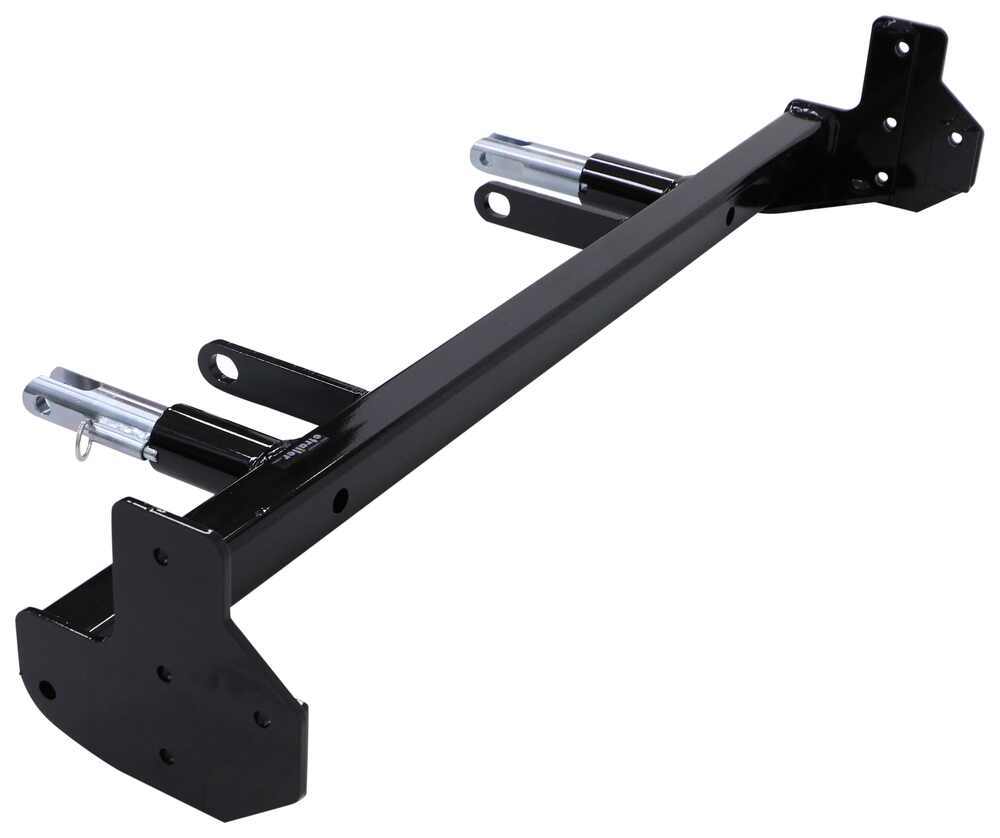
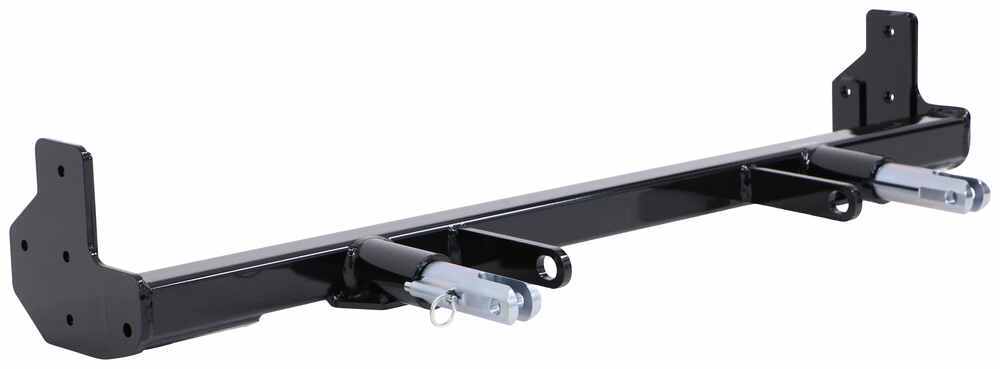
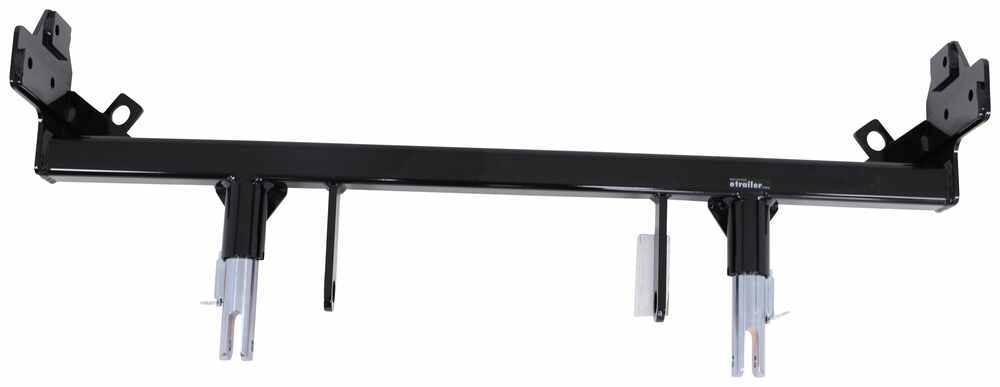
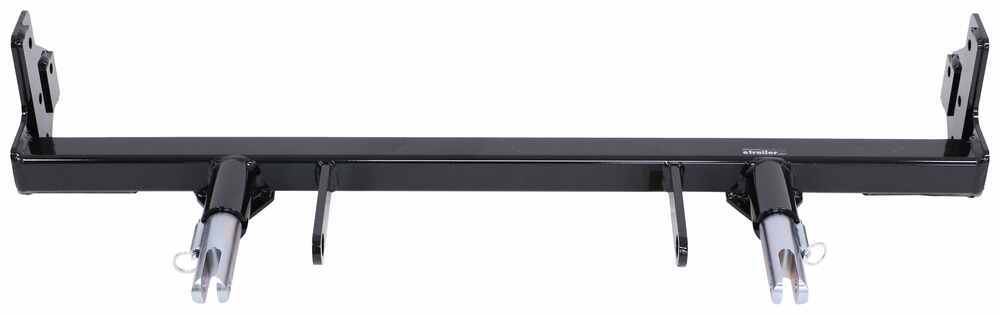
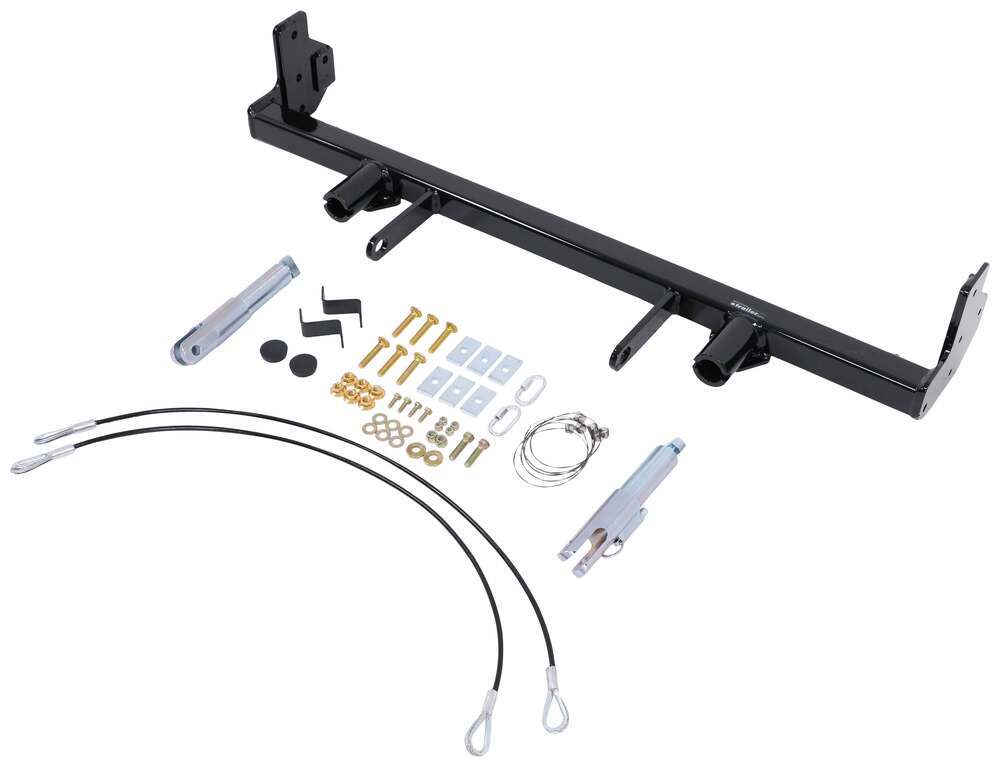
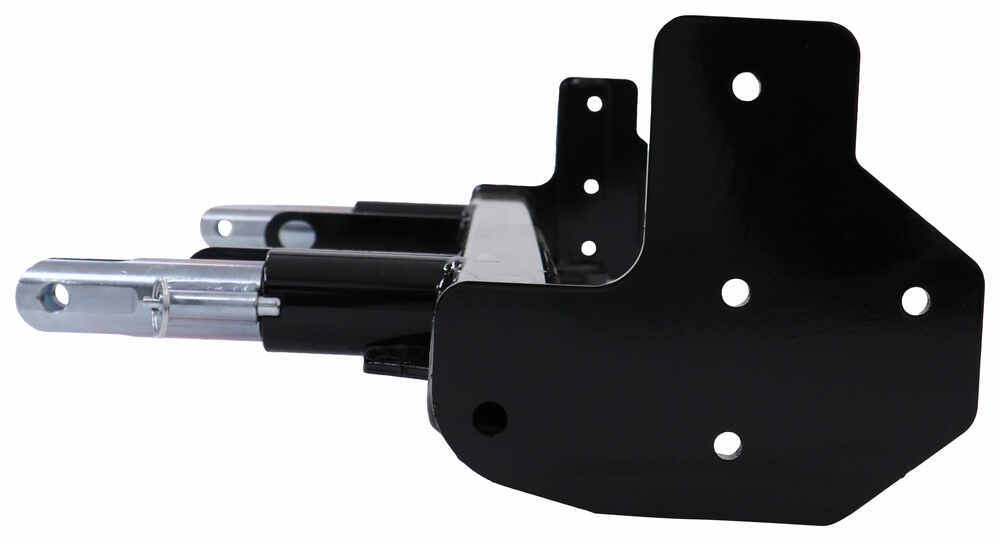

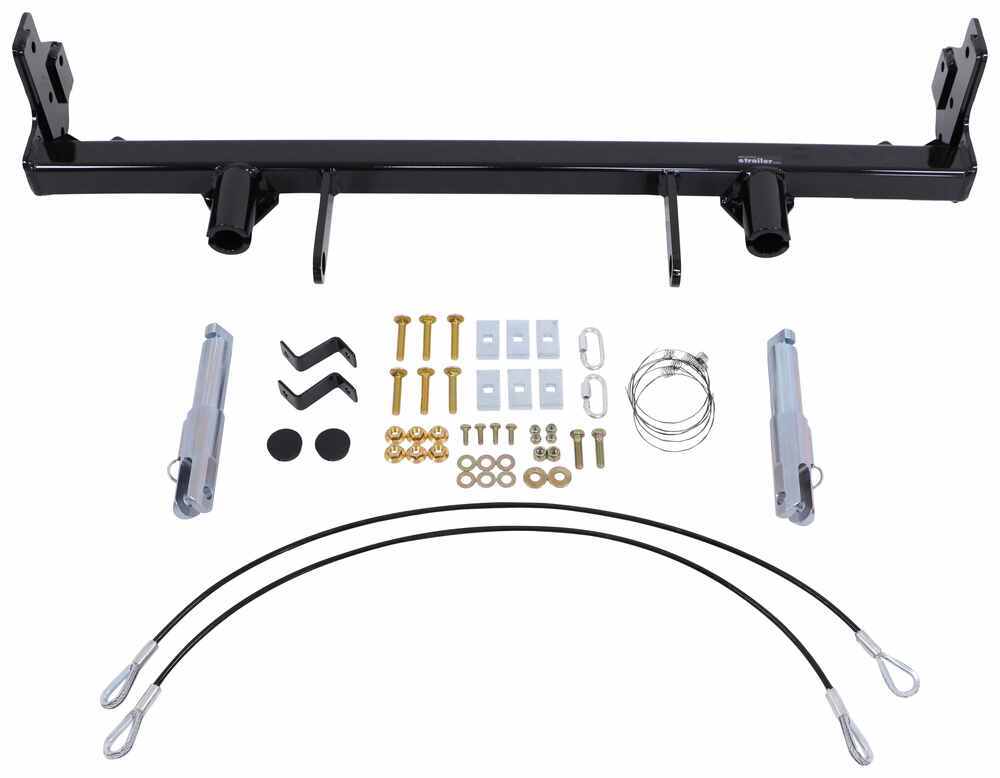


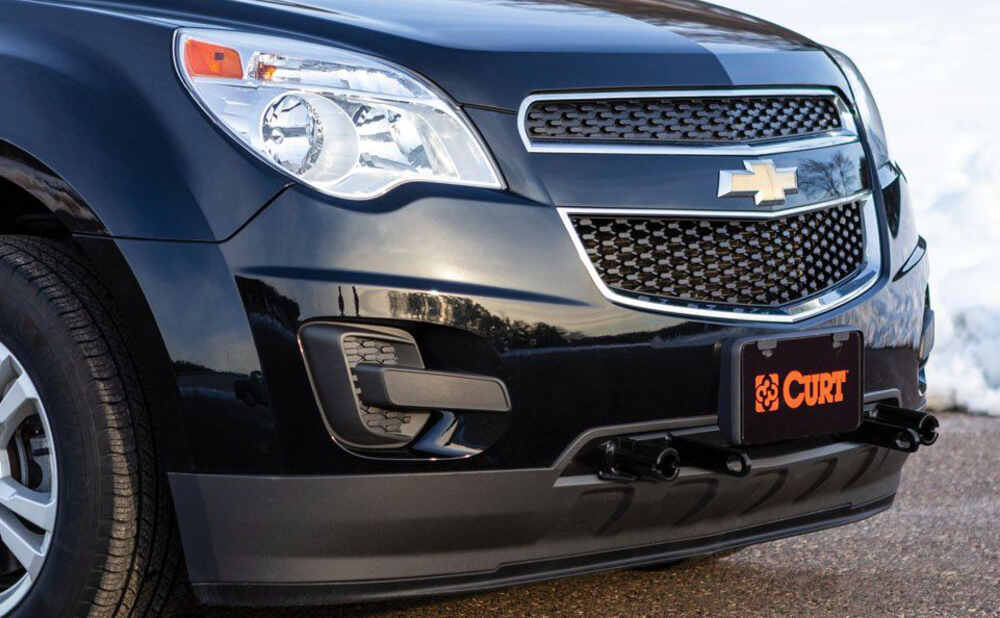



When you’re not towing, you won’t even notice the setup. The concealed main body keeps the front end looking clean and factory-fresh, and the removable arms come off fast when you’re done towing. With a completely hidden design and no exposed hardware, it’s low-profile, safe to walk around, and looks like it was meant to be there.
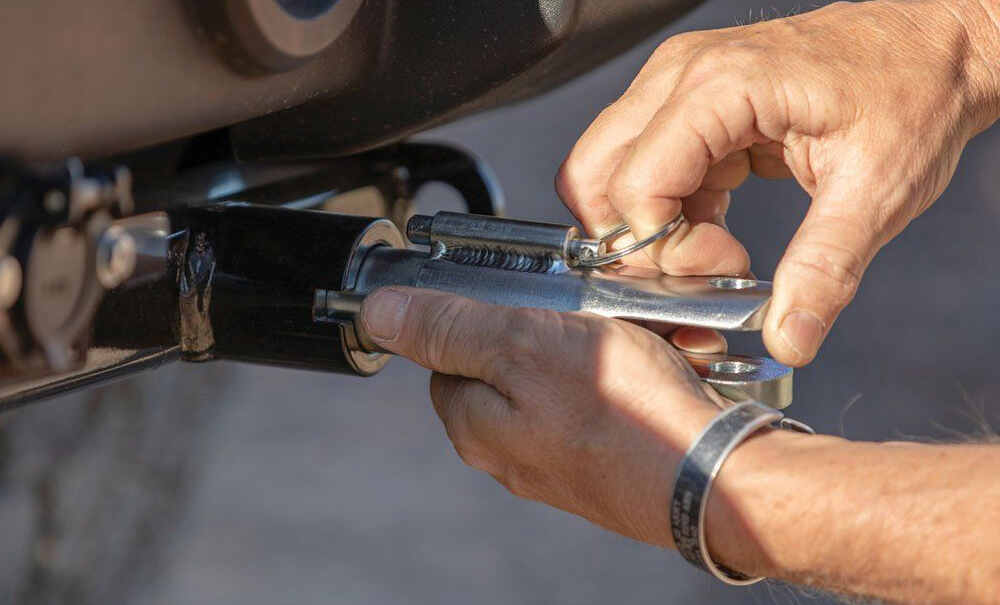
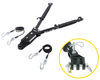
Connecting your tow bar is a quick, no-fuss job thanks to the twist-lock tabs. Each arm locks into place with a simple twist and can be removed just as easily when it’s time to unhook. The secure design makes solo hookups simple and repeatable trip after trip.
This base plate is constructed of welded steel and bolts securely to the vehicle chassis—no welding required. The design spreads towing forces evenly to minimize weight on the suspension and frame. It’s physically tested to gross vehicle weight rating (GVWR) for dependable performance mile after mile.
The high-gloss black powder coat is co-cured in a rust-resistant liquid Bonderite coating inside and out, keeping the steel protected from moisture and road grime. That finish helps maintain both strength and appearance through years of towing.
If you already use Blue Ox tow bars, this kit fits right in. The Curt Custom Base Plate Kit - Removable Arms #C53FR connects directly without needing an adapter, so you can keep your existing towing gear and hit the road with confidence.

Videos are provided as a guide only. Refer to manufacturer installation instructions and specs for complete information.
Hey everyone, Ryan here at etrailer. Today on our 2015 Chevy Equinox, we're gonna be showing you how to install the Curt Base Plate Kit with Removable Arms. Before we do that though, let's take a minute, check this out and make sure it's gonna work for you. So before we jump right in and talk about the base plate, I do want to address probably the biggest question that people ask about when it comes to flat towing their vehicle, and that's what parts am I gonna need, all right, and so there's gonna be a total of five main components, the base plate, which allows us to attach our tow bar to, tow bar's the second part, physical link that actually connects the two vehicles together. Then you'll have your safety cables and those are just there in the events of an unlikely disconnect, will keep everything paired together. You'll have tow bar wiring, which is going to transfer the lighting functions from the back of your RV to the back of your Equinox.
And last but not least, you're going to have a supplemental braking system. And what that'll do is apply the brakes in your Chevy whenever you hit the brakes in your coach, bringing you to a predictable and safe stop. This is what the front of your Equinox can look like whenever you're not hooked up and flat towing it, which I think is important, you know, because you're not always going to be pulling your vehicle behind the motor home. And so with this setup, I think it looks pretty good actually, about as as good as it can. You know, the components kind of come through this small opening here that's already there from the factory, so it utilizes that and does a decent job of blending in.
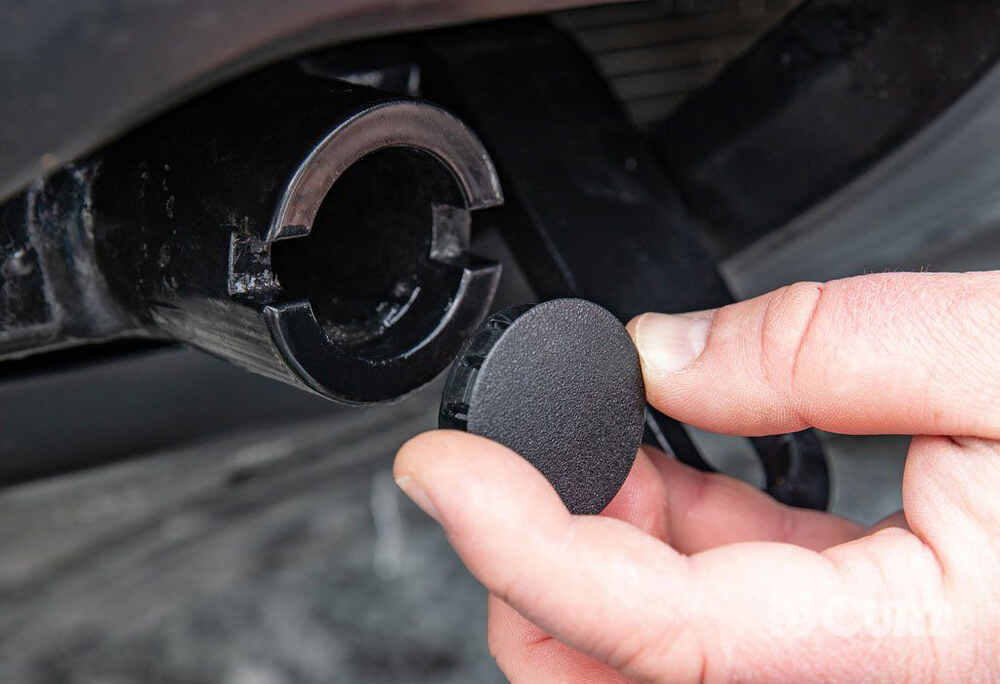
I mean, ultimately you're still gonna be able to see these parts, really no way around it. But that's pretty good at staying somewhat concealed compared to some of the other ones, at least visually speaking. They're all gonna be relatively the same, you know, come out in the same opening and do a pretty good job of blending in. Whenever you are ready to set up, the base plate is gonna use these removable arms. And so you will pull these plugs out, which I think is cool that they come included.
Not only does it help keep the opening protected, you know, dirt and junk from getting in there, but I think it makes it look a little bit cleaner as well. But anyway, you pull those out and then you take these arms, you'll slide 'em into place, rotate it about a quarter turn until it'll lock into position. You'll have the same deal over here on the other side. When you are ready to set your tow bar up to it, really not much different there. The end simply just lines up, put your pin and clip through, that's really about it.
The safety chain openings are in a good position and relatively easy to get to as well. And one of the nice things with the Curt setup is works with a lot of different tow bars in terms of manufacturers. So of course the Curt tow bars work with it. It's compatible with Blue Ox tow bars, I believe some others as well. And even if you have a manufacturer that isn't directly compatible with it, so for example, we have a Roadmaster Nighthawk Tow Bar and you can actually pick these up with Blue Ox ends to pair these together. But let's say if you have one, a Roadmaster for example, with Roadmaster ends on it, you can always pick up adapters, change just this part out, and allow you to pair that up with the new base plate. This is what your Equinox can look like whenever you're flat towing it behind the motor home. And I like it, it's a pretty clean setup, you know, everything's evenly spaced apart, you know, easy to take a quick look back here, make sure everything's sorted and organized and everything like that. One thing I do wish that this particular base plate came with are some brackets. That way it'll make mounting up your other components a little bit easier. So for example, your wiring, you are going to have to kind of come up with something to be able to mount up that connector plug. What I would suggest doing is getting a no drill long bracket and a six-way round bracket. That'll bump that connector plug out a little bit further than I have it set up here today and just make it a little bit easier to get to. So at the end of the day, a decent base plate set up, you know, it looks good and it's pretty versatile, you know, works with a lot of different tow bars, so one you really can't go wrong with. As far as the installation goes, you know, these Equinoxes are a little challenging but that kinda holds true for just about any base plate you put on a vehicle. You know, you are gonna have to take the front fascia off. With this one in particular, you are gonna have to do some drilling and I'll say, trimming the opening here to allow the base plate to come through and everything took a little bit of time. Just it seems like a lot of these vehicles are set up just a little bit different from the next. And so, you know, instructions really don't give you a ton of guidance. So hopefully what I did and can show you will kinda help speed that process up and make it a little bit easier on you. But with that said, why don't we go ahead, pull into the garage and get started on it now. To begin our installation, we're gonna be here at the front of our Equinox and we're gonna need to remove the fascia to open up your hood. And on top here, we're gonna start with four fasteners here in the center. Here's the fasteners and in our case, they're a T20, you know, depending on your vehicle, you might have a push pin fastener or a seven millimeter. They kind of change vehicle to vehicle, but either way you need to get 'em removed. (tool buzzes) So we will work our way across and get 'em pulled out. (tool buzzes) All on each side of our vehicle, we're gonna have these little side pieces and we can remove those. These are push pins, you just get underneath the head of the fastener with a trim tool like this or you can use a flathead screwdriver as well, but you pry up on the head of it, then you can pop the whole base out. So there's gonna be three of these you can work out. Last one's kind of buried the corner here and then looks like ours is split already, but, you know, we can get this out of the way. A lot of times this will still be connected here, it's just kind of crease and you can actually kind of fold this up and out of the way. Did the same thing over here on this side of the vehicle. And from this point on, whatever we do to one side of the vehicle, we'll also do to the other side 'cause it'll be set up the same way. Moving to your wheel wells now, we're gonna have five fasteners we can get removed. Definitely helps if you turn your wheels one way or the other, it gives you more space. In our case we have two push pins. Like I said, your hardware combinations might vary a little bit but so we'll get those pulled out, (plastic cracks) and then we can switch to a T20 Torx bit, two of those. (tool buzzes) We switch out one more time here, a seven millimeter socket, and straight up here, there's gonna be a screw. (tool buzzes) You can pull that out. Underneath the vehicle now, we're gonna have two screws, you know, these are attaching part of our wheel well liner to the bottom of the fascia (tool buzzes) and you get them removed using a seven millimeter, you kind of pop that out of place. If your vehicle is equipped with fog lights like ours is, while we're down here, you might as well disconnect 'em. The connector, there's a tab on each side you can kind of pull out on it and down and that will release the connector plug. At this point I put some painter's tape along the seams here we're gonna be working 'cause we are gonna take our fascia off. If you have someone that can give you a hand doing this, it makes it a lot easier, but you can start at the corner, kind of work your way up. Sometimes you might have a clip that gets kind of stuck in there. These release tabs, that's what's holding this on. So if you got a trim tool or a small screwdriver, you can always push down on it to release 'em. And then just carefully kind of pop it off, make sure we don't have any wiring, which we don't. And with it free, we can set it off to the side. If you move over here to the passenger side, we're gonna have this air baffle we can remove. So there's two 10 millimeter head nuts, (tool buzzes) pull those off and then it looks like I should just kind of slide down and drop out of position. On the driver's side, you're gonna have this reinforcement piece we can remove. So inside of these little pockets, we're gonna have (tool buzzes) some 10 millimeter head bolts. (tool buzzes) If they get stuck in there, not really a big deal. (tool buzzes) So that's gonna come off anyway, but we can change over to a 15 millimeter and we're gonna have these bolts (tool buzzes) and we can get this removed. We're gonna need to trim off a small portion of this metal here so our base plate can clear. So there's a diagram and instructions. I followed that to draw it out and I like to use the Sawzall to get this material removed, so I'll just follow up the edge of our frame up to here and cut it on over. (tool buzzes) On the passenger side, you're gonna have this ambient air temp sensor which is pressed into here. You can just pop that out with a flathead or a trim tool, and I'm just gonna tuck it up out of the way for now, in your bumper here, that way it's out of our way. And that's because this little piece, you are gonna have to trim out a portion of it. It's relatively thick plastic. I like to use a multi-tool just to speed things up. (tool buzzes) For this, the bottom flange deal here on the bumper beam hangs down at the corner. They want you to bend that up 90 degrees. Well if you try it, this is extremely tough steel and it was really difficult to do, and my thought is why even have it in the way. So I just use that Sawzall, getting to cut out maybe an inch, inch and a half long piece down just to give us that clearance that we need. And then I took some spray paint, painted over all the bare metal, that way it'll help protect against rust. And then this lower air dam piece here too, kinda overhung about out to here and it looked like that would interfere with the base plate too. So while we we're at it, not a huge deal, I just kind of 45'd it to give us a little extra space. Now if you got someone to give you a hand doing this, it definitely makes it easier. You're gonna take the base plate, slide it up into position, we'll just get it roughly in place and then we're just going to clamp it in place here for now so it'll stay put. So you wanna make sure your base plate is positioned correctly, make sure it's level and everything else like that. And once you have that sorted you're gonna use this top hole in the base plate as a guide or you can take a drill bit and drill through the frame and allow us to get some hardware in place. (tool buzzes) Once you got that drilled out, you can take the coiled end of your fish wire, push that through and you kind wanna angle it towards the back of the vehicle a little bit and down. And on the bottom side of our frame, there's gonna be a square hole there that we're gonna use as an access hole. So trying to get that wire to come out of the bottom of it. A lot of times you have to kind of reach up there and kind of feel for that pull wire. Other times you'll get lucky and it'll just come right out. But what you wanna do is take a spacer block, and the bolt, we'll thread that carriage bolt onto the fish wire and then you can feed that hardware up into the frame one at a time. You can pull your bolt into position there and unthread that pull wire. And what I'm gonna do on the hardware that we're gonna use, I'm just going to put some Loctite on the threads and I should have grabbed a flathead screwdriver to hold this bolt steady, but this'll work. If you kind of push down on the bolt, they prevent it from falling back into the frame. Gonna take your flange nut, and get that started hand tight and then I'm gonna snug it down with the 9/16". (tool buzzes) Once that is snug, (metal clatters) might work better with the smaller socket, but once that is snug, you can go ahead and get that cleaned up and removed. So I'm gonna repeat that same process and use that same hardware combination for these two holes as well. (tool buzzes) I got the other holes drilled out and got the hardware in and snug down like we talked about. And then I also use that same bit to drill out this bottom one, and this is gonna use a different hardware combination. You're just gonna have a regular hex head bolt on your, some Loctite there I did, you'll have a conical tooth washer, make sure the teeth are gonna face this way towards the base plate. We'll push that through, and then on the other side we can put a nut on. Where the bolt comes through, take your nylon lock nut, we'll get that started hand tight. And then to snug this one down, take a 9/16" wrench to prevent the nut from spinning while you use your 9/16" to actually snug the bolt on. (tool buzzes) Now you wanna make sure to come back with a torque wrench and tighten down all of the hardware to the amount specified in the instructions. At this point you can take the safety cables and wrap them around the frame and connect them to your base plate down here. So in my case it seems like this happens to other people as well, the D-link that they give you is too small to actually fit inside of the opening there. So you got a couple of choices, you can get bigger quick links or I just took a little grinder bit and kind of just ground a little bit down there to make that thickness a little bit smaller. You didn't have to get crazy and was able to push it through that way to to get it connected. As far as our intake air temp sensor, that one that we removed earlier from that piece of plastic, really wasn't anywhere great to kind of remount it. You don't have a ton of space, and in our case, it's gonna have this. Some of these models have an external cooler that attaches here, ours didn't. So I just utilized this tab that was already there, there's a hole in it, I drilled it out a little bit bigger and was able to push our sensor through there to re-secure it. On the passenger side, we have our air baffle and the two studs that this slides over, the base plate's gonna give you six of these washers, okay so take three of 'em and put three on each stud, and then this'll slide back into place. It is kind of a tight fit, but we are able to get it re-secured. Now at this point, it'd be a great time to install any of your other flat towing components like wiring or braking system and I say that because you got all this extra room to work with the fascia off. That's exactly what I'm gonna do. Once I'm done with that, we can go to our fascia and see if we need to trim it in order to get it to fit around all this stuff and get put back in position. With the rest of my components ready to go on the front, we can do some trimming on our fascia, so you can reference the instructions, as well if you want, you can kind of just test fit the fascia, you know, lightly put it in place and see what needs to be cut. And I think I figured out where we need to cut. If you always need to take out more, not a big deal. It's easier to cut stuff than try to put material back. So we're gonna have these two little tabs. I'm gonna cut maybe just like 1/8" off of those. This corner foam piece here, and then part of this as well, maybe 3/4" down or something all the way through here. So it's just foam and plastic. You can use a utility knife or whatever you see fit. I like to use a multi-tool, kind of just gives it a quick clean cut. So we'll go ahead and get this material removed. (tool buzzes) (tool buzzes) So I was able to get our fascia resecured the opposite way that we removed it, plugged our fog lights back in and I did have to trim out a little bit more than I expected originally, but that's kind of how things go sometimes, I did actually have to kind of cut, release the shape of our base plate out in this bottom plastic part for it to clear up high enough and then took a little bit more material out through here. That way you could push it back into place and get everything to line up. And that'll finish up our look at and our installation of the Curt Base Plate Kit with Removable Arms on our 2015 Chevrolet Equinox.
Customer Satisfaction Score:
97% were satisfied with this product
3% of customers were not satisfied
Ratings & Reviews

Everything fit like it was supposed to. Not to difficult to install. A couple hours at most. Seems to be a quality product. Thanks
This was a quick install on my 2011 Wrangler Rubicon. Contrary to the Q&A advice that the c38FR (Curt 70102) base plate does not fit the Rubicon with the base stock Rubicon bumper, it indeed does fit. The base plate tucks up within an inch or so of the bottom of the bumper. Base plate C33FR (Curt 70110) recommended by eTrailer and Curt for the stock Wrangler Rubicon would hang down 4 inches below the bumper and would not be a great look!
Easy to install. All the holes lined up. Vey happy with my purchase
Works just like the video with the green Jeep shows you.
The hardest part was getting the outside nuts off the bumper.
Use long extensions and a swivel and a short 18 mm socket.
Other than that it went smoothly. But my friend has a lift so it was a lot easier to do it all baseplate , wiring, and brake buddy cable.
I'm very happy with everything I buy are very professional and they have very good products at very good prices, thank you
Product worked great! Installation was not that difficult, but instructions were xeroxed causing pictures to be difficult to see detail. I was able to go online and see full color pictures with the ability to zoom in. Took about 2-2.5 hours to install
Installed the Curt Custom Base Plate Kit (#C64ER) onto my 2019 Ford Ranger XLT FX4. Could not have been easier. Directions were excellent! Time required was about 2 hours. Great product!
Great tech advice finding the right product, easy purchase and prompt delivery!! Thanks Etrailer!!
Custom fit, everything went together smoothly. I'm ready to haul my Ford ranger behind my motor home.
This base plate kit worked very well with the Blue Ox Acclaim non-binding tow bar - coupler for 2" ball (code BX4330). We towed a 4 door Rubicon over 2000 miles and the setup worked great. The bar is very easy to couple and uncouple. The removable arms work exactly as advertised. I did have to cut two small slots in my custom bumper to install the base plate, but the slots are not in strength critical areas. The installation instruction are clear and good.
Easy to install with typical tools found in about anyone's garage. Took maybe an hour or so to do. We have pulled our Ranger about 2000 miles behind our RV without any issue.
No issues, easy installation. Great tech support.
Wasn't to hard to install with a helper to get bumper off my truck. Had bumper pulled and installed baseplates in about hour and a half.
Fit like it was made for it. :) Only issue was the fishing wires for the bolts in the frame. They would not fit through the holes in the locking plates so I couldn't use them. I used a magnet stick instead and it worked well. I did not put on the safety cables around the frame. I figure since this thing bolts to the steering box, if it comes off so does the steering box and then I have much bigger issues that these cables are not going to help.
Etrailer is with out a doubt the best supplier in the market today. they are on time every time and there support is excellent.
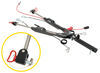
Great Base plate kit! Very easy to follow instructions even with my aftermarket bumper with winch. It fit perfect. The only issue I have is where the safety cables attach to the base plate….the cable connectors are too big to fit through the holes because the Jeep’s frame blocks part of the hole. See photo with red circle. I will have to get a smaller connector.
It preforms as designed. I tow a jeep gladiator with a 32’ class C RV
This is not the first time I have purchased from ETrailer, but by far the best experience yet. I was treading in uncharted waters and decided to call, i happened to get Paula S. And she was able to educate me on the subject at hand. She also made sure I was ordering all the right parts for the task at hand. I received the two boxes of parts and assembled everything on the vehicle and noticed i was missing something so I called back and talked to Ashley. She assured me that Paula did order the missing part and that it would be here the next day. (Delayed due to holiday) You can sure tell both ladies love their jobs and liked taking care of us customers. I will always try to deal with them when I need something towing related.
Jaime was very helpful in getting the right baseplate for my Jeep Cherokee and in retuning the wrong item which I ordered myself.
The baseplate installed easily and will be used for the first time next week. Also, the curt base plate did not require any trimming whatsoever of the plastics on the front of the car.
Thanks Jaime
Madison M. was great to talk to and very helpful.and Very knowledgeable. At what she does thank you Madison.M
haven't installed yet. received in quick timely manner. read the instructions, seems easy enough.
After a little help from a friend and a little bit of cutting on the car, everything worked out great!
Info for this part was:
At etrailer we provide the best information available about the products we sell. We take the quality of our information seriously so that you can get the right part the first time.





















Nick S.
9/29/2025
Nothing an extra set of hands can't do! I am glad you were able to get it installed. Where are you headed first with your new setup?