


How to Fix a Leak on a Elbow Valve on an Air Lift Air Bag
Updated 08/13/2026 | Published 04/18/2022
Products Featured in This Question
Question:
The threads on the connector to the airbag on the driver side is leaking after soapy water application. #88338. What do you recommend as a fix? What tool is best for removal of the connector since an open wrench doesn’t move in the tight space?
asked by: Andy D
Expert Reply:
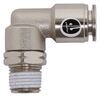
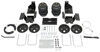
To remove the valve on the Air Lift LoadLifter 5000 Ultimate Air Helper Springs item # AL88338 you will need to remove the air spring from your truck. You can't turn that valve inside the bracket. Once off I recommend using the Replacement 1/4" Elbow for Air Lift Ride Control Air Helper Springs - Qty 1 item # AL21837 in case you have a bad fitting that way you do not have to repeat this process again. I wish there was an easier way but those brackets are built so closely to protect that fitting. I have linked an installation video below to help you out.
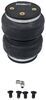
The replacement bag for that system is the Replacement Air Spring for Air Lift LoadLifter 5000 Ultimate System - Rear Axle - Qty 1 item # AL84297.

John
8/13/2026
I thought my air fitting was leaking but it was the insert that the fitting screws into. Also, one of the plate mounting bolts spun in place. I had to heat the bolt but the whole threaded insert came out. I ordered a new airbag. I got 20 years out of these bags so I guess that's OK. It may be worth putting anti seize on the new mounting bolts.



Product Page this Question was Asked From
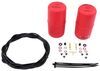
Air Lift 1000 Air Helper Springs for Coil Springs - Rear

- Vehicle Suspension
- Towing/Load Leveling
- Air Springs
- Suspension Only
- Light Duty
- Rear Axle Suspension Enhancement
- Air Lift
more information >
Featured Help Information
Instructions
Miscellaneous Media


Continue Researching
- Search Results: door strap
- Shop: Vehicle Sway Bars
- Search Results: steering stabilizer anti~sway bars
- Shop: Suspension Enhancement
- Shop: Roadmaster Reflex Steering Stabilizer with Mounting Brackets for Class A Motor Homes
- Shop: Universal RV Door Security Strap
- Search Results: solar panel charger
- Search Results: solar panels
- Search Results: 2k jack
- Shop: Replacement 1/4" Elbow for Air Lift Ride Control Air Helper Springs - Qty 1
- Search Results: air brake hose
- Video: Roadmaster Reflex Steering Stabilizer Installation - 1999 Freightliner Sport Chassis
- Q&A: What Part Number for Steering Stabilizer for 2003 Newmar Dutch Star on Freightliner XC Chassis
- Q&A: Potential Steering Stabilizer Option For A 2004 National RV On A Freightliner XC Chassis
- Search Results: air brake fittings
- Shop: Roadmaster Exact Center Steering Stabilizer w/ Custom Brackets for Class A Motorhomes
- Video: Installation: TorkLift Tie Downs on a 2016 Chevrolet Silverado 2500
- Shop: TorkLift AnchorGuard Derringer Turnbuckles for Truck Camper Tie-Downs - Stainless Steel - Qty 4
- Shop: TorkLift Locking FastGun Turnbuckles for Frame-Mounted Tie-Downs - Stainless Steel - Black - Qty 4
- Shop: TorkLift Tie Downs - Custom Frame Mount - Front and Rear
- Shop: Camper Tie-Downs
- Video: The Low-Down on the Replacement 1/4" Elbow for Air Lift Ride Control Air Helper Springs
- Shop: RV Antenna and Radio
- Q&A: How to Remove Elbow Air Fitting AL21848
- Shop: RV Interior Lighting
- Video: Review of Roadmaster Steering Stabilizer with Custom Mounting Brackets - RM32RR
- Q&A: How Long Does It Take To Install Air Force One Supplemental Braking System
- Shop: RV Exterior Lighting
- Video: Review of Air Lift Replacement LoadLifter 5000 Ultimate Plus Elbow Fitting - AL52RV
- Q&A: Replacement Elbow for Air Bag Systems
Rich
7/16/2024
What worked for me was remove pressure from the bag by removing the hose. Remove the nuts from the upper U bolts (they go over the frame above). Find something that will hold the bag down (boards, wire, etc.), and use a wrench to reach the fitting from the tire side. Removing the tire will give you better access. I replaced my elbow with part number 21839, it's a straight connection. A socket easily fits over this part for removal. If you're concerned you could get a dirt build up where the hose connects, wrap it in electrical tape. The next time this union goes bad (if it ever does), a socket, rachet and a hose cutter will be all the tools you need. Don't forget a lot less time and effort to.