Inserting Wire Connections to Interior When Installing # MCL13A2B Clearance Light on Toyota Camper
Updated 09/28/2012 | Published 09/27/2012
Question:
I want to mount the five yellow and seven red marker lights on my 1986 Toyota camper. I also have the foam gasket and chrome ring for each light. My problem is that there are already two wires coming through the small hole where each light will be mounted and no way to get to the connection inside the camper. While I can connect the existing wires to the wires from the marker light, there is no room for those wires behind the light if I flush-mount the lights using gasket and ring. Now what? Thanks for your help.
asked by: Mike W
Expert Reply:
It seems to me that your best bet would be to enlarge the hole slightly, and then push the wires back in once the connections are made. I would use a utility knife with a new blade to carefully enlarge the hole, being careful not to nick the wires. You will only need to enlarge the hole large enough to slip the wiring connection through. If you used heat-shrink tubing to seal the connections instead of electrical tape, the connections would be smaller in diameter and would be easier to get through the hole. The wire leads on the lamp are long enough that you should be able to run 1 connection at a time through the hole, which will make things easier.



Product Page this Question was Asked From
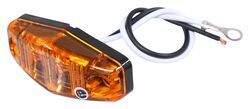
Optronics LED Mini Clearance or Side Marker Trailer Light - Submersible - 2 Diodes - Amber Lens

- Trailer Lights
- Clearance Lights
- Marker
- Rectangle
- Surface Mount
- Submersible Lights
- LED Light
- 2-1/2L x 1-1/16W Inch
- Amber
- Optronics
more information >

Continue Researching
- Shop: Optronics LED Mini Clearance or Side Marker Trailer Light - Submersible - 2 Diodes - Amber Lens
- Shop: Optronics LED Clearance or Side Marker Light - Submersible - 3 Diodes - Rectangle - Amber Lens
- Search Results: straight tongue trailer coupler
- Shop: LED Trailer Mini Clearance or Side Marker Light - Submersible - 2 Diodes - Amber LEDs - Clear Lens
- Shop: Plastic, Single-Axle Trailer Fender w/ Top and Side Steps - White - 13" to 15"
- Q&A: Mounting Hole Spacing on Sealed, Mini LED Side Marker, Clearance or Identification Light MCL13A2B
- Video: Complete Breakdown of the Plastic, Single-Axle Trailer Fender w/ Top and Side Steps
- Search Results: boat trailer fenders
- Shop: Cam-Action Lockable Door Latch w/ 36" Pipe for Enclosed Trailers - Zinc Plated Steel
- Shop: Parallel Multi Conductor Wire - 14 Gauge - Green-Yellow-Brown - per Foot
- Shop: Pollak Black Plastic, 7-Pole, RV-Style Trailer Connector - Trailer End
- Search Results: trailer fenders
- Q&A: Will Optronics Replacement LED Clearance Lights Fit?
- Search Results: e track anchor e track
- Shop: Lift Assist
- Shop: RV Interior Lighting
- Search Results: clearance lights trailer lights
- Search Results: atv~utv tie downs
- Video: Detailed Breakdown of the Optronics LED Mini Clearance or Side Marker Trailer Light
- Video: Checking Out the Trimax Trailer Door Hasp for Puck Lock
- Video: Ultimate Overview of the Peterson Great White LED Trailer Interior Cove Light
- Video: Cam-Action Lockable Door Latch for Fold Down Trailer Gate or Side Door Feature Review
- Video: etrailer Electric Trailer Brakes Installation Guide - Flat Bed Trailer
- Video: Complete Breakdown of the Optronics LED Mini Clearance or Side Marker Trailer Light
- Search Results: 23~105
- Article: Wiring Trailer Lights with a 4-Way Plug (It's Easier Than You Think)
- Article: Trailer Lighting Requirements
- Q&A: What Sealant Should I Use Between an Aluminum Jeep-Style Fender and My Trailer?
- Article: Trailer Wiring Diagrams
- Q&A: Is There Prep Work Needed to Install Rubber Door/Hatch Seal for RV and Trailers # SR98ZR

on Trailer Lights