


How to Install the Jensen Multimedia Navigation System Part # JRV9000R
Updated 08/13/2020 | Published 01/22/2019
Products Featured in This Question
Question:
I am looking to replace the Soundstream infotainment system in our 2019 Jayco Greyhawk with the Jensen JRV9000R. Can you tell me what is involved in the installation and if all parts needed are included with the Jensen unit? Thanks for your help.
asked by: Lani
Helpful Expert Reply:

The first step for installing the Jensen Multimedia Navigation System part # JRV9000R in your 2019 Greyhawk Class C Motorhome would be to make note of the dimensions that way you can be sure the sleeve will slide into the mount you have now. If not there is always the option to modify but so long as they are relatively the same size, you shouldn't need to cut or trim any material.
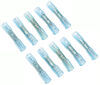
The next step in the installation process would be hooking up all the connections at the rear. The video components should all be pretty much plug and play. However, the connection for your audio will take a bit of work. Basically, you will cut the wiring harness that your existing system uses in two and then splice the new wiring harness on using some butt connectors like part # DW05744-10.
Once you install the outer metal sleeve and make the connections at the rear, the rest is just finishing touches such as installing the trim plate and going through the setup procedure for the unit. I have attached the technical specifications document you will need to use to make the wiring connections and a sample install video for you. Please note, the install video is just replacing an old Jensen system with a new one so the wiring connections are much simpler.
You will need basic wiring tools and connectors to complete the installation but not much else. If you do not feel comfortable with the above steps you can always take your motorhome into a service center and they could install the new system for you.



Featured Help Information
Miscellaneous Media


Continue Researching
- Search Results: voyager rv camera system
- Shop: Voyager Camera Extension Cable - 10' Long
- Shop: RV Backup Camera System - 2 Cameras - 7" Screen
- Shop: Voyager RV Side Camera - Driver's Side - Gray Primer - Qty 1
- Video: Review of Jensen RV Stereos - RCA Camera Cable - JEN52RR
- Shop: Backup Camera Audio/Video to RCA Cable for Jensen Touch Screen RV Stereos
- Shop: Dexter Electric Trailer Brakes - 12" - Left/Right Hand Assemblies - 7,000 lbs
- Article: Trailer Wiring Diagrams
- Q&A: Recommended Replacement For A JVR9000R RV Stereo System With Three Cameras
- Search Results: vehicle lights
- Shop: RV Exterior Lighting
- Video: Feature Breakdown: Peterson Trailer Tail Light w/ Grommet and Plug
- Shop: Trailer Tail Light Rubber Grommet, 4" Round
- Shop: PVC Grommet for Peterson 4" Round Tail Lights - Flush Mount - Black
- Search Results: trailer hitch
- Shop: Trailer Hitch
- Q&A: What is the Difference Between a Class II and a Class III Hitch?
- Search Results: trailer tires and wheels
- Article: Brake Controller 7- and 4-Way Installation Kit (ETBC7)
- Video: A Look at the Power Mountain Tallboy 6 Ton Off-Road Bottle Jack with a Military Cargo Trailer
- Q&A: What is the Difference Between a 4-Way and 7-Way Trailer Connector
- Shop: Trailer Wiring
- Q&A: Instructions to Wire a Trailer for Electric Brakes
- Search Results: rv air conditioners
- Shop: Suspension Enhancement
- Article: How to Measure for Trailer Hitch Drop
- Video: How to Choose a Trailer Brake Controller
- Search Results: trailer wiring
- Q&A: Replacing 6-Way on Trailer With 7-Way Connector
- Article: Wiring Trailer Lights with a 7-Way Plug (It's Easier Than You Think)










Lynn
8/3/2020
We are not getting a video signal on cameras. When blinker is activated no signal or when u hit camera. Please help.