


To see if this custom-fit item will work for you please tell us what vehicle you'll use it with.


Thank you! Your comment has been submitted successfully. You should be able to view your question/comment here within a few days.
Error submitting comment. Please try again momentarily.


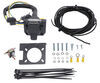
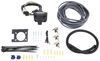
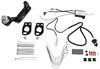
Running trailer wiring can get messy, but this harness keeps things clean. The CURT T-Connector Vehicle Wiring Harness plugs right into your vehicle’s factory connectors behind the driver-side tail light. There’s no splicing or wire tracing—just a straightforward plug-and-play setup that’s ready to use once connected.
This harness provides a 4-flat trailer connector that powers your trailer’s running lights, turn signals, and brake lights. It’s the standard connection used for most light-duty trailers, so you can hook up and go without any extra adapters or wiring kits.
Whether your trailer uses LED or incandescent bulbs, this harness delivers steady power as long as your lights stay within 3 amps for stop and turn signals and 6 amps for tail lights. That makes it a solid choice for a variety of small to mid-size trailers while keeping your electrical system protected.
To keep connections protected from moisture and road grime, it’s recommended to use dielectric grease on the 4-way plug. A small dab at each terminal helps prevent corrosion and keeps the connection working smoothly trip after trip.

Videos are provided as a guide only. Refer to manufacturer installation instructions and specs for complete information.
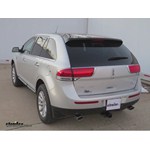
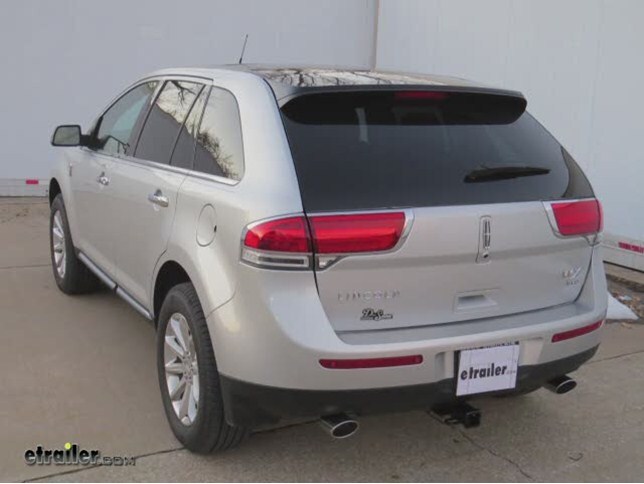
Today on our 2013 Lincoln MKX, we'll be installing the Curt T-connector vehicle wiring harness, part number C56121. Now to begin our install, we'll open up the rear hatch. Then, we'll need to remove the fasteners to secure the rear tail light assembly. There are two fasteners on each side. Once we remove the screws and set them aside, we'll then pop the tail light assembly out of its position being careful not to break the alignment tabs underneath. Next, we'll go ahead and press on the wiring connector lock so that we can remove the wiring harness from the back of the tail light assembly. We will set the tail light assembly aside. Now, we'll go ahead and repeat the same process on the other side.
Now, with both tail light assemblies removed, we'll move to the inside of the vehicle where we'll the remove spare tire cover and then the rear threshold. The rear threshold has fasteners underneath, so we gently pull up until the fasteners released and then remove the threshold completely setting aside. Next, we'll remove plastic trays on either side of the spare tire. We'll set them aside for re-installation later. Next, we'll go ahead, we'll remove the grommet that secures the tail light wiring harness as it passes through the body of the vehicle. Once we pull it out, we can then take the new green wire connector from our new 4-pole harness, feed it up behind the interior panel and out through the open hole from where we removed the grommet.
Then, we'll take a pair of side cutters, cut a slice in the grommet where we can feed the green wire into and reinstall the grommet. Next, plug the green wire connector directly into the manufacturers wiring. The other end will go into the back of the tail light assembly. Next, we'll go ahead and take a zip tie and secure the green wire to the manufacturers wiring. We'll cut off the excess from zip tie to clean up the install look. Now, we're ready to re-install tail light assembly.
Next, we'll begin routing our wiring over to the driver side. This application, we can route it inside the body channel using a pull wire. We'll take the pull wire, route it through the channel first, pulling it over to the driver side. Next, we'll repeat the same process taking the yellow wire connector and feeding it up behind the driver side tail light assembly. We'll cut the slit in the grommet, feeding the wire in.
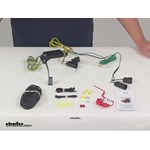
Then, we'll plug the yellow wire connector into the manufacturers wiring and the other end of T-connector into the tail light assembly. We'll secure the wiring with a zip tie, cut off the excess from zip tie, and then reinstall the driver side tail light assembly. Next, we'll start routing the power wire for our new converter box. This power wire will ultimately get run up to the vehicle battery. We'll go and take the power wire and route it around the second row seat post interior panel to the converter box. We'll strip back the power wire and add the butt connector provided with our install kit. The other end of the butt connector will get secured to the black wire coming from the converter box. Next, we'll go ahead and wrap up this connection point with some black electrical tape to help keep out any dust, dirt, debris, or moisture. Now, with the power wire secured, we'll go ahead and mount the converter box. To mount the converter box, we'll use the two-side adhesive supplied with our install kit. Peel back one side of the adhesive and adhere it to the converter box and then remove the other side of the adhesive and secure it back behind the paneling on the driver side. Note, when you're securing converter box, we're looking for a clean, flat surface, preferably sheet metal. Now, with our converter box mounted, we'll go ahead and take the white wire from the converter box with the pre-attached ring terminal and secure it to the body for the ground for our new converter box and 4-pole connection. Using a self-tapping screw, we'll go ahead and secure the ring terminal directly to the body of the vehicle. Quick check tip: I recommend a final location where the sheet metal doubles up for a more secure ground. Below the tail light assembly near the threshold will be a great location. Now, with our power wire secured to the converter box, we'll go back to the manufacturers grommet and use our utility knife to cut a small slice in the grommet. Then, we can take the other end of our power wire, feed it down through the manufacturers grommet underneath the vehicle. We'll go ahead and pull the excess wire down underneath the vehicle and then secure the power wire to the manufacturers wiring with a zip tie. Now, with our wire fit underneath the vehicle, we can go ahead and route it up through the front of the vehicle at the bottom of the engine compartment. We'll then route up through the engine bay and ultimately to our battery. Keep in mind when routing your wire, stay away from any moving components such as steering or suspension, or excessive heat such as exhaust. Now, we've reached the bottom of the engine bay. We'll go ahead and take our pull wire, feed it up through the engine compartment, and then secure the power wire to the pull wire and pull it up to the top of the engine bay. We'll go ahead and secure it with the black zip ties provided with our install kit. Now, with our power wire pulled into position, we'll go ahead and cut off the excess from the zip ties and clean up our install look and move to the top of the engine compartment. Here, we'll secure the wiring as necessary and route it towards to the positive battery post. We'll go ahead and cut off any excess wire from the power wire so that we can install our inline fuse holder. To do this, we'll strip back the power wire and add a butt connector. We'll take the fuse holder and attach it to the butt connector and a ring terminal to the other end of the fuse holder. We'll go ahead and wrap up this connection point with some black electrical tape and then route the ring terminal to the positive battery post. We'll remove the cover from the positive battery post revealing a positive battery post. We can remove the nut, install the ring terminal, and then re-secure the nut. We'll go ahead and install the fuse into the fuse holder and then secure our fuse holder here to the manufacturers wiring. We'll go ahead and reinstall the positive battery post cover and secure our wiring as necessary with the zip ties. We'll cut off the excess from the zip ties, clean up our install look. We're now ready to test our new 4-pole connector. To test the 4-pole connector, we'll use our test light, taking the ground clamp and putting it on the white wire terminal, which also be the open or bare terminal. Then, testing the brown wire terminal will be our running light circuit, yellow wire terminal will be the left turn signal/left brake, and green wire terminal will be the right turn signal right braking. Now, we know our new 4-pole connector works. Let's go ahead and show you how to use it. We'll simply take the 4-pole connector out of the lower storage compartment and route it out and over the threshold and down to our hitch or accessory. Be careful to stay away from the rear cargo door latch as pinching off in the latch can harm the wire, however, the weather stripping is thick enough having simply close the rear cargo door on it, pull out any wire necessary to run to our hitch or accessory, and then once we're finished, we'll simply open up the rear cargo door and store it down with the spare tire cargo area, and that's it, we're ready to hit the road. That does it for the install of the Curt T-connector vehicle wiring harness with 4-pole flat connection, part number C56121 on our 2013 Lincoln MKX. .
Customer Satisfaction Score:
93% were satisfied with this product
7% of customers were not satisfied
Ratings & Reviews



Rachael H.
6/20/2018
It is recommended to route the power all the way to the vehicle battery fpr proper fuse and circuit protection. I have included a link to one of our help articles for your reference.
Helpful Links

Wolfgang

6/20/2019
Hi, with my connection I never had a problem. Still works fine.

Do you have a question about this Custom Fit Vehicle Wiring?
Info for this part was:
At etrailer we provide the best information available about the products we sell. We take the quality of our information seriously so that you can get the right part the first time. Let us know if anything is missing or if you have any questions.



















Jeff S.
9/15/2014
The wiring harness has not given me a bit of problems after a year of use.