


To see if this custom-fit item will work for you please tell us what vehicle you'll use it with.


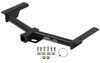
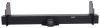
You don’t need a heavy-duty setup to make your vehicle more useful. With a 6,000 lbs gross trailer weight and 600 lbs tongue weight rating, this hitch is built for everyday towing and hauling. It’s right at home carrying a cargo carrier on a weekend trip, taking bikes out to the trailhead, or towing a small trailer to the store. The Class III design gives it the strength for regular use, not just occasional jobs.
This hitch uses a 2" x 2" receiver opening that fits most ball mounts, bike racks, and cargo trays. You won’t need an adapter to use your existing gear or add new accessories later. It’s built to handle all kinds of setups—whether you’re hauling tools for work or packing up for a road trip.
The steel frame and welded construction give this hitch solid strength under load. A black powder coat and A-coat finish protect it from corrosion and road grime, so it stays looking good and performing well over time. It’s been tested under SAE J684 standards for safety, so you can tow with confidence every time you hit the road.
This hitch bolts directly to the frame using standard tools and the included hardware—no drilling or welding needed. The design lines up cleanly for a simple install in your own garage or driveway. It’s a straightforward fit that keeps things quick and frustration-free so you can get on with your next project or trip.
Videos are provided as a guide only. Refer to manufacturer installation instructions and specs for complete information.
Hi, this is Scott with etrailer. Today we're taking a look at and installing our Trailer Mate hitch on our 2016 Ford Transit T250. Our Trailer Mate hitch we have on our T250 today is gonna be a good option for contractors or people that just wanna pull a small trailer, something behind their van. The nice thing I like about this one is, it tucks in behind our bumper line, so if you're working back here outta the back of your van, you're not gonna be bumping into it with your shins or anything, it is tucked away really nicely. This hitch is gonna have a 5/8" pin hole opening, that's gonna hold in any of your accessories that you have in your receiver. Now, this one won't come with a pin and clip, so you may want to pick one up here at etrailer.
But keep in mind, a lot of your accessories may have a pin and clip with it, like your cargo carriers, and your bike racks usually have a anti-rattle pin that will come with those. Our hitch is gonna have heavy duty welded-on chain loops, that's gonna accept either your S-style hooks or your Clevis-style hooks, so either one of those are gonna work for your trailer towing needs. As far as our measurements go for this hitch, from the center of our pin hole out to the edge of our bumper, we're looking at four inches. Now with that measurement, you'll be able to decide, if you have any accessories that fold up or stow away, will make any contact with the back of your vehicle when you fold those up. Now, from the top inside of our receiver down to the ground, we do have our van on a lift today, so we did do the math, and with that measurement, from here to the ground will be 14 inches.
With that measurement, you'll be able to decide on the type of ball drop you may need, or to also let you know if you need any rise of the shank of either your bike rack or your cargo carriers for clearance. As far as weights go for this hitch, this hitch is gonna have a tongue weight rating of 600 pounds, that's gonna be the weight pushing down on the lower portion of your receiver. That's gonna be the combination of your bike rack loaded down with all of your bikes, or your cargo carrier loaded down with all of your gear. Now for a gross trailer weight rating, we're gonna be at 6,000 pounds for that, that's gonna be the weight of your trailer and everything that you have loaded on that. Now keep in mind, it's always a good idea to take a look in your owner's manual and make sure that you don't exceed any of your maximum towing capabilities listed in there.
If you have any questions or comments about this hitch for your transit van, you can always leave a question or comment down below in the comment section, or you can get ahold of one of our experts here at etrailer, they'd be glad to help you out. Now as far as installation goes, this one isn't really too bad, it's definitely something you could handle yourself. But if it's something you don't have the time, the tool or the place to do it, you can always take a look at our dealer locator and get something done for you locally. If it's something you feel like tackling yourself, stick around, watch our video, and we'll help you get it installed. To start our installation, we got our spare tire down out of the way, just to give us a little more room to work, and also just to make it a little bit easier for you guys to see what we're doing.
Now, we're underneath our vehicle, and we're gonna have our loaded frame rails here on each side. And we're gonna start by tapping into this hole here towards the back, on both sides, that's where we're gonna be mounting our self-tapping screw through. So what we want to do is just kind of get that area cleaned out a little bit, just use a tube brush or something. Now, this isn't threaded, so we're gonna be making threads into this. So I like to spray a little silicone or some penetrating oil up in there and just get any debris out. Also, you wanna wipe off any debris that you may have on here, that way we'll have a good flush fit when we go and lift our hitch into place. So I'm gonna take our bolt that comes into our kit, that's gonna be a self-tapping bolt, I'm just gonna get that started. And we want to start running this in slowly and just get it to start in, and we want it to stay perpendicular with our frame. In the backs of our frames, we're gonna have this hole back here, and we're gonna want to get our hardware in place. So in our kit, we're gonna have our carriage bolt, gonna have our carriage bolt, our spacer block, and our nut, and that's gonna be in the back of our frame here. So what we're gonna have is this fish wire that comes in our kit, we wanna take the coiled end and just run that into the hole, and then back. Then what we'll do is we'll take our spacer block, run that up on to the coiled end. Now we'll take our carriage bolt, and we'll just thread that into our fish wire coil. And we can just pull that through our frame, down and through. Now, we'll leave our fish wire on, that's gonna help in case our bolt ends up getting pushed up into our frame, this is also gonna help with that so we can pull it down through our hitch when we get it in place. Now with an extra set of hands, we're gonna go ahead and lift our hitch into place, we just wanna run our fish wire into the corresponding hole. Now we'll just move that into position. With it in place, now we can unscrew our fish wire off of there. Now we'll just get our nut installed, and run that up finger tight. Now we can come back through with our self-tapping bolts, and we'll just get those started in the holes that we pre-tapped. Now we'll come back through and snug down all of our hardware. After we have everything snugged down, now we can come back through with a torque wrench and get everything torqued down to the specifications listed in our instruction manual. Now, if you don't have a torque wrench, you can always get one here at etrailer, we do have some options available for these, or you can take a look at your local auto parts store, you should be able to rent one there. Now for this back bolt right here, you can see we have our exhaust in the way. You can either lower your exhaust to get your torque wrench on that, or you can go ahead and use like a dog bone-style wrench, and that will get in there and get you around the exhaust so you don't have to lower that down. With everything torqued down, now all we have to do is get our spare tire put back in place, and that'll do it for our look at and our installation of our Trailer Mate hitch on our 2016 Ford Transit T250. I'm Scott with etrailer, and thanks for watching.
Customer Satisfaction Score:
94% were satisfied with this product
6% of customers were not satisfied
Ratings & Reviews

Info for this part was:
At etrailer we provide the best information available about the products we sell. We take the quality of our information seriously so that you can get the right part the first time. Let us know if anything is missing or if you have any questions.















Thank you! Your comment has been submitted successfully. You should be able to view your question/comment here within a few days.
Error submitting comment. Please try again momentarily.