
To see if this custom-fit item will work for you please tell us what vehicle you'll use it with.
This hard tonneau cover folds up toward your cab for full access to your truck bed. It secures to your cab with latches, making it safe for highway driving. Extruded aluminum panels withstand impact from hail and other falling objects.
Features:
Specs:
The Lomax Stance folds up to provide unfettered access to your full truck bed. Unlike other tonneau covers that use prop rods to hold the folded-up cover against your cab, the Stance uses latches that attach to your cab with magnets and adhesive to hold the cover at a 90-degree angle. This prevents the cover from touching your cab, reducing the risk of scuffing the paint or scratching your rear window.

California residents: click here
Videos are provided as a guide only. Refer to manufacturer installation instructions and specs for complete information.
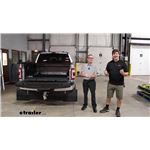
Hello, neighbor, this is Curt with etrailer. And today we're gonna take a look at the installation of a Lomax hard tonneau cover on our 2015 Ram 1500. Now the reason why you might need a hard tonneau cover is that a soft tonneau cover can be a little bit susceptible to security issues. If somebody really wants to get in there, they could always slash it open and get outta there whatever they need. A hard tonneau cover is gonna offer more security and protection for your cargo in your truck bed. Now, I had mentioned that this is a 2015, so this truck has seen some wear, and the owner of this truck does use it as a truck, which makes it no surprise to me at all that they chose a hard tonneau cover.
This really is gonna be offering the best protection, not just from thieves or anything like that, but also you know, hail damage. Maybe you park under a tree in a bad windstorm, has some branches falling. Something like this is gonna do an excellent job of really protecting all of your cargo and keeping it in good order. Now the installation of this tonneau cover is actually fairly simple. It is something you could do on your own.
However, there might be a step or two where having a friend around could help. You're gonna notice that your side rails are gonna come in two pieces, okay And where they're going to be connected at is going to be right here. But first, really quick, I just wanted to show you how these are gonna go on while I got a small piece that's easy to do it with. So we're gonna have these kind of grooves here. And where they're those grooves are is where the teeth of our clamps are gonna end up gripping onto.
On the other side of that panel, we're going to have a rubber seal. So the way that this is going to end up going on for us is going to be like this. There is a very small lip here to help kind of guide it, but essentially you're gonna be getting it on like this and then the clamps are gonna be coming up and gripping through there. But the first thing we're gonna do is assemble our rail. And in order to do that, the first thing is going to be to remove this bolt here.
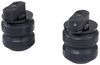
If it's tightened down, this is a 7/16 bolt, or nut rather. Once that's out, we can go ahead and put our rails together. Come together, just like so. You'll see that the hole here is going to line up, and now we're gonna be able to put our carriage bolt back through. And the carriage bolt is squared, so it's gonna be pretty easy to maneuver. We're gonna replace our nut and then take our 7/16 socket and get it tightened down. (metal clacking) So we've got our rail in place, just like I showed you earlier, and we've got it pushed all the way to the front here as far as it can possibly go. We also put our first bracket on as far as it can possibly go forward as well. And we put that on the same way that I showed you with the teeth. So as you can see, there's some teeth on here. We've got those grooves in here that we're gonna attach it to. And what I'm gonna do with this clamp is make sure that it grabs basically a part of both of these sections of the rail. So I'm gonna go ahead and get that on there, make sure the teeth are grabbing, and then I'm gonna hand tighten it a bit for now and get that right where it should be. So we've got the bracket placement, as such. The first bracket is to be placed as far to the front as you could possibly get it. The second bracket placement is, like I said, gonna be between where the rail splits. The fourth bracket placement is going to be as far to the, or as close to the tailgate, rather, as you can possibly get it. And then this bracket here, the third bracket, is to be measured from the first to the last. We want it to be 2/3 the distance away from this clamp right here. So with that in mind, you're gonna go ahead and tighten all those down with your half inch socket, and then you're gonna torque them down with that same socket to the specs provided in your instructions. (torque wrench cranking) (torque wrench beeping) Now that our side rails are installed, the next thing we're going to be putting in is our bulkhead seal. But in order to prep that, first, we need to make sure that our bulkhead is very, very clean. So we're gonna use the provided alcohol wipes that they give us in with the kit, and we're just gonna get this nice and clean and let it dry before we apply our adhesive seal. So now that our bulkhead is clean, we're gonna go ahead and apply our seal. Now your seal is going to have kind of a shorter side and a longer side. We wanna make sure the longer side is the one facing the cab, and we're gonna put it right up here along the edge. So first we're gonna peel back a small section. We're gonna start it right at or just outside the top of our rail right here. In our case, because we have this little gap between the liner, we're gonna start at just outside of the seal and trim off any extra that we have. And once I do that, I'm just going to start slowly working my way down, just being careful to make sure that this is lined up across the whole way. So now we've got our rails installed, we've got our bulkhead steel installed, and now it's time to go ahead and place the cover itself on. So one of the things I wanted to point out before we did that is this short piece right here is going to be the piece that's gonna be up there closest to the bulkhead. These tabs here are gonna be loosened, and at some point we're gonna be sliding these over underneath the lip of our rails and then tightening it back down to keep it in place. But first and foremost, we're gonna go ahead and get it on to our rails, slide it toward the front, and we're gonna drop our first latch system here into the gap where the two rails came together. So we're gonna go ahead and get that done now. I've got my friend, Daniel, here to get us helped out, and he's gonna go ahead and grab that other end and help us get this done. Now, I'm gonna go ahead and lift this up and come around. We're gonna get it into the rails and slowly guide it forward. And now, we're gonna keep it lifted about an inch up and we're gonna get these dropped right into that gap. All right, so now that we've got everything lined up, we've got our latches dropped into place and we double-check to make sure they are actually catching on it. So everything's lined up great. The next thing we're gonna do is attach that small bulkhead piece that I was talking about. I'm gonna be loosening this and sliding it over so that it catches underneath the lip of our rails. And then I'm gonna tighten it down. And we're gonna end up torquing that to spec according to the instructions. (torque wrench beeping) All right, so now we've got everything lined up, tightened down, torqued down, it's time to go ahead and deploy our tonneau cover and just ensure that we could still get our tailgate closed. (tonneau cover thudding) We should get a good latch here at the end. There we go. (tailgate thudding) Brilliant. Fits great. Now the only thing we have left to do is to take our knife, trim that little bit of extra that we had on our bulkhead seal there. And this is ready to go. It went on fairly simple. You can do it by yourself. However, as you could tell, there are certain areas of this install that it will help to have a friend with you. And that just about does it. Unless you plan on having your tonneau cover fully deployed to where it's up here against your rear windshield, there are some anchors that can be placed up here in order to ensure that it stays upward. It's not recommended to drive that way, but in case you need the full bed, I'm gonna show you how to get those on too. One of the great things about this tonneau cover is that it has a no-drill application as far as these go. They are magnetic and also adhesive. So being magnetic, they'll let you get it in a good spot, you can mark it right before you take off the adhesive. So we're gonna go up on the roof here and I'll show you exactly how I got that done. So the the spot that I'm gonna want to be placing this is gonna be really kind right here just off of this rail piece here. First thing I need to do though is make sure I get it all cleaned off really well. We are gonna use the adhesive in conjunction with that magnetism to make sure it sticks. I just don't want it to compromise anything. So I'm gonna make sure I get it nice and clean and dried off. Then what I'm gonna do is deploy one of these arms off of the tonneau cover. It's located inside this little clip here, so you can lift up on that, get it out. This gives us a pretty good idea of where we wanna be. So now I'm gonna take this, I'm gonna put it right around where I want it to be. I'm gonna loop it around, just like that. Then what I'm gonna do is I'm gonna make sure that this, you know, is anchoring in a place where it's not really resting on this top taillight back here. So now that I've got it lined up and in a good position, I'm gonna take a piece of this painter's tape. I'm gonna mark it. And now I'm gonna go ahead and remove it, take off the adhesive, and put it right where it needs to be. So there's a look at the installation of our Lomax hard tonneau cover on our 2015 Ram 1500. Now if you've had any experience with this tonneau cover or if you have some questions about this video and its installation, go ahead and leave those in the comments below. We'd love to answer those and use those to help our other neighbors make the best decisions. Once again, I'm Curt with etrailer. Thanks for stopping by.

Looks good on my Santa Cruz excellent product and easy installation. 2 thumbs up .
After watching an installation video it was relatively easy to install in a short time. However, the instruction booklet need clearer pictures, and the side rails did not have indicators of which side they each needed to be installed.
Great product. Your YouTube video was excellent for the installation. Thanks
Easy to order! Quick delivery! Easy in stallation!
After receiving the order it took about 1 hour for install.
everything fit really well. Product looks nicely made. packaging was great and protected the product well during shipping.
The tonneau cover fits tight and the installation was pretty straight forward. My only complaint is the tailgate will not open remotely because the seals are very tight between the tailgate and the cover..Hyundai Santa Cruz
Excellent cover. Easy to install and use. No drain tubing needs to be installed for the Lomax Stance cover. I would recommend this cover over other trifold covers, especially if you have the Ford bed liner.
I ordered it and it came in about one week. It was very well packed and in excellent condition I read the instructions a couple of times and then went to install it. I wasn't sure which was the right side rail and the left side rail at first. It would be nice if they would put a little round sticker on the front of the rails. That said, left front right front. I did get them on right the first time ,install was fairly easy and when I got it all together it fit beautiful and looks awesome and it Opens and shots very easily. Awesome product!
I like the look and the convenience provided by the tonneau cover on my Maverick Lobo. However it took a lot longer to install and I had to call the company to get clarification on the front seal, the instructions were not clear.
I suggested that it would be easier to install the clamps if you taped the bottom of the clamp to create a hinge and prevent miss-alignment of the "teeth". This made it much easier to position the clamp and tighten the nut.
The railing that has the release cord was bent in so the adjustment tabs could not slide. The bent rail also affected the alignment of the latch. Did not expect to have to jerry rig the installation. Now that it’s been installed it looks good but it does leak in a hard rain.
I just installed my cover today. It looks really good on the truck. So sleek....not like the canvas ones. It was super easy to install. All you have to do is clamp (they give you the clamps) rails to the sides of your truck bed and drop the cover into the rails and tighten it down. I can not say enough about Etrailer's customer service. Originally they sent me the wrong cover and they took responsibility for the error. I had several emails and calls from Marti in customer service...even on the weekend. She did incredible work to make it right. In the end, although it took a long time, I am a satisfied customer.
Info for this part was:
At etrailer.com we provide the best information available about the products we sell. We take the quality of our information seriously so that you can get the right part the first time. Let us know if anything is missing or if you have any questions.


Thank you! Your comment has been submitted successfully. You should be able to view your question/comment here within a few days.
Error submitting comment. Please try again momentarily.