


To see if this custom-fit item will work for you please tell us what vehicle you'll use it with.


Wiring a trailer can be a pain when you have to cut into the factory wiring, but this Curt T-Connector takes all that out of the equation. It plugs straight into the existing vehicle connectors to give you a 4-flat trailer plug. No splicing, no guesswork—just connect it and you’re ready for trailer lights.
This harness tucks neatly behind the panels using factory connection points. There’s no need to run wires the length of the vehicle or drill new holes. The plug-and-lead design keeps it simple and clean, so you can get the job done quickly and spend more time towing.
The integrated powered converter keeps your vehicle’s sensitive wiring safe by drawing power directly from the battery instead of the lighting circuits. It handles the trailer load while protecting against overloads or blown fuses—a must-have feature for modern vehicles with advanced electrical systems.
Once installed, you get a standard 4-pole flat connector that runs your trailer’s stop, turn, and tail lights. It’s the common setup for small utility trailers, campers, or boat trailers and gives you reliable lighting every time you hook up.
For vehicles that didn’t come with factory tow wiring, this kit provides everything needed to add trailer lighting safely. It’s built to integrate cleanly with your existing wiring and deliver dependable power to your trailer lights without extra modifications.


Videos are provided as a guide only. Refer to manufacturer installation instructions and specs for complete information.
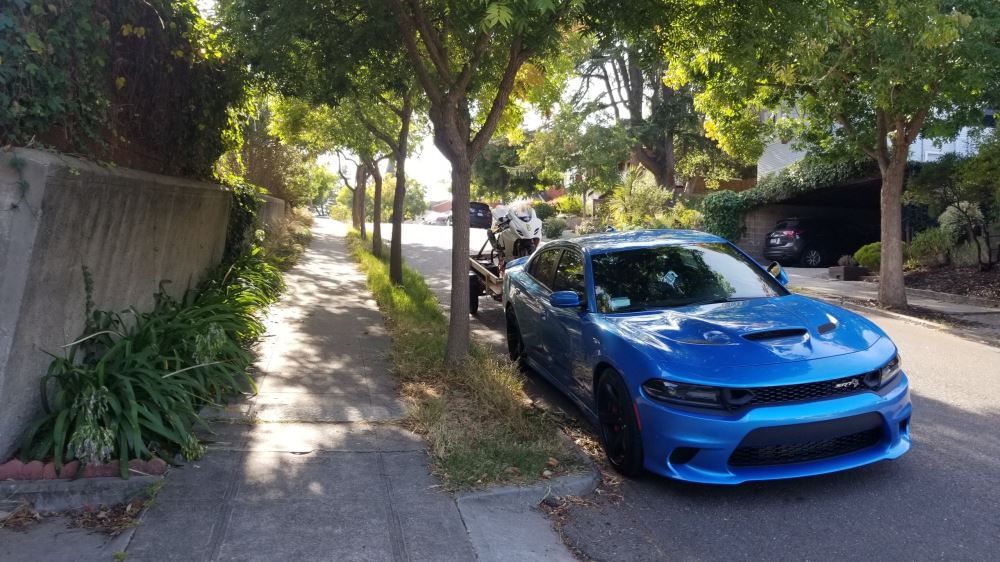
Speaker 1: Today on our 2018 Dodge Charger, we're gonna be taking a look at and showing you how to install the Curt T-Connector Vehicle Wiring Harness with 4-Pole Flat Trailer Connector. That's part number C56234.Here's what our wiring's gonna look like once we have it installed. This is gonna give us all the lighting functions we need to safely get down the road, like our tail lights, our turn signals, and our brake lights. It is gonna provide us the 4-pole connector for easy connections. Now whenever we're not towing with it, and we wanna store it, we simply open up our trunk and we store it right by our spare tire. So it's gonna keep it out of the elements and keep it from getting any rust or corrosion on the contact points.The maximum amps of our wiring is gonna be three amps for our stop and our turn signals, and six amps for our tail light circuits.A lot of our customers said that they really like this wiring kit because of how easy it is to install.
We're not gonna have to cut or slice into any of our wiring 'cause it's gonna simply plug in right behind our tail light. And unlike most powered tail light converters that we're gonna have to run from the back all the way up to the front by the battery, our Charger actually has the battery in the trunk which is gonna make the installation that much easier.Our wiring kit's gonna have a converter box. It's gonna take the signal from our Charger and turn it into a working signal for our trailer. But it's also gonna protect our Charger from any kind of back feeding if any problems we're to arise on the trailer end.Now that we've seen the end result of our wiring and gone over some of the features, let's show you how to get it installed. To begin our installation, we're gonna open up the trunk on our Charger and remove all the floor coverings out of it.
Your may look a little bit different than ours. You may have the compact spare that's gonna be underneath in that recessed area here. You're gonna pull the floor covering out and pull the compact spare out as well as pull off the cover that's covering the battery. We'll just lift it up, and we'll set it aside for right now.On each side of our trunk we're gonna have this tie-down hook that's secured by a screw. You're gonna wanna grab a T-20 Torx bit and pull that out.
Now if we come down and towards the back, we're gonna have these cargo tie-down points, and we're gonna need to pop those out. The easiest way if you grab a flat-head screwdriver, and we come underneath, kind of turn while you're prying away, and we can pop them out. So we'll go ahead and remove all four of those, two on each side. And then on the trunk here, we're gonna have push pin that's holding the carpet in place right at the corner. So we'll take a trim panel tool or flat-head screwdriver, and coming from underneath it we'll pop that out.
And we'll do that on both sides.Next we're gonna remove the plastic threshold that's at the very bottom, right by the bumper here. If we reach towards the bottom where that panel is, we can lift out and then up, and then I'll start releasing those clips, and we're slowly gonna work our way all the way across. Once all of them are released, we'll take our panel and set it aside for right now.So with everything loose, we're gonna grab the felt liner. We're gonna start pulling it away so that we can expose the tail light connector right here. There's gonna be a small tab right on top. We wanna depress that while we're pulling away to disconnect it. Push on that tab, and then pull the connector away from the tail light. Since we're on the passenger side, we're gonna start with the connector that has the green, white, and brown wires on it. Now you'll notice that the connectors are gonna look very similar to the ones in our vehicle. So we're gonna take the wire, the loose connector, and we'll plug it into our wiring harness, and then we'll take the female end and we'll plug it in directly behind our tail light.And with that connection made, we're gonna have another push pin at the bottom here where it's holding the felt in place. We're gonna go and remove that one so it'll make it easier for us to route our wires. Let me just pull the felt back giving ourselves a lot more room to work with here. We're gonna take our wires and our converter box, and we're gonna drop it down behind the felt, and we're gonna route the yellow cable and our 4-pole wire across the threshold here. And we're gonna take the yellow wire and go all the way over to the driver's side and make the connections at our tail light just like we did here. We're just gonna drop our wires down behind the felt here, and we're gonna take our yellow wire and our 4-pole wire and start going towards the driver's side. Now, our yellow wire's gonna have a T-connector, just like we had over here, and we're gonna connect it the exact same way. Just pull the felt back and plug it in. I'm just gonna take a couple zip-ties and secure all the excess wire here along the back where we have this factory wiring. We can tuck any excess wire back behind the felt as well.Now we're gonna find a spot to mount our converter box. In our kit, they provide us with some double-sided foam tape. So I'll remove the backing from one side and gonna place it directly on the converter box. Just push firmly so you know it sticks good, and find a nice flat spot on the back of the trunk here. Remove the other side of the backing, and we can just stick our converter box directly to the metal.Now we should have two wires left, a white wire with a ring terminal on it, and our fuse holder that also has a ring terminal. Our white wire's gonna be our ground, and fortunately for us, our battery is right here and we have a spot right on top of the negative post that we can put our ring terminal. So we're gonna take a 10-millimeter socket and take this nut off right here. We'll slide our ring terminal over the post, and then re-install the nut. Now the last one we're gonna need to hook up to the battery positive. Now if we come back to the battery and we take the cover off, we can run it directly to the battery, but I usually don't like to put ring terminals on the type of clamp we have here 'cause that's what holds the terminal to the battery itself. But if we follow the positive cable, it'll lead right to our fuse box. We'll push in on this tab here, lift up. We're gonna have a positive post right there at the end of the fuse panel. So again, we can take a 10-millimeter socket. We're gonna loosen up the nut and slide our ring terminal directly over that. Then we're gonna replace the nut.Now we made sure our wires are out of the way, we can put our fuse cover back in place. We can take the 10-amp fuse, put in our fuse holder, and now that everything's hooked up before we put all of our panels back in place, now would be a good time to test our wiring to make sure that it all works properly. So I'm gonna plug in my 4-pole tester. If you need one of these, you can pick one up here at etrailer.com using part number I26. Now we'll have an extra set of hands run our lights, and we'll make sure that all functions are working properly. So here we can see that our tail light function's working properly. The one with the left turn signal, and our right turn signal, and our brakes, and the brakes with our turn signals. All we have left to do now is put all the panels back in place and clean up any excess wires. Gonna make sure you get your weather stripping on the correct side of that felt liner.With our wiring all installed, whenever we do wanna use it, we'll just simply drop it out of the back of our trunk. Just make sure you stay away from the actual latch mechanism itself, 'cause the weather stripping will provide enough cushion where it won't damage the wire. Then we can just simply close the trunk and hook up to our trailer. That'll finish up your look at the Curt T-Connector Vehicle Wiring Harness with 4-Pole Flat Trailer Connector, part number C56234, on our 2018 Dodge Charger.
Customer Satisfaction Score:
96% were satisfied with this product
4% of customers were not satisfied
Ratings & Reviews

Great
Great product!!
Plug-in and that’s it!!!!
Great item and fast service thank you
Just put on today, took my time and 1 hr was done,fit perfectly thanks
Easily installed, worked as stated. Fair price and shipped quickly.
Product came quick ! Great customer service !!!
Connection was easy and simple. I recommend you guys do this for all vehicles makes the process so easy than having to run wires all over the place like other company’s offer.
Great Product fast shipping works as advertised
Instructions were very clear and easy to understand. Install took about 20 minutes. It works great. Lights, turn, and brake all work flawlessly.
Thank you for making sure my order arrived in time.
Owner of 2018 Dodge Charger R/T -. Installation was super simple and took no more then 30 mins. Install guide was right on point and Was easy to follow. Everything fit perfectly and after the install everything snapped back together as if it was stock. No one would ever be the wiser. Once again quality product and that why I keep highly recommending this company for all your trailer needs and accessories.
Keep it real guys
Awesome product. Shipping was fast and install was easy. Wiring harness was easy plug and play. Ive used mine tow a little trailer on my Dodge charger.


Do you have a question about this Custom Fit Vehicle Wiring?
Info for this part was:
At etrailer we provide the best information available about the products we sell. We take the quality of our information seriously so that you can get the right part the first time. Let us know if anything is missing or if you have any questions.





















Thank you! Your comment has been submitted successfully. You should be able to view your question/comment here within a few days.
Error submitting comment. Please try again momentarily.