


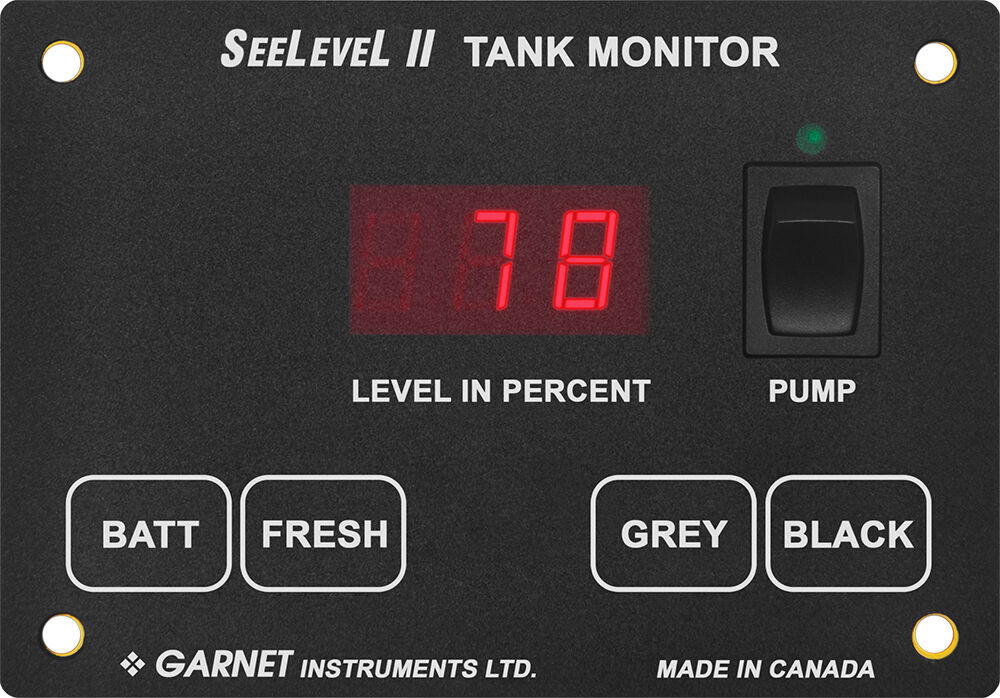
Get advanced tank monitoring for your advanced RV. This monitor is compatible with multiplex, RV-C systems so you can get improved readings at your primary control panel. Accurately tracks 3 holding tanks using SeeLeveL sensors (sold separately).
Features:
Specs:
Note: SeeLeveL tank monitoring systems are not compatible with metal tanks.
Traditional tank monitors have a reputation for being unreliable. Only a few sensors are installed inside, meaning that they usually only measure in quarter increments and can send false readings if they get dirty. When you're keeping an eye on how much fresh water you have, the difference between 25% full and empty means a lot, and that inaccuracy can be a problem.
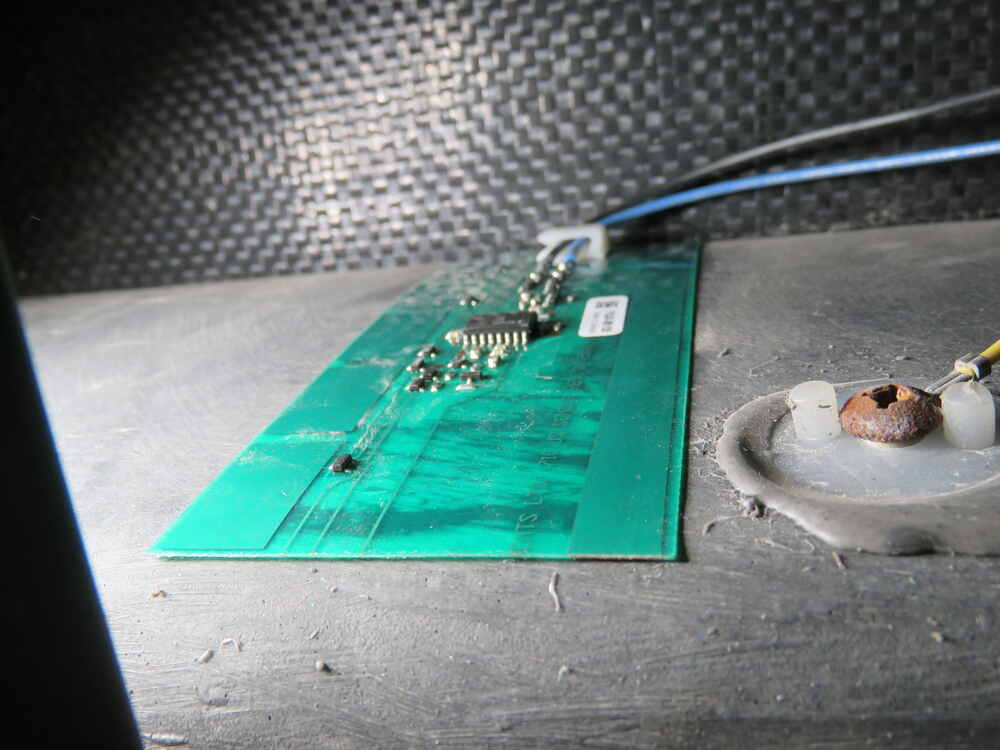
The SeeLeveL tank monitoring system uses technology that can sense fluid levels from the outside of the tank. The sensors' flexible circuit board sticks in place and measures along its entire height. This makes it accurate in single-digit increments.
Multiplex Compatible
This monitor is compatible with RV-C, multiplex wiring systems in RVs. This method of wiring allows multiple components in an RV to be operated by splicing them all into a single wire. This single wire usually connects to a central control panel, letting you control everything from lights, slides, and temperature from one place. This also simplifies the wiring process in RVs, since every component doesn't need to be individually wired to its own control panel.
With multiplex compatibility, this monitor can send accurate tank readings to a primary control panel. It will still work in RVs without multiplex wiring - just wire it normally. But if your RV doesn't have multiplex wiring, and you have no plans to get a multiplex system, then you can save your money and choose another SeeLeveL monitor without this capability.
Get the Model You Need
SeeLeveL monitors come in a variety of configurations depending on your specific requirements.
| Model | Fresh | Gray | Black | Galley | Propane | Water Pump Switch | Water Heater Switch | Bluetooth | Multiplex Compatible |
|---|---|---|---|---|---|---|---|---|---|
| SE94VR | ✔ | ✔ | ✔ | ||||||
| SE34VR | ✔ | ✔ | ✔ | ✔ | |||||
| SE44VR | ✔ | ✔ | ✔ | ✔ | |||||
| SE64VR | ✔ | ✔ | ✔ | ✔ | ✔ | ||||
| SE74VR | ✔ | ✔ | ✔ | ✔ | ✔ | ✔ | |||
| SE67VR | ✔ | ✔ | ✔ | ✔ | ✔ | ✔ | |||
| SE37VR | ✔ | ✔ | ✔ | ✔ | ✔ | ||||
| SE47VR | ✔ | ✔ | ✔ | ✔ | ✔ | ||||
| SE97VR | ✔ | ✔ | ✔ | ✔ | |||||
| SE84VR | ✔ | ✔ | ✔ | ✔ | |||||
| SE24VR | ✔ | ✔ | ✔ | ✔ | ✔ | ||||
| SE57VR | ✔ | ✔ | ✔ | ✔ | ✔ |
If you are replacing an old tank monitoring system, you'd want to check which functions are being provided by the existing panel. Some models incorporate switches for pumps or heaters or are providing information on propane levels. You'd want to pick the SeeLeveL monitor that can provide for all of these features.

Videos are provided as a guide only. Refer to manufacturer installation instructions and specs for complete information.
Hey guys, Kevin here with etrailer. And today I'm going be showing you how to install the SeeLevel RV Tank Monitor System. So the SeeLevel Tank Monitoring System is going to give you a more precise reading of what your tanks are actually at. So if you look at your older style tank readers you're gonna have a full, a two thirds, one third, or empty. That sensor that's in your tank is honestly only gonna read you up to one third. So anything past one third, it's gonna assume that you're empty.
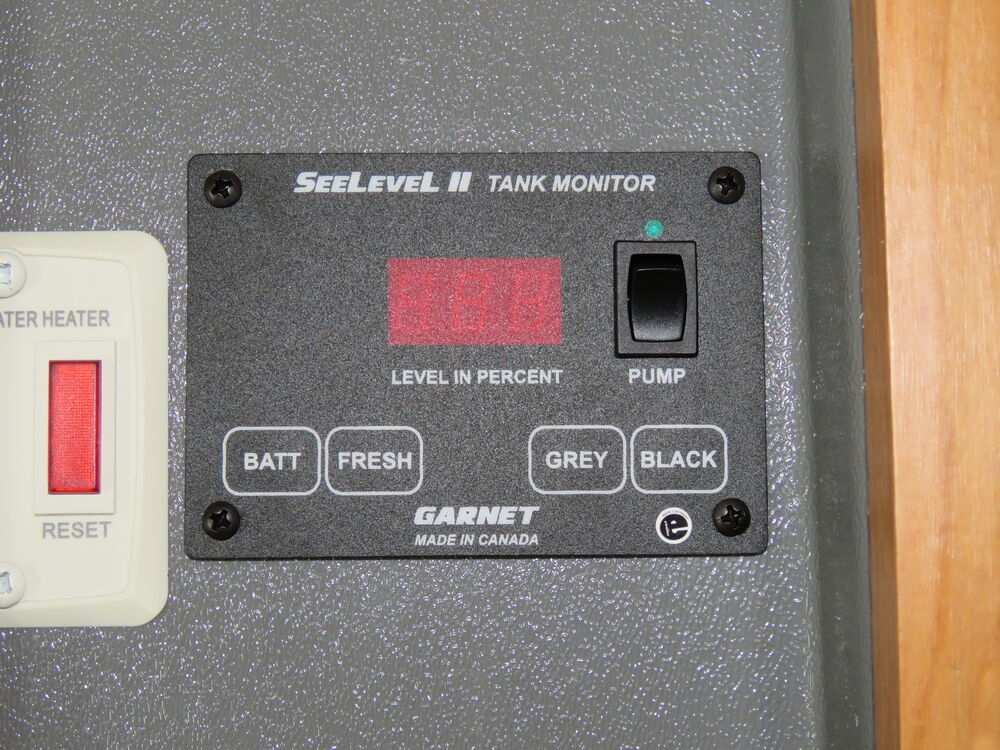
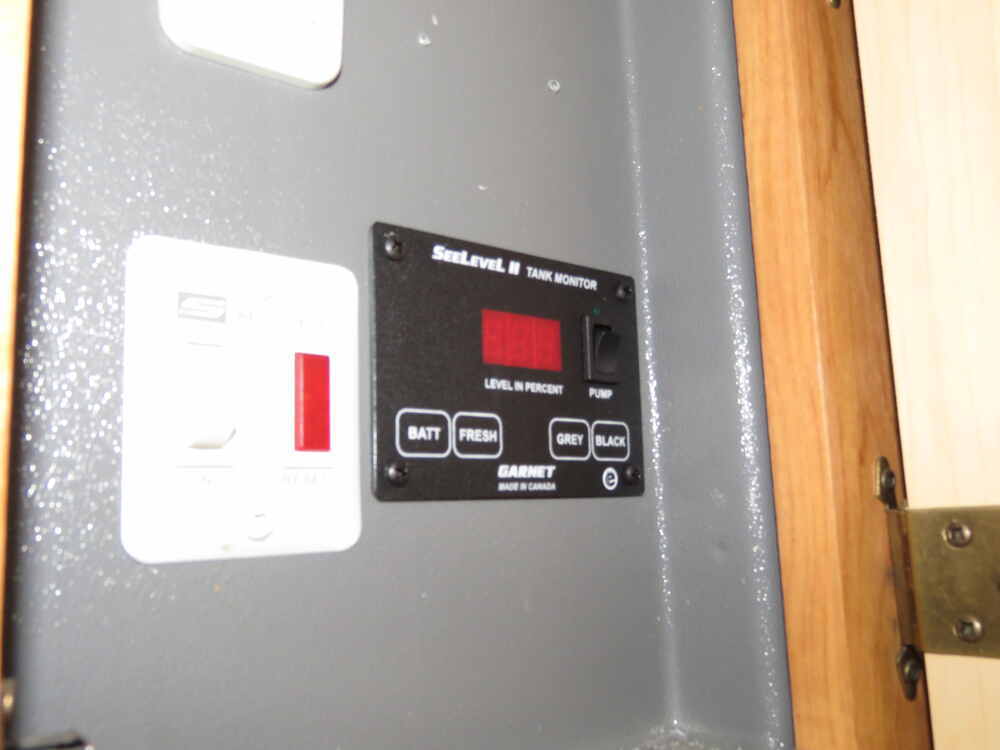
Whereas, with our new sensors, every inch on here there's a new sensor. So it's going to give you a more precise reading so that you know, "Hey when I hit one third, I'm not actually empty, I still have this much more to go". So that I can plan whether I need to dump out my grey or my black tank, or if I need to go fill up my fresh water tank. So depending on what kind of system you have, with our trailer today, ours is going to monitor our battery, our fresh, our grey, our black, and then also power our water pump. But this also comes with other monitors that come without the monitor pump button or will come with a gas button, so that you can also monitor how much gas you have.
So for this install you can expect it to be fairly straightforward. Just because we're only replacing a monitoring system that already existed. So we're easily just tapping into those wires. If this was a new build maybe you have an enclosed trailer and you're adding this in, you'd have to run the wires yourself. But obviously, if it's a brand new build it'd be a little bit easier to run the wires through.
It's fairly simple, all you're doing is hooking up a wiring harness that's going to connect to your monitor, and then just splicing those wires together. And then splicing your wires running from your sensors over to your monitor. All right, so here's what you're gonna get in your SeeLevel kit. It's gonna come with a monitor, a wiring harness that'll plug right into the back of your monitor for easy hookup into your system. You're gonna have three different strips with it.
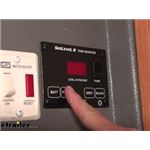
These are the 12-inch strips but this can also so come in 16-inch. And what you're gonna have to do, depending on the size of your tank, is you're going to cut right in between the sensors here. One thing I do wanna say though is as you cut this down to length, you're taking away the sensitivity basically of this. So, in your tank sensors that are on your RV are going to be basically, just three sensors showing one third, two thirds, or full. Whereas, this has a sensor about every single inch, to give you a more accurate reading of what your tank's actually at. So taking away any of these is gonna cut down that sensitivity, thus giving you less accurate of a reading. So at the top of your strip you're going to see these little squares here with little indicators for what they are for. Inside of your manual it's going to show you which ones of these that you're going to cut, depending on the specific tank. Say, I was putting this on my grey tank, I would come over and I would cut right through this and cut that little tip off. Same thing if I was doing it with my black tank. And there's also a fail safe, kind of built in. So that say I was meaning to put this in my black tank but I accidentally cut out the grey. There's a different piece that we can cut, which you can find in your manual, which will make it so that it knows that you're actually wanting to cut the black. All right, so now down under the trailer, we can see we have our three water tanks. We have two black ones and a white one. Our white one is gonna be our fresh water tank. Our two black ones are gonna be our grey tank and our black tank. The easy way to determine which is which, your black tank's gonna have a three-inch pipe for its drain whereas your grey water tank's only gonna have an inch and a quarter. So that make it real easy to determine which is which so that you make sure you put the right sensor on the right tank. All right, so before I do any cutting I wanna make sure I'm not gonna be overlapping off of the tank, 'cause it is rounded here in the corner. So I think I am gonna have to cut it down just one more piece here, yeah. That way, we're right dead-on with our tank. So I'm just gonna take a pair of scissors and trim this last sensor off just like that. And then up here, I'm gonna peel back our backing just a bit. I know this is my black tank so I'm gonna cut off my black tab so that the sensor knows where it's going. As you can see the wires on each of these are facing over the right and it has to be that way. If you go over the sensor to the left, it ends up causing some issues. That is just a little tech tip from SeeLevel. So from now we can figure out where we wanna place it on our tank. I'm gonna set it pretty close to where my wiring is for our previous probes, which is gonna be right over here, just so that I don't have to run any extra wiring to it. As you can see, we've got one wire coming out here from our cables and it's connecting to our three sensors. So what I'm gonna do is just untwist this 'cause this is gonna connect to our blue wire. You may wanna wear some safety glasses or something, especially if your trailer's a little bit older. Get some old debris or anything like that, you don't want that getting in your eyes. Just take that out, unhook our sensors. Now these, you can just cut off and leave. We're not gonna be using those sensors anymore once we have this new system in, but it's not gonna hurt you to have 'em in there still. All right, so now I got my wire cutters. Just gonna go ahead and snip these off. There's nothing electrical running to this at all. So you don't have to worry about getting a shock or anything like that. So I'm gonna put my strip right here. I'm gonna try and keep it completely centered and level. That way we get a very accurate read, but you'll simply peel off your backing. As you can see right there, there's the sensors and we will slap it in place up on our tank. Just make sure you give it a real good press. Try not to touch any of the components on here. Wanna make sure we get a nice tight seal to our tank, we don't want this coming off at all and go ahead and strip back our wires. All right, so like I said before our blue is going to be our signal wire and our black is going to be our ground. It's right up in here. Here's our signal wire from our previous system. We're gonna wrap that around, get to a spot where I can see and we can just reuse the cap that we had from our old one. And if you wanna go the extra mile you can seal that up with some electrical tape. Now, for our black, I'm just gonna take a self tapping screw and a ring terminal, and I'm gonna tie it right into the frame. All right, now that I've got my black wire grounded to the frame of the chassis here, we can go ahead and do the same thing with our other two strips. So for my fresh water tank, I'm going to have to also cut off one of the strips here. Like I said before, we cut off the bottom going up as needed, but for the fresh water tank, we actually don't have to cut any of these tops. So all we have to do is just stick it right on for that one. For the next one that we're gonna do, it's gonna be our grey, it's the furthest in there by the axles. All I have to do is just chip off that little grey tab, and the grey tank is actually just a little bit taller, so I won't actually have to take off anything on this one. All right, so now that we have our sensors in place down below and they're wired in, we're gonna go ahead and go up inside of our RV and install our wiring harness and our monitor. All right, so as you can see our Fifth Wheel here was already set up with a tank sensor but this has our grey, our black, our fresh, our battery and then also a switch for our pump. So this is the correct monitor that we're gonna use 'cause it has the exact same setup. So let's go ahead and start taking this apart. Now that I have my screws outta my base here I'm gonna go ahead and take this connector off so I can pull down my monitor. And as you can see on the base, pull little bit more of this wiring out got three different spade connectors for our pump. Take those off. So the next thing we're gonna have to do is try and cut a hole out here to fit the body a of our monitor 'cause as you can see, this is gonna be a flush mount. So I'm gonna go ahead and I'm gonna draw up some lines here get this exactly how I want it and then we're gonna make our cut. So I lucked out, my painters tape is exactly the same width as the body of my monitor here. So I kind of just cut a little piece to kind of gimme a little outline and then I'm gonna go ahead with my multi tool here and just cut out the rest of the hole. All right, now that we have our piece out you can just go ahead and take a knife. I'm just kind of clean up the hole a little bit get these little burrs right off, and we can just do a quick little test fit. Even though I got the wires in the way, just a bit, it'll be fine sitting right there. So, hops right into place, no issue. So we'll go ahead and start hooking up our wires. All right, so these three wires right here are for our pump and on here, we are going to clip off our wiring running to our old connector, so we can plug in our new wiring harness. All right, so on our wiring harness for our new monitor, our white is gonna go to our pump, our red is going to be our power, black is our ground, and blue is our tank sensors. The old wiring had three separate wires running to our sensors. So this is for our fresh, our black, and our grey tanks. So I'm going to strip this back, splice those all together, and then attach those to my blue wire on my new wiring harness. And then I'm gonna attach my red to my power, which is also red on my new one, and then I'm going to attach my other three cables to my pump. All right, so here's my three tank sensor wires. I'm just gonna put these all together 'cause our new system runs just off of one wire and I'm gonna take my blue wire from my wiring harness for the new sensor or monitor, and we are going to run that around that, nice and tight. I'm gonna use a wire nut, oh, not tight enough apparently. Take the wire nut, and I'm gonna twist that on, then if you want you can go ahead and use some electrical tape to really make sure that this wire nut isn't gonna come off and then from there, we are going to strip back the casing on our white wire here. As you can see, this is our ground going to our pump and then they just. Splice another line right into that spade terminal for us to hop over to our monitor with. So we are just going to take that jumper cable and connect it with a butt connector to our ground on our monitor. All right, next, I'm going to connect my power with our little red wire here. See my power on my new harness. All right, the last wire that we have to connect is our white wire right here and looking at the wiring diagram for our old monitor, it has to connect to our violet wire right here. So I'm actually gonna have to cut this off and splice these wires together and then put a new spade terminal on. All right, I got my two wires spliced together. I'm putting all my new spade terminal now, I'm gonna crimp that down. All right, now we can begin connecting our spade terminals to our pump on our monitor. As you can see, there's like an open side up on the top, we're gonna put that facing up on our monitor 'cause these little tabs here on the connector's gonna kind of click into the plastic holder piece so that the connector doesn't come off. Next, we will take our power for our pump and just put on either the top or the bottom. We'll put our purple wire, which is our wire to our sensors. We're gonna put that right in the middle and then I'm gonna place my ground on the top prong And we can go ahead. And when I hit my battery it's a reading that our battery voltage is at 13.6. Now we can go ahead and we can fill up our fresh water tank, and our grey, and black, and give you a little reading of those to make sure that the sensors work. All right, now that we have all of our connections made, I'm just gonna hide our wiring back inside of our hole here. All right, now we can go ahead and test our battery. We're reading 13.5 volts, our fresh. So I actually went ahead and I hooked up and put in some water. So this reading that we're getting here for 10 is in percentage. So 10% of our sensor is reading right now. So our tanks are only 10% full, and if you want that to stay, if you hit it again that little light will pop up there and it'll hold that so that you have to keep hitting it. So let's check our grey. I think I ran that a little bit more. Yeah, so we're at 25% and on our black I'm just at 10%. All right, so now that we've checked all of our tank levels let's go ahead and we'll flip on our pump. And as you can see that little green light comes on and we can flip on our water. So I don't know if you can really hear it but the pump's going on in the background. If I flip this off, cuts the powder to the pump. Well, I think that about does it for our installation of the SeeLevel RV Tank Monitoring System. My name's Kevin, thanks for watching..
Customer Satisfaction Score:
78% were satisfied with this product
22% of customers were not satisfied
Ratings & Reviews

Ordered 2 however one was faulty, otherwise everything was great
Was extremely easy to install. Has been great!
Great customer service fair price and follow thru…
Chris G
I installed the seelevel system 2 years ago and was disappointed that the wire on one of the tank sensors becamdetached.I had the same system on a previous boat and had no issues.
Install was the challenge, I was replacing the stock non Bluetooth version that came on our 2025 Airstream. The mounting pattern was identical so that was great. There is no documentation included and the wire colors from the original one do not match the new one. I had to find schematics for both units on the internet and figure out old function/color to new function/color. In the end it worked fine.
As always, great job!
Found a hard to find part for my Airstream trailer at a great price! Plus, very timely free shipping! Can’t beat that!!
I used one of these in another trailer and love it. That’s why I bought one for the trailer I am currently rebuilding. I had a sender problem with one tank and their customer service was wonderful helping me find a solution to the specific problem that existed.
Combined with the sensors perhaps the best upgrade to my trailer.
Monitor works great. Fast shipping.
Part repaired our tank sensor for our gray tank on our DRV.
replaced the WGO OEM panel with this one as it had all the options that I needed and fit nicely into the same area... as with the sensors, it was an easy single-wire install (for the sensors) and gives a much more accurate indication of the tank status'... would highly recommend this product!
I'm looking forward to installing this in the rig to add blue tooth capability to the SeaLevel system. This will make it convenient to be outside of the rig while draining the tanks or adding fresh water.
The SeeLevel system has worked flawlessly. It is a vast improvement over the tank monitoring system that came with our Airstream.
not needed so I returned it, but not the fault of etrailer.
This was the item I needed. Informative videos, Fair price, fast delivery, fixed the gray tank reading issue. Thank you
This was a replacement panel for one of the same model that failed.. the new panel went into place and works well..
Got it quickly and came as advertised and is working like it should very happy with it and etrailer was very easy to order it from. Will definitely buy from etrailer again
Easy installation and they work great
This unit is not "Plug & Play. I am replacing the original (1yr old) SeeLevel II with the 7090-BTP7 and it would not work. Calling Garnet Tech support, the supplied pigtails with plug must be used. Wires from the RV need to be cross referenced.
eTrailer is my go to for trailer parts. Large inventory and they carry specialized replacement parts. Competiveky priced and fast shipping.
Excellent service from e trailer unfortunately it is the wrong item to replace the one that is no longer operating.
I installed the system about a week ago. So far it is working beautifully! I have a 2022 Renegade Verona LE and the original Firefly system was never reliable. I installed the panel in my wet bay and use the Bluetooth feature to check the levels when I'm in the rig.
After doing some you-tube research and chatting with the SeeLevel tech team, I felt safe that my unresponsive tank level reading was caused by a faulty tank sensor. This fixed the problem.
I am surprised, and delighted, that eTrailer has expanded their inventory to include RV parts. As always, great selection, helpful videos, fair pricing, and quick shipping all make for a swell experience. Thank you!
I bought this SeeLeveL display to replace one which had stopped lighting up some of the LED segments. I just matched the display functions of the old one when I made my order using the product images on the etrailer website. The new one was a direct drop-in replacement. The connector pins on the new one were bent and had to be straightened which I did by hand with a key. Once plugged in and tested all the displays segments worked based on the tank levels at the time and were brighter than the old display. The display arrived within a few days of placing the order as predicted. I like the etrailer website and the service they provide.
Info for this part was:
At etrailer we provide the best information available about the products we sell. We take the quality of our information seriously so that you can get the right part the first time. Let us know if anything is missing or if you have any questions.




















Thank you! Your comment has been submitted successfully. You should be able to view your question/comment here within a few days.
Error submitting comment. Please try again momentarily.