
Yakima BaseLine FX Roof Rack for Naked Roofs - JetStream Crossbars - Aluminum - Black - Qty 2


To see if this custom-fit item will work for you please tell us what vehicle you'll use it with.


Thank you! Your comment has been submitted successfully. You should be able to view your question/comment here within a few days.
Error submitting comment. Please try again momentarily.
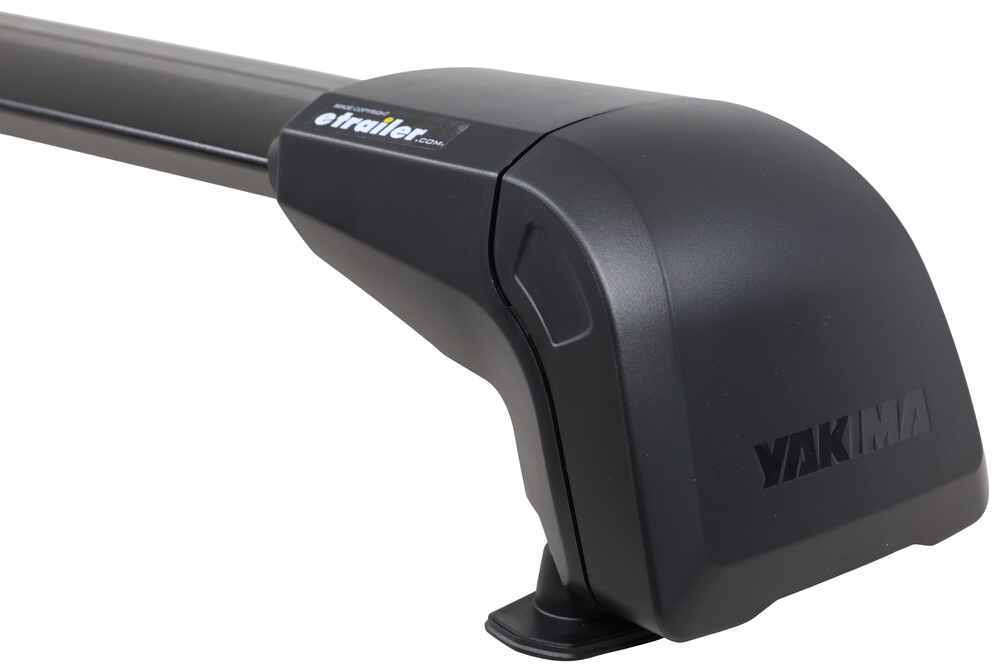


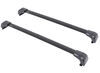
This Yakima BaseLine FX setup comes as a full package with two flush-mount crossbars, towers, and a custom fit kit. It installs on a naked roof and gives you the carrying space you need for gear, kayaks, or cargo boxes without adding clutter. Everything integrates cleanly for a solid, ready-to-use base that feels like part of your vehicle from day one.
The flush design keeps the crossbars tight to the roofline and eliminates bar overhang. That makes the rack look like it came built-in rather than bolted on. The black aluminum construction keeps it lightweight but sturdy, and its low-profile shape keeps things streamlined and balanced even when loaded up.
Long highway drives can bring plenty of wind noise, but this rack keeps things much quieter. The aero-style bars help smooth airflow over the top of your vehicle. Push-down rubber strips in the top channels reduce vibration and whistling while sealing around any mounted accessories for a cleaner, more peaceful ride.
You can mount just about any gear setup you already own or plan to add later. These crossbars work with both channel-mount and clamp-on accessories, so it’s easy to switch between bikes, cargo boxes, kayaks, or snow gear without extra adapters. The top channels measure 7/8" wide x 7/16" tall with a 7/16" opening, giving you a sturdy and repeatable mount every time.
When you stop at a trailhead or rest overnight on a road trip, lock your rack and channel-mounted accessories with Yakima Same Key System (SKS) lock cores (sold separately). It’s an easy way to add theft deterrence so your gear stays right where you left it.
 Alternate Instructions
Videos are provided as a guide only. Refer to manufacturer installation instructions and specs for complete information.
Hey, everyone, I'm Evangeline right here at etrailer. If you're looking to carry some fun things on top of your Camry, you're probably gonna need a roof rack system. Today we're taking a look at the Yakima BaseLine FX roof rack, how it looks, how it fits, and I'll also show you how to get it all installed on your 2025 Toyota Camry. There are plenty of different options for the Toyota Camry, but I really like how the Yakima BaseLine FX looks. I actually picked this one because of its sleek look and how low profile it sits. One of the big things about it too is that it is very functional as a roof rack system and it actually compensates for the curve of your roof.
The front of your Camry is gonna be pretty curved compared to the center of your Camry, but even then, the front bar is a little tilted so that you still have that good experience. This is a full kit where you have your two bars, your two towers, and then your custom fit kit designed specifically for your Camry. So this actually has your base pads as well as your hook that go into your door. So the pads give you that base to support all of your gear and cargo and the hooks have these curves to them that matches your door's curves too, so that way you can even slam the door on your roof rack with no worries at all, 'cause they're also tightened down to a very specific spec so that you have that support. So if you do wanna carry heavier things like kayaks or maybe mount things like bikes or get some extra cargo space in the form of a roof box, this is totally a great base system for that.
Where this sits on your roof, it is gonna be very sleek, which means that you actually don't have as much space on your roof for things that clamp around. So measuring from the top of the roof to the bottom of the bar, I see around 2 1/2 inches here in the front, and then here in the back, I see around closer to three inches of space. So if you have items that have extra thick clamps, they might not have as much room over your front bar, but a lot of your modern accessories have straps that go around or your thinner clamps and those should be fine. You also have a top strip where you can attach your channel mount accessories to. This will definitely work with that.
Another thing worth considering is the height that your cargo sits. So here at the front, this is gonna sit at four inches. Then here in the back, around 3 1/2 inches. So if you're planning on carrying skis and snowboards, think about those skis with your tall bindings. Those may come in contact with your roof unless you get accessories that give you that extra height.
For example, we have ski carriers here at etrailer that have a ski lift to them that give you that extra clearance in cases like these. With the flush system, your bars are actually going to sit right inside your towers. And for security purposes, if you take the end caps of your towers, you can get access to the inside of your towers and you can see your crossbars too. If you want to, you can switch out these plastic lock cores for metal lock cores and utilize the Yakima same key system. This is super helpful if you use other Yakima accessories 'cause then you can get everything keyed alike. Otherwise, when everything is tightened down and locked into place, these end caps sit in front of it all and create that very flush and sleek look. You do miss out a little bit on crossbar space with this style of a system. So I do recommend this, especially if you're only planning on carrying one item or maybe your thinner items like your roof-mounted bike racks. How much space do you actually get Well, if you're mounting inside those, or onto those crossbars, here up front, we have 37 inches of space, and then here in the back, we have 35 inches of space, which is still very reasonable if you wanna carry a roof box or even two kayaks could potentially fit on here. Now, that is something worth considering if you do wanna carry more things. You can get the Yakima BaseLine system that has bars that come out a little bit further out. There is one downside to that though. With a lower car like this Camry, if you do have bars that sit out a bit more, you do have a little bit more likelihood to run up against those bars when entering or exiting your car. That's gonna be about it for what the Yakima BaseLine FX system looks like and how it would work here on your Camry. I think this is a really good option for this vehicle. All of my friends that have roof racks on their sedans prefer that sleeker look simply because it looks good on the car, but also you have less chances of collision with longer bars and they're still very functional. But it is really about what are you carrying, how much you are carrying, and what look you want for your vehicle. And hopefully this video just helped you visualize how this may work for your adventures. And if you really wanna take a look at the installation process for this roof rack, stick around and I'll show you how I got this all installed. Of the different roof racks that Yakima has for the Camry, the BaseLine FX is probably one of the easiest ones to install. The reason that this is super easy is because your crossbars and towers already arrive put together just like this. Then you're gonna have your fit kit, which has your pads and your hooks in a separate box. Now, I already installed the rear bar and we get to install the front crossbar together. In fact, the front crossbar is usually where you would start the installation process. First step is to get your crossbar, and for the front, you're gonna use the extra large crossbar, not the large one. So get the extra large crossbar. We're gonna flip it over and then we're gonna look at the towers. So in the towers, you're actually gonna have two bolts. So we're gonna start off by just loosening the two bolts on each tower. And then we're going to, since this is loose, adjust the tower to where it needs to be. We're going to our first measurement, which is gonna be M1, and that's how far do you set these towers apart So we're gonna go for 39 inches and 3/4 of an inch. Your point of reference is gonna be that small line on your tower, which actually says M1 and N3. Now, we're going to secure our tower in this position and the first thing we're gonna do is we are going to adjust the pitch. So the pitch is going to be this first bolt right by that line and we are adjusting this to pitch A. Pitch A is gonna be the notch furthest away from you if the center arrow is facing away from you. This here is that center arrow. Again, for proper pitch and tow, this will be facing away from you. And then past that bolt, you're gonna have another bolt and that's gonna be your tow. So for the front bar, that's gonna be one, which, again, arrow facing away from you, is gonna be the furthest notch away from you. Now go ahead and use your tool to tighten it down once you get the tow and the pitch bolts lined up to exactly where you need them to be. And whenever you are using your Yakima tool, this is actually a torque tool, that will click to prevent overtightening of any of those bolts. Then you have these rubber pads. So in your fit kit, these pads will actually be attached to your plastic clip. In the case of our Camry, we actually don't need that plastic clip and that's why these bars already come with their own plastic plate. So just remove the pad from the old plates and then just pop these new pads onto the plates that are already on your tower. Now, all the pads are going to be the same, so no worries there. And then we're gonna take our end caps off of our tower. So this is accomplished by pinching the top of the tower and just pulling it straight off. And now we can put this onto our roof. Now, here on our Camry, the way that Yakima measures this is that the location of this front bar is gonna be measured from your front window. So see that edge of the front window We're actually gonna go six inches past that edge and we're gonna go right up to the edge of the tower, and make sure you measure on both sides. This is a really great way to see how that pitch and tow plays out. You can see the outline of the crossbar here where it's level, but then the tower around it is definitely skewed. So that's all to work together so you get a more level experience. Now we're gonna insert our hook. Here's what I do. I actually use the back of the hook in order to unlock our end cap, just like that. So turn that to the unlocked position. And once it's unlocked, you're then able to lift up on this cap. If you struggle with lifting up on the cap, another trick that I use is I again use the hook to pry that cap up, just like that. And now we're gonna go ahead and use our tool again and we're going to loosen this catcher. So this catcher will loosen to that position so that we can put the hook in and it then catches the hook, just like that. So we're gonna do this on both sides before we start tightening down. When you are ready to tighten down, there's gonna be these two bolts that you're going to keep an eye on. So this bolt up in the corner, that's gonna be your swing bolt. So that affects the height of your hook. So it will swing the hook down towards the car, you can see it move, as you tighten this bolt. Once your hook makes contact with the car, then go ahead and tighten down this middle bolt, and this will pull your hook up to itself. So going back and forth between the swing bolt and the middle bolt will get a good traction or good secure fit on your car. Now, I've tightened down right where we've made contact on those both bolts. We're gonna stop here and go to the other side. It's very important that you are evenly tightening down on each side. Because this system pulls towards your doors, you don't wanna overtighten one side and pull the whole system that way. So if you want a flush experience on those rubber pads all around and that hook to be sitting properly, then make sure that you're tightening evenly. What I like to do is do maybe four turns of each bolt on one side, go back to the other, four turns there, just go back and forth until we're done tightening. Speaking of done tightening, again, secure all the bolts until your tool clicks (tool clicks) just like that. And then I always like to double check to make sure all of them are secure. And then we're just gonna cover this up by pushing that cap back into place. And then if you have a flathead screwdriver, you can then turn that plastic lock over to the locked position. There we go. And then our final step here is to put the end caps on. These just slide into their little tracks underneath and then they clip into place up above. That looks good. And that's gonna be it for your installation. Definitely very simple once you know exactly where all the pieces go. If you ever needed to remove this roof rack, the main tool that you will need is going to be the included torque tool or you can use any of your own Allen keys if you really need to. But now you're ready to load up your roof rack with all the cool things and hit the road. That was a look at the installation of the Yakima BaseLine FX roof rack here on a 2025 Toyota Camry.
Ratings & Reviews


Gwendolyn Y.
7/7/2025
That sounds like you had an amazing trip, Ryan! What places did you travel to?
Gwendolyn Y.
7/7/2025
That sounds like you had an amazing trip, Ryan! What places did you travel to?
Mike L.
5/2/2026
We're glad we could help Alex, nice truck!!
Jana

1/3/2026
I’ve lost a second cover. Some shifting of the rack but I use it weekly.

Albert
1/30/2026
It continues to work just fine. The customer service st etrailer has always been exceptional
Jd
3/7/2019
2-years into owning my system: I have had the rack on the vehicle for 2-years and never removed it. Every 3-4 months i check the performance of the base clips and they have never come lose. I think best practice is to always check the stability of the rack however i have never had a problem and the system has always stayed tight and firm. Its been a great system for the vehicle.

Victoria H.
11/29/2024
That's awesome Steve! Thanks for the photo; what a fun looking set up you have there.

Do you have a question about this Roof Rack?
Info for this part was:
At etrailer we provide the best information available about the products we sell. We take the quality of our information seriously so that you can get the right part the first time. Let us know if anything is missing or if you have any questions.
























Mike L.
5/28/2026
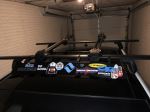
Nice! Glad to hear that your roof rack is working well for you. Thanks for sending the photos!