
Thule WingBar Evo Roof Rack for Flush Rails - Aluminum - Black - Qty 2


To see if this custom-fit item will work for you please tell us what vehicle you'll use it with.


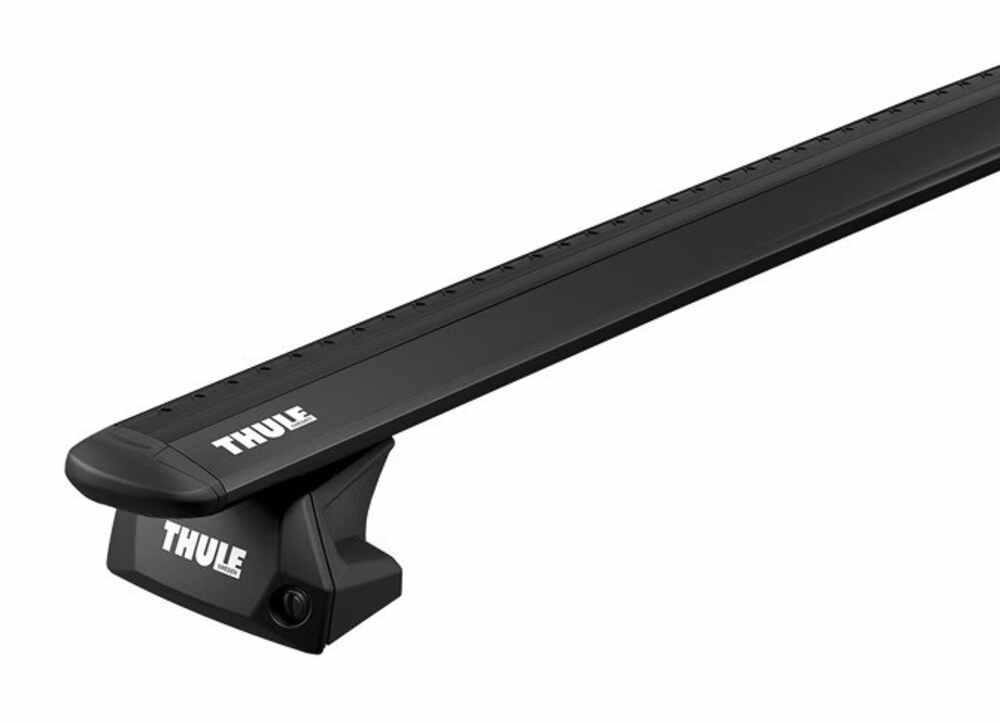


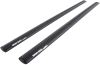
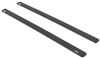
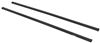
When you’re loading up kayaks, canoes, or camping gear, you want bars that stay solid and steady. The Thule WingBar Evo Roof Rack uses strong aluminum construction and an aerodynamic shape to handle up to 165 lbs of cargo. Each bar measures 47" long x 3-1/8" wide x 1" tall, giving you plenty of space for carriers or boxes while keeping a low, balanced stance on your roof.
Long highway trips can get noisy when air moves around your roof setup. These bars help keep things quiet with built-in split rubber strips that fill the top channels. The strips close around accessories to smooth out airflow and reduce vibration and whistling. The result is a calmer drive with less wind buzz, even when the rack’s fully loaded.
From kayaks and bikes to ski racks and cargo boxes, this system works with both channel-mount and clamp-on accessories. The open top channels make it simple to slide in gear mounts—no trimming or cutting required. That means less time setting up and more time getting on the road or out on the water.
You can add Thule One-Key System locks (sold separately) to secure both the rack and any channel-mounted accessories. It’s a small upgrade that helps protect your gear when you park overnight or hit a trailhead, giving you peace of mind while you’re away from your vehicle.
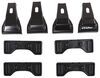
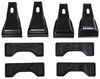
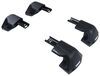
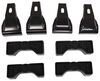
This complete roof rack system includes 2 WingBar Evo crossbars, 4 Evo Flush Rail feet, and a custom fit kit designed for flush rails. The components work together for a clean, integrated look that feels solid once installed. It’s a setup made to handle long adventures without wobble or guesswork.
 Alternate Instructions
Videos are provided as a guide only. Refer to manufacturer installation instructions and specs for complete information.
Hello neighbor, this is Curt with etrailer and today we're gonna take a look at the Thule WingBar roof rack and see how it works with our 2025 Mazda CX30. So a roof rack could be an excellent way to carry that extra cargo with you on your next trip that you either don't want riding in the car with you or it's simply won't fit. The kinds of things you could put up here are roof boxes and cargo baskets, but you've also got bike racks, kayak carriers, snowboard carriers, and all sorts of different things that can go up on your roof and just make your journey a lot more enjoyable. So this roof rack is gonna have a weight capacity of 165 pounds. However, you always wanna double check your owner's manual and see what the vehicle's roof capacity is. If it's less than 165 pounds, you'll have to stick with the vehicle roof capacity.
It's an arrow style bar, which means it's got kind of an elliptical or an ovular shape, wider in the front, narrower in the back. But the kind of thing this is gonna do is help out with some aerodynamics. It's gonna have less wind resistance, it's gonna cause less vibration and therefore, it's gonna be a quieter ride as you go down the road than your traditional square bar or round bar. You're gonna be able to use your clamp mount accessories around it as well as, and I like this part of the Thule bars is you just have to lift up your end cap rather than remove it in order to slide in any of your T-track accessories. There's a double rubber strip up here at the top that allow you to slide those things down while also keeping any gaps up here covered and again, reducing that road noise.
And this roof rack setup is an overhang setup and what that means is that your 47 inch crossbars are gonna be coming outside of the towers and what that allows for is a bit more room to work with up here. The other style of crossbar you can get is what they call a flush, where the bar actually dead ends inside the tower and it really just kind of forces you to move any cargo up here toward the middle. It doesn't give you much opportunity to get something a little closer to the driver of the passenger side and they tend to have a lot less bar space to work with as well. With the overhang, I have the opportunity, even though the roof of the CX30 isn't that wide, I have a better chance of being able to put two rooftop accessories up here as long as they're underweight capacity and be able to carry a little bit more cargo. The overhang is something that some people do get concerned with as far as head clearance getting in and outta the vehicle, but as you could see, even the back bar that has more overhang, you're not even outside of the top of the door threshold here.
So I can't anticipate somebody really hitting their head on it. Now there are some accessories like awnings and things like that that might stick out a little bit further than here and in those cases, you might have to be a little more careful. But generally speaking, I wouldn't really worry too much about hitting my head on these getting in and out of the vehicle. But we we inchesre gonna talk a little bit about how specifically this fits onto the CX30. So let's get up on the roof and take a few measurements.
So from up here, we're just going to check on a couple of things. One of the things that we're gonna check on is our roof clearance. So you know, every once in a while you may come across a place that's a little bit more low hanging and things like that and it's good to know just how much height these are adding to your vehicle. So for where we've got our bars placed, the front bar is gonna give us about four and a quarter inches of extra height on top of the vehicle. The back bar where we have in place is actually about the same. So however high or however tall rather your accessory is, add that to your vehicle height and that four and a quarter inches and you'll get your overall vehicle height to be able to determine whether you can go into a low clearance area. The other thing I'm gonna take a look at is how much room do I have underneath the bar and that's gonna come out to about three inches, which is more than enough room for those clamp mounted accessories to get on there and get tightened up. And the last measurement that is really important to know can be a little bit maneuverable. The way this installs, there aren't fixed mounting points so we do have a bit more freedom of where we can put our bars, but when setting up, I wanted to set up to make sure that I had a crossbar spread that would be acceptable to most rooftop accessories. The crossbar spread that we set it up with today is at 28 inches. Generally speaking, all rooftop accessories have a minimum maximum crossbar spread that they can work with and I do find that 28 to 32 inch area is really where most rooftop accessories would fall into. So when I set these up and installed them on here, I wanted to get to that 28 inch mark. Now, there are accessories up there that can go as low as 25 or 24 inches and if that's something you wanted to do, move this bar back a little bit. It would give you a little more overhang because of how the roof tapers on this and just give you a little bit more opportunity to put things side by side. It's just because of how short these rails are and how narrow this roof is, you are a little bit limited in that, but you do have room to move these back and forth as needed. In this instance, if I'm trying to get a little more overhang, I'm probably gonna move my front bar back a little bit just to give me an extra inch or so on that overhang. But I had talked a little bit about installation while we we inchesre up here and installation of this is actually really, really simple. It could be something that could be done on your own. So follow along and I'll show you exactly how I got these up on the roof of the CX30. So installation is a really simple process and I'm gonna walk you through it right now. The only tool that you're going to need is the tool that Thule provided for you. This right here. But if you have something like a flathead screwdriver, that's gonna be a handy thing to have around as well. And I'll show you how we'll be using that in just a moment. But the first thing that you want to do is take your crossbar, turn it over on its underside and you're gonna find these slots underneath right here. I'm gonna remove my end cap and I'm gonna grab one of my towers here. Now, the clamps that are gonna go on our rails, Thule was nice enough to actually stamp them for us. So they give us the order which they need to go on. The first one here, the first piece is gonna be marked with an A. And where this is going to go is I'm gonna take the bolt on my tower here, thread it through like that, and these two tabs are gonna go through these two slots up here on the top. So it'll go in just like so. Once that's in, I'm gonna turn it over on its underside and the rubber pad is stamped with a B, indicating that's gonna go on next. When I put this on, I wanna make sure that this first part, the part stamped A is going to go underneath this lip right here. So we're just going to get that into place and put it down right there. So that's gonna go on just like so and it actually has a really good snug fit. You don't have to fight it too much. We just wanna make sure this piece here is going to overlap the rubber part. The next part is going to be stamped with a C and that is going to slip right through this tab and the bolt is gonna come through just like that. We're gonna take this special bolt here and one end is made with a hex shape. That's where we're gonna be using our tool. The other end is gonna thread on just like a standard nut wood onto a bolt. So we're gonna get that on there. And I'm just gonna loosely thread it on so it just grabs. I wanna leave it loose 'cause I want as much maneuverability in these clamps as I can get. The next step is going to be actually to attach it onto our bar. So with the end cap removed, we have access to the slot right here. There are some tabs at the top that are gonna fit into that. So it's gonna work just like a T slot. We're gonna make sure our bolt is facing the outside of the bar and we're just gonna slide it on and into place. At this point, we can replace our end cap and we're ready to go ahead and get this up on our roof. So as we position this onto our roof, we wanna make sure that the wider part of our crossbar is facing the front of the vehicle and the narrower portion is facing the rear of the vehicle. I'm just going to reach across. If you have a friend to help, that does make it a little bit easier, but this vehicle isn't too tall, so if you have a small step ladder or something, you should be able to maneuver this on your own. But I'm just going to kind of position this to where it's going to sit right on top of our rails, just like so. At this point, I'm gonna reach behind and make sure that the back of the clamp is going around this inner lip and the outside is gonna be going around this lip here. So as far as where on your rails to position your crossbars, we did already put our rear bar up. It's very important to understand that you really want these to be parallel to each other. And the way to ensure that is to make sure that we have kind of a even spacing on both sides of the vehicle. So for instance, on my back bar here, just to make sure that these we inchesre gonna be perpendicular to my rails and even with each other, I found a little anchor point with this little popup tab that's on top of the rail. And what I did was measure one inch from the back of my rubber pad to the front of that section there and then went and did the same measurement on the other side. That way I know that these are directly across from one another. I'm gonna be doing something very similar with the front bar, but I'm gonna be using the second bar as my measurement. So one of the things that I wanna make sure that I get as I'm putting these up here is a decent crossbar spread. Now, most rooftop accessories, they're gonna have a minimum and a maximum that they can fit. I like to get mine in the 28 to 32 inch range if I can because that is where you're gonna be most acceptable to most of those rooftop accessories up there. So I just want to take a measurement from the center of my weather strip up here to the center of the other one. And I'm coming up a bit short at 25 and a half inches. So I'm just gonna slide this forward a little bit until I get to the point where I'm at about the 28 inch mark, I think. I think 30 inches would be too much on this particular vehicle. We've just got a little bit more to go. I'm going to double check that I have the same measurement on the other side. That's gonna guarantee that my towers on the front bar are directly across from each other and it's gonna make sure that we're parallel when it comes to both of our crossbars. So the next thing I want to check on is going to be my overhang and I wanna make sure that's gonna be even on the driver and the passenger side. Now, the bar up here is still maneuverable and slidable back and forth on the front here because these rails taper outward as they get to the front of the vehicle. I'm not gonna have as much overhang on my front bar as on my back bar. But while I haven't tightened down this bolt, I've still got some maneuverability back and forth. So what I wanna do at this point is take a measurement here and I'm gonna basically be taking a measurement here on the driver's side and trying to match it to a measurement on the passenger side. That way I know that the bar is going equally across, it's equally supported by the towers because I've got the same amount of overhang on each side. So I'm just gonna kind of maneuver back and forth until I get that even measurement. Okay, so at this point what I like to do now that I have equal space in between my bars, I've got equal overhang on both sides of my front bar, I'm just gonna go ahead and hand tighten this bolt a little bit and until I get it fitting to where it's snug. I'm gonna keep double checking to make sure that it grabs around the top lip of our rail here. And it should seed itself nicely right underneath it. But once I get it to the point where it's snug, I'm gonna go to the passenger side and do the same thing. What I don't wanna do is completely tighten down one side and then move to the other. Reason being is a lot of times when you completely tighten down the one side while the other side's loose, it could kind of pull it out of position and then you're loosening this up and repositioning and re measuring everything. If I just make it snug on both sides, I can take my Thule tool and start to tighten them. So with our clamp snug on both sides and our rubber pad seating really, really well on the top of the rail, at this point, I could take the provided Thule tool and I'm gonna go ahead and get everything tightened down completely at this point. Now, this is a torquing tool, so once you get it tight enough, you're gonna hear a click come from your tool that's gonna indicate that that side is tightened down completely and you'll be ready to grab your covers. That's the click right there. So now that I've got that done on both sides, I'm gonna give it a good shake. The tower's not moving, the crossbar's not moving, but the vehicle, as you can see, is. So I've got a really good tight, comfortable fit on here. I'm gonna go ahead and grab my covers to complete the installation. Now, when you get these out of the box, what you're going to get are these plastic lock cores. You can actually substitute these for metal lock cores and keys. And not only that, but through Thule's one key system, you can get them key to like all your Thule accessories. So if you have a Thule roof box or a Thule bike rack that has some locks on it, you can use that key number to get your towers key to like. That way it's just gonna keep everything a lot more organized. You don't have multiple keys from Thule on your key chain. There's never any guesswork involved in what you're unlocking and locking. It's just a great way to simplify things. But not only that, a great way to make sure that your roof rack stays securely on your roof and doesn't get stolen or anything like that. But the way that this goes on is you're gonna have, our tab here is going to be horizontal. That means it's gonna be open to go in this slot here. We're just gonna pop right in. And once we do, if we're remaining with our plastic cores, this is where that flathead screwdriver is gonna come in. We're just gonna take that, turn it and lock it on. And one last thing that you want to double check, it may be necessary, depending on how you put 'em on and maybe not, but these tabs underneath with the scale that slide back and forth, it's a good idea to get those moved all the way up and closed. That way there's no gaps underneath the bar that can create noise as you're driving down the road. So as you can see, installation is really simple, and this is actually a pretty versatile roof rack system, I think for your Mazda CX30. But if after watching this video, you decide that this is the roof rack for you and you have the opportunity to get it and use it a little bit, please share with us what you think about it in the comments below. Sharing your experience with us and other neighbors just like you can help them make the best decision for themselves. Once again, this is Curt with etrailer. Thanks for stopping by.


Do you have a question about this Roof Rack?
Info for this part was:
At etrailer we provide the best information available about the products we sell. We take the quality of our information seriously so that you can get the right part the first time. Let us know if anything is missing or if you have any questions.
















Thank you! Your comment has been submitted successfully. You should be able to view your question/comment here within a few days.
Error submitting comment. Please try again momentarily.